1. Introduction
This manual provides comprehensive instructions for the assembly, operation, and maintenance of your VEVOR Dual Motor 3-Stage Standing Desk Frame. Please read this manual thoroughly before installation and use to ensure proper function and safety. Keep this manual for future reference.

Image 1.1: The VEVOR Dual Motor 3-Stage Standing Desk Frame in white, shown without a tabletop.
2. Safety Information
- Ensure the controller and power socket are compatible with local electrical standards.
- If the desk encounters an obstruction during movement, it may stop or reverse. Clear any obstacles.
- Do not allow children to operate the desk without supervision. Utilize the child lock function to prevent accidental adjustments.
- Keep hands and fingers clear of moving parts during height adjustments.
- Do not overload the desk. Refer to the specifications for maximum load capacity.
- If any issues arise, such as unusual noises or movement problems, immediately discontinue use and refer to the troubleshooting section or contact customer service.
3. Package Contents
Verify that all components are present before beginning assembly:
- Standing Desk Frame x 1
- M6x35 Screws x 8
- M6x13 Screws x 20
- ST4x16 Screws x 2
- M6 Ball-Head Hex Key x 1
- M6 Cross-Use Hex Key x 1
- 6P Plug Connector Cable x 1
- User Manual x 1
4. Specifications
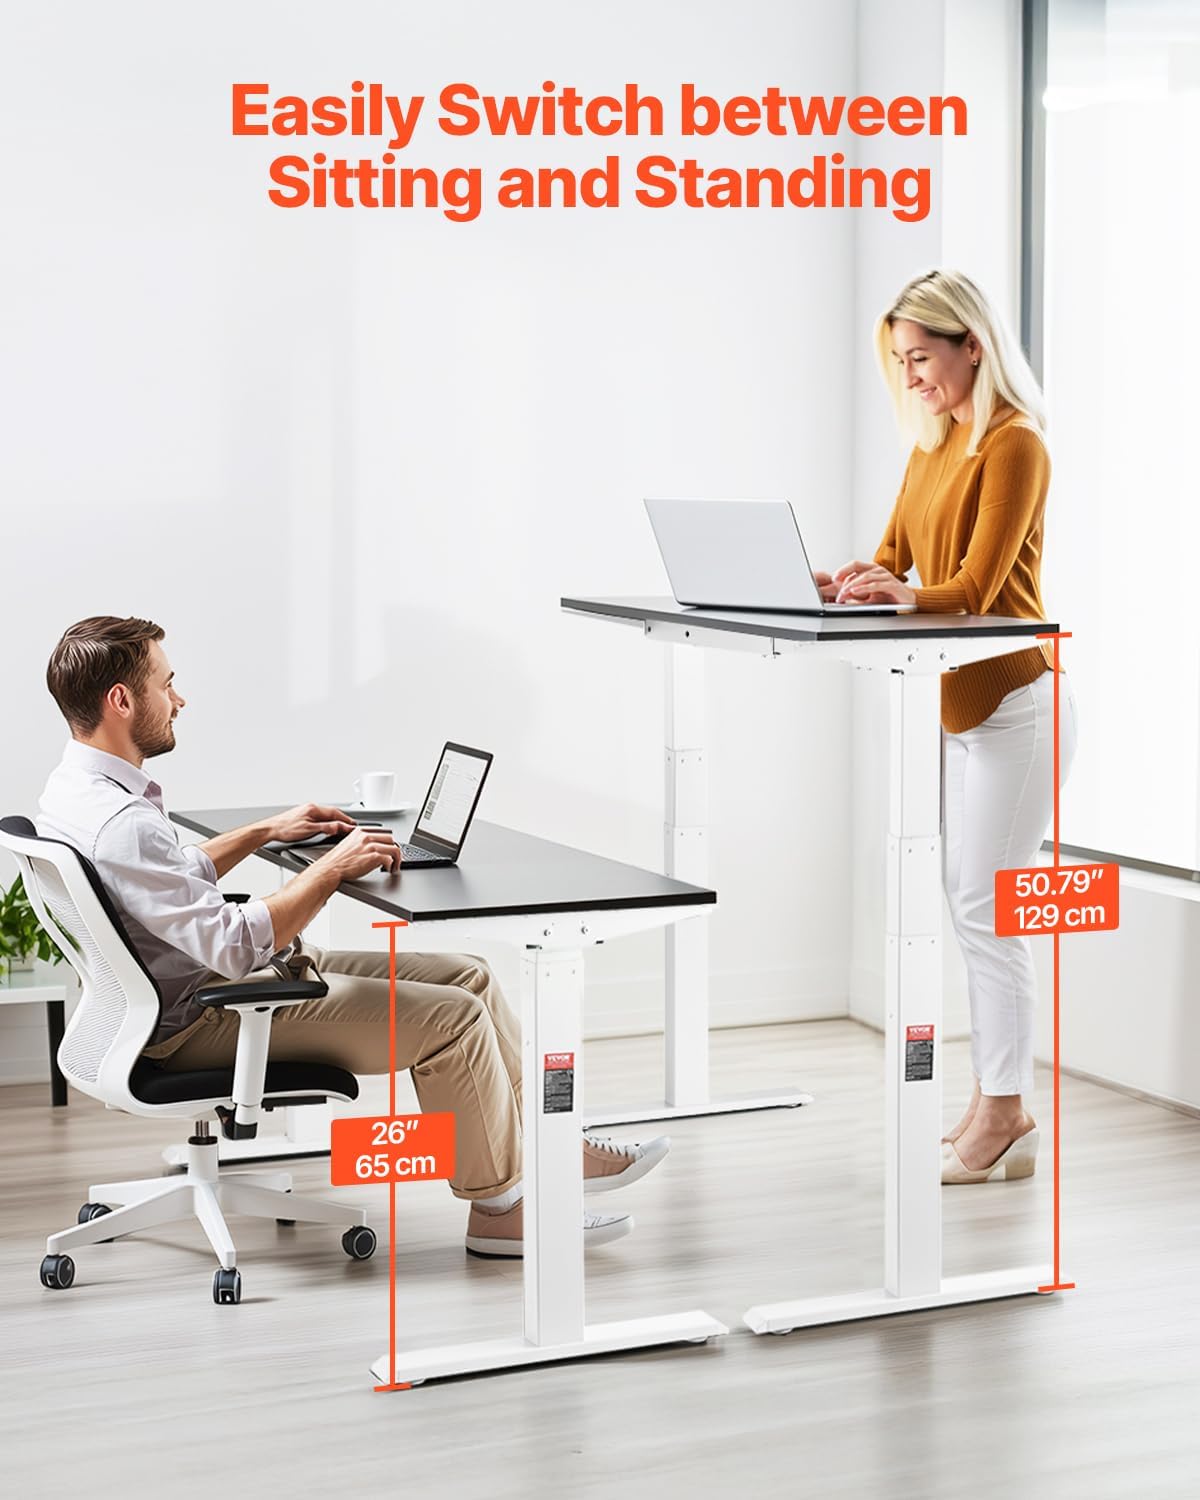
Image 4.1: Diagram illustrating the VEVOR Standing Desk Frame's key dimensions and specifications.
| Feature | Specification |
|---|---|
| Model | ZW-19 |
| Height Lifting Range | 26 - 50.79 inches (65 - 129 cm) |
| Length Extension Range | 43.31 - 70.08 inches (110 - 178 cm) |
| Load Capacity | ≥ 276 lbs (125 kg) |
| Adjustable Lifting Speed | ≥ 1.26 in/s (3.2 cm/s) |
| Noise Level | < 50 dB |
| Desktop Size Compatibility | 47.24 - 82.7 inches (120 - 210 cm) |
| Main Material | Q235A Cold Rolled Carbon Steel |
| Position Memory Function | 3 Position Settings |
| Unit Conversion | Yes |
| Child Lock | Yes |
| Net Weight | 47.84 lbs (21.7 kg) |
| Minimum Product Dimensions (L x W x H) | 43.31 x 22.83 x 25.20 inches (110 x 58 x 64 cm) |
5. Assembly Instructions
Follow these steps to assemble your VEVOR Standing Desk Frame. All necessary tools are included in the package.
- Install Left and Right Side Beams: Attach the side beams to the lifting columns using the provided screws.
- Insert Crossbeam: Slide the adjustable crossbeam into place between the side beams. Adjust its length to fit your desired tabletop size.
- Tighten Screws: Securely tighten all screws connecting the side beams and crossbeam.
- Install Screws into Desk Legs: Attach the feet to the bottom of the lifting columns using the appropriate screws.
- Attach Side Wings: Secure the side wings to the frame, ensuring they are properly aligned.
- Install LED Controller: Connect the LED control panel to the frame and secure it in a convenient location, typically at the front edge of your tabletop.

Image 5.1: Visual guide for the assembly process, showing key steps from attaching side beams to installing the controller.
After assembly, place your chosen tabletop onto the frame and secure it using appropriate screws (not included with the frame).
6. Operating Instructions
The VEVOR Standing Desk Frame features an intuitive LED control panel for easy operation.

Image 6.1: Detailed view of the LED control panel, highlighting the up/down arrows, memory preset buttons, and set button.
6.1. Height Adjustment
- Press the Up (▲) arrow to raise the desk.
- Press the Down (▼) arrow to lower the desk.
- Release the button to stop the desk at your desired height.

Image 6.2: The desk frame demonstrating its adjustable height range, suitable for both sitting and standing positions.
6.2. Memory Presets
The control panel allows you to save and recall three preferred height settings.
- Adjust the desk to your desired height using the Up/Down arrows.
- Press the Set (S) button. The display will show 'S-'.
- Within 3 seconds, press one of the memory buttons (1, 2, or 3). The current height will be saved to that button.
- To recall a saved height, simply press the corresponding memory button (1, 2, or 3). The desk will automatically move to the saved position.
6.3. Child Lock Function
Activate the child lock to prevent unintended height adjustments.

Image 6.3: Icons indicating the child safety lock, unit conversion, and sedentary reminder features.
- To activate: Press and hold the Set (S) button for approximately 5 seconds until a lock icon or 'LOC' appears on the display. All buttons will be disabled.
- To deactivate: Press and hold the Set (S) button again for approximately 5 seconds until the lock icon disappears. Buttons will become active.
6.4. Unit Conversion
Switch between imperial (inches) and metric (centimeters) display units.
- Consult the specific instructions provided with your controller for the exact button combination to toggle between units. This is typically a long press of a specific button or a combination of two buttons.
6.5. Sedentary Reminder
The desk can remind you to change positions after a set period.

Image 6.4: Features such as stepless adjustment, enhanced stability, and the sedentary reminder function.
- To activate/set: Refer to your controller's specific instructions. This function usually involves pressing a button (often 'S' or a dedicated timer button) and then using the up/down arrows to set the reminder interval.
- The desk will emit an audible alert or display a message when the set time has elapsed, prompting you to adjust your posture.
7. Maintenance
Regular maintenance ensures the longevity and smooth operation of your standing desk frame.
- Cleaning: Wipe the frame with a soft, damp cloth. Avoid abrasive cleaners or solvents that could damage the finish.
- Inspection: Periodically check all screws and connections to ensure they are tight. Retighten if necessary.
- Cable Management: Ensure all cables are neatly routed and not pinched or strained, especially during height adjustments.
- Lubrication: The lifting columns are designed for maintenance-free operation. Do not apply lubricants unless specifically instructed by VEVOR support.
8. Troubleshooting
If you encounter issues with your standing desk frame, try the following solutions:
- Desk Not Moving or Uneven Movement:
- Check all cable connections to ensure they are secure.
- Ensure the power supply is properly connected and receiving power.
- Perform a reset procedure.
- Reset Procedure:
- Press and hold the Down (▼) arrow button until the display shows '70.5' or the desk reaches its lowest position and slightly retracts. This recalibrates the lifting columns.
- If the reset is successful, the desk should now operate normally.
- Error Codes: If an error code appears on the display, consult the specific error code section in the full user manual (if available) or contact customer service with the displayed code.
- Noise: A slight motor hum is normal during operation. Excessive or unusual noise may indicate an issue. Ensure the desk is not overloaded and all connections are tight.
9. Warranty and Support
Your VEVOR Standing Desk Frame is designed for durability and performance. For any concerns or assistance, please refer to the following:
- Return Policy: This product is eligible for a 30-day easy return policy. Refer to your purchase platform for detailed return instructions.
- Protection Plans: Extended protection plans may be available for purchase, offering 2-year or 3-year coverage. Check with your retailer for options.
- Customer Support: For technical support, warranty claims, or further assistance, please contact VEVOR customer service through their official website or the contact information provided with your purchase.