1. Introduction
This manual provides essential information for the proper installation, operation, and maintenance of your Safeliveo CO04R Carbon Monoxide (CO) Alarm. Carbon monoxide is a colorless, odorless, and tasteless toxic gas that can be fatal. This alarm is designed to detect the presence of carbon monoxide gas and alert you to potentially dangerous levels, helping to protect your household. Please read this manual thoroughly before installation and keep it for future reference.
This device complies with the EN 50291-1:2018 standard for electrical apparatus for the detection of carbon monoxide in domestic premises.
2. Product Features
- High-Quality Construction: Crafted with premium materials for durability and reliable detection.
- 10-Year Sensor Life: Provides continuous monitoring for an extended period, ensuring long-term protection.
- Replaceable AA Batteries: Designed for convenience, allowing for simple and cost-effective maintenance.
- Versatile Application: Suitable for various indoor environments including homes, offices, and hotels.
- EN 50291-1:2018 Certified: Meets stringent safety requirements and industry regulations for optimal performance.
- 3-Color LED Indicator: Visual status updates for normal operation, alarm conditions, and malfunctions.
- Audible Alarm: Alerts up to 85 dB when CO levels exceed safe thresholds.
- Test/Mute Button: Allows for easy testing of the alarm and silencing during an event.

Image: Front view of the Safeliveo CO04R Carbon Monoxide Alarm, showing its compact design and central button.
3. Setup and Installation
Proper placement and installation are crucial for the effective operation of your CO alarm.
3.1 Battery Installation
- Open the battery compartment cover located on the back of the alarm.
- Insert two (2) AA batteries, ensuring correct polarity (+ and -).
- Close the battery compartment cover securely. The alarm will typically emit a short beep and flash the green LED to indicate it is powered on.
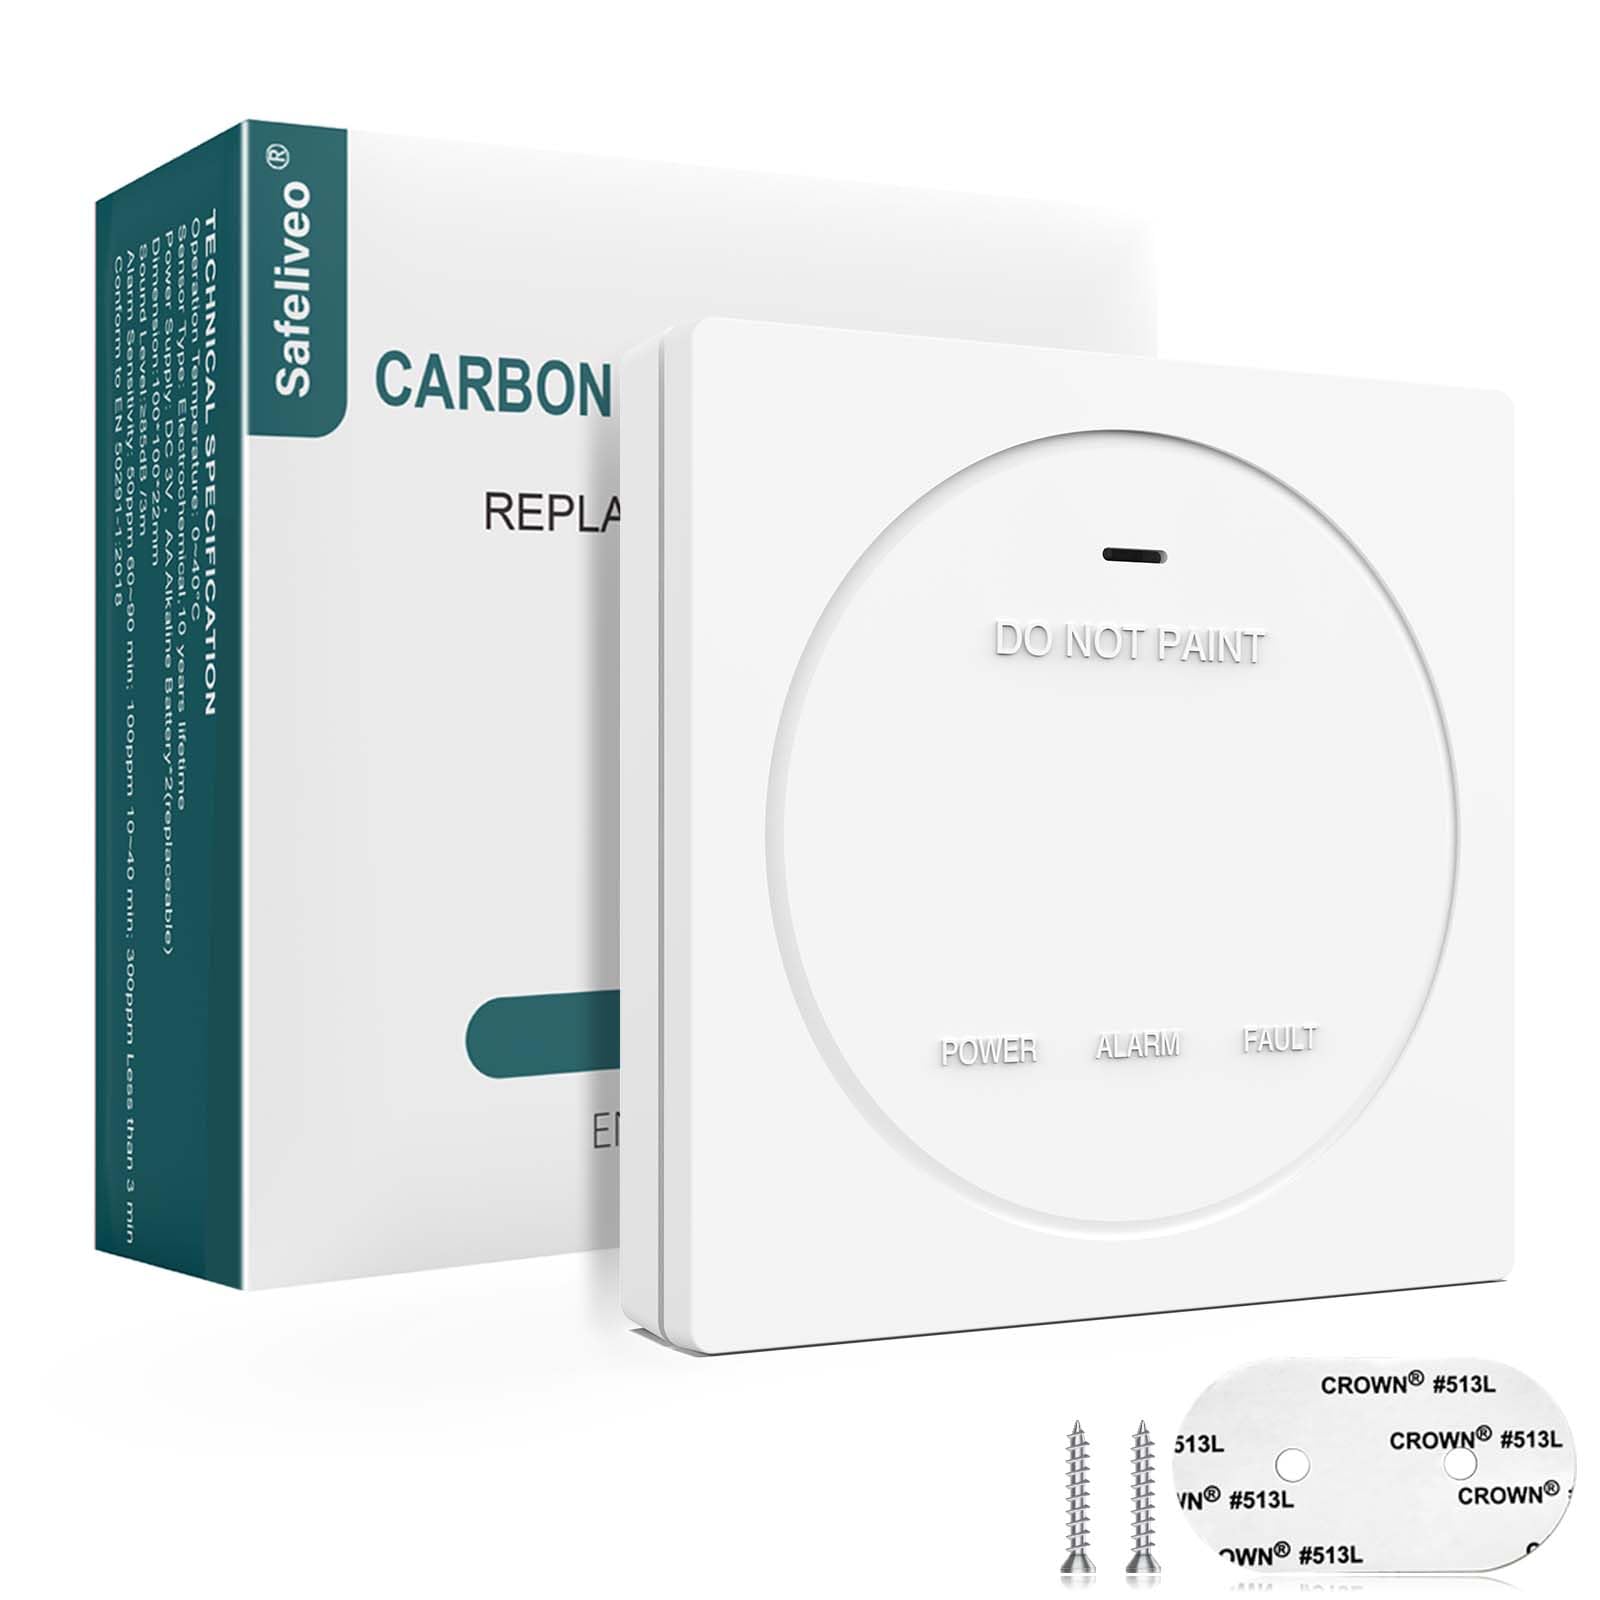
Image: The back of the CO alarm with the battery compartment open, showing two AA batteries being inserted. This image also highlights the 10-year sensor life and replaceable battery feature.
3.2 Mounting Location
- Install the alarm in a central location on each level of your home, especially near sleeping areas.
- For optimal detection, place the alarm at least 1.5 meters (5 feet) from fuel-burning appliances.
- Avoid placing the alarm in direct sunlight, near vents, windows, or areas with high humidity.
- Mount the alarm on a wall at eye level or higher, but not directly on the ceiling unless specified by local regulations.
3.3 Wall Installation
The CO04R can be installed using screws or adhesive pads.
- Screw Installation:
- Use the provided screw kit to drill two holes in the desired wall location.
- Insert the wall anchors and then screw the mounting bracket firmly to the wall.
- Align the alarm with the mounting bracket and slide it down to secure it in place.
- Adhesive Installation:
- Clean the wall surface thoroughly to ensure it is free of dust and grease.
- Attach the adhesive pads to the small bracket on the back of the alarm.
- Press the alarm firmly against the wall in the desired location for at least 30 seconds.

Image: Visual guide demonstrating two methods for installing the CO04R alarm: using screws to secure a bracket to the wall, and using adhesive pads on a small bracket for wall mounting.
4. Operating Instructions
4.1 LED Indicators
The CO04R features a 3-color LED indicator to communicate its status:
- Green LED (Power): Flashes periodically (e.g., every 30 seconds) to indicate the unit is powered on and operating correctly.
- Red LED (Alarm): Flashes rapidly accompanied by an audible alarm when carbon monoxide is detected at dangerous levels.
- Yellow LED (Fault/Low Battery): Flashes to indicate a malfunction or low battery condition. Refer to the Troubleshooting section for details.

Image: The CO04R alarm displaying its three LED indicators: green for power, yellow for fault/low battery, and red for alarm, with corresponding labels.
4.2 Carbon Monoxide Detection Levels
The alarm activates based on specific CO concentration levels and exposure times:
- 30 PPM: No alarm before 120 minutes.
- 50 PPM: Alarm between 60 to 90 minutes.
- 100 PPM: Alarm between 10 to 40 minutes.
- 300 PPM: Alarm within 3 minutes.
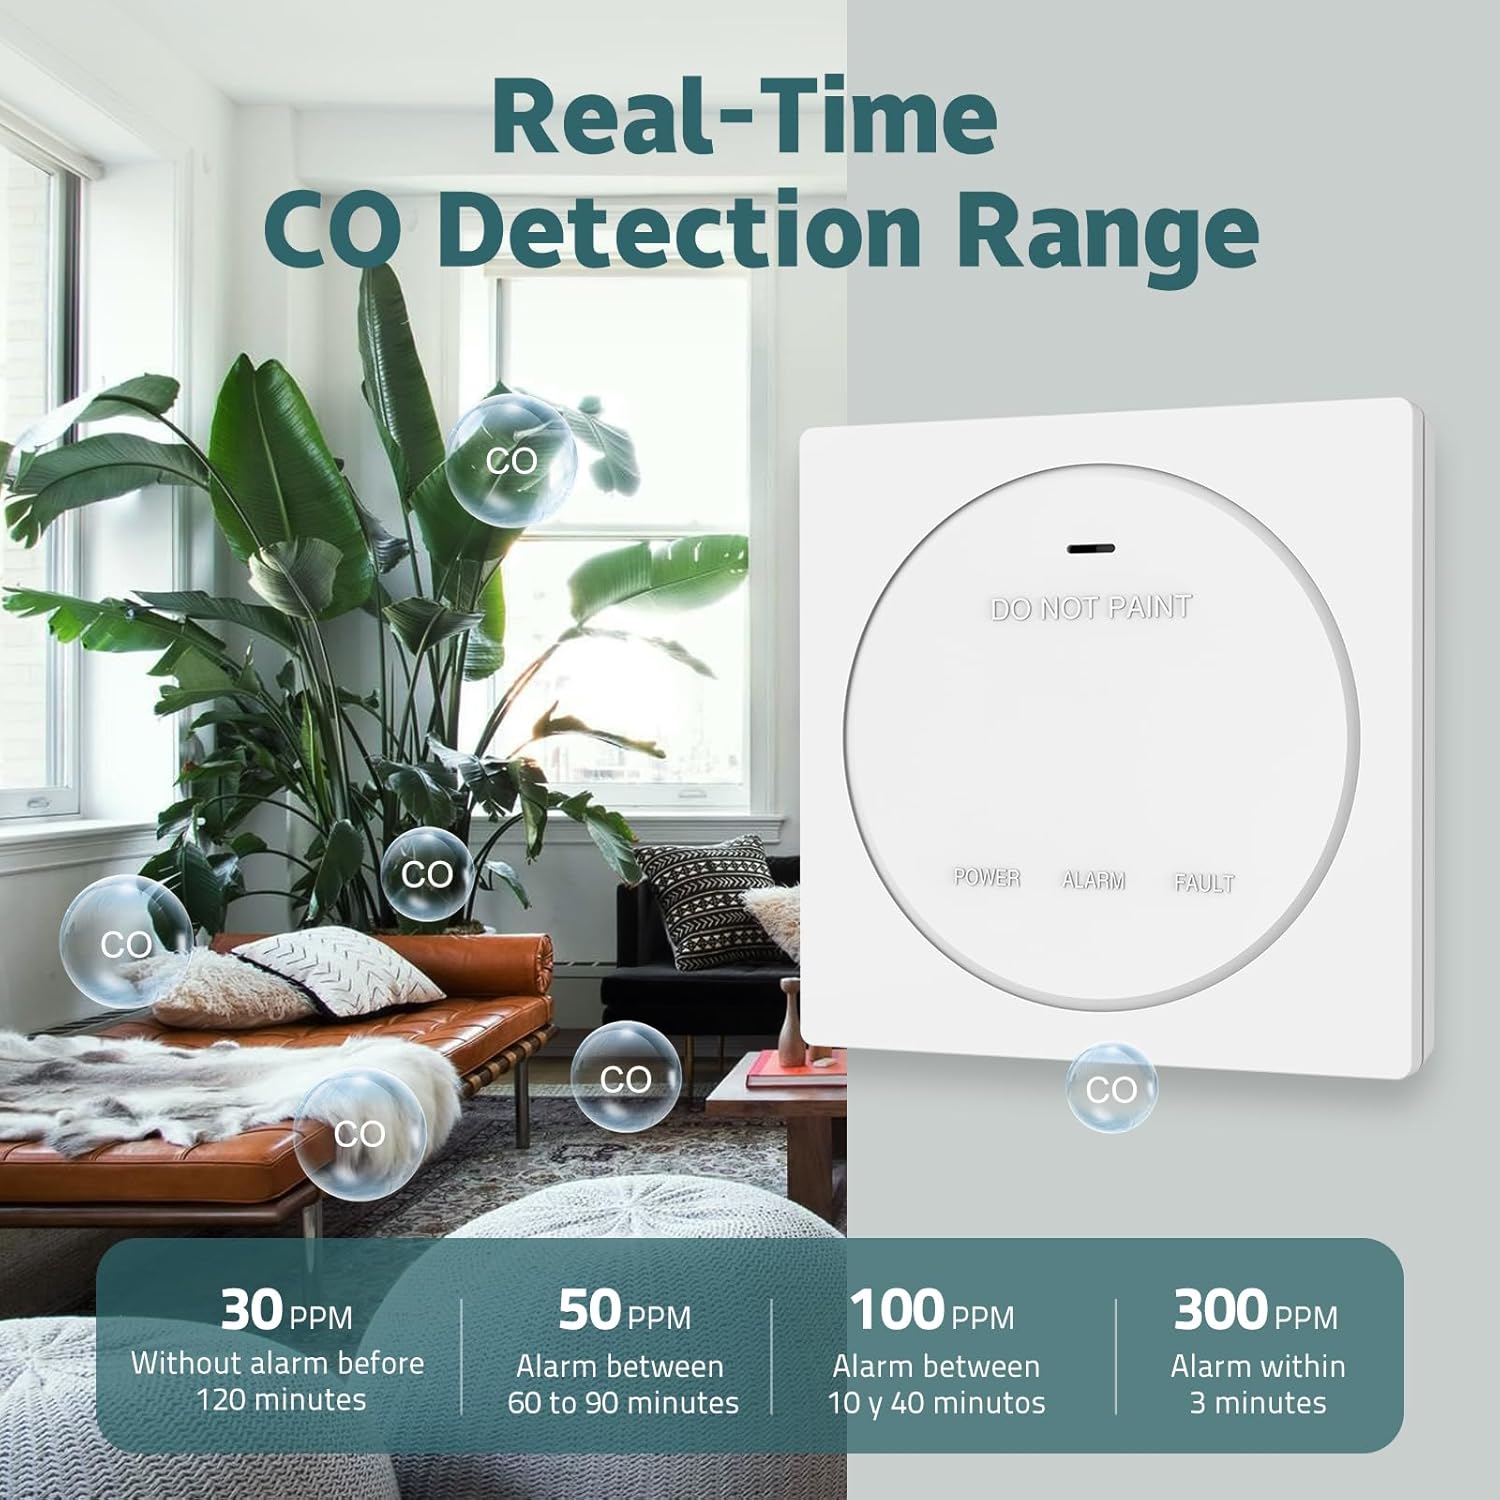
Image: A visual representation of the CO04R alarm's real-time CO detection range, illustrating the different PPM levels and the corresponding timeframes for alarm activation.
4.3 Test/Mute Button
- Testing: Press and hold the Test/Mute button for a few seconds. The alarm will sound, and the red LED will flash, indicating that the alarm's circuitry and horn are functioning. Release the button to stop the test.
- Silencing: If the alarm sounds due to CO detection, pressing the Test/Mute button will temporarily silence the audible alarm for a short period (e.g., 5-10 minutes). The red LED will continue to flash. If CO levels remain high, the alarm will reactivate.

Image: Detailed view of the CO04R alarm, highlighting its features including the 85dB alarm, Test/Mute button, 3-color indicator, and smoke entrance, along with dimensions.
5. Maintenance
- Weekly Testing: Test your CO alarm weekly by pressing the Test/Mute button to ensure it is functioning correctly.
- Battery Replacement: When the yellow LED flashes and the alarm chirps periodically (e.g., every 60 seconds), it indicates a low battery. Replace the AA batteries immediately.
- Cleaning: Dust can accumulate on the alarm and affect its performance. Gently vacuum the alarm's vents and exterior cover monthly using a soft brush attachment. Do not use cleaning solvents or sprays directly on the alarm.
- Sensor Life: The CO sensor has a lifespan of 10 years. After 10 years from the date of manufacture, the alarm should be replaced, even if it appears to be working.
6. Troubleshooting
| Symptom | Possible Cause | Action |
|---|---|---|
| Alarm sounds (Red LED flashes) | High levels of Carbon Monoxide detected. |
|
| Yellow LED flashes and chirps periodically | Low battery. | Replace the AA batteries immediately. |
| Yellow LED flashes continuously or alarm fails self-test | Malfunction or end-of-life. | If within 10 years of manufacture, contact Safeliveo support. If beyond 10 years, replace the unit. |
| Alarm does not respond to Test button | No power or unit malfunction. | Check battery installation and charge. If still unresponsive, replace the unit. |
7. Specifications
- Model: CO04R
- Sensor Type: Electrochemical Carbon Monoxide Sensor
- Sensor Life: 10 Years
- Power Source: Replaceable AA Batteries
- Alarm Volume: ≥85 dB at 3 meters
- Operating Temperature: 0°C to 40°C (32°F to 104°F)
- Operating Humidity: 30% to 90% RH (non-condensing)
- Product Dimensions: 10 cm x 10 cm x 2.25 cm (3.94 in x 3.94 in x 0.89 in)
- Product Weight: 200 g (0.44 lbs)
- Standard Compliance: EN 50291-1:2018
8. Warranty and Support
Safeliveo products are designed for reliability and performance. While specific warranty details are not provided in this manual, please retain your proof of purchase for any warranty claims.
For technical support, troubleshooting assistance, or warranty inquiries, please contact Safeliveo customer service through the retailer where the product was purchased or visit the official Safeliveo website for contact information.
Important: Do not attempt to repair the alarm yourself. This may void your warranty and could lead to improper operation, compromising your safety.