1. Introduction
This manual provides comprehensive instructions for the safe and efficient operation, maintenance, and troubleshooting of your ecozy Nugget Ice Maker Countertop, Model IM-NS331A. Please read this manual thoroughly before using the appliance and retain it for future reference.
2. Important Safety Instructions
To reduce the risk of fire, electric shock, or injury when using your ice maker, follow these basic precautions:
- Read all instructions before use.
- Do not touch the evaporator or ice-making blades when the unit is in operation.
- Do not immerse the appliance, power cord, or plug in water or other liquids.
- Supervise children closely when the appliance is in use.
- Unplug the ice maker from the outlet when not in use or before cleaning.
- Do not operate any appliance with a damaged cord or plug, or after the appliance malfunctions or has been damaged in any manner.
- Use only potable water for ice production.
- Ensure the appliance is placed on a stable, level surface.
- Do not block ventilation openings.
3. Product Overview
The ecozy Nugget Ice Maker Countertop IM-NS331A is designed to produce soft, chewable cylindrical ice. Key features include an intuitive ErgoScreen control panel, a pull-out ice basket, and a self-cleaning function.
3.1 Components
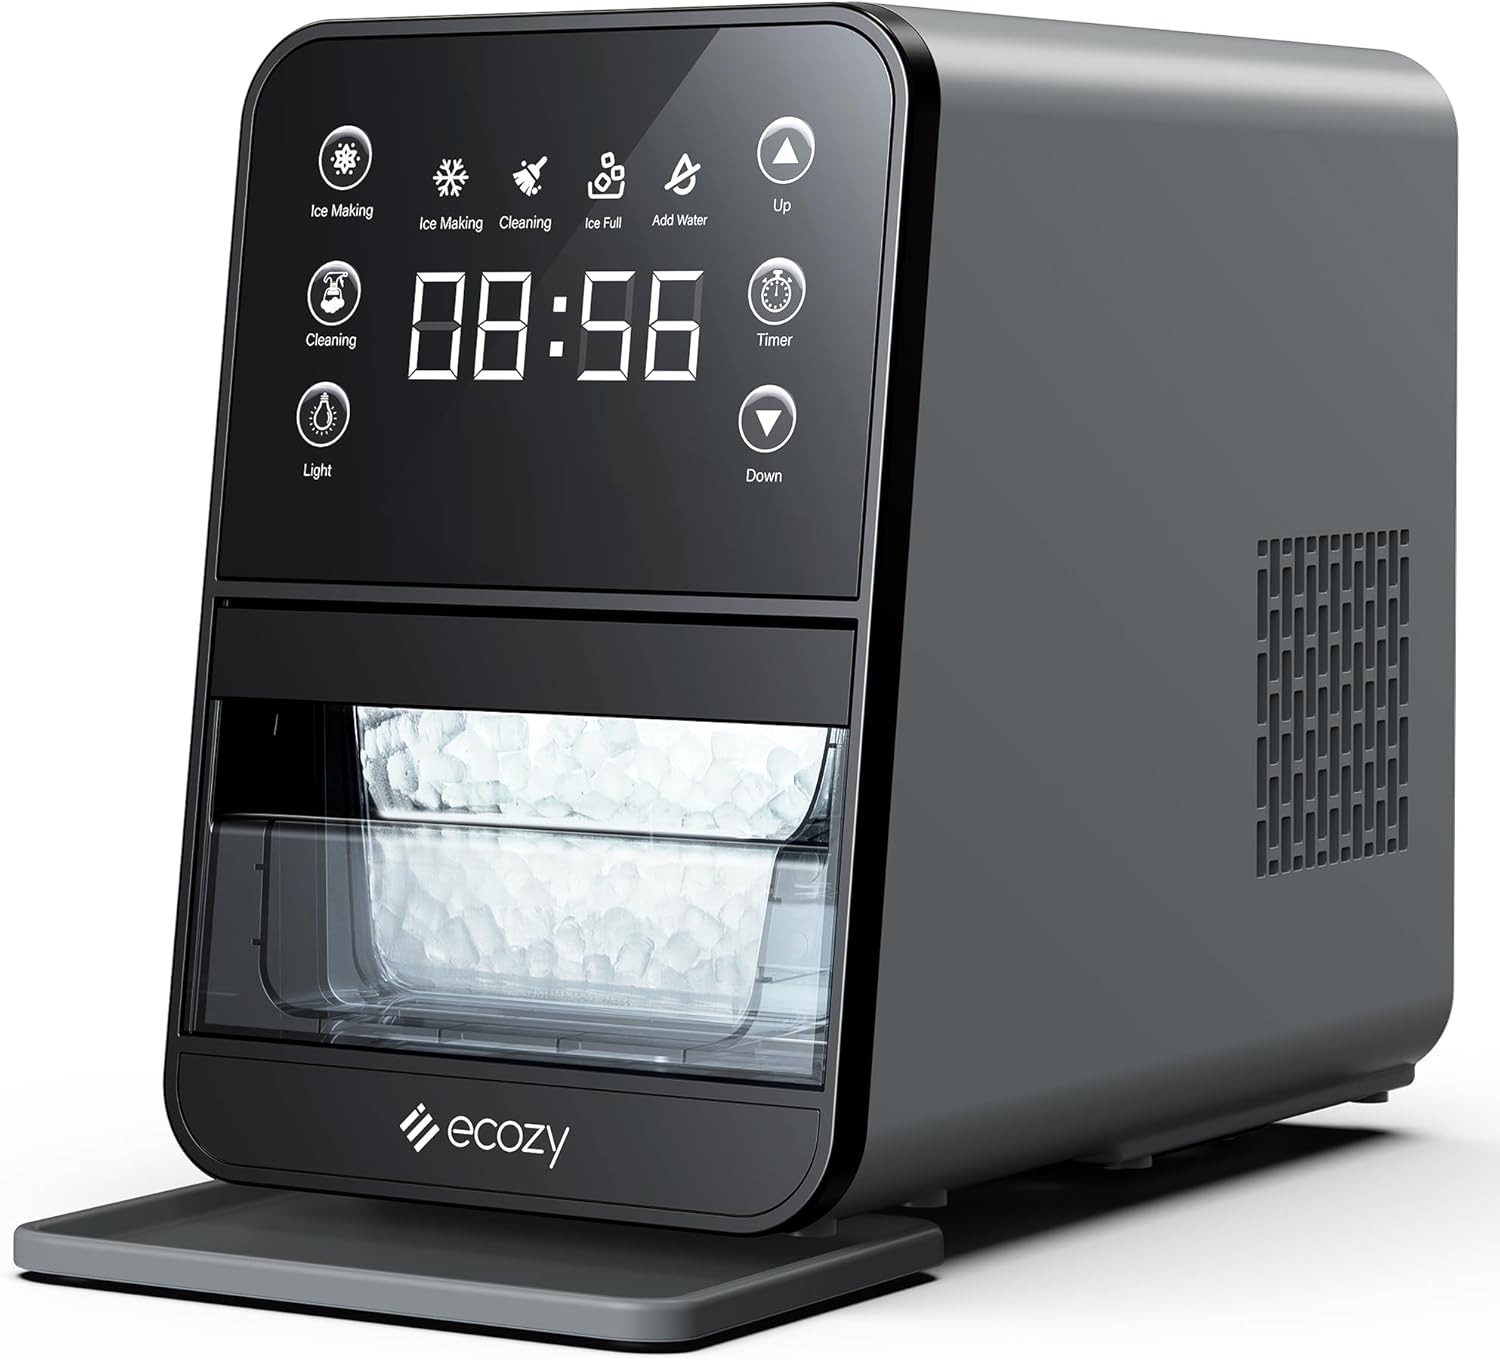
- ErgoScreen Control Panel: Angled high-resolution touch screen for easy operation.
- Ice Basket: Pull-out design with 3 lbs storage capacity.
- Water Reservoir: Internal water tank for ice production.
- Drip Tray: Collects water to keep the countertop clean.
- Drain Plugs: Located at the back for water drainage.
3.2 Control Panel Functions

- Ice Making Indicator: Illuminates when the unit is producing ice.
- Cleaning Indicator: Illuminates during the self-cleaning cycle.
- Ice Full Indicator: Alerts when the ice basket is full.
- Add Water Indicator: Alerts when the water reservoir needs refilling.
- Light Button: Activates the internal light to view ice production.
- Timer Button: Used to set the ice-making schedule.
- Up/Down Buttons: Adjust timer settings.
3.3 Ice Type
This ice maker produces soft, chewable cylindrical nugget ice, which is known for its ability to absorb flavors and chill drinks effectively.

4. Setup
4.1 Unpacking and Placement
- Remove all packaging materials and inspect the ice maker for any damage.
- Place the ice maker on a stable, level countertop away from direct sunlight and heat sources. Ensure adequate ventilation around the unit.
- Allow the unit to stand upright for at least 2 hours before plugging it in to allow refrigerants to settle.
- Install the drip tray at the base of the unit.
4.2 Initial Cleaning
Before first use, it is recommended to clean the ice maker:
- Fill both the top water tank and the lower water tank (ice basket area) with clean, potable water up to the MAX fill line.
- Add a small amount of lemon juice (e.g., 1 tablespoon) to the water for a thorough clean.
- Press the "Cleaning" button on the ErgoScreen to start the self-cleaning cycle.
- Once the cycle is complete (approximately 10 minutes), drain the water from the unit using the two drain plugs located at the back.
- Rinse the unit by repeating the cleaning cycle with only clean water (no lemon juice) to remove any residue. Drain thoroughly.
5. Operating Instructions
5.1 Adding Water
Open the top lid and fill the water reservoir with potable water up to the MAX fill line. The "Add Water" indicator will turn off once sufficient water is detected.
5.2 Starting Ice Production
Press the "Ice Making" button on the ErgoScreen. The "Ice Making" indicator will illuminate, and the unit will begin producing ice. The first batch of ice may take longer to produce.

5.3 Using the Timer Function
The ice maker features a 24-hour timer function to schedule ice production:
- Press the "Timer" button. The digital display will show a flashing time.
- Use the "Up" and "Down" buttons to set the desired delay time (in hours) before ice production begins.
- Press the "Timer" button again to confirm the setting. The timer indicator will illuminate.
Note: This is a timer for scheduling ice production, not a clock displaying current time.

5.4 Retrieving Ice
When the "Ice Full" indicator illuminates, the ice basket is full. Gently pull out the drawer-style ice basket to access the ice. Use the provided ice scoop to retrieve ice.

5.5 Internal Light
Press the "Light" button to illuminate the interior of the ice maker, allowing you to view the ice production process or check the ice level. The light will stay on for approximately 10 minutes or can be turned off by pressing the button again.
6. Maintenance and Cleaning
6.1 Regular Cleaning
Regular cleaning helps maintain ice quality and extends the life of your appliance. Use the self-cleaning function weekly or as needed.

- Ensure the unit is unplugged before manual cleaning.
- Remove the ice basket and wash it with mild soap and warm water. Rinse thoroughly.
- Wipe the interior and exterior surfaces of the ice maker with a soft cloth dampened with mild detergent.
- For the self-cleaning cycle, refer to "4.2 Initial Cleaning" for detailed steps. Remember to fill both the top and bottom water tanks for a thorough clean.
6.2 Draining the Water
To drain residual water from the unit, locate the two drain plugs at the back of the ice maker. Place a container underneath and remove the plugs to allow water to drain completely. Replace the plugs securely after draining.
6.3 Hard Water Considerations
Hard water can lead to mineral buildup (scaling) inside the ice maker, affecting performance and ice quality. Consider using filtered or pure water, especially in areas with high mineral content.

- Descaling: If you notice mineral buildup, descale the unit using a descaling solution or a mixture of water and vinegar. Follow the self-cleaning procedure with the descaling solution, then rinse thoroughly with clean water.
- Frequency: Descale monthly in moderately/hard water areas, and every two weeks in very hard water areas.
7. Troubleshooting
Before contacting customer support, please refer to the following troubleshooting guide:
| Problem | Possible Cause | Solution |
|---|---|---|
| Ice maker not producing ice. | No water in reservoir; "Add Water" indicator is on. Unit is unplugged or power outage. Ambient temperature is too high. | Fill water reservoir. Ensure unit is plugged in and power is supplied. Operate in a cooler environment. |
| "Ice Full" indicator is on, but basket is not full. | Ice sensor is blocked or dirty. Ice is piled up unevenly. | Clear any obstructions from the ice sensor. Redistribute ice in the basket or remove some ice. |
| Ice melts quickly or freezes together. | Ambient temperature is too high. Ice is not being transferred to a freezer. | Ensure the unit is in a cool environment. Transfer freshly made ice to a freezer for long-term storage. The ice maker is not a freezer. |
| Unit is making loud or unusual noises (e.g., knocking, grinding). | Internal components may be obstructed or malfunctioning. Air in the system. | Unplug the unit and allow it to rest for 30 minutes, then restart. If the noise persists, contact customer support. Ensure the unit is on a level surface. |
| Self-cleaning function not working effectively. | Insufficient water in tanks. Mineral buildup. | Ensure both top and bottom water tanks are filled during the cleaning cycle. Perform descaling if hard water is suspected. |
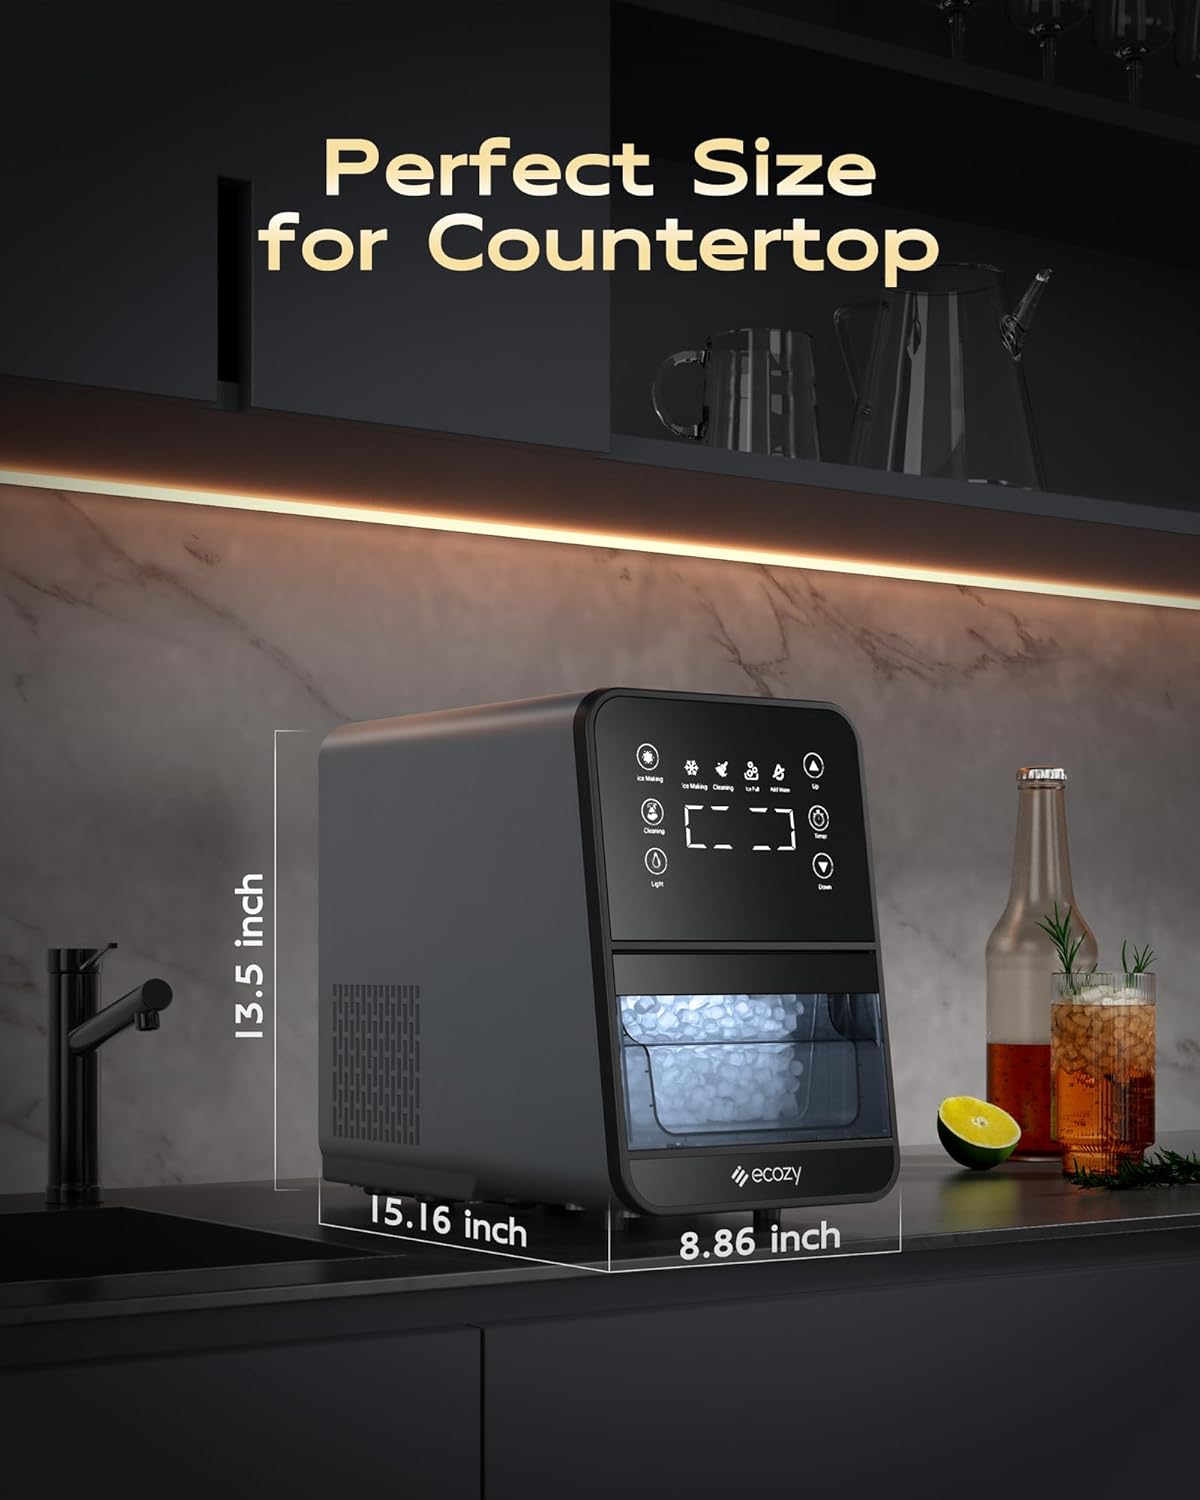
8. Specifications
| Feature | Detail |
|---|---|
| Brand | ecozy |
| Model Name | IM-NS331A |
| Product Dimensions (D x W x H) | 15.16" x 8.86" x 13.5" |
| Ice Production Capacity | Up to 33 lbs per 24 hours |
| Ice Storage Capacity | 3 lbs |
| Voltage | 115 Volts |
| Refrigerant | R600a |
| Material | Plastic |
| Item Weight | 23.1 pounds |
| Installation Type | Countertop |
| Included Components | Ice Scoop, Drip Tray |
9. Warranty and Customer Support
For warranty information or technical assistance, please contact ecozy customer support. Refer to the product packaging or the official ecozy website for the most current contact details.
Website: ecozy Official Store