1. Introduction
This manual provides essential information for the proper installation, operation, and maintenance of your Vvikizy Vehicle Mounted Digital DAB Antenna. Designed to enhance your digital radio reception, this antenna offers wide compatibility and easy installation for an improved in-car audio experience.

Figure 1.1: Overview of the Vvikizy Vehicle Mounted Digital DAB Antenna. This image shows the flat, rectangular antenna element with an attached cable terminating in an SMB female connector.
2. Product Features
- Enhanced Digital Reception: Specifically designed to improve the quality of digital radio reception (DAB and DAB+), providing a clearer and more stable audio signal in your vehicle.
- Sturdy Connector Design: Features a gold-plated SMB Angle connector for secure, durable, and reliable connection to your car's audio system.
- Wide Compatibility: Compatible with all DAB and DAB+ radios, including popular brands like JVC, Kenwood, Alpine, and Pioneer.
- Easy Installation: Designed for plug-and-play operation, making installation straightforward and convenient without complex procedures.
- Premium Quality Construction: Manufactured with professional technology to ensure high performance, longevity, and seamless integration with your vehicle.

Figure 2.1: The antenna's cable and gold-plated SMB angle connector, highlighting its robust design.
3. Setup and Installation
The Vvikizy DAB Antenna is designed for simple, plug-and-play installation. Follow these steps for optimal performance:
- Choose a Location: For best reception, it is recommended to stick the antenna inside the vehicle's window. A clean, flat surface on the windshield or rear window is ideal. Ensure the chosen spot does not obstruct your view or interfere with vehicle operations.
- Clean the Surface: Before attaching, thoroughly clean the chosen window surface with a glass cleaner to remove any dust, dirt, or grease. Allow it to dry completely.
- Attach the Antenna: Carefully peel off the protective backing from the adhesive pad on the back of the antenna. Press the antenna firmly onto the cleaned window surface, ensuring good contact across the entire adhesive area.
- Route the Cable: Route the 3-meter (9.8ft) cable discreetly along the vehicle's interior trim to your DAB/DAB+ radio unit. Ensure the cable is not pinched or exposed to excessive heat.
- Connect to Radio: Plug the SMB Female Head connector of the antenna cable into the corresponding SMB input port on your DAB/DAB+ radio. Ensure a snug and secure connection.
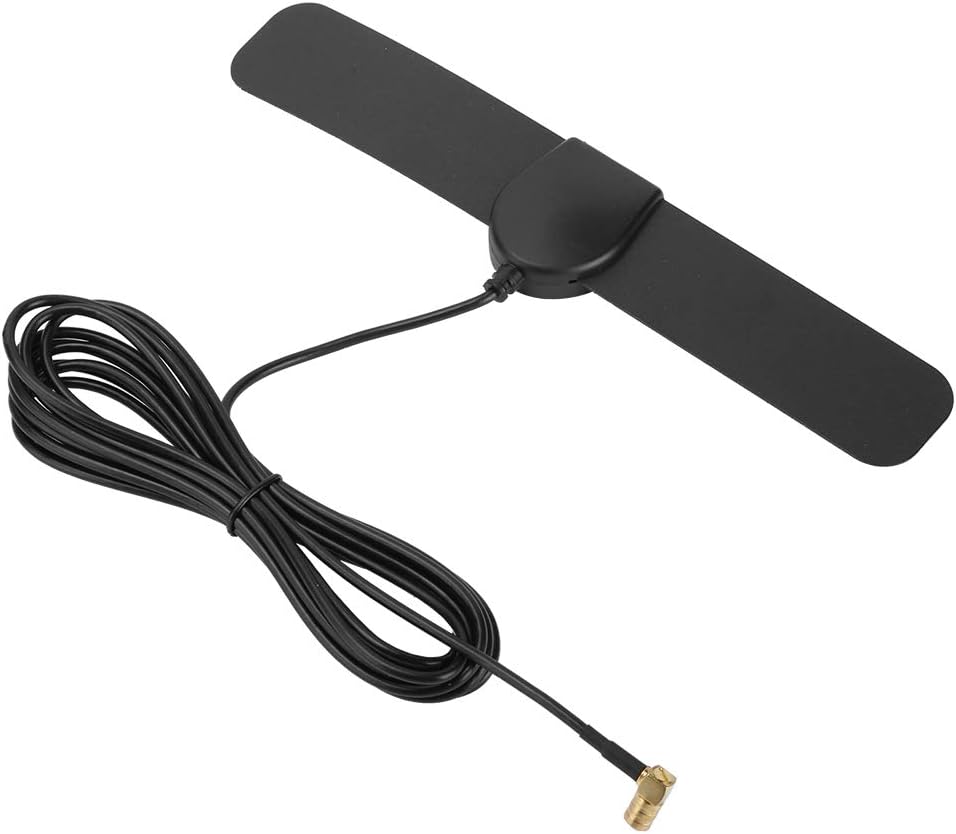
Figure 3.1: The rear view of the antenna, showing the adhesive pad for easy mounting on a window surface.

Figure 3.2: Illustrative image of the antenna's potential placement within a vehicle, demonstrating its compact and discreet design.
4. Operating Instructions
Once the Vvikizy DAB Antenna is correctly installed and connected to your DAB/DAB+ radio, operating it is straightforward:
- Power On: Turn on your vehicle's ignition and your DAB/DAB+ radio unit.
- Scan for Stations: Access the radio's menu and initiate a scan for DAB/DAB+ stations. The antenna will work to capture available digital radio signals.
- Select Station: Once the scan is complete, select your desired digital radio station from the list provided by your radio.
- Adjust Position (if needed): If reception is poor in a specific area, slight adjustments to the antenna's position on the window (if possible without re-adhering) or re-scanning for stations may improve signal quality.
5. Maintenance
The Vvikizy DAB Antenna requires minimal maintenance to ensure long-lasting performance:
- Cleaning: If the antenna surface becomes dusty, gently wipe it with a soft, dry, or slightly damp cloth. Avoid using harsh chemicals or abrasive cleaners.
- Cable Inspection: Periodically check the antenna cable for any signs of wear, kinks, or damage. Ensure the connector remains securely plugged into your radio.
- Adhesive Check: Ensure the antenna remains firmly adhered to the window. If it starts to peel, re-adhere it if possible, or consider using a stronger adhesive if necessary (though this is generally not required).
6. Troubleshooting
If you experience issues with your Vvikizy DAB Antenna, consider the following troubleshooting steps:
| Problem | Possible Cause | Solution |
|---|---|---|
| Poor or No Digital Radio Reception |
|
|
| Antenna Not Sticking |
|
|
Important Note: Before purchase, please confirm that your radio unit has an SMB Female Head connector input for compatibility.
7. Specifications
| Attribute | Detail |
|---|---|
| Brand | Vvikizy |
| Model Number | Vvikizy3v4s6mbkdc |
| Item Type | Antenna |
| Material | Flexible PC |
| Color | As Pictures Shown (Typically Black) |
| Weight | Approx. 55g / 1.9 oz |
| Line Length | 3 meters / 9.8 ft |
| Connector Type | SMB Female Head (Gold-plated Angle Connector) |
| Product Dimensions | 21 x 5 x 2 cm (approximate, based on product details) |
8. Warranty and Support
Vvikizy is committed to providing high-quality products. For any questions, technical assistance, or warranty inquiries regarding your DAB Antenna, please refer to the contact information provided with your purchase or visit the official Vvikizy website. Please retain your proof of purchase for warranty claims.