1. Product Overview
The KETOTEK KT3100BL is a versatile digital thermostat designed for precise temperature control across various applications. It features a clear VA LCD display with backlight, wide temperature control range, and multiple timer functions, making it suitable for heating and cooling devices, incubators, greenhouses, and more.

Figure 1: KETOTEK KT3100BL Digital Thermostat with its integrated temperature probe.
Key Features:
- HD VA LCD Screen with Backlight: Adjustable backlight for clear visibility in various lighting conditions.
- Wide Temperature Control Range: Operates from -40℃ to 120℃ (-40℉ to 248℉), suitable for both heating and cooling applications.
- High Power Output: 16A, 3680W capacity, compatible with most household appliances.
- Multiple Timer Functions: Includes cycle timer (F01) and countdown modes (F02-F04) for flexible operation.
- 3m Temperature Sensor: Equipped with a NTC10K/B3950 sensor for accurate readings.
- Temperature Unit Switch: Easily switch between Celsius (℃) and Fahrenheit (℉).
- Calibration Function: Allows for fine-tuning temperature accuracy.
- Reset Function: Simplifies configuration for new applications.
- Plug-and-Play Design: Pre-wired for immediate use.

Figure 2: Visual summary of the thermostat's main features.
2. Setup
Setting up your KETOTEK KT3100BL thermostat is straightforward due to its plug-and-play design. Follow these steps to get started:
- Unpack the Device: Carefully remove the thermostat and its temperature sensor from the packaging.
- Connect the Sensor: The 3-meter NTC10K/B3950 temperature sensor is pre-attached. Ensure it is securely connected.
- Position the Sensor: Place the temperature sensor in the environment where you need to monitor and control the temperature (e.g., inside an incubator, greenhouse, or aquarium). Ensure it is not directly exposed to heat sources or drafts that could skew readings.
- Plug in the Thermostat: Insert the thermostat's plug into a standard 100-250 VAC power outlet.
- Connect Your Appliance: Plug your heating or cooling appliance (e.g., heater, fan, incubator) into the thermostat's output socket.

Figure 3: Simple plug-and-play setup for immediate use.
3. Operating Instructions
The KT3100BL thermostat is designed for intuitive operation. Here's how to use its main functions:
3.1. Display and Backlight
The VA LCD screen displays the measured temperature, start temperature (ON), and stop temperature (OFF). The backlight can be adjusted for optimal viewing.
- Always On Backlight: Configure the backlight to remain on continuously.
- Timed Backlight: Set the backlight to illuminate for a specific duration after a button press.
- Disabling Backlight: Press the DOWN button to turn off the backlight.

Figure 4: Clear VA LCD display for easy temperature monitoring.

Figure 5: Backlight functionality for improved visibility.
3.2. Temperature Control Mode
The thermostat can operate in either heating or cooling mode, depending on your set temperatures.
- Setting Temperatures:
- Press the SET button once to enter temperature setting mode. The "Start Temperature" will flash.
- Use the UP and DOWN buttons to adjust the desired start temperature.
- Press SET again to move to "Stop Temperature". Adjust using UP and DOWN.
- Press SET a third time to confirm and exit.
- Heating Mode: If the "Start Temperature" is set lower than the "Stop Temperature" (e.g., Start 20°C, Stop 25°C), the thermostat will activate the connected appliance when the measured temperature drops below the start temperature and deactivate it when it reaches the stop temperature.
- Cooling Mode: If the "Start Temperature" is set higher than the "Stop Temperature" (e.g., Start 28°C, Stop 20°C), the thermostat will activate the connected appliance when the measured temperature rises above the start temperature and deactivate it when it drops to the stop temperature.

Figure 6: Understanding heating and cooling modes based on temperature settings.

Figure 7: The thermostat supports a broad temperature range for diverse applications.
3.3. Timer Functions (F01-F04)
The thermostat includes advanced timer functions accessible via the MODE button.
- Accessing Timer Modes: Press the MODE button repeatedly to cycle through the F01-F04 timer functions.
- F01 - Cycle Timer:
This mode allows the appliance to cycle on and off repeatedly. You can set the ON duration and OFF duration in hours and minutes.
- Set ON time (hours and minutes).
- Set OFF time (hours and minutes).
- F02 - Countdown ON, Countdown OFF:
The appliance turns ON after a set countdown, then turns OFF after another set countdown.
- F03 - Countdown OFF:
The appliance turns OFF after a set countdown.
- F04 - Countdown ON, Countdown OFF (Single Cycle):
Similar to F02 but designed for a single cycle operation.
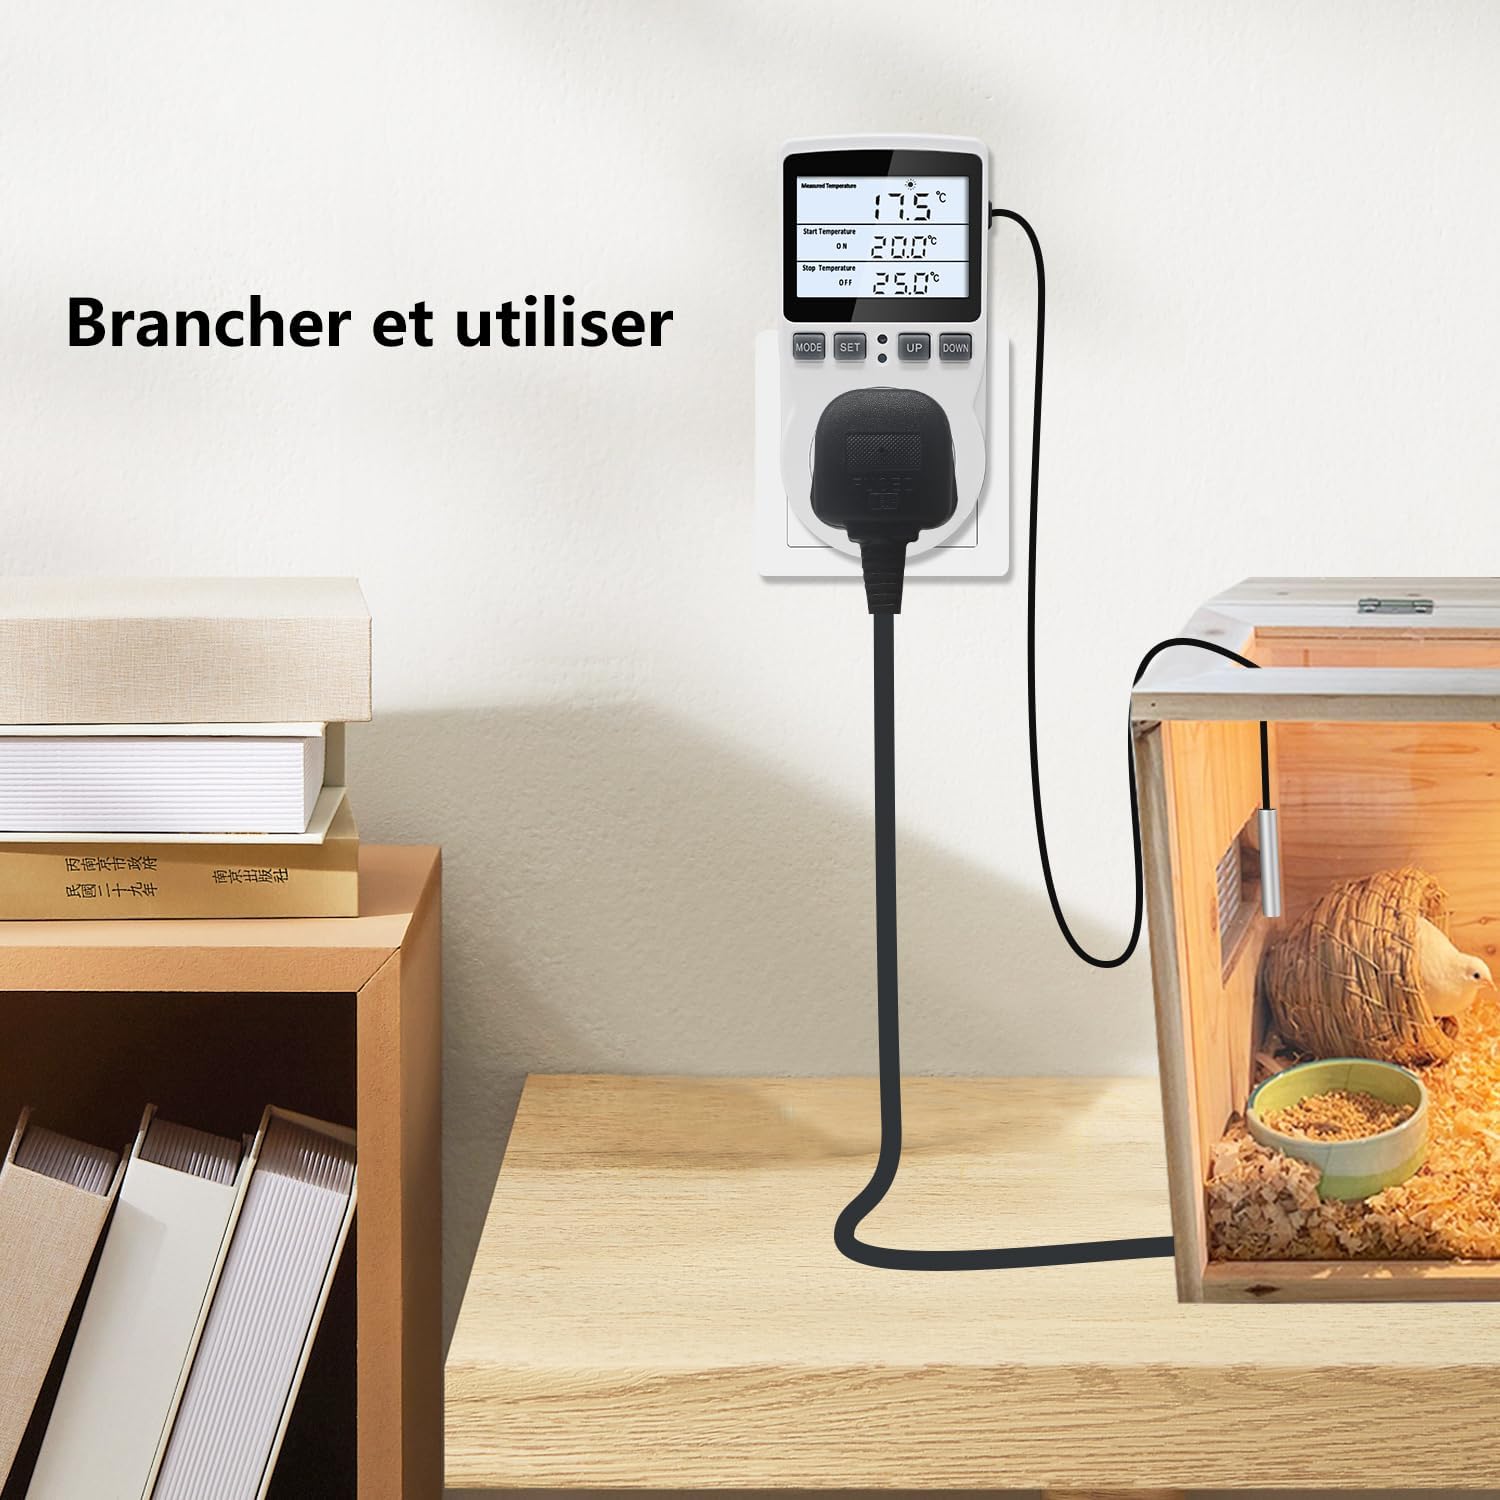
Figure 8: Detailed view of the various timer functions.
4. Calibration
The calibration function allows you to adjust the temperature reading for improved accuracy, compensating for any minor discrepancies between the sensor and the actual temperature of the environment.
- Disconnect Power: Unplug the thermostat from the power outlet.
- Enter Calibration Mode: While holding down the MODE button, plug the thermostat back into the power outlet. The screen will display "0.0" and flash, indicating it's in calibration mode.
- Adjust Offset: Use the UP and DOWN buttons to adjust the calibration value. You can set a positive or negative offset (e.g., -9.9 to 9.9).
- Save and Exit: Press the SET button to save the calibration and exit the mode.

Figure 9: Calibration process to fine-tune temperature readings.
5. Reset Function
If you need to revert all settings to their factory defaults, use the reset function. This is useful when transitioning the thermostat to control different appliances or environments.
- Disconnect Power: Unplug the thermostat from the power outlet.
- Perform Reset: While holding down the SET button, plug the thermostat back into the power outlet. The screen will display "888.8" indicating a successful reset.
- Release Button: Release the SET button. The thermostat will now be at its default settings.
Note: Performing a reset will erase all custom temperature and timer settings.
Figure 10: Resetting the thermostat to factory default settings.
6. Maintenance
To ensure the longevity and optimal performance of your KETOTEK KT3100BL thermostat, follow these simple maintenance guidelines:
- Cleaning: Wipe the device with a soft, dry cloth. Do not use abrasive cleaners, solvents, or immerse the unit in water.
- Sensor Care: Keep the temperature sensor clean and free from debris. Avoid bending or kinking the sensor cable excessively.
- Storage: When not in use for extended periods, store the thermostat in a cool, dry place away from direct sunlight and extreme temperatures.
- Power Disconnection: Always unplug the thermostat from the power outlet before cleaning or performing any maintenance.
7. Troubleshooting
If you encounter issues with your KETOTEK KT3100BL thermostat, refer to the following common problems and their solutions:
| Problem | Possible Cause | Solution |
|---|---|---|
| Display is blank or not turning on. | No power supply; loose connection. | Ensure the thermostat is securely plugged into a live power outlet. Check the outlet with another device. |
| Appliance not turning ON/OFF at set temperatures. | Incorrect temperature settings (heating/cooling mode); faulty appliance; sensor issue. |
|
| Temperature reading is inaccurate. | Sensor placement; need for calibration. |
|
| Timer functions not working as expected. | Incorrect timer mode selected; incorrect time settings. | Review Section 3.3 to ensure the correct timer mode (F01-F04) is selected and the ON/OFF durations are set properly. |
| Device not responding to button presses. | Temporary software glitch. | Unplug the thermostat from the power outlet, wait 10 seconds, and plug it back in to perform a soft reset. If the issue persists, perform a factory reset (Section 5). |
8. Specifications
Detailed technical specifications for the KETOTEK KT3100BL Digital Thermostat:
| Parameter | Value |
|---|---|
| Model Number | KT3100BL FR |
| Brand | KETOTEK |
| Voltage | 100-250 VAC |
| Max Current Output | 16 A |
| Max Power Output | 3680 W |
| Temperature Control Range | -40℃ to 120℃ (-40℉ to 248℉) |
| Temperature Sensor | NTC10K/B3950, 3 meters (9.8 ft) length |
| Display Type | VA LCD with Backlight |
| Product Dimensions (L x W x H) | 8 x 5.8 x 12 cm (3.15 x 2.28 x 4.72 inches) |
| Item Weight | 215 grams (0.47 lbs) |
| Color | White |

Figure 11: Product dimensions and sensor length.
9. Applications
The KETOTEK KT3100BL Digital Thermostat is highly versatile and can be used in a wide range of applications requiring precise temperature control:
- Incubators: Maintain stable temperatures for hatching eggs.
- Greenhouses: Regulate temperature for optimal plant growth.
- Aquariums: Control water temperature for aquatic life.
- Refrigerators/Freezers: Monitor and control temperatures for specific storage needs.
- Fermentation: Ensure consistent temperatures for brewing, yogurt making, etc.
- Reptile Habitats: Create ideal thermal environments for reptiles.
- Carbon Crystal Heating: Manage heating systems efficiently.
- General Heating/Cooling Appliances: Control fans, heaters, and other devices.

Figure 12: Diverse applications for the KETOTEK KT3100BL thermostat.
10. Warranty and Support
For warranty information and customer support, please refer to the documentation provided with your purchase or contact KETOTEK customer service directly. Specific warranty terms may vary by region and retailer.
Note: Based on the provided product data, detailed warranty information is not available. Please consult the manufacturer's official website or your point of purchase for the most accurate and up-to-date warranty and support details.