Introduction
This manual provides detailed instructions for the proper setup, use, and maintenance of your windhike Naturehike Cloud up Pro Camping Tent. Designed for 1, 2, or 3 person ultralight backpacking, this 3-season tent offers waterproof protection and a self-standing design for easy setup. Please read this manual thoroughly before using your tent to ensure safety and optimal performance.
Safety Information
- Keep all flame and heat sources away from the tent fabric. The tent is made of flame-resistant fabric, but it is not fireproof.
- Do not use fuel-burning devices inside the tent. This can lead to carbon monoxide poisoning.
- Ensure proper ventilation to prevent condensation and maintain air quality.
- Pitch the tent on level ground, clear of sharp objects and potential falling debris.
- Securely stake down and guy out the tent in windy conditions to prevent damage or injury.
- Avoid setting up the tent near open water or in areas prone to flash floods.
Package Contents
Verify that all components are present before attempting to set up your tent.
- Outer Tent (Flysheet)
- Inner Tent
- Tent Poles (Aluminum)
- Ground Pegs (Stakes)
- Wind Ropes (Guy Lines)
- Tie-down Strap
- Ground Sheet (Footprint)
- Tent Storage Bag


Setup Instructions
The Cloud up Pro tent features a self-standing design for quick and simple pitching. Follow these steps for a secure setup.
Step 1: Lay Out Groundsheet and Inner Tent
- Choose a flat, clear area for your tent.
- Lay out the groundsheet (footprint) on the chosen spot.
- Place the inner tent on top of the groundsheet, aligning the corners.
- Secure the corners of the groundsheet and inner tent with pegs.

Step 2: Assemble and Insert Poles
- Assemble the aluminum tent poles. The Cloud up Pro uses a double-Y freestanding structure.
- Insert the pole ends into the grommets or sleeves at the corners of the inner tent.
- Clip the inner tent to the pole structure.


Step 3: Attach Outer Tent (Flysheet)
- Drape the outer tent over the erected inner tent, ensuring the doors align.
- Attach the buckles or clips on the outer tent to the corresponding points on the inner tent or poles.
- Secure the outer tent with additional pegs and guy lines for stability, especially in windy conditions.


Operating Instructions
Ventilation
The Cloud up Pro tent is designed with enhanced ventilation to minimize condensation. It features internal and rear ventilation windows, along with a side bird wing design.
- Internal Ventilation Window: Works with the rear ventilation window to create cross-ventilation. These can be opened or closed from inside the tent.
- Side Bird Wing Design: Increases the gap between the inner and outer tents to promote air circulation, effectively reducing condensation buildup.


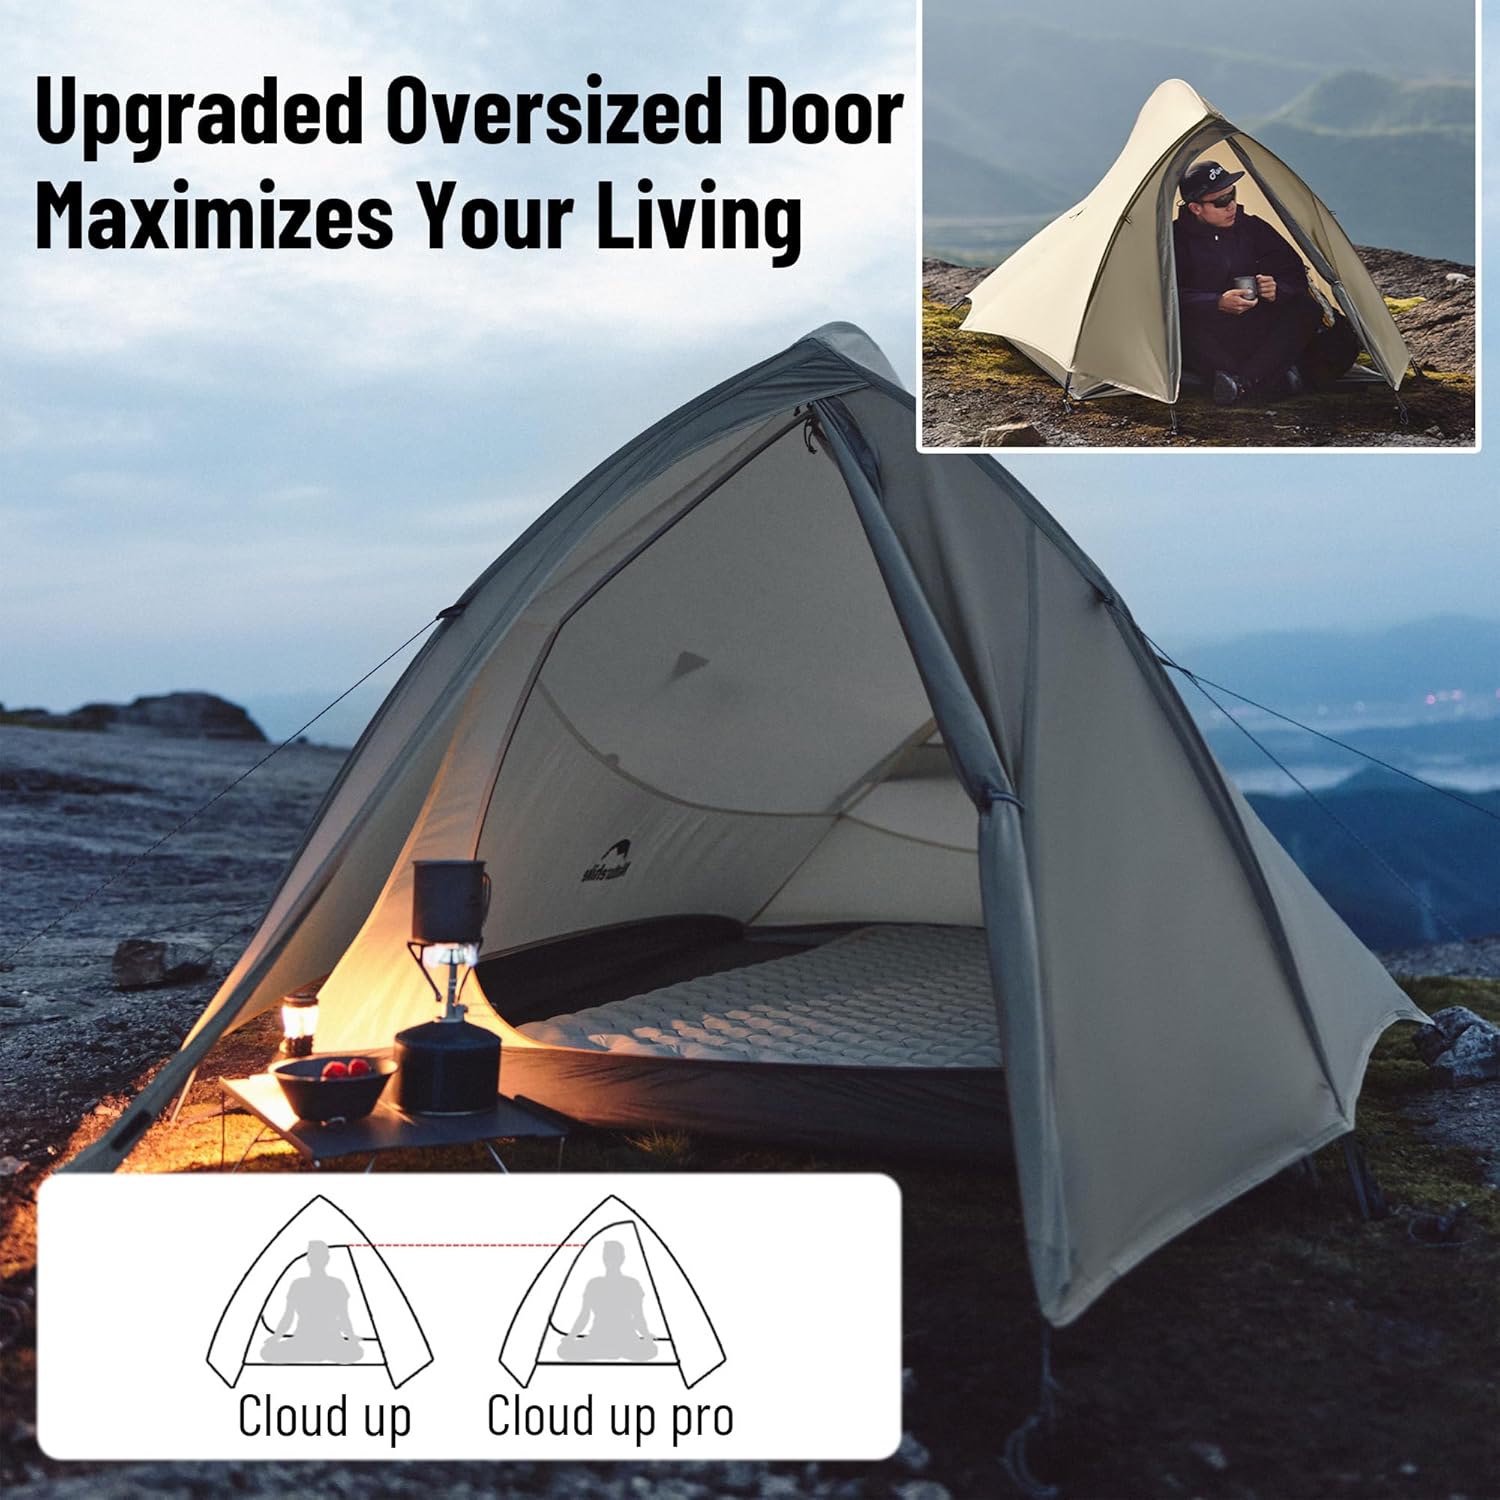
Door Access and Space
The tent features an upgraded door design for easier access and increased headroom.
Maintenance
Cleaning
- Clean the tent by hand washing with mild soap and water. Do not use harsh detergents or bleach.
- Rinse thoroughly and allow the tent to air dry completely before packing.
- Do not machine wash or tumble dry, as this can damage the waterproof coating and fabric.
Storage
- Ensure the tent is completely dry before storing to prevent mildew and odors.
- Fold or roll the tent loosely into its storage bag. Avoid tight folding along the same creases repeatedly.
- Store the tent in a cool, dry place away from direct sunlight and extreme temperatures.
Troubleshooting
| Problem | Possible Cause | Solution |
|---|---|---|
| Condensation inside tent | Insufficient ventilation, high humidity, temperature difference. | Open ventilation windows and ensure the side bird wing design is allowing airflow. Choose a well-ventilated campsite. |
| Tent not standing securely | Improper pole assembly, insufficient staking, loose guy lines. | Recheck pole connections. Ensure all pegs are firmly in the ground. Tighten guy lines. |
| Water leakage | Damaged fabric, unsealed seams, improper flysheet setup. | Inspect for tears or punctures. Ensure all seams are sealed. Verify the flysheet is correctly positioned and taut. |
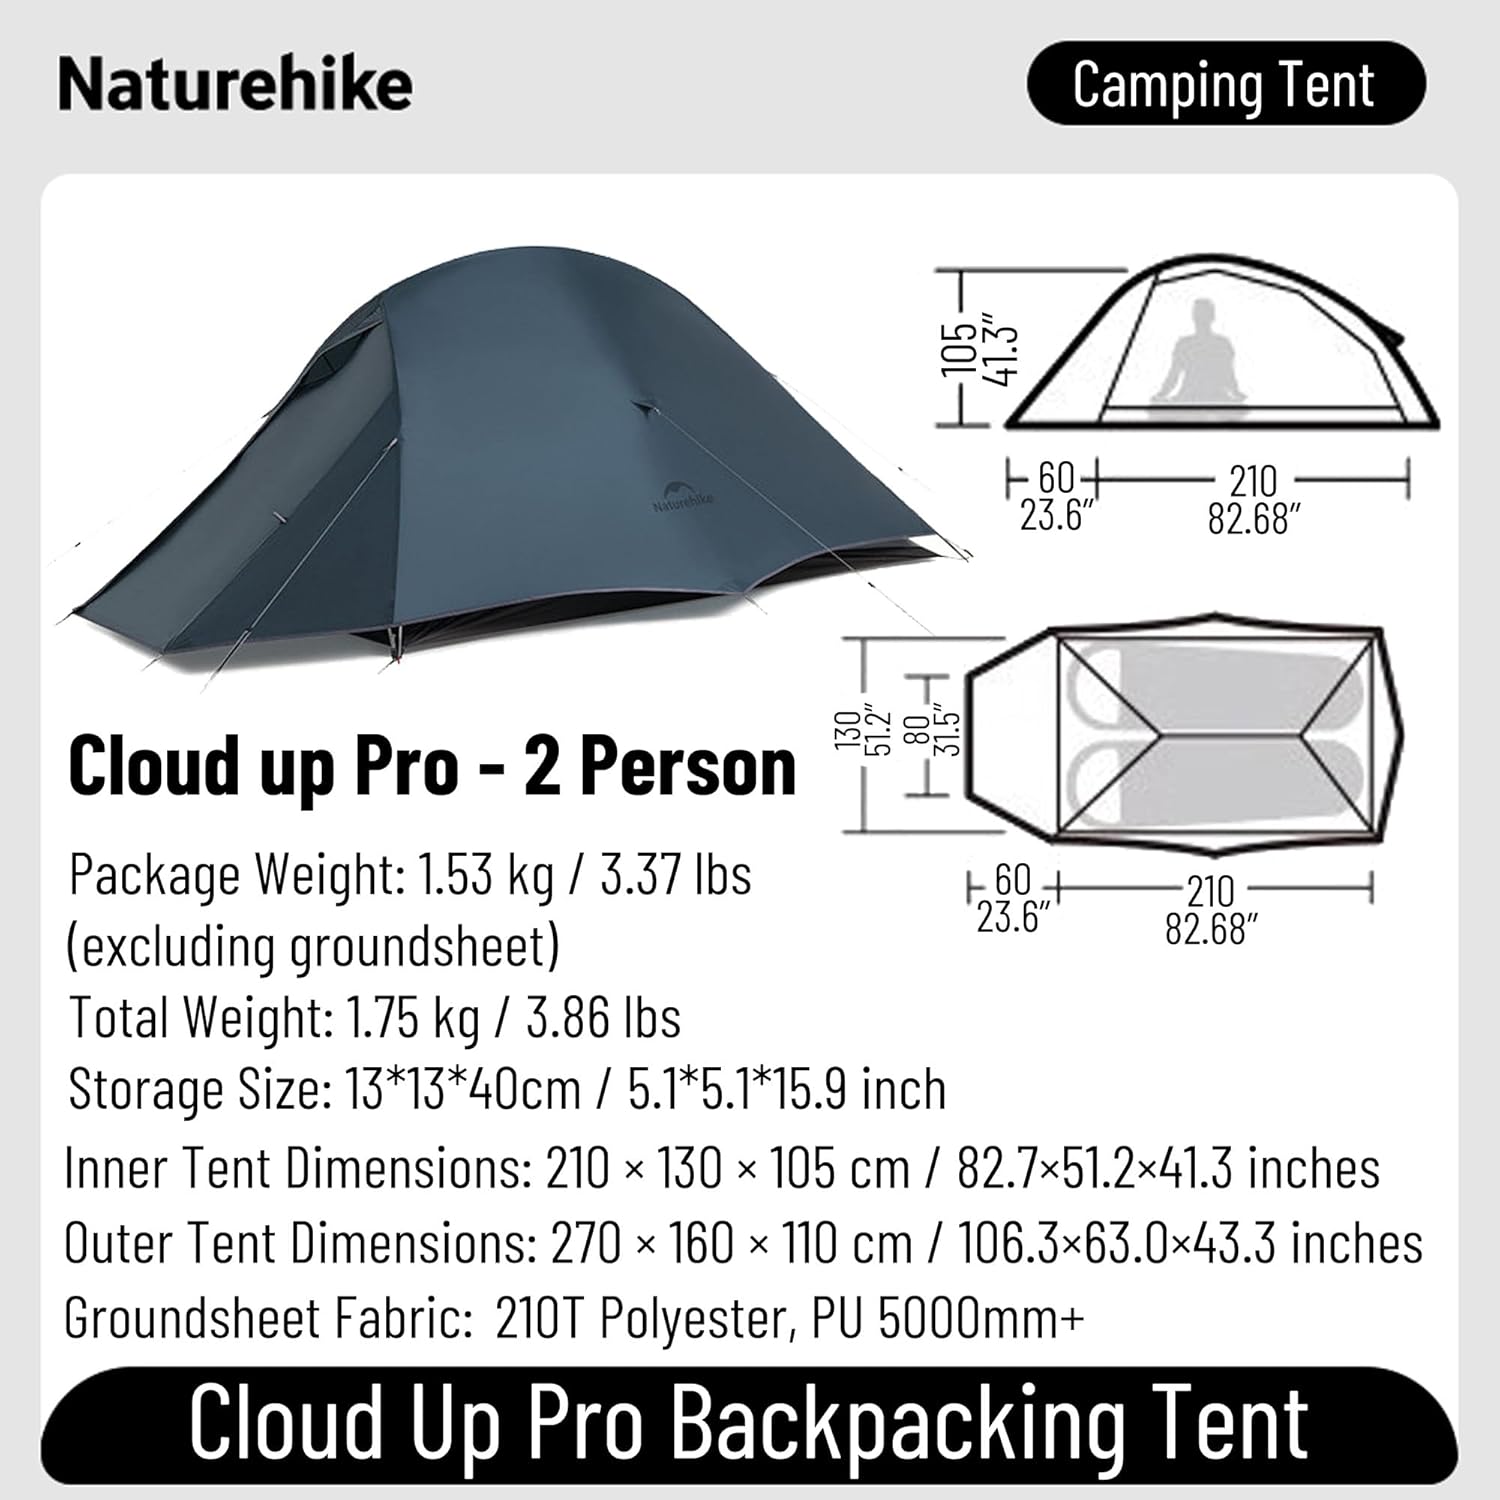
Specifications
| Feature | Detail |
|---|---|
| Brand | windhike |
| Model Name | Cloud up Pro Tent |
| Model Number | WH-116 |
| Occupancy | 1, 2, or 3 Person (variant dependent) |
| Seasons | 3 Season |
| Material Type | 20D Nylon with PU3000mm+ waterproof rating and silicone coating |
| Pole Material | Aluminum |
| Water Resistance Level | Waterproof (PU3000mm+) |
| Installation Type | Free Standing |
| Approx. Weight (1-person) | 1.57 kg (3.47 lb) |
| Approx. Weight (2-person) | 1.75 kg (3.86 lb) |
| Approx. Weight (3-person) | 2.3 kg (5.06 lb) |
| Storage Size (2-person) | 13×13×40 cm (5.1×5.1×15.7 inches) |
| Inner Tent Dimensions (2-person) | 210×130×105 cm (82.7×51.2×41.3 inches) |
| Outer Tent Dimensions (2-person) | 270×160×110 cm (106.3×63.0×43.3 inches) |

Warranty and Support
Your windhike Naturehike Cloud up Pro Camping Tent comes with a manufacturer's warranty. For any questions or concerns regarding your tent, please contact customer service. We are committed to providing a satisfactory solution within 24 hours.
Contact Information: Refer to the contact details provided with your purchase or visit the official windhike store online.