Introduction
Thank you for choosing the XHDATA R-9012 AM/FM/SW 12 Bands Shortwave Radio Receiver. This compact and portable radio is designed to provide reliable reception across multiple frequency bands, including FM, AM, and 12 Shortwave bands. This manual provides detailed instructions for the proper setup, operation, and maintenance of your new radio. Please read it thoroughly before use to ensure optimal performance and longevity of your device.
Product Overview
Key Features:
- Multi-Band Reception: FM (76-108MHz), AM (525-1620KHz), SW (3.7-21.85MHz).
- Compact and Portable: Dimensions of 80 x 126 x 28 mm (3.1 x 5.0 x 1.1 inches) for easy transport.
- Analog Tuning: Features a tuning dial for straightforward frequency selection.
- Battery Operated: Requires AA batteries (not included) for power.
- Integrated Antenna: Telescopic antenna for enhanced reception.
Component Identification:

Figure 1: Front view of the XHDATA R-9012 radio with labeled components.
- LED Indicator for Tuning: Illuminates to indicate successful tuning.
- Stand (rear): Fold-out stand for upright positioning.
- Telescopic Antenna for SW/FM: Extendable antenna for improved signal reception on FM and Shortwave bands.
- Tuning Knob: Used to select the desired frequency.
- Frequency Tuning Dial Scale Display: Visual display of the selected frequency band.
- Power On/Off Switch: Toggles the radio's power.
- Band Selector (FM/MW/SW 1-10): Slide switch to choose between FM, AM (MW), and various Shortwave bands.
- Band Indicator: Displays the currently selected band.
- Battery Compartment (rear): Location for AA batteries.
- DC Jack: For external power adapter (not included).
- Earphone Jack: 3.5mm audio output for headphones.
- Volume Knob: Adjusts the audio output level.
- Hand Strap: For convenient carrying.
Setup
1. Battery Installation:
The XHDATA R-9012 radio operates on AA batteries (not included).
- Locate the battery compartment on the rear of the radio (Component 9 in Figure 1).
- Slide open the battery compartment cover.
- Insert the required number of AA batteries, ensuring correct polarity (+ and - terminals) as indicated inside the compartment. Incorrect battery insertion can prevent the radio from functioning.
- Close the battery compartment cover securely.
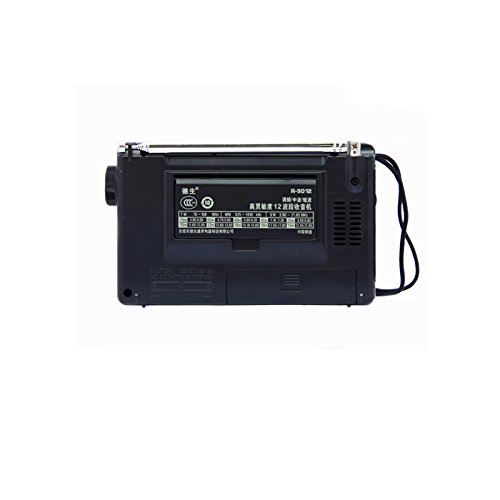
Figure 2: Rear view of the radio, highlighting the battery compartment.
2. Initial Power On:
After installing batteries, slide the Power On/Off switch (Component 6 in Figure 1) to the "ON" position. The radio should power on.
Operating Instructions
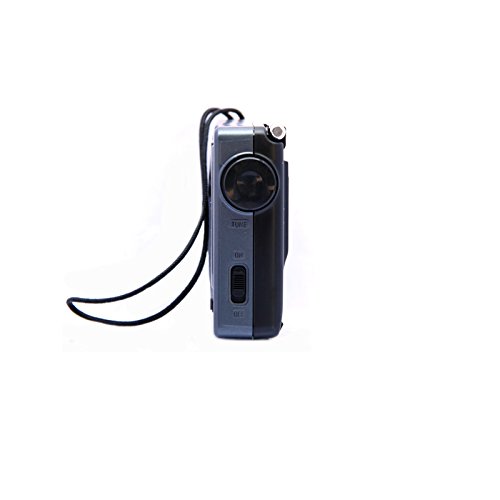
Figure 3: Side view of the radio, illustrating the power switch, tuning knob, and earphone jack.
1. Power On/Off:
To turn the radio on, slide the Power On/Off switch (Component 6) to the "ON" position. To turn it off, slide the switch to the "OFF" position.
2. Adjusting Volume:
Rotate the Volume Knob (Component 12) to increase or decrease the audio output level.
3. Selecting a Band:
Use the Band Selector slide switch (Component 7) to choose your desired frequency band:
- FM: For local FM broadcasts.
- AM (MW): For local AM broadcasts.
- SW 1-10: For various Shortwave bands.
4. Tuning to a Station:
Once a band is selected:
- For FM and Shortwave reception, extend the Telescopic Antenna (Component 3) fully for optimal signal. For AM reception, the internal antenna is typically sufficient, but rotating the radio may improve reception.
- Slowly rotate the Tuning Knob (Component 4) to scan through frequencies.
- Observe the Frequency Tuning Dial Scale Display (Component 5) to identify the frequency.
- The LED Indicator for Tuning (Component 1) will illuminate when a strong signal is received, indicating successful tuning to a station.

Figure 4: Detailed view of the tuning dial and frequency scale.
5. Using Earphones:
Plug standard 3.5mm earphones into the Earphone Jack (Component 11) for private listening. The internal speaker will automatically mute when earphones are connected.
Maintenance
- Cleaning: Wipe the radio with a soft, dry cloth. Do not use abrasive cleaners or solvents.
- Battery Care: Remove batteries if the radio will not be used for an extended period to prevent leakage.
- Storage: Store the radio in a cool, dry place away from direct sunlight and extreme temperatures.
- Antenna: Handle the telescopic antenna gently to avoid bending or breaking. Retract it when not in use.
Troubleshooting
| Problem | Possible Cause | Solution |
|---|---|---|
| Radio does not power on. |
|
|
| Poor reception or static. |
|
|
| No sound from speaker. |
|
|
Specifications
- Brand: XHDATA
- Model Number: R-9012
- Frequency Range:
- FM: 76-108 MHz
- AM (MW): 525-1620 KHz
- SW: 3.7-21.85 MHz (12 Bands)
- Sensitivity:
- FM: <5uV
- MW: <1mV/m
- SW: <50uV
- Power Supply: AA Battery Operated (Batteries not included)
- Product Dimensions: 12.6L x 2.8W x 8H Centimeters (approximately 3.1 x 5.0 x 1.1 inches)
- Weight: Approximately 200g
- Material: Plastic
- Connectivity: 3.5mm Audio Jack (for earphones)
- Special Feature: Portable
Warranty and Support
This product comes with a standard manufacturer's warranty. Please refer to the packaging or your point of purchase for specific warranty terms and conditions. For technical support or inquiries, please contact the retailer or XHDATA customer service.
For further assistance, you may also refer to the official XHDATA website or contact their support channels.