Jansite Jansite 12" 4K Mirror Dash Cam
Jansite 12" 4K Mirror Dash Cam User Manual
Model: 12" 4K Mirror Dash Cam
Introduction
This manual provides detailed instructions for the installation, operation, and maintenance of your Jansite 12" 4K Mirror Dash Cam. This device is designed to enhance your driving safety and provide reliable video evidence with its advanced features, including 4K UHD recording, WiFi connectivity, and comprehensive safety functions.

Image: Overview of the Jansite 12" 4K Mirror Dash Cam system, showing the main mirror unit, rear camera, 64GB SD card, and a smartphone displaying the app interface.
What's in the Box
Please check the contents of your package to ensure all items are present:
- 1 x 4K Mirror Dash Cam
- 1 x 64GB TF Card
- 1 x Rear Camera with 10m Cable
- 2 x Rubber Mounting Straps
- 1 x Car Charger
- 1 x User Manual (this document)
- Rear window windshield bracket
- Accessories (additional mounting hardware)

Image: A visual representation of all components included in the Jansite 4K Mirror Dash Cam package.
Setup
1. Initial Power-On and Testing
Before permanent installation, it is recommended to test the main unit and rear camera. Connect the mirror dash cam and rear camera using the provided cables, then power them on using the included car charger. Ensure both cameras display video correctly on the mirror screen.
2. Inserting the TF Card
Insert the supplied 64GB TF card into the designated slot on the mirror dash cam. Ensure it is inserted correctly. The device will automatically format the card upon first use or if a new card is detected.
3. Mounting the Mirror Dash Cam
Attach the 4K mirror dash cam over your existing rearview mirror using the provided rubber mounting straps. Ensure it is securely fastened and does not obstruct your view or vehicle controls.
4. Installing the Rear Camera
The rear camera can be installed either inside or outside your vehicle, offering 180° angle adjustment without requiring drilling. Choose the optimal location for your vehicle to ensure the best viewing angle.
- Inside Installation: Mount the camera on the rear windshield using the provided bracket.
- Outside Installation: Mount the camera near the license plate using the appropriate bracket and adhesive.

Image: Illustration of the two primary installation methods for the rear camera.

Image: The rear camera's adjustable bracket, highlighting its flexibility and non-drilling installation.
5. Wiring and Power Connection
Route the rear camera cable and the car charger cable neatly to avoid interference with driving. Connect the car charger to your vehicle's 12V power outlet (cigarette lighter socket). The device will power on automatically when the vehicle starts.
6. WiFi Connectivity and App Setup
The dash cam features built-in WiFi for easy access to recordings via a smartphone app. Follow these steps to connect:
- Download the recommended app (e.g., AZDOME APP) from your smartphone's app store (App Store for iOS, Google Play for Android).
- On your smartphone, turn off cellular data and VPN.
- Connect to the dash cam's WiFi network. The WiFi name (SSID) and default password (e.g., 12345678) can be found in the dash cam's settings or user manual.
- Open the app and add your dash cam. You can now view live footage, replay, download, and share recorded videos.

Image: Visual guide for connecting the dash cam to your smartphone via WiFi and setting it up through the app.
Operating Instructions
1. Display and Interface
The 12-inch IPS screen provides a wide horizontal field of view. It features low reflectivity and WDR technology to reduce glare from rear headlights, ensuring clear visibility. You can interact with the device via its touch screen.

Image: The large 12-inch IPS screen interface, demonstrating its wide view and touch control.

Image: A visual comparison illustrating the effectiveness of the low-reflective screen and WDR technology in reducing glare.
2. Recording Modes
- Loop Recording: The dash cam continuously records video in segments (e.g., 1, 3, or 5 minutes). When the memory card is full, it automatically overwrites the oldest unlocked files to ensure uninterrupted recording.
- G-Sensor Recording: In the event of a sudden impact or collision, the built-in G-sensor automatically detects the event and locks the current video footage, preventing it from being overwritten. This ensures critical evidence is preserved.
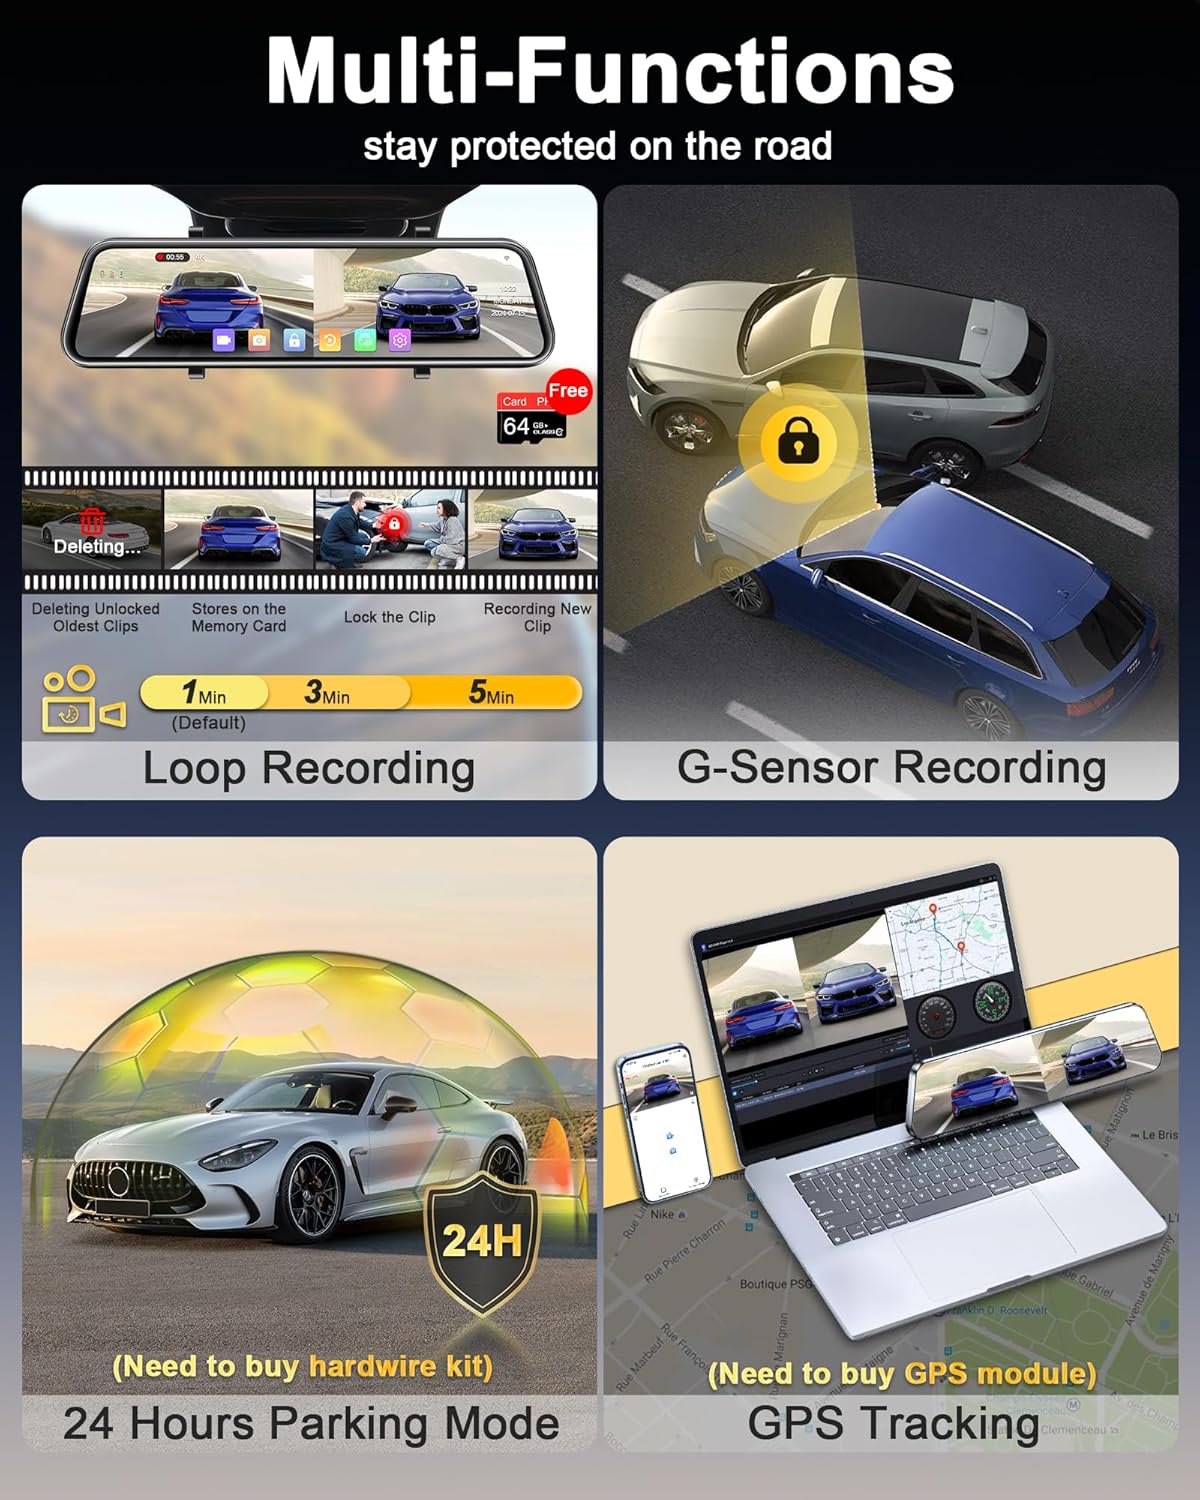
Image: An overview of the dash cam's various recording and safety features.

Image: Explanation of how seamless loop recording functions.

Image: Visual representation of the G-sensor's function during an impact.
3. Super Night Vision
Equipped with HDR/WDR technology and an F1.5 aperture, the dash cam provides clear night-time video. The IMX589 image processing chip enhances low-light performance, capturing details even in challenging conditions.

Image: Demonstration of the Super Night Vision capabilities with WDR/HDR technology.

Image: Details of the components contributing to the dash cam's superior night vision.
4. Wide-Angle Cameras and Reversing Assist
The front camera offers a 170° wide-angle view, and the rear camera provides a 140° view, minimizing blind spots. When reversing, the dash cam automatically displays the rear view with parking assist lines, making parking safer and easier. The rear camera is IP69 waterproof.

Image: Illustration of the reversing assist function with wide-angle views and parking guidelines.

Image: Visual representation of the broad coverage provided by the front and rear cameras.

Image: A detailed view of the parking assistance feature with dynamic guide lines.
5. Parking Monitor (24 Hours Parking Mode)
When the vehicle is off, the parking monitor functions as a surveillance camera system. This feature requires an additional hardware kit (not included) for continuous power supply.

Image: Information regarding the 24-hour parking mode and its power requirements.
6. GPS Tracking
The dash cam supports GPS tracking to record your location and travelling speed. This feature requires an additional GPS module (not included) to function.

Image: Explanation of the GPS tracking capability and the need for an external GPS module.
Maintenance
1. SD Card Management
The included 64GB TF card is designed for continuous use. To maintain optimal performance and prevent data corruption, it is recommended to format the SD card periodically (e.g., once a month) through the dash cam's settings. This will erase all data on the card, so ensure you back up any important footage before formatting.
2. Cleaning the Device
Use a soft, dry cloth to clean the screen and lens of the dash cam. Avoid using abrasive cleaners or solvents, as they may damage the surfaces. For stubborn smudges, a slightly damp cloth can be used, followed by a dry cloth.
3. Power Port Care
The upgraded Type-C power port is designed for enhanced stability. Ensure the power cable is inserted firmly and not subjected to excessive strain to prevent connection issues or overheating.
Troubleshooting
- "Insert Memory Card" Error: If the dash cam repeatedly prompts to insert the memory card, try reinserting the card. If the issue persists, the card may be faulty. Please contact customer support for a replacement if the supplied 64GB card is defective.
- Rear Camera Cable Length: For larger vehicles like trucks, the provided 10m rear camera cable might be insufficient. If you require a longer cable, please contact Jansite customer service for assistance.
- Restarting/Overheating Issues: Ensure you are using the provided Type-C car charger. Using incompatible power cords can lead to restarts or overheating.
- No Power: Check the car charger connection and the vehicle's 12V power outlet. Ensure the vehicle's ignition is on if the outlet is not continuously powered.
- Image Quality Issues: Ensure the camera lenses are clean and free from obstructions. Check the settings for resolution and WDR/HDR to ensure they are configured optimally.

Image: Key notes and warnings for proper use and troubleshooting.
Specifications
| Feature | Detail |
|---|---|
| Product Dimensions | 13 x 12 x 3 inches |
| Item Weight | 2.33 pounds |
| Batteries | 1 Lithium Polymer batteries required (included) |
| Connectivity Technologies | Wi-Fi (5.8GHz) |
| Special Features | Built-In WiFi, Super Night Vision, G-Sensor, Loop Recording, Parking Monitor (requires hardware kit), GPS Tracking (requires GPS kit) |
| Video Capture Resolution | Front: 4K (2160p), Rear: 1080P |
| Mounting Type | Rearview Mirror Mount |
| Control Method | Touch Screen |
| Included Storage | 64GB TF Card |
| Manufacturer | Jansite |
| Vehicle Service Type | 12-24V vehicles (cars, trucks, pickups) |
| Rear Camera Waterproof Rating | IP69 |
Warranty and Support
Warranty Information
The Jansite 12" 4K Mirror Dash Cam is backed by a full 1-YEAR After-Sale Warranty. This warranty covers manufacturing defects and ensures reliable performance of your device.
Customer Support
If you encounter any problems during use, have questions about installation, or if any accessories are missing or defective, please do not hesitate to contact our customer service team. We are committed to providing professional and timely service to resolve any issues quickly.
Please refer to the contact information provided in your product manual or reach out via the Jansite official channels.