1. Introduction
Thank you for choosing the pealiritansemen Electric Bread Dough Proofer Machine. This appliance is designed to provide an optimal environment for dough fermentation, ensuring consistent and high-quality results for your baked goods. With adjustable temperature, humidity, and time settings, it offers precise control for various fermentation needs. Please read this manual thoroughly before operation to ensure safe and efficient use.
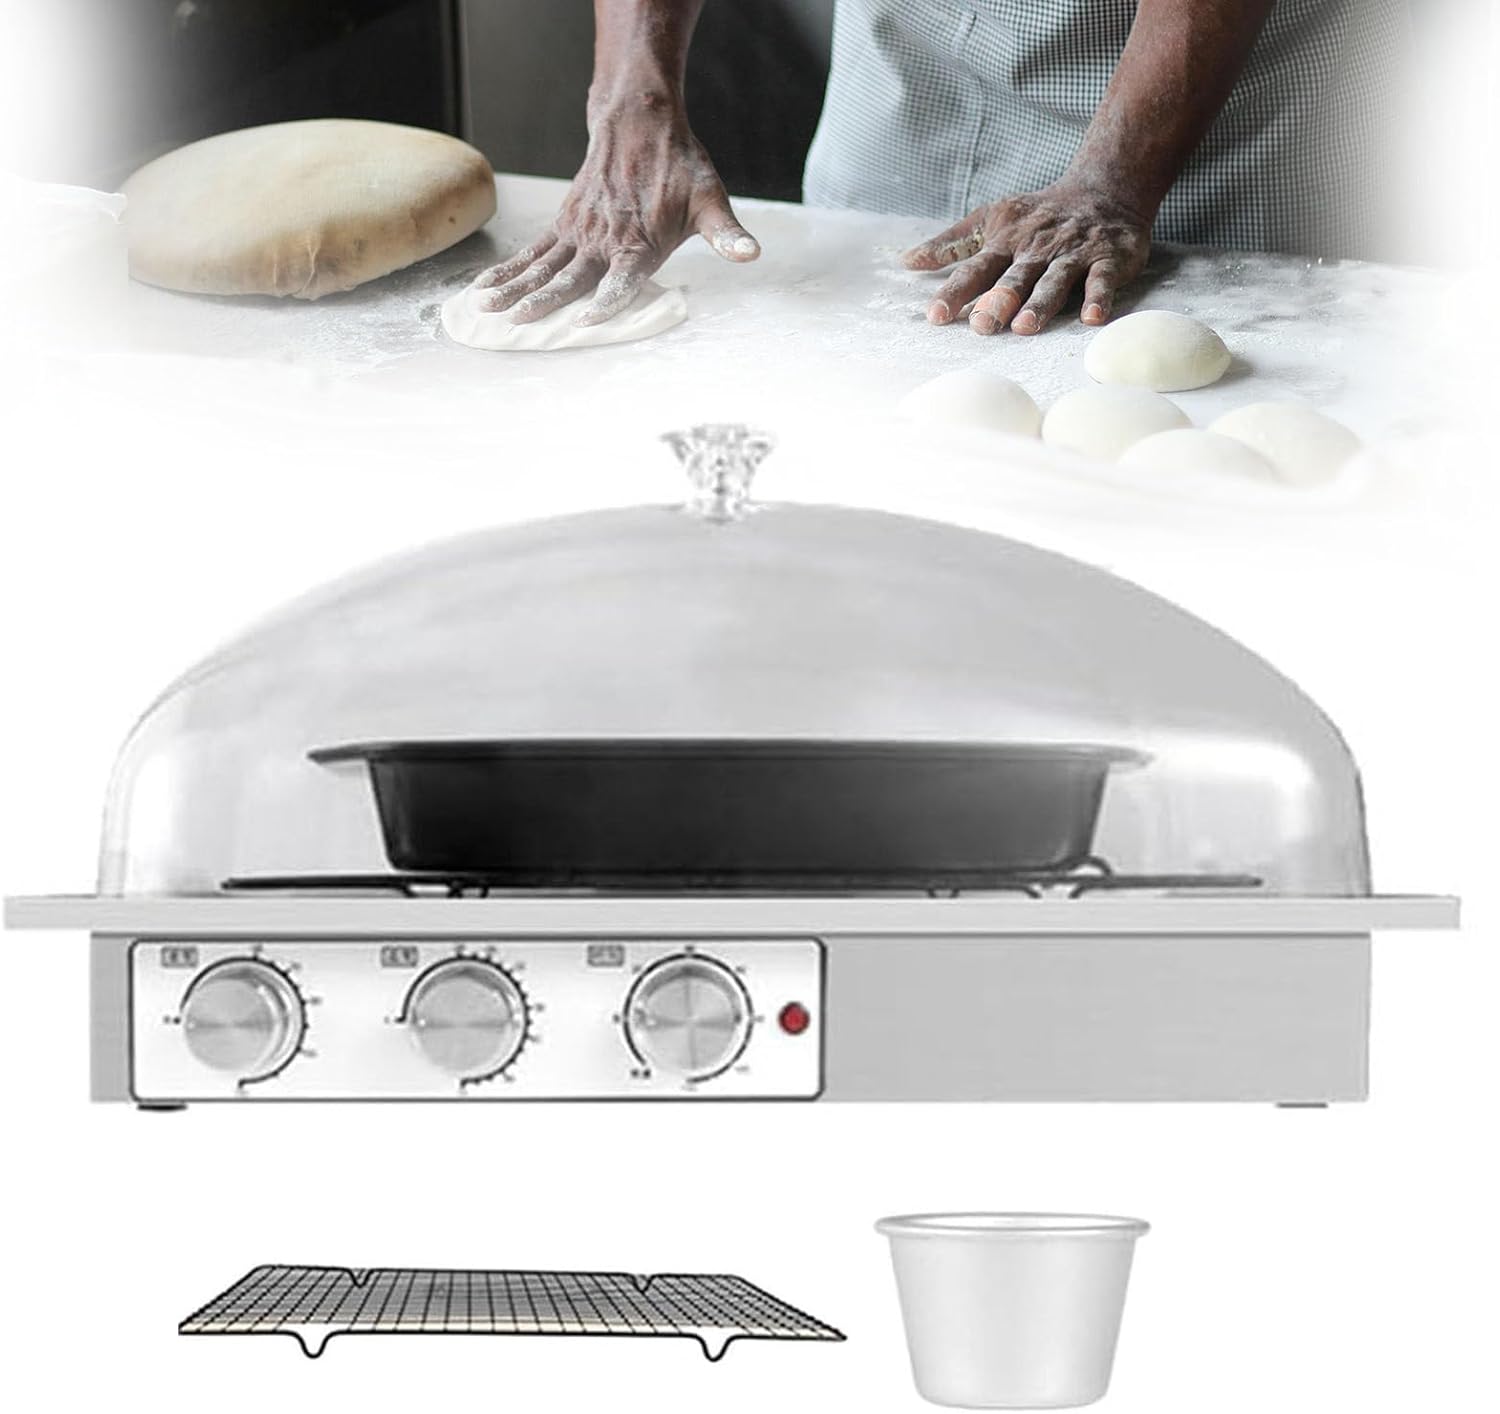
Image 1.1: pealiritansemen Electric Bread Dough Proofer Machine.
2. Safety Instructions
- Read all instructions before using the appliance.
- Do not immerse the main unit, cord, or plug in water or other liquids.
- Ensure the power supply voltage matches the rating label on the appliance.
- Unplug from the outlet when not in use and before cleaning. Allow to cool before putting on or taking off parts, and before cleaning the appliance.
- Do not operate any appliance with a damaged cord or plug, or after the appliance malfunctions or has been damaged in any manner.
- Close supervision is necessary when any appliance is used by or near children.
- Do not use outdoors.
- Do not place on or near a hot gas or electric burner, or in a heated oven.
- Do not use the appliance for other than intended use.
- Always attach plug to appliance first, then plug cord into the wall outlet. To disconnect, turn any control to “off”, then remove plug from wall outlet.
3. Package Contents
Verify that all items are present in the package:
- Machine (Main Unit) x 1
- Water cup x 1
- Grid stand x 1
- Dough proofing basin x 1
- PC Lid x 1

Image 3.1: Exploded view of the proofer's components.
4. Product Overview and Setup
4.1 Components
- Main Unit: Houses the heating element and control panel. Features a stainless steel body for durability.
- Control Knobs: Independent mechanical knobs for adjusting humidity, temperature, and time.
- Transparent PC Cover: Allows for easy observation of the fermentation process while maintaining a sealed environment.
- Grid Stand: Supports the dough proofing basin or other containers.
- Water Cup: Used to generate humidity within the proofer.
- Dough Proofing Basin: A container for placing dough.

Image 4.1: Control knobs and stainless steel body detail.
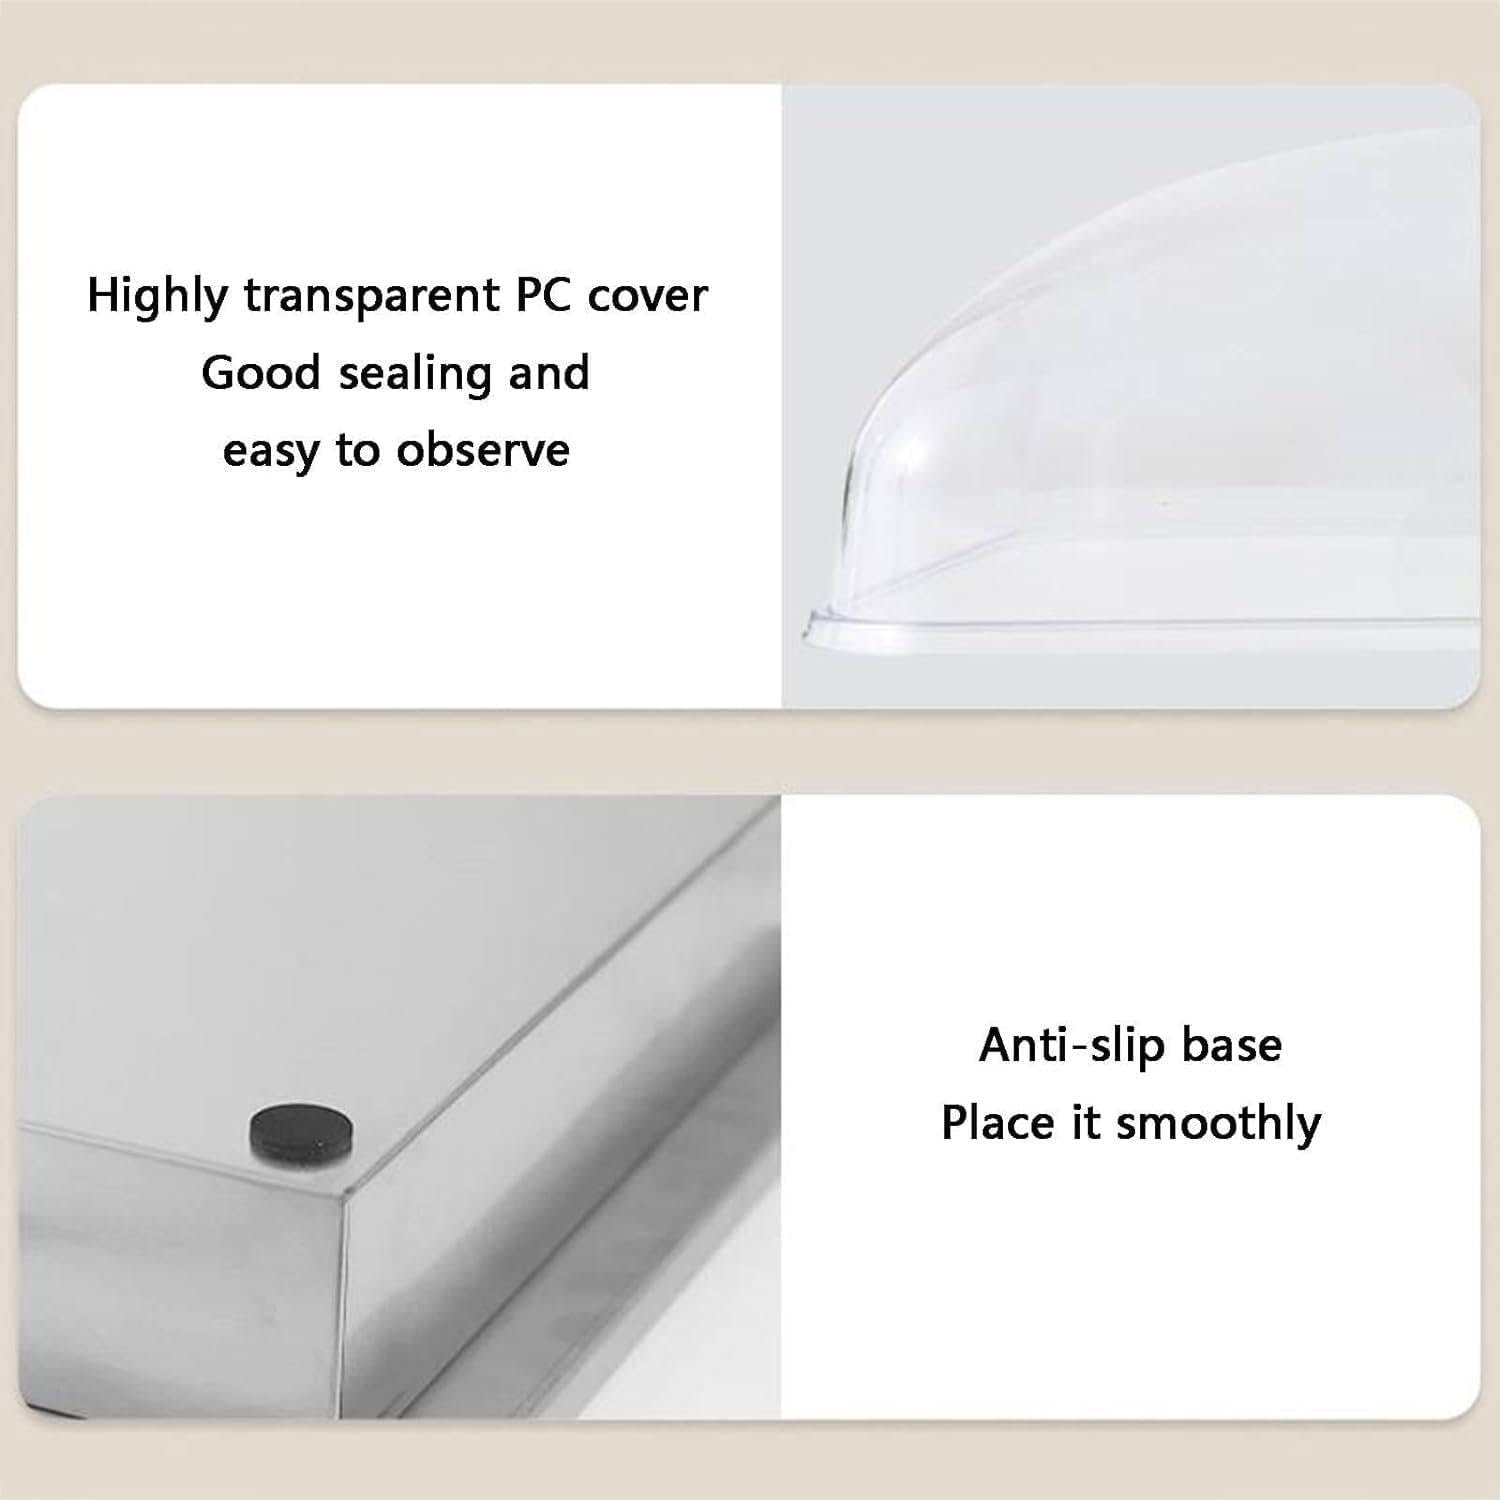
Image 4.2: Transparent PC cover and anti-slip base detail.
4.2 Initial Setup
- Unpack all components and remove any packaging materials.
- Place the main unit on a stable, flat, and heat-resistant surface.
- Insert the grid stand into the main unit.
- Place the dough proofing basin on the grid stand.
- Fill the water cup with water (distilled water is recommended to prevent mineral buildup) and place it in the designated area within the main unit to generate humidity.
- Carefully place the transparent PC cover over the main unit, ensuring it is properly sealed.
- Plug the power cord into a grounded electrical outlet.
5. Operating Instructions
The proofer features independent controls for humidity, temperature, and time, allowing for precise fermentation conditions.

Image 5.1: Control panel with humidity, temperature, and time knobs.
5.1 Setting Humidity
- Ensure the water cup is filled with water.
- Turn the Humidity knob to your desired setting. The humidity is adjustable from 60% to 100%.
- The water in the cup will evaporate to create the humid environment.
5.2 Setting Temperature
- Turn the Temperature knob to select the desired fermentation temperature. The temperature is adjustable from 0°C to 54°C.
- The proofer will begin to heat to the set temperature.
5.3 Setting Time
- Turn the Time knob to set the duration of the fermentation process. The timer can be set from 0 to 120 minutes.
- Once the set time has elapsed, the proofer will automatically turn off the heating element.
- For continuous operation, set the knob to the '常通' (Continuous) position.
5.4 Proofing Dough
- Prepare your dough according to your recipe.
- Place the dough in the proofing basin or on a baking sheet, ensuring it fits within the proofer.
- Fill the water cup and place it in the proofer.
- Close the transparent PC cover.
- Set the desired humidity, temperature, and time using the respective knobs.
- Monitor the dough through the transparent cover.
- Once fermentation is complete, carefully remove the dough for the next baking step.
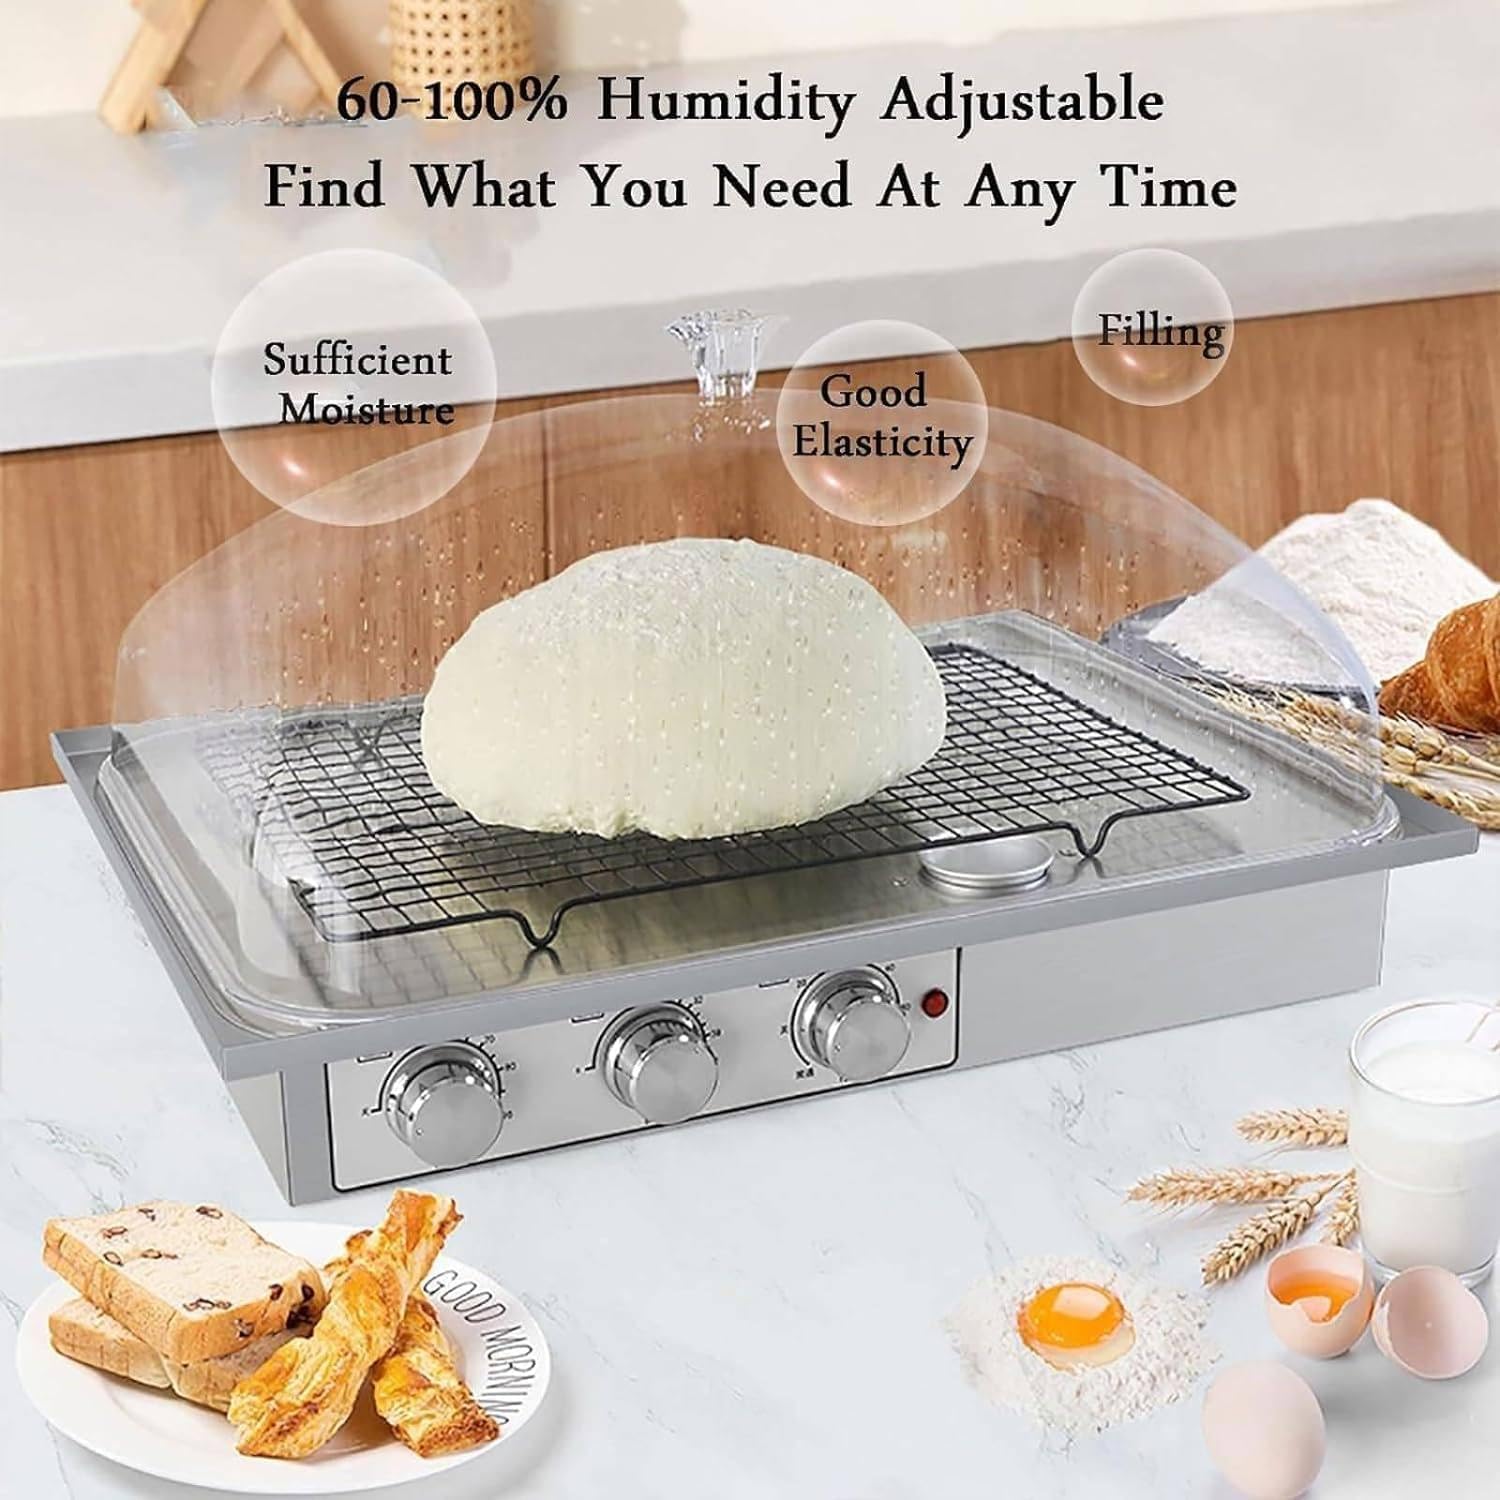
Image 5.2: Dough proofing with controlled humidity.
5.5 Other Applications
This proofer is versatile and can be used for various fermentation tasks beyond bread dough, including:
- Making yogurt
- Fermenting buns
- Preparing liqueur starters
- Other controlled fermentation processes

Image 5.3: Versatile applications of the proofer.
6. Maintenance and Cleaning
Regular cleaning and maintenance will ensure the longevity and optimal performance of your proofer.
- Before Cleaning: Always unplug the appliance from the power outlet and allow it to cool completely.
- Main Unit: Wipe the stainless steel body with a damp cloth. For stubborn stains, use a mild detergent and then wipe clean with a damp cloth. Do not immerse the main unit in water.
- PC Cover, Grid Stand, Water Cup, Dough Proofing Basin: These parts are detachable and can be washed with warm, soapy water. Rinse thoroughly and dry completely before reassembling.
- Descaling: If using tap water, mineral deposits may accumulate in the water cup area. Clean regularly with a descaling solution suitable for kitchen appliances or a vinegar solution.
- Storage: Ensure all parts are clean and dry before storing. The detachable body allows for simple assembly and easy storage.
7. Troubleshooting
If you encounter any issues with your proofer, refer to the following common problems and solutions:
- Appliance does not turn on:
- Ensure the power cord is securely plugged into a working electrical outlet.
- Check if the power outlet is functional by plugging in another appliance.
- Verify that the timer knob is not set to 'Off' or 0.
- Dough is not rising:
- Check the temperature setting. Ensure it is appropriate for your dough type (typically 24-38°C for most bread doughs).
- Verify the humidity setting. Insufficient humidity can dry out the dough, hindering rising. Ensure the water cup is filled.
- Ensure the PC cover is properly sealed to maintain the internal environment.
- Consider the yeast activity in your dough recipe.
- Temperature or humidity is inconsistent:
- Ensure the PC cover is securely in place and there are no gaps.
- Check that the water cup is filled for humidity generation.
- Avoid placing the proofer in drafty areas or near direct heat sources.
- Excessive condensation inside:
- This is normal for high humidity settings. Ensure the water cup is not overfilled.
- If condensation is excessive and dripping onto the dough, you may slightly reduce the humidity setting.
If the problem persists after checking these points, please contact customer support.
8. Specifications
| Specification | Value |
|---|---|
| Material | Stainless steel, PC cover |
| Temperature Range | 0~54°C adjustable |
| Humidity Range | 60% - 100% adjustable |
| Time Setting | 0-120 minutes timing |
| Power | 140W |
| Product Size (L*W*H) | 410mm * 310mm * 280mm (16.14 x 12.20 x 11.02 inches) |
| Item Weight | 4 KG (Approx. 11 pounds) |

Image 8.1: Product dimensions.
9. Warranty and Support
No specific warranty information is provided in the product details. For warranty inquiries or technical support, please refer to the retailer or manufacturer's contact information provided at the point of purchase.
When contacting support, please have your product model number (Electric Bread Dough Proofer Machine) and ASIN (B0D3TGLF5C) ready.