Harpaq YSW01-03B
Harpaq YSW01-03B Tall Nightstand with Charging Station and LED Lights - Instruction Manual
Model: YSW01-03B | Brand: Harpaq
1. Introduction
This manual provides detailed instructions for the assembly, operation, and maintenance of your Harpaq YSW01-03B Tall Nightstand. Please read this manual thoroughly before assembly and use to ensure safe and efficient operation. Keep this manual for future reference.
2. Important Safety Information
WARNING: Failure to follow these instructions may result in electric shock, fire, or serious injury.
- Ensure all electrical connections are secure and meet local electrical codes.
- Do not overload the electrical outlets or USB ports.
- Keep liquids away from electrical components.
- Place the nightstand on a flat, stable surface to prevent tipping.
- Keep small parts away from children during assembly.
- Do not stand or climb on the nightstand.
- Regularly check all fasteners to ensure they remain tight.
3. Package Contents
Before beginning assembly, verify that all parts listed below are present and undamaged. If any parts are missing or damaged, do not proceed with assembly. Contact customer support for assistance.
3.1 Components
- Top Shelf with LED Lights and Charging Station (1)
- Main Frame (1)
- Drawers (2)
- Bottom Shelf (1)
- Hanging Hooks (2)
- Adjustable Feet (4)
3.2 Hardware & Tools
- Assembly Screws and Fasteners (various sizes)
- Hex Key (Allen Wrench)
- Remote Controller for LED Lights (1)
- Installation Tool (as per specifications)
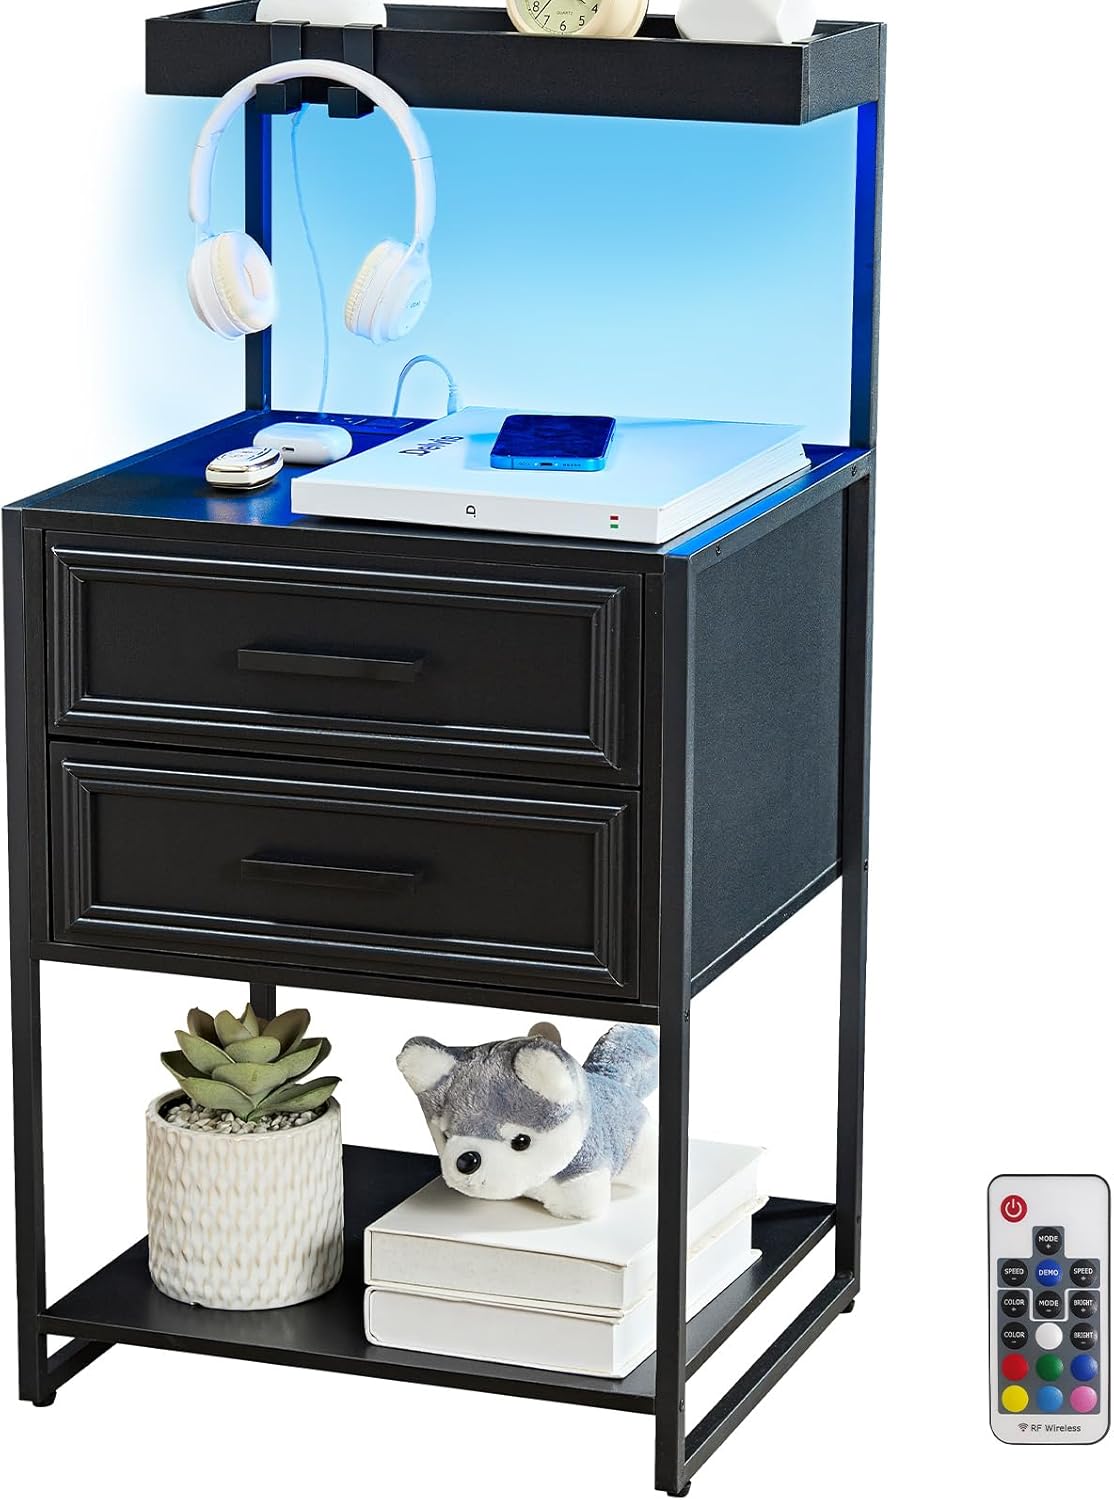
Figure 1: Harpaq YSW01-03B Tall Nightstand. This image displays the fully assembled nightstand, highlighting its black finish, LED lighting, and overall structure with drawers and open shelves.
4. Setup & Assembly
Follow these step-by-step instructions for proper assembly. It is recommended to assemble the unit on a soft, clean surface to prevent scratches.
4.1 Unpacking
- Carefully open the packaging and remove all components.
- Check the package contents against the list in Section 3.
- Keep all packaging materials until assembly is complete and you are satisfied with the product.
4.2 Assembly Steps
- Attach Adjustable Feet: Secure the four adjustable feet to the bottom of the main frame. Ensure they are tightened for stability.

Figure 2: Close-up of the adjustable feet at the base of the nightstand, designed to provide stability and protect flooring.
- Assemble Main Frame: Connect the vertical and horizontal frame pieces using the provided screws and hex key. Refer to the included diagram for correct orientation.
- Install Bottom Shelf: Place the bottom shelf onto the designated supports within the main frame and secure it with screws.
- Prepare Drawers: Assemble the two drawers according to the instructions, ensuring the drawer slides are correctly installed.
- Install Drawers: Slide the assembled drawers into their respective compartments.
- Attach Top Shelf with Charging Station: Carefully place the top shelf, which includes the integrated charging station and LED lights, onto the top of the main frame. Secure it using the appropriate fasteners. Ensure the power cord for the charging station is routed correctly.
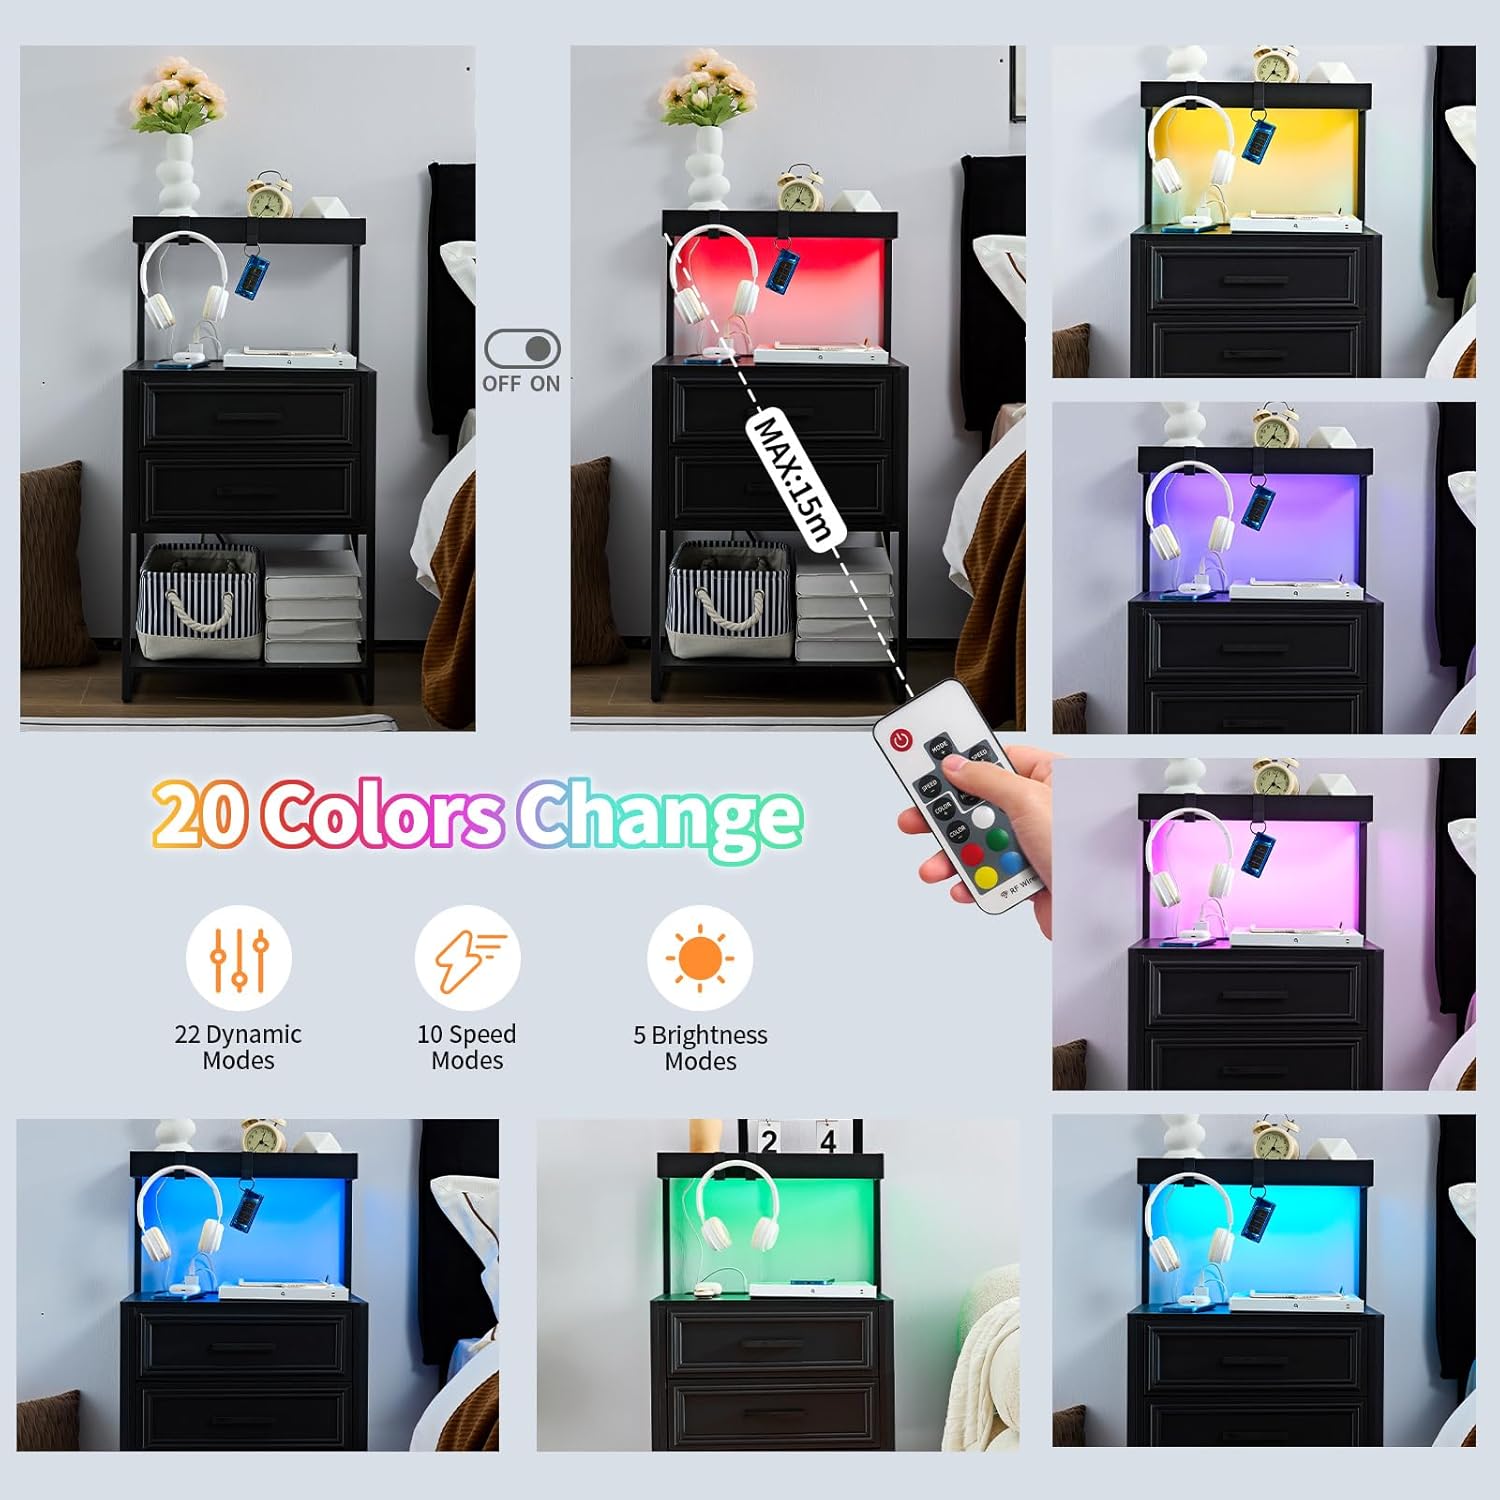
Figure 3: The nightstand's top shelf featuring a built-in charging station with two AC outlets and two USB ports, alongside the LED light strip.
- Attach Hanging Hooks: Secure the two hanging hooks to the side of the nightstand as desired. These are suitable for headphones, keys, or small accessories.

Figure 4: Detail of the hanging hooks, providing convenient storage for headphones or other small items.
4.3 Assembly Video
Video 1: This video provides a visual guide to the assembly process of a similar LED nightstand, demonstrating the steps involved in putting together the frame, drawers, and electrical components. Note: This video is for a similar product and may not perfectly match the nightstand's exact components or assembly order, but illustrates general assembly principles.
5. Operating Instructions
5.1 Using the Charging Station
- Plug the nightstand's main power cord into a standard wall outlet.
- The charging station includes two 125V/12A AC outlets and two 5V/2A USB ports.
- Connect your devices (phone, laptop, etc.) to the appropriate ports for charging.
- An on/off switch is provided for the charging station to control power flow.

Figure 5: A close-up view of the charging station with devices connected, demonstrating its functionality for powering electronics.
5.2 Controlling the LED Lights
The LED lights offer multi-variable RGB options, adjustable brightness, dynamic modes, and speed control.
- Remote Control: Use the included remote controller to adjust colors, brightness, and dynamic lighting effects.
- Smartphone App: Download the compatible smartphone application (refer to product packaging or manufacturer website for app details) to access additional features, including music rhythm synchronization and a wider range of color options.

Figure 6: The nightstand illuminated by its LED lights, showcasing various color options and the remote control used for adjustments.
5.3 Storage Features
- Top Shelf: Features raised edges, suitable for displaying items like picture frames or small plants.
- Open Space: Convenient for daily use items.
- Drawers: Two closed drawers provide storage for personal items.
- Bottom Shelf: Ideal for books or decorative objects.

Figure 7: The nightstand displaying its various storage options, including the top shelf, open compartment, and two drawers, organized with typical bedside items.
6. Maintenance
Regular maintenance ensures the longevity and optimal performance of your nightstand.
- Cleaning: Wipe surfaces with a soft, damp cloth. Avoid harsh chemicals or abrasive cleaners.
- Electrical Components: Keep the charging station and LED lights free from dust. Do not attempt to repair electrical components yourself.
- Fasteners: Periodically check all screws and connections to ensure they are tight. Re-tighten if necessary.
- Adjustable Feet: Ensure the adjustable feet are properly set to maintain stability and prevent wobbling.
7. Troubleshooting
If you encounter any issues, refer to the following troubleshooting guide before contacting customer support.
| Problem | Possible Cause | Solution |
|---|---|---|
| LED lights not turning on. | Power cord not connected; remote battery low; LED strip disconnected. | Ensure power cord is securely plugged in. Replace remote battery. Check LED strip connection. |
| Charging station not working. | Power switch off; device cable faulty; power outage. | Ensure the charging station's power switch is on. Try a different charging cable. Check household power. |
| Nightstand is wobbly. | Uneven floor; loose fasteners. | Adjust the leveling feet. Tighten all assembly screws. |
| Drawers do not slide smoothly. | Improper assembly of drawer slides; obstruction. | Recheck drawer slide installation. Remove any obstructions. |
8. Product Specifications
| Feature | Detail |
|---|---|
| Brand | Harpaq |
| Model Name | YSW01-03B |
| Product Dimensions (D x W x H) | 15.74"D x 17.71"W x 34.64"H |
| Item Weight | 30.4 Pounds |
| Maximum Weight Recommendation | 250 Pounds |
| Frame Material | Wood or Metal (MDF) |
| Color | Black |
| Number of Drawers | 2 |
| Charging Station | 2 AC Outlets (125V/12A), 2 USB Ports (5V/2A), 6.56ft Power Cord |
| LED Lights | Multi-variable RGB, adjustable brightness, dynamic modes, music rhythm sync (via app) |
9. Warranty & Customer Support
For warranty information or assistance with your Harpaq YSW01-03B Tall Nightstand, please refer to the product packaging or contact Harpaq customer service directly. Keep your purchase receipt for warranty claims.
Contact Information: Refer to the manufacturer's official website or product documentation for the most current contact details.
Ask a question about this manual
Ask about setup, troubleshooting, compatibility, parts, safety, or missing instructions. Manuals+ will review the question and use this page’s manual context to help answer it.