1. Introduction
This manual provides instructions for the safe and efficient operation of your Aifeel OU-6118 Stand Mixer. This appliance is designed for various kitchen tasks, including mixing, kneading, whisking, grinding meat, and making pasta and cookies. Please read all instructions carefully before first use and retain this manual for future reference.

Image 1.1: Aifeel OU-6118 Stand Mixer with meat grinder attachment.
2. Important Safety Instructions
- Read all instructions before operating the appliance.
- Do not immerse the motor unit in water or other liquids.
- Unplug from outlet when not in use, before putting on or taking off parts, and before cleaning.
- Avoid contact with moving parts. Keep hands, hair, and clothing, as well as spatulas and other utensils, away from beaters during operation to reduce the risk of injury to persons and/or damage to the mixer.
- Do not operate any appliance with a damaged cord or plug, or after the appliance malfunctions or has been dropped or damaged in any manner.
- The use of attachments not recommended or sold by the manufacturer may cause fire, electric shock, or injury.
- Do not use outdoors.
- Do not let cord hang over edge of table or counter.
- Do not let cord contact hot surfaces.
- Always operate the mixer on a dry, stable, and level surface.
- Do not operate for more than 9 minutes continuously to prevent overheating. Allow the unit to cool down before resuming operation.
- This appliance is equipped with an overheat protection chip that will automatically shut down the unit if it overheats.
3. Product Components
Your Aifeel Stand Mixer comes with the following components:
- Main Unit: Motor housing with tilt-head mechanism and speed control knob.
- Mixing Bowls: One 8.5-quart stainless steel bowl and one 6-quart stainless steel bowl. These bowls are designed for nesting storage.
- Dough Hook: For kneading heavy mixtures like bread dough.
- Whisk: For aerating mixtures like egg whites, cream, and light batters.
- Beater (Flat Beater): For general mixing tasks such as cakes, cookies, and mashed potatoes.
- Splash Guard: Helps prevent ingredients from splashing out of the bowl during mixing.
- Meat Grinder Attachment: Includes various grinding plates for different textures.
- Sausage Kit: For making homemade sausages.
- Pasta Maker Attachments: Includes 4 discs for different pasta types.
- Cookie Presses: For shaping cookies.

Image 3.1: Overview of included attachments: meat grinder, sausage kit, pasta maker, and cookie presses.

Image 3.2: The 8.5-quart and 6-quart stainless steel mixing bowls.
4. Setup
- Unpacking: Carefully remove all components from the packaging.
- Cleaning: Before first use, wash the mixing bowls, dough hook, whisk, beater, and all attachments in warm, soapy water. Rinse thoroughly and dry completely. Wipe the main unit with a damp cloth.
- Placement: Place the stand mixer on a clean, dry, stable, and level surface. Ensure the anti-slip silicone suction cups are securely attached to the counter.
- Attaching the Bowl: Place the desired mixing bowl onto the base and turn it clockwise until it locks into place.
- Attaching the Beater/Hook/Whisk:
- Ensure the mixer is unplugged.
- Rotate the knob on the side of the main unit to the right completely to release and tilt the head upwards.
- Insert the chosen attachment (dough hook, whisk, or beater) into the shaft and turn it counter-clockwise until it locks.
- Lower the head by rotating the knob back to the left until it locks into place.
- Attaching the Meat Grinder/Pasta Maker/Cookie Press:
- Ensure the mixer is unplugged.
- Remove the front cover from the attachment hub on the front of the mixer head.
- Insert the desired attachment (meat grinder, pasta maker, or cookie press) into the hub, aligning the drive shaft with the square opening.
- Turn the locking knob clockwise to secure the attachment.
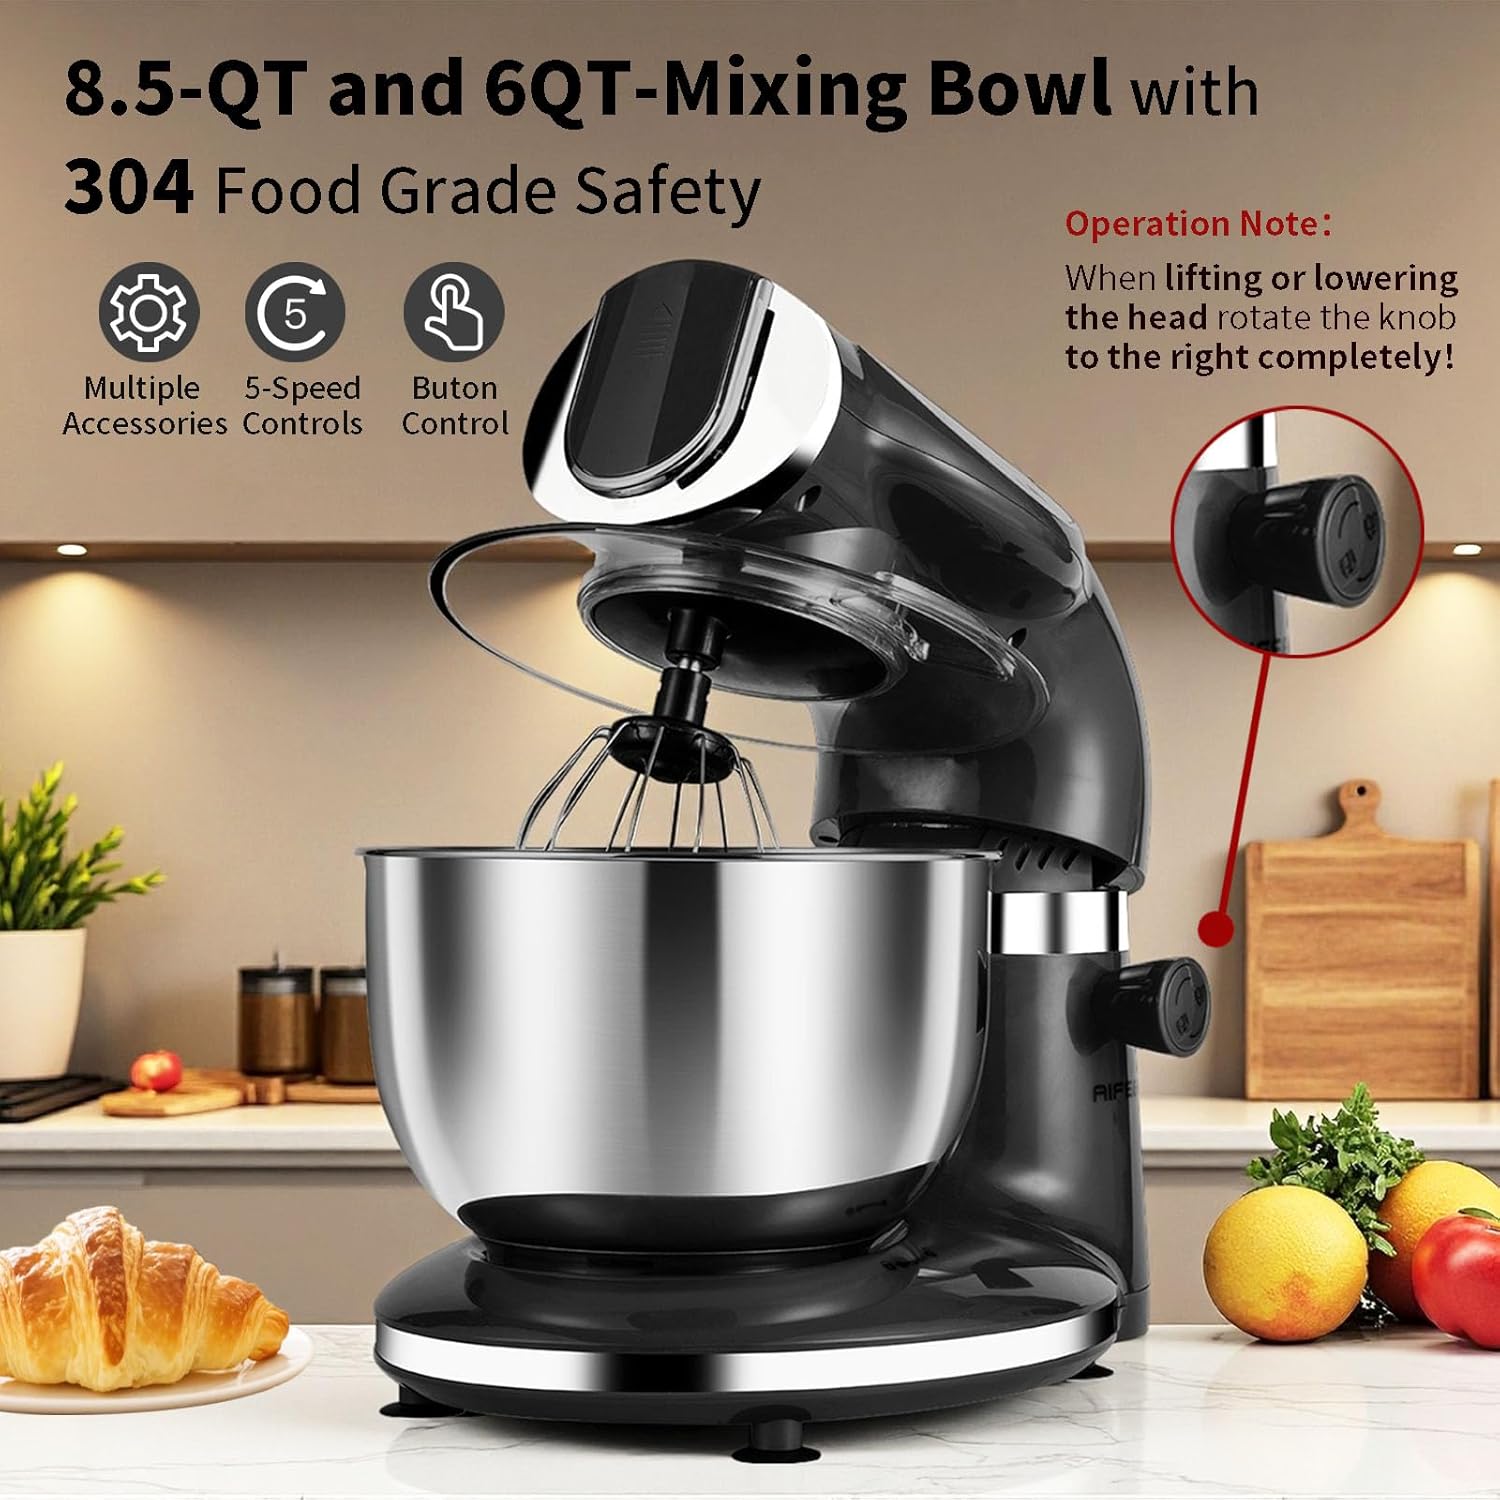
Image 4.1: Tilt-head design for easy attachment and bowl access.
5. Operating Instructions
5.1 General Operation
- Ensure the mixer is properly assembled and plugged into a suitable power outlet.
- Add ingredients to the mixing bowl. If using the splash guard, place it over the bowl before starting.
- Turn the speed control knob to the desired speed setting.
- After mixing, turn the speed control knob to "0" (off) and unplug the mixer.
- To remove the bowl or attachments, tilt the head upwards (if applicable) and detach.
5.2 Speed Settings Guide
The Aifeel Stand Mixer features 5 variable speed settings for different tasks:
- Speed 1-2 (Kneading Dough Hook): Ideal for kneading heavy doughs for bread, pizza, or cookies.
- Speed 3-4 (Flat Beater / Pasta Maker): Suitable for mixing salads, batters, or using the pasta maker attachment.
- Speed 5 (Whisk / Meat Grinder): Best for whisking egg whites, cream, or operating the meat grinder attachment.
Important: Do not operate the mixer for more than 9 minutes at a time. Allow a cooling period between uses to prevent motor overheating. The built-in temperature sensor chip will automatically shut down the unit if it overheats.

Image 5.1: Planetary mixing action ensures thorough ingredient incorporation.
5.3 Using Specific Attachments
Meat Grinder
- Assemble the meat grinder attachment as per Section 4.
- Cut meat into small pieces that fit into the feed tube.
- Place a bowl under the grinder outlet to collect the ground meat.
- Turn the mixer to Speed 5. Use the food pusher to guide meat into the grinder.

Image 5.2: Meat grinder attachment in operation.
Pasta Maker
- Assemble the pasta maker attachment with the desired pasta disc as per Section 4.
- Prepare your pasta dough according to a recipe suitable for extrusion.
- Feed small pieces of dough into the feed tube.
- Turn the mixer to Speed 3-4. The pasta will extrude through the disc. Cut to desired length.

Image 5.3: Pasta maker attachment in use.
Sausage Maker
- Assemble the meat grinder with the sausage stuffing horn as per Section 4.
- Prepare your sausage mixture and casings.
- Feed the mixture into the grinder, guiding the casing onto the horn.
- Turn the mixer to Speed 5.

Image 5.4: Sausage maker attachment in use.
Cookie Press
- Assemble the cookie press attachment with the desired disc as per Section 4.
- Fill the press with cookie dough.
- Turn the mixer to a low speed (Speed 1-2) to extrude cookies onto a baking sheet.

Image 5.5: Cookie press attachment in use.
6. Cleaning and Maintenance
- Always unplug the mixer before cleaning.
- Main Unit: Wipe the exterior of the motor unit with a damp cloth. Do not immerse in water.
- Mixing Bowls, Dough Hook, Whisk, Beater: These parts are generally safe for washing in warm, soapy water. Rinse thoroughly and dry immediately to prevent water spots or corrosion. The product specifications state "Is Dishwasher Safe: No", so manual washing is recommended for all parts.
- Meat Grinder, Pasta Maker, Cookie Press Attachments: Disassemble these attachments completely. Wash all parts in warm, soapy water. Use a brush to remove any food residue. Rinse thoroughly and dry immediately. Some metal parts may rust if not dried properly.
- Storage: Store the mixer and its attachments in a dry place. The nesting design of the bowls allows for space-efficient storage.
7. Troubleshooting
| Problem | Possible Cause | Solution |
|---|---|---|
| Mixer does not start. | Not plugged in; power outage; speed knob not at "0" before starting. | Ensure plug is securely in outlet; check power supply; turn speed knob to "0" and then select desired speed. |
| Motor stops during operation. | Overheat protection activated; too much load. | Unplug the mixer and let it cool down for at least 30 minutes. Reduce the amount of ingredients or use a lower speed for heavy mixtures. |
| Attachments not mixing properly. | Attachment not securely installed; incorrect attachment for task. | Ensure attachment is locked into place. Refer to Section 5.2 for correct attachment usage per speed. |
| Meat grinder/pasta maker jams. | Ingredients too large or too hard; too much force applied. | Cut ingredients into smaller pieces. Do not force ingredients into the feed tube. Disassemble and clean the attachment. |
| Excessive noise or vibration. | Mixer not on a stable surface; attachment not properly installed. | Ensure the mixer is on a flat, stable surface and suction cups are engaged. Check that all attachments are securely locked. |
8. Specifications
- Brand: Aifeel
- Model Name: OU-6118
- Product Dimensions: 13.38"D x 7.48"W x 11.69"H
- Capacity: 8.5 Quarts (main bowl), 6 Quarts (secondary bowl)
- Controls Type: Knob
- Special Features: Adjustable Speed Control, Anti-Skid, Low Noise, Overheat Protection, Tilt-Head Design
- Item Weight: 7.2 pounds
- Dishwasher Safe: No (for all components)

Image 8.1: Product dimensions for storage reference.
9. Warranty and Support
Aifeel offers a full five-year quality guarantee for this stand mixer. For any questions, technical assistance, or warranty claims, please contact Aifeel customer support. Please refer to the contact information provided with your purchase or visit the official Aifeel website for support details.
Retain your proof of purchase for warranty validation.