
Introduction
This manual provides detailed instructions for the assembly, operation, and maintenance of your HOMMPA Floating TV Stand with LED Light. Please read all instructions carefully before beginning assembly and retain this manual for future reference.
Safety Information
WARNING: Always follow the assembly instructions carefully to avoid injury during installation. Do not exceed the maximum load capacity of 110 lbs to prevent structural failure. Be cautious of pinch points and sharp edges. When using the LED lights, ensure the power supply is properly connected and turned off before any maintenance to prevent electrical shock.
Product Features
- Modern Design: Features a white high-gloss finish on the front surface for a sleek, contemporary aesthetic. The smooth paint allows for easy cleaning of dust and oil stains.
- Versatile Installation: Can be installed as a wall-mounted unit to free up floor space or as a floor-mounted media console.
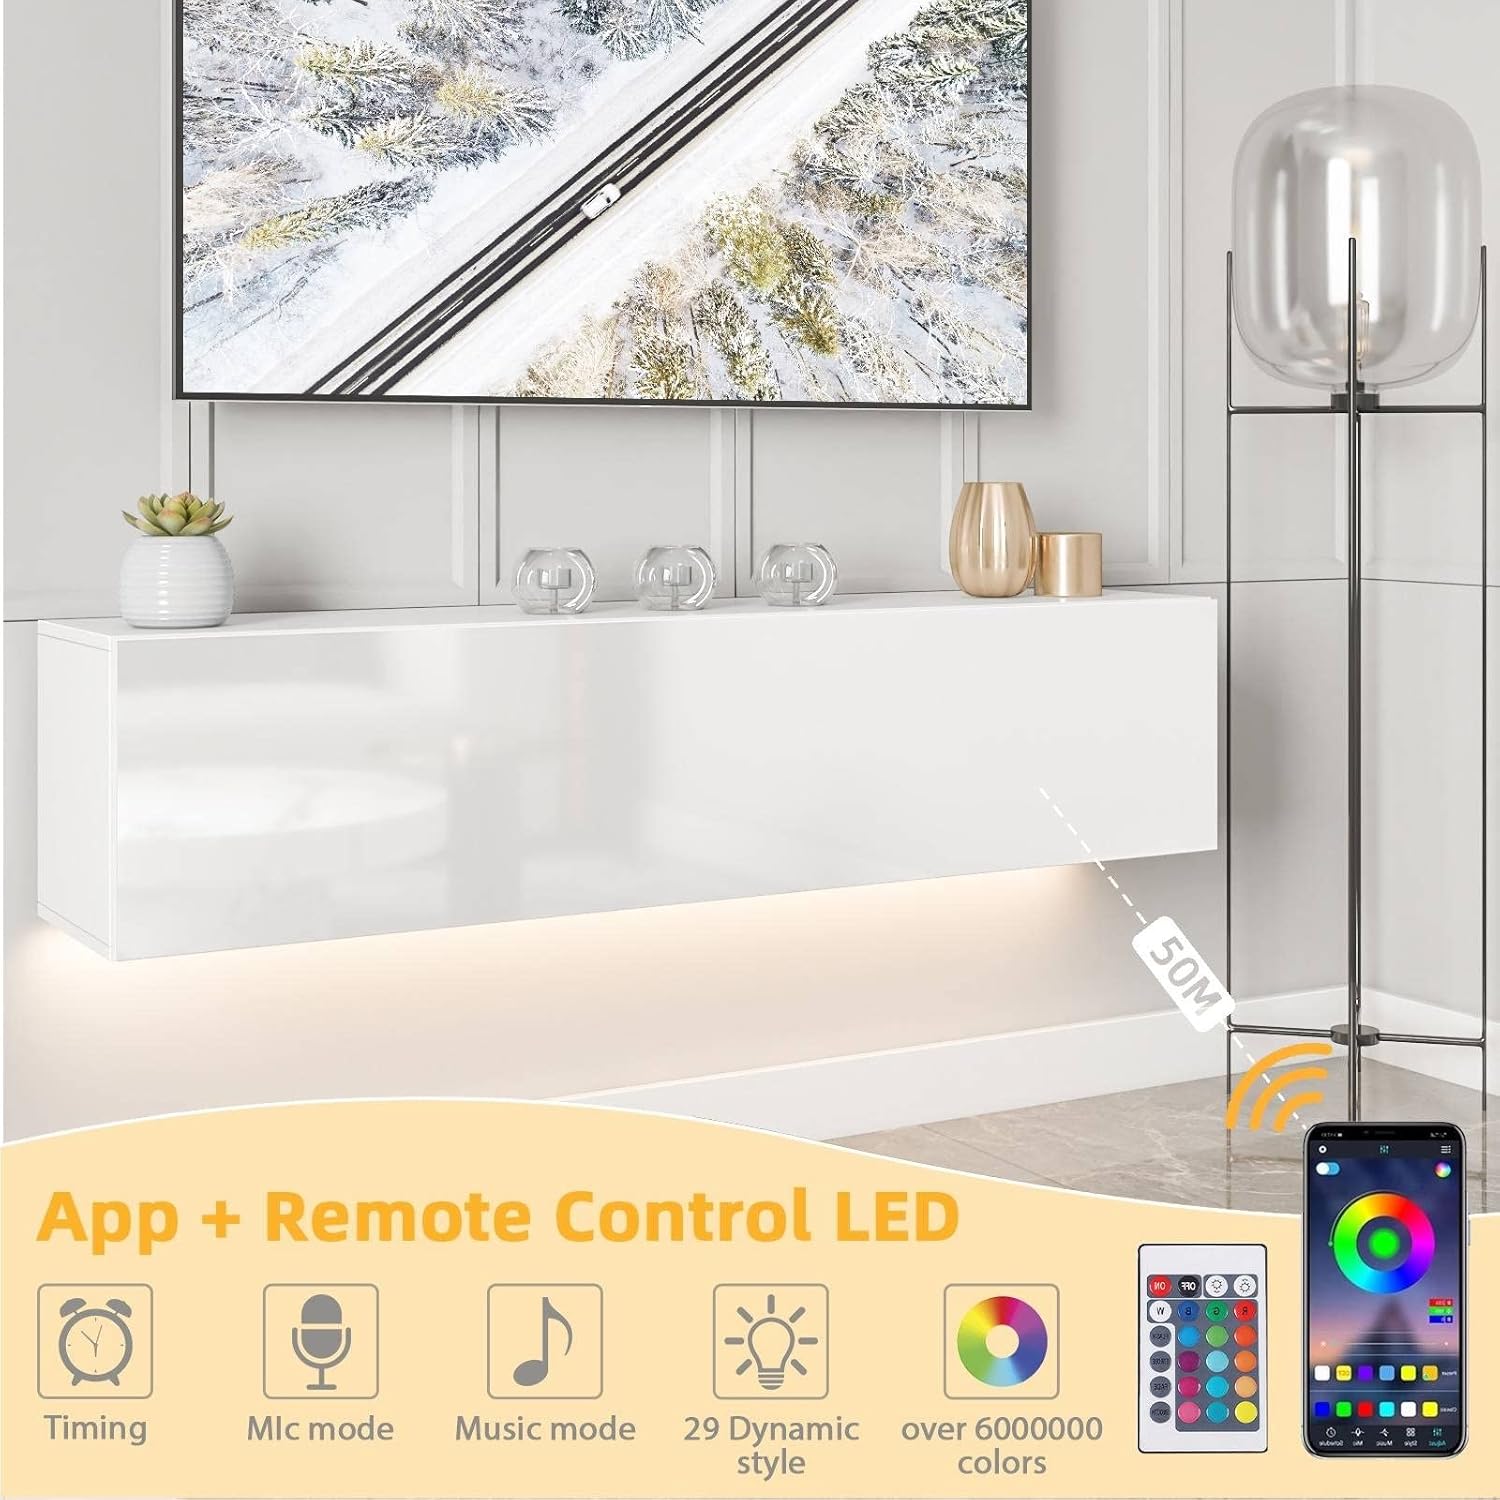
- Integrated LED Lighting: Equipped with multi-color ambient LED lights controllable via a mobile application or remote control. Offers 29 dynamic styles and over 6 million color options to customize room ambiance.
- Ample Storage: Includes drop-down cabinets for media players and other items. The top surface provides space for decorative items and photos.
- Cable Management: Features wire holes and wire boxes on the top and bottom plates for organized equipment wiring.
Specifications
| Brand | HOMMPA |
| Model Name | TV Stand15w |
| Color | White |
| Material | 15 mm thick particle board (Melamine Particleboard) |
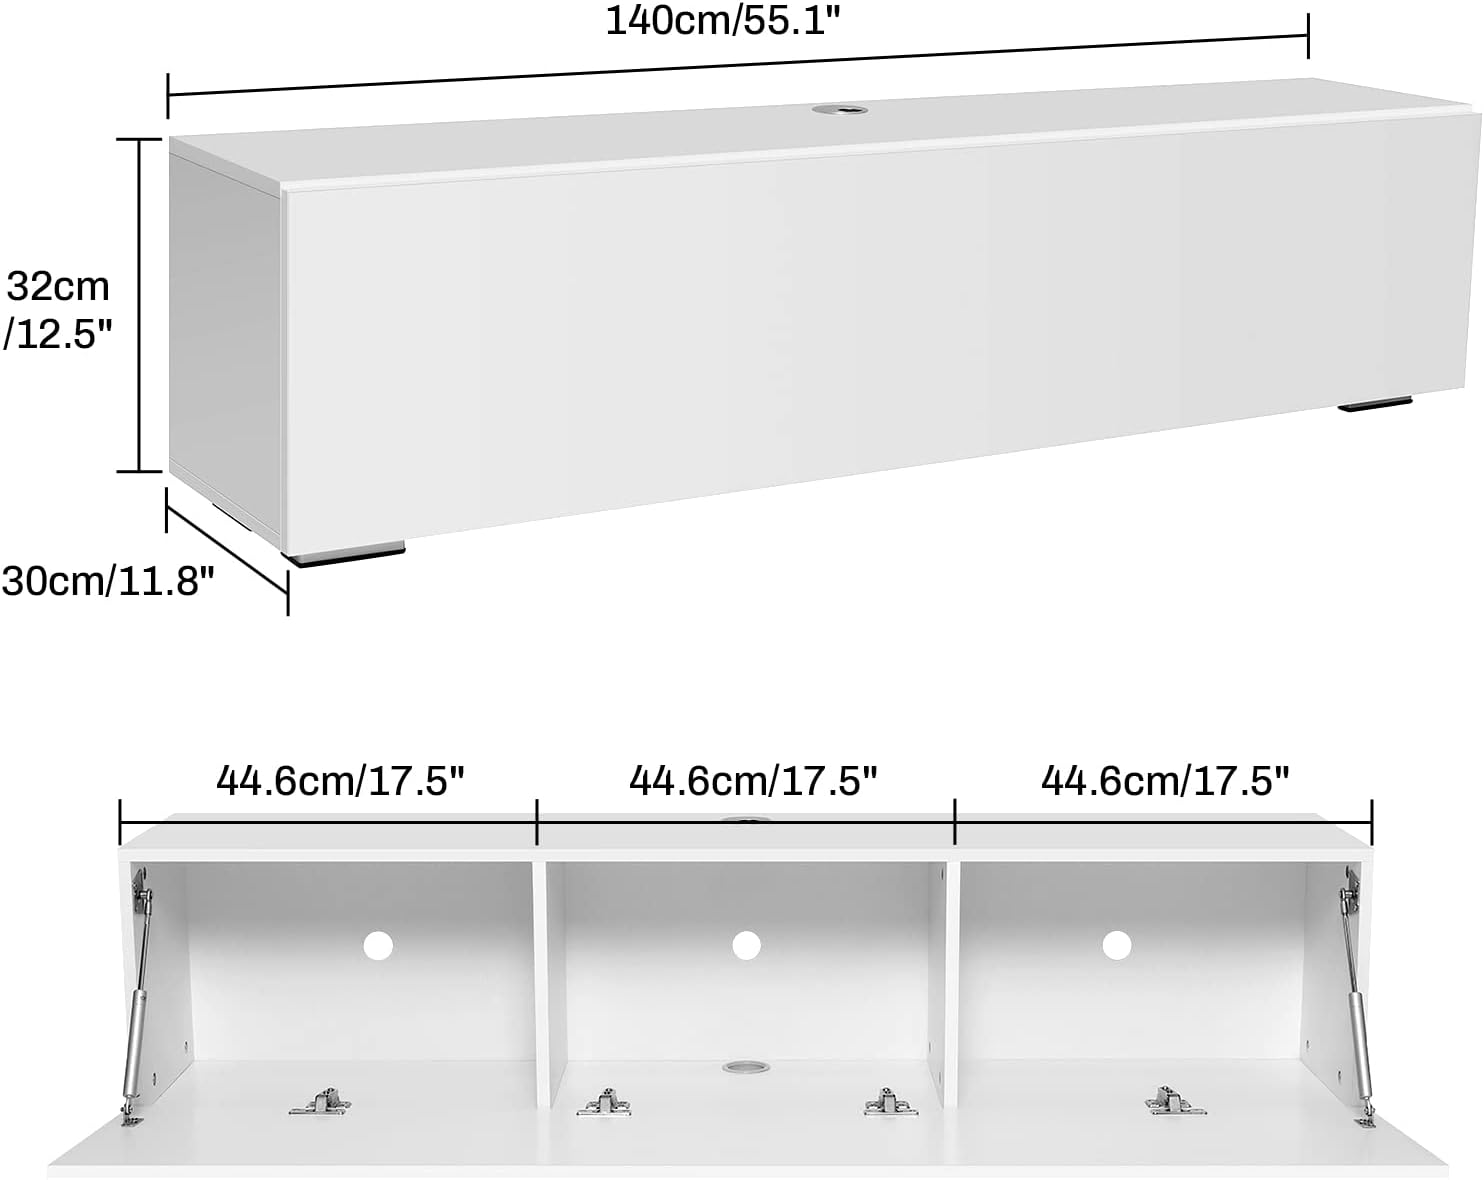
| Product Dimensions (D x W x H) | 11.8" x 55.1" x 12.59" (30cm x 140cm x 32cm) |
| Item Weight | 49.9 pounds |
| Mounting Type | Wall Mount, Floor Mount |
| Number of Compartments | 3 |
| Special Feature | LED Light with APP & Remote Control |
Note: Only the front board surface is glossy. Other board surfaces are matte.
Package Contents
Before assembly, ensure all parts and hardware are present. Refer to the included assembly diagram for a complete list of components. Typically, the package includes:
- Main particle board panels (top, bottom, side, and internal dividers)
- Drop-down cabinet doors
- L-shaped plastic feet (for floor mounting)
- LED light strip with controller and power adapter
- Hinges and air pressure rods for cabinet doors
- Various screws, cam bolts, and wooden dowels
- Wire boxes and wire holes for cable management
- Assembly instruction manual

Assembly Instructions
Follow these steps carefully for proper assembly. It is recommended to have two people for assembly, especially for wall mounting.
General Assembly (Floor Mounted Option)
For a visual guide, please refer to the 'Floating LED TV Stand Installation Guide' video below.
Video 1: Floating LED TV Stand Installation Guide. This video demonstrates the step-by-step assembly process for the TV stand, including attaching feet, internal panels, and doors.
- Attach Feet: Connect the L-shaped plastic feet (G) to the bottom panel (2) using screws (C). Ensure they are securely fastened.
- Install LED Strip: Stick the LED band (L) to the side of the base panel. Fasten the LED band with buckles as shown in the diagram.
- Prepare Panels: Screw the cam bolts (A) into the designated holes on panels (2), (3), (4), and (5). Insert the wire box (H) into panel (2).
- Insert Dowels: Insert wooden dowels (E) into panels (3), (4), and (5).
- Assemble Frame: Attach panels (3) and (5) to panels (7) and lock with cam (B).
- Insert Back Panel: Slide panel (6) into the grooves of the assembled frame.
- Attach Top Panel: Screw cam bolts (A) into panel (1) and insert the wire box (H). Attach panel (1) to panels (3), (4), (5), and (7) and lock with cam (B).
- Install Doors: Attach hinges (F) to the cabinet doors (8) with screws (D). Attach the air pressure rods (I) to the cabinet doors (8) and the main frame with screws (D).
Wall Mounted Option
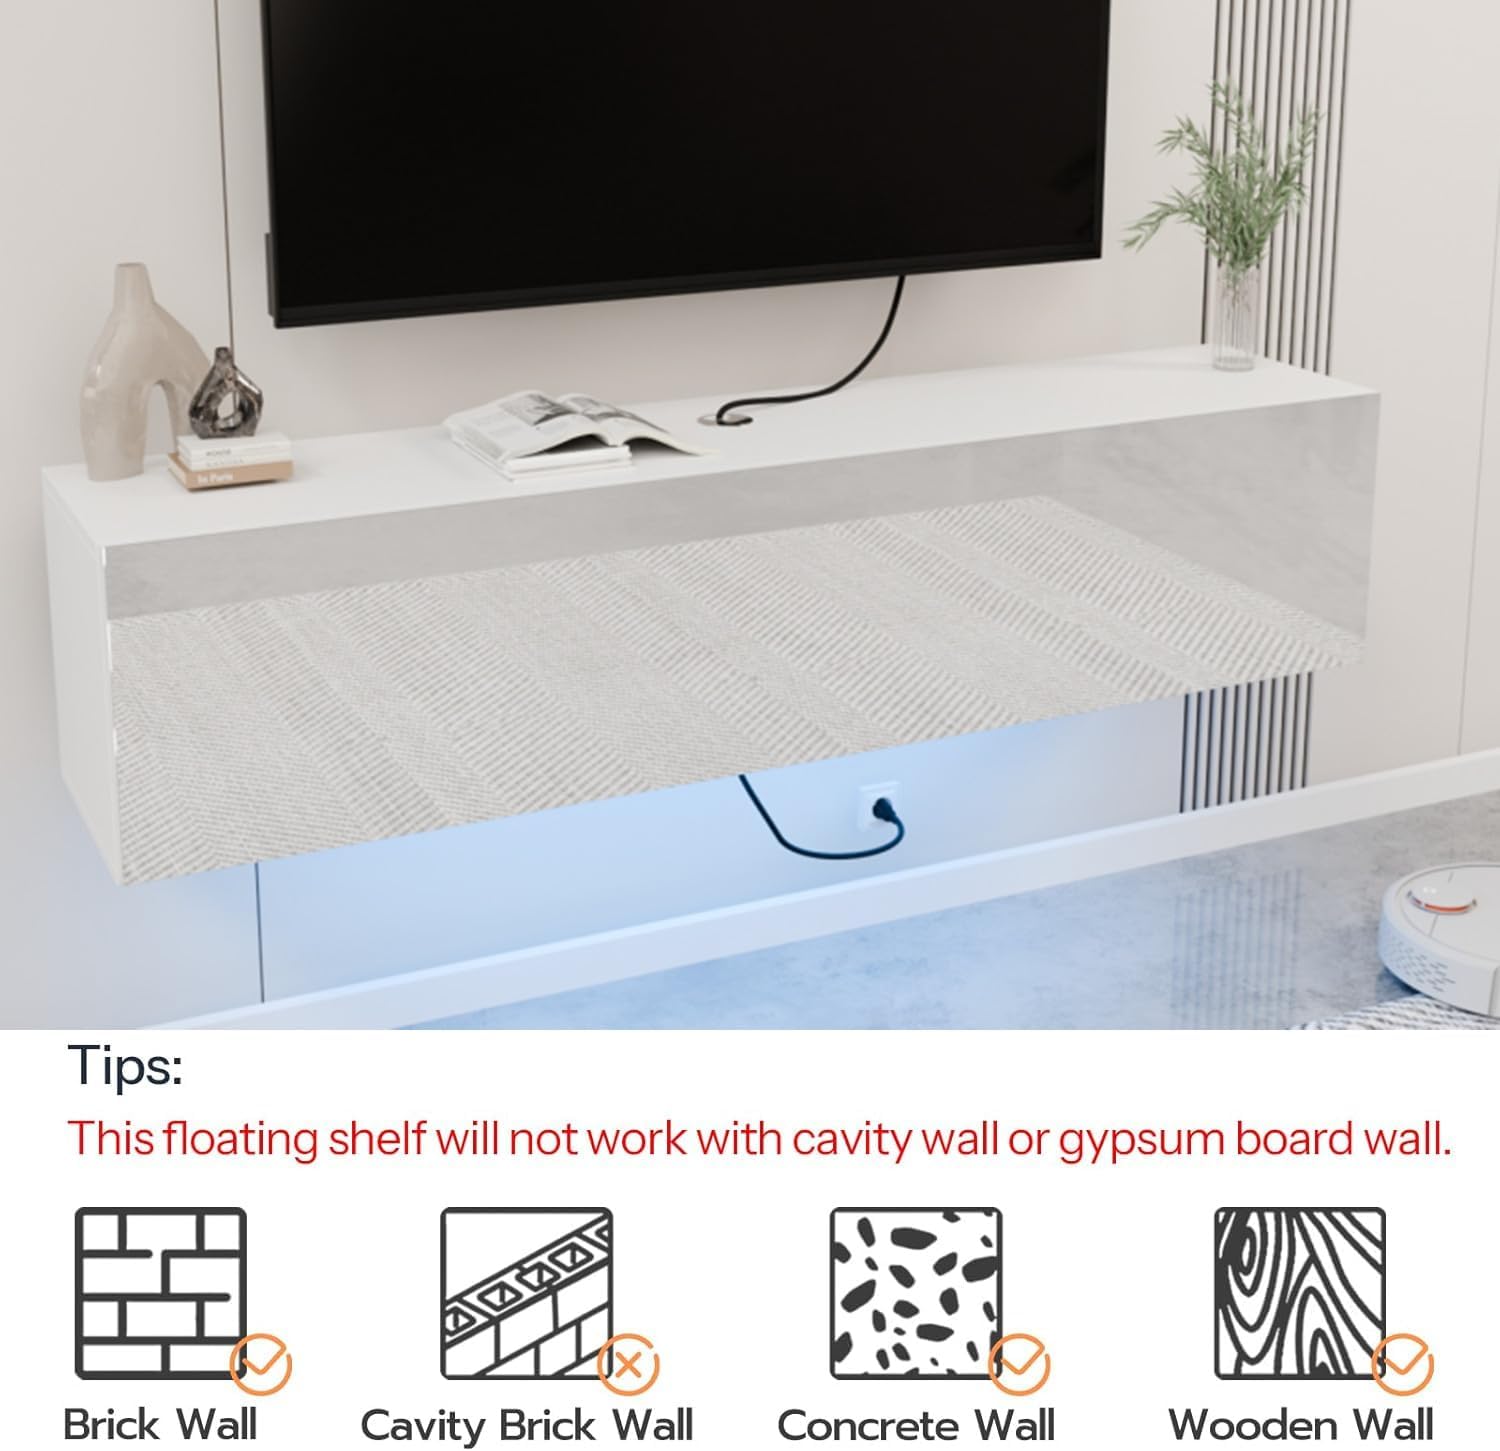
This product must be installed on a load-bearing surface or a stud. It will not work with cavity walls or gypsum board walls. For a visual guide, please refer to the 'Floating TV Stand Wall-Mounter Installation Guide' video below.
Video 2: Floating TV Stand Wall-Mounter Installation Guide. This video demonstrates how to use the positioning sticker and securely mount the TV stand to a wall.
- Prepare Wall: Use the provided positioning sticker. Tear off the back adhesive and stick it on the wall at the desired height.
- Drill Holes: Using a drill, create pilot holes at the marked positions on the sticker. Ensure the drill bit size matches the wall anchors.
- Insert Anchors: Gently tap wall anchors into the drilled holes until flush with the wall surface.
- Mount Stand: Align the pre-drilled holes on the back of the TV stand with the wall anchors. Secure the stand to the wall using appropriate screws.
- Finalize Assembly: Complete the remaining assembly steps for the doors and LED lights as described in the general assembly section.

Operating Instructions (LED Lights)
The integrated LED lighting system can be controlled via a mobile application or the included remote control.
Video 3: HOMMPA Floating TV Stand with LED Light. This video showcases the LED lighting features and color options.
- Power Connection: Connect the LED light strip to the power adapter and plug it into a standard electrical outlet.
- Remote Control: Use the provided remote control to turn the lights on/off, change colors, adjust brightness, and select dynamic modes. Point the remote directly at the LED receiver for optimal response.
- Mobile App Control: Download the designated mobile application (refer to the LED light instruction sheet for app name and QR code). Follow the app's instructions to pair your device with the LED lights. The app typically offers more advanced controls, including custom color mixing, timing functions, and music synchronization.
Maintenance
To ensure the longevity and appearance of your TV stand, follow these maintenance guidelines:
- Cleaning: Wipe surfaces with a soft, damp cloth. Avoid abrasive cleaners or harsh chemicals that may damage the finish. For the high-gloss front, use a microfiber cloth to prevent scratches.
- Dusting: Regularly dust the unit to prevent buildup.
- LED Lights: If the LED strip becomes dirty, gently wipe it with a dry cloth. Do not immerse the LED strip or controller in water.
- Hardware: Periodically check all screws and connections to ensure they remain tight. Retighten if necessary.
- Avoid Overloading: Do not place items heavier than the recommended weight capacity (110 lbs) on the stand.
Troubleshooting
| Problem | Possible Cause | Solution |
|---|---|---|
| LED lights not turning on. | Power connection loose; remote battery dead; LED strip damaged. | Check power adapter connection. Replace remote battery. Ensure LED strip is properly connected to the controller. |
| Cabinet door not closing smoothly. | Hinges loose; air pressure rod misaligned or faulty. | Tighten hinge screws. Check air pressure rod installation. |
| Stand feels unstable (floor mounted). | Feet not level; loose connections. | Adjust the feet to ensure the stand is level on the floor. Check and tighten all assembly screws. |
| Stand feels unstable (wall mounted). | Improper wall type; anchors not secure; screws loose. | Ensure installation on a load-bearing wall/stud. Re-check anchor security and tighten all mounting screws. If issues persist, consult a professional. |
Warranty and Support
For any questions, missing parts, or issues with your HOMMPA Floating TV Stand, please contact customer support. Refer to your purchase documentation for specific warranty details and contact information. Protection plans are available for purchase separately.