1. Introduction
This manual provides essential information for the safe and efficient operation of your OPTI 3kW Solar Hybrid Inverter, Model SP3000-Handy. This device is designed to convert DC power from batteries or solar panels into pure sine wave AC power for home use, offering a reliable power solution by integrating solar, grid, and battery power sources.
Please read this manual thoroughly before installation and operation. Keep it for future reference.
2. Safety Instructions
- Installation must be performed by qualified personnel.
- Ensure proper grounding of the inverter.
- Do not expose the inverter to rain, snow, spray, or any liquids.
- Do not disassemble the unit. Refer servicing to authorized service personnel.
- Install an AC Surge Protector and connect it to earth for device protection.
- Ensure adequate ventilation around the inverter to prevent overheating.
- Keep flammable materials away from the inverter.
3. Product Overview
The OPTI SP3000-Handy is a 3kW pure sine wave hybrid inverter with a built-in 80A MPPT solar charger. It supports 24V DC input and provides 220V AC output. It features automatic switching between various power sources to ensure uninterrupted power supply.

Figure 1: Front view of the OPTI 3kW Solar Hybrid Inverter, showing the display and control buttons.
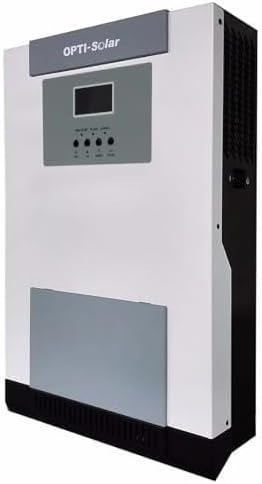
Figure 2: Angled view of the OPTI 3kW Solar Hybrid Inverter, highlighting its compact design and side ventilation.
Key Features:
- 3000W Pure Sine Wave Output (220V AC)
- 24V DC Input
- Integrated 80A MPPT Solar Charge Controller
- Supports charging from Solar, Grid, or Generator
- Automatic power source switching for continuous operation
- Compatible with 24V Lead-Acid or Lithium batteries (100-200 Ah recommended)
- Can operate without batteries during daylight hours, directly powering loads from solar.
4. Installation and Setup
4.1 Unpacking and Inspection
Upon receiving the inverter, carefully unpack it and inspect for any shipping damage. Ensure all included components (power inverter, built-in solar charger, possibly mounting hardware) are present. If any damage or missing parts are found, contact your supplier immediately.
4.2 Mounting the Inverter
Choose a suitable location for mounting the inverter. The location should be:
- Indoors, protected from direct sunlight, rain, and moisture.
- Well-ventilated to allow for heat dissipation.
- On a solid, non-flammable surface.
- Accessible for wiring and maintenance.
Use appropriate mounting hardware to securely fasten the inverter to the wall.
4.3 Wiring Connections
Important: All wiring must be performed by a qualified electrician. Ensure all power sources are disconnected before making any connections.
- Battery Connection: Connect the 24V battery bank (Lead-Acid or Lithium, 100-200 Ah recommended) to the inverter's battery terminals. Ensure correct polarity (+ to + and - to -).
- Solar Panel Connection: Connect your solar panel array to the inverter's PV input terminals. Ensure the solar array voltage and current are within the inverter's specifications for the 80A MPPT charger.
- AC Input (Grid/Generator): Connect the AC input from your utility grid or generator to the inverter's AC input terminals.
- AC Output (Loads): Connect your home loads to the inverter's AC output terminals.
- Grounding: Connect the inverter's ground terminal to a reliable earth ground. Install an external AC Surge Protector and connect it to earth for enhanced protection.
Warning: Incorrect wiring can cause severe damage to the inverter and connected devices, and poses a risk of electric shock.
5. Operating Instructions
5.1 Initial Power-Up
- After all connections are securely made and verified, switch on the battery breaker.
- Switch on the solar array breaker (if applicable).
- Switch on the AC input breaker (if connecting to grid/generator).
- Press the power button on the inverter to turn it on. The display will illuminate, showing system status.
5.2 Display and Control
The inverter features a display screen and control buttons for monitoring and configuration. Refer to the on-screen menus for detailed information on input/output voltage, battery status, charging current, and load percentage.
5.3 Operating Modes
The inverter automatically manages power flow between solar, battery, and grid/generator. It prioritizes solar power when available, charges batteries, and switches to grid/generator power when solar is insufficient or batteries are low, ensuring continuous power to your loads.
Battery-less Operation: During daylight hours, the inverter can directly power loads from solar panels without requiring batteries, provided the solar input is sufficient.
6. Maintenance
Regular maintenance ensures optimal performance and longevity of your inverter.
- Cleaning: Keep the inverter's exterior clean and free from dust. Ensure ventilation openings are not blocked. Use a dry cloth for cleaning.
- Connections: Periodically check all electrical connections for tightness and signs of corrosion.
- Battery Inspection: If using lead-acid batteries, check electrolyte levels and terminal cleanliness as per battery manufacturer guidelines.
- Environment: Ensure the installation environment remains within specified temperature and humidity ranges.
- Performance Monitoring: Regularly monitor the inverter's display for any error codes or unusual operating parameters.
Caution: Disconnect all power sources before performing any maintenance or cleaning.
7. Troubleshooting
This section provides solutions to common issues. For problems not listed here, contact technical support.
| Problem | Possible Cause | Solution |
|---|---|---|
| Inverter does not power on. | No battery connection or low battery voltage. Power button not pressed. | Check battery connections and voltage. Ensure batteries are charged. Press the power button. |
| No AC output. | Overload. Short circuit. Inverter in fault mode. | Reduce load. Check for short circuits in wiring. Restart inverter. Check display for error codes. |
| Batteries not charging. | No solar input. AC input not connected. Faulty battery connection. | Check solar panel connections and sunlight. Verify AC input connection. Inspect battery wiring. |
| Inverter overheating. | Blocked ventilation. Excessive load. High ambient temperature. | Clear obstructions from vents. Reduce load. Ensure adequate room ventilation. |
8. Specifications
| Feature | Detail |
|---|---|
| Model | SP3000-Handy |
| Rated Power | 3000W (3kW) |
| DC Input Voltage | 24V |
| AC Output Voltage | 220V (Pure Sine Wave) |
| Solar Charger Type | MPPT |
| Solar Charger Current | 80A |
| Recommended Battery Capacity | 100-200 Ah (24V Lead-Acid or Lithium) |
| Dimensions (L x W x H) | 34 x 28.5 x 10 cm |
| Weight | 6.5 kg |
| Manufacturer | OPTI |
| Origin | Taiwan |
| Certifications | GSO Certified |
9. Warranty and Support
For warranty information and technical support, please refer to the documentation provided with your purchase or contact your local distributor. Keep your purchase receipt as proof of purchase.
Manufacturer: OPTI