1. Introduction and Key Features
This manual provides detailed instructions for the installation, operation, and maintenance of your X X-HOUSE C05 Automatic Dual Swing Gate Opener. This solar-powered system is designed for light to medium-duty dual swing gates, supporting up to 770 lbs per gate leaf.
Key Features:
- Solar System Powered: Utilizes two 12V batteries (included) as the primary power source, charged by a 20W solar panel (included). Ensure batteries are fully charged before initial use.
- Powerful 24V 40W Motor: Capable of handling dual swing gates up to 770 lbs per leaf. Constructed from high-quality Grade 304 stainless steel for durability in various environments.
- Multiple Protection Functions: Advanced control board allows individual arm control. Features 'Auto-Close' for convenience and security, and a safety stop-and-reverse mechanism for obstruction detection.
- Reliable Limit Switch Function: Allows precise adjustment of gate stop points, preventing over-extension. Motor stroke is adjustable to match gate width.
- Wide Application Range: Compatible with various gate types (steel, aluminum, stainless steel panels and pipes). Suitable for courtyards, residential, commercial, driveways, farms, and ranches. Supports inward or outward opening.
- Remote Control: Includes two remotes with a maximum range of 100 feet, supporting up to 120 remotes. A manual release key is provided for backup.
2. Setup and Installation
2.1 Component Overview
Before beginning installation, ensure all components are present and undamaged. The complete kit includes two gate openers, a control box with control board and batteries, a 24V 20W solar panel, two remotes, and a set of installation accessories.

Image: All components included in the X X-HOUSE C05 Automatic Dual Swing Gate Opener kit.
2.2 Solar Panel Installation
Proper installation of the solar panel is crucial for efficient battery charging. The panel should be placed in a location that receives maximum direct sunlight throughout the day.
- Assemble the Bracket: Attach the provided brackets to the solar panel using the included hardware.
- Mount the Solar Panel: Securely mount the solar panel bracket into the ground or onto a suitable surface, ensuring stability and optimal sun exposure.
- Connect Wiring: Connect the 2-core cable to the solar panel's positive and negative ports. If available, use a soldering iron to secure the connection for durability.
Video: Detailed instructions for solar panel assembly, mounting, and initial wiring connections.
2.3 Control Box Installation and Wiring
The control box houses the main control board and batteries. It should be installed in a secure, weather-protected location near the gate.
- Prepare the Control Box: Drill holes on the control box as required for cable entry and install the cable glands to protect the cables from moisture and damage.
- Mount the Control Box: Securely install the control box on a wall or post using the provided screws.
- Connect Solar Panel to Control Board: Connect the 2-core cable from the solar panel to the POWER port on the control board, ensuring correct positive and negative polarity.
- Battery Wiring: Remove the covers from the batteries. Use the short black wire to connect the negative terminal of one battery to the positive terminal of the other, wiring them in series.
- Connect Batteries to Control Board: Use the remaining black wire to connect the negative terminal of the battery series to the Battery - port on the control board. Use the red wire to connect the positive terminal of the battery series to the Battery + port on the control board.
To avoid short circuits:
- Secure the black wire first.
- Connect the red wire to the control board's positive terminal.
- Link the other end of the red wire to the battery's positive terminal.

Image: Wiring diagram for the solar power system and control board.
3. Operating Instructions
3.1 Remote Control Programming
Follow these steps to program your remote controls for the gate opener:
- Erase Existing Remotes: Press and hold the 'Learn' button on the control board until the display shows '00'. This indicates all previously programmed remotes have been erased.
- Program New Remote: Press a button on your remote control, then briefly press the 'Learn' button on the control board. The display will show a number (e.g., '01'), confirming successful programming.
- Program Additional Remotes: Repeat the programming process for any other remote controls you wish to use.
Video: Visual guide on how to erase and program remote controls for the gate opener.
3.2 Remote Control Functions
The remote control features four buttons (A, B, C, D) with specific functions:
- Button 'A' (or '1'): Operates a single gate (Motor 2) with open - stop - close functionality.
- Button 'B' (or '2'): Operates both gates (Motor 1 and Motor 2) with open - stop - close functionality.
- Button 'C' (or '3'): No function.
- Button 'D' (or '4'): Used to disable the auto-close function via remote.
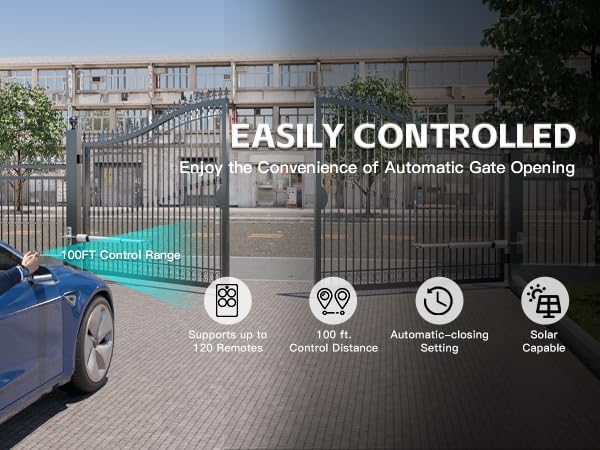
Image: Remote control operation of the automatic gate opener.
4. Maintenance
Regular maintenance ensures the longevity and optimal performance of your gate opener system.
- Clean Solar Panel: Periodically clean the solar panel surface to remove dust, dirt, and debris that may reduce charging efficiency.
- Check Wiring Connections: Inspect all wiring connections for tightness and signs of corrosion or damage. Secure any loose connections.
- Lubricate Moving Parts: Apply appropriate lubricant to the gate opener arms' moving parts as recommended by the manufacturer to ensure smooth operation.
- Monitor Battery Health: Regularly check the battery charge level, especially during periods of low sunlight. Ensure batteries are fully charged before extended periods of non-use.
- Inspect Gate Movement: Observe the gate's opening and closing cycles for any unusual noises, jerky movements, or obstructions. Address any issues promptly.
5. Troubleshooting
This section addresses common issues you might encounter with your gate opener. For complex problems, contact customer support.
- Gate Not Responding to Remote:
- Check remote battery.
- Ensure the remote is programmed correctly (refer to Section 3.1).
- Verify power supply to the control board.
- Gate Operates Intermittently:
- The batteries may be low or dead. Ensure the solar panel is receiving adequate sunlight and the batteries are charging.
- Inspect wiring for loose connections.
- Gate Stops or Reverses Unexpectedly:
- Check for obstructions in the gate's path.
- Verify limit switch settings are correct and not being triggered prematurely.
- Gate Does Not Open/Close Fully:
- Adjust the limit switch settings (refer to the installation guide for detailed steps).
- Ensure there are no physical obstructions preventing full travel.
6. Specifications
| Specification | Value |
|---|---|
| Manufacturer | Giant |
| Item Weight | 50.6 pounds |
| Product Dimensions | 33.2 x 2.16 x 3.38 inches |
| Item Model Number | PKM-C05-DUAL-S |
| Size | 770lb Solar Dual Gate Opener |
| Color | Silver |
| Installation Method | Screw-In |
| Included Components | 24V 20W Solar Panel *1, Battery *2, Single-swing gate openers *2 |
| Batteries Included? | Yes |
| Batteries Required? | Yes |
| Battery Cell Type | Lead Acid |
| Date First Available | May 8, 2024 |
| Exterior Finish | Stainless Steel |
7. Warranty and Support
X-XHOUSE is dedicated to providing high-quality, reliable products and professional after-sales service.
- Warranty: All products come with a one-year warranty.
- Customer Support: 24-hour after-sales service is available to assist with any issues.
- Service Email: smart02@x-house.net


