1. Introduction
The LWOHSI PG108 Alarm System is a versatile home security solution featuring WiFi and 4G GSM connectivity. It provides multi-channel alarm methods including APP push notifications, SMS, and voice monitoring for stable and reliable performance. The system supports up to 100 controllers, RFID cards, and wireless detectors, offering comprehensive coverage for various monitoring needs. It is compatible with popular smart home platforms like Amazon Alexa and Google Assistant for convenient voice control.

Figure 1: Main components of the LWOHSI PG108 Alarm System, including the control panel, SOS button, siren, door/window sensors, motion sensors, and remote controls.
2. Setup
2.1 Host Introduction
The alarm host is the central unit of the system. It features a 2.4-inch TFT display, a numeric keypad, an SOS button, and an RFID sensing area. The rear of the unit includes an installation area, SIM card slot, audio port, power button, and USB interface.

Figure 2: Close-up of the LWOHSI PG108 control panel, highlighting its 2.4-inch TFT colorful LCD screen and simple design.
2.2 SIM Card Installation
To install the SIM card, ensure the device is powered off. Open the SIM card slot cover on the back of the host. Insert the SIM card with the chip facing upwards and the notch facing outwards. Gently press to ensure it is securely in place. The system supports 4G GSM for cellular communication.
2.3 Network Connection (WiFi)
The alarm system connects to your home WiFi network (2.4 GHz is required). This allows for APP push notifications and remote control. Ensure your phone's Bluetooth is off and WiFi is connected to a 2.4 GHz network before proceeding.
Video 1: PG108 Alarm System Network Connection Tutorial. This video demonstrates the step-by-step process of connecting your alarm system to your WiFi network using the mobile application.
2.4 Accessory Pairing
All accessories are paired with the host. When an accessory detects an abnormal situation, it triggers the alarm. Follow the on-screen instructions on the host panel to pair each accessory.
Video 2: PG108 connection operation video. This video provides a visual guide on how to pair various accessories with the PG108 alarm system.
- PIR Detector: Navigate to Menu > Parts > Detector > Add. Select 'Panic Alarm' or 'Out Arm Active'. Confirm and trigger the PIR detector to pair.
- Remote Control: Navigate to Menu > Parts > Remote > Add. Press any button on the remote control to pair.
- RFID Tag: Navigate to Menu > Parts > RFID > Add. Place the RFID tag on the RFID sensing area of the host to pair.
- Magnetic Door/Window Sensor: Navigate to Menu > Parts > Detector > Add. Select 'Door Alarm' or 'Out Arm Active'. Confirm and separate the two parts of the magnetic sensor to pair.
- SOS Button: Navigate to Menu > Parts > Detector > Add. Select 'Panic Alarm' or '24 Hours Active'. Confirm and press the SOS button to pair.
- Smoke Detector: Navigate to Menu > Parts > Detector > Add. Select 'Gas Alarm' or '24 Hours Active'. Confirm and press the smoke detector button to pair.
- Siren: Navigate to Menu > Parts > Siren Learn. Turn on the siren switch and long-press the button until you hear three beeps. Confirm to pair.
3. Operating
3.1 Setting Language & Time
To set the language, go to Menu > Settings > Language. Select your desired language from the available options. To set the time, navigate to Menu > Timer > Date & Time and adjust the current time and date.

Figure 3: The alarm system supports 11 languages, allowing users to switch freely for menu display, voice operation prompts, and alarm SMS settings.
3.2 Keypad Lock
To manage the keypad lock, go to Menu > Settings > Password. The system has two types of passwords: system (initial: 6666) and user (initial: 1234). These can be customized. To enable or disable the keypad lock, go to Menu > Settings > Switch > Keypad Lock. You will need to enter the corresponding setting password to make changes. If the keypad lock is enabled, you must enter the password to operate the panel after it restarts.
3.3 Alarm Calls & Text Messages
To set up alarm notifications, go to Menu > Phone. You can set up to 5 groups of telephone alarm numbers and two groups of SMS alarm numbers. Enter the desired phone numbers. When the alarm is triggered, the control panel will call and send SMS to the preset numbers. You can also use your mobile phone to dial or send SMS to the control panel number.

Figure 4: The system supports 5 preset alarm calls to ensure no alarm information is missed.
3.4 Arming/Disarming
The system offers various arming modes: Arm (full arm), Stay Arm (partial arm, e.g., for night), and Disarm. These modes can be activated via the control panel, remote control, RFID tag, or the mobile application. You can also set regular arming and disarming schedules through the app.

Figure 5: The system allows for scheduled arming and disarming, saving time and effort.
3.5 Mobile App Remote Control
The dedicated mobile app (Tuya Smart or Smart Life) allows for comprehensive remote control of your alarm system. You can arm, disarm, receive alarm notifications, and query history records from anywhere. The app also supports integration with Amazon Alexa and Google Assistant for voice control.
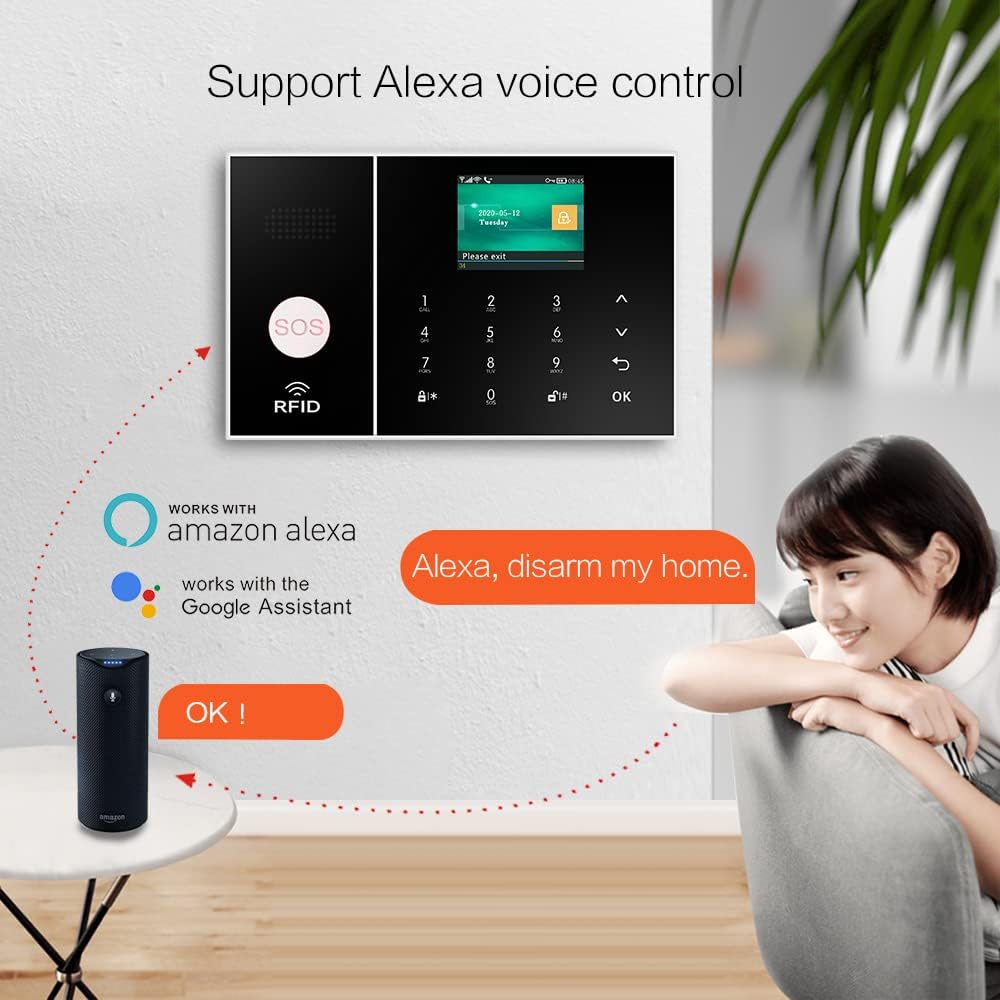
Figure 6: The alarm system supports Alexa voice control for convenient arming and disarming.

Figure 7: The mobile app displays the door sensor state and allows for easy editing of sensor names for better management.
4. Maintenance
4.1 Battery Information
The main control panel has a built-in Lithium Polymer battery for backup power, providing approximately 8.5 hours of operation during a power outage. The system also features a low battery alarm for connected sensors and an anti-disassembly alarm function.

Figure 8: The system features low power consumption and an 8.5-hour backup battery to ensure continuous operation.
4.2 Device Update
Regularly check for firmware updates through the mobile app to ensure optimal performance and access to new features. Updates are typically found within the device settings section of the app.
4.3 Cleaning
To maintain the system, gently wipe the control panel and sensors with a soft, dry cloth. Avoid using abrasive cleaners or solvents that could damage the surfaces.
5. Troubleshooting
- WiFi Connection Issues: Ensure your WiFi network is 2.4 GHz. Verify the password is correct. Try resetting the device and re-pairing through the app.
- Sensor Not Pairing: Ensure the sensor is within range of the host. Check the sensor's battery. Follow the pairing instructions carefully for the specific sensor type.
- No Alarm Notifications: Verify that alarm phone numbers are correctly set up in the host. Ensure SMS and call functions are enabled. Check your mobile phone's network signal and notification settings for the app.
- Keypad Not Responding: If keypad lock is enabled, ensure you are entering the correct password. If the issue persists, try restarting the host.
6. Specifications
| Brand | LWOHSI |
| Model Number | LW108-4GUS-F |
| Power Source | Battery Powered |
| Connectivity Technology | Wireless (WiFi + 4G GSM) |
| Compatible Devices | Tablet, Smartphone (Alexa, Google Assistant, Tuya) |
| Item Dimensions (L x W x H) | 7.09 x 0.59 x 3.86 inches |
| Item Weight | 2.68 pounds |
| Battery Cell Composition | Lithium Polymer (1 included) |
| Maximum Range | 60 Meters |
| Alert Type | Audio & Motion |
7. Warranty & Support
For information regarding product warranty and extended protection plans, please refer to the purchase documentation or contact LWOHSI customer support. You can also visit the official LWOHSI store on Amazon for additional resources and support.
LWOHSI is a high-tech security company focused on research and development, production, and sales in the burglar alarm industry for over ten years. They offer a range of surveillance products, fire alarm systems, security burglar alarm systems, and IoT sensors.


