1. Introduction
This manual provides comprehensive instructions for the assembly, installation, operation, and maintenance of your Generic Dartboard Surround. This product is designed to provide a protective barrier around your dartboard, safeguarding your walls from stray darts and enhancing your playing experience. Please read this manual thoroughly before use to ensure proper installation and longevity of the product.
2. Safety Information
Observe the following safety guidelines to prevent injury or damage:
- Ensure the dartboard surround is securely assembled and stable before use.
- This product is intended for use with standard 18-inch dartboards. Using other sizes may compromise wall protection.
- Keep the product away from open flames or extreme heat sources.
- Do not hang heavy objects from the dartboard surround.
- Regularly inspect the surround for any signs of wear or damage. Discontinue use if significant damage is observed.
3. Package Contents
Verify that all components are present in the package:
- 1 set of Dartboard Surround (consisting of 4 interlocking EVA foam pieces)
4. Specifications
| Feature | Detail |
|---|---|
| Product Material | EVA Foam |
| Color | Black |
| Compatibility | Suitable for 18-inch dartboards |
| Assembled Dimensions (L x W) | 72cm x 72cm (28.5 inches x 28.5 inches) |
| Central Opening Diameter | 45cm (17.7 inches) |
| Item Weight | 1.6 Pounds (approx. 725g) |
| Installation Method | 4-piece interlocking splicing |
| Model Number | Generic-RP1FOX0S85YTV1HDP |

Figure 4.1: Dimensions of the Dartboard Surround. The overall assembled size is 72cm x 72cm, with a central opening of 45cm for the dartboard.
5. Setup and Installation
The dartboard surround features an easy, tool-free installation process. Follow these steps to assemble and install your surround:
- Unpack all four EVA foam pieces from the packaging.
- Identify the interlocking puzzle-piece edges on each section.
- Begin by connecting two pieces together, ensuring the puzzle edges align and fit snugly.
- Continue by connecting the remaining two pieces in the same manner.
- Once you have two pairs, interlock these pairs to form a complete square with a central circular opening. The fit should be secure and stable.
- Carefully insert your 18-inch dartboard into the central opening of the assembled surround. The surround is designed to fit snugly around the dartboard.
- Position the assembled dartboard and surround on your desired wall. Ensure the wall surface is clean and dry if using any adhesive mounting solutions (not included).
- Verify that the dartboard and surround are level and securely mounted to prevent movement during play.

Figure 5.1: The four individual EVA foam pieces interlock to form the complete surround, designed to fit an 18-inch dartboard.
6. Operating Instructions
Once installed, the Generic Dartboard Surround provides an effective protective zone around your dartboard. Its primary function is to prevent darts that miss the board from damaging the wall surface.
- Ensure your dartboard is properly secured within the surround.
- Aim for the dartboard as usual. In the event of a missed throw, the EVA foam material of the surround will absorb the impact of the dart, preventing it from penetrating or marking the wall.
- The high-density EVA material is designed to be self-healing, minimizing visible marks from dart impacts over time.

Figure 6.1: The dartboard surround fully assembled with a dartboard, ready for use.
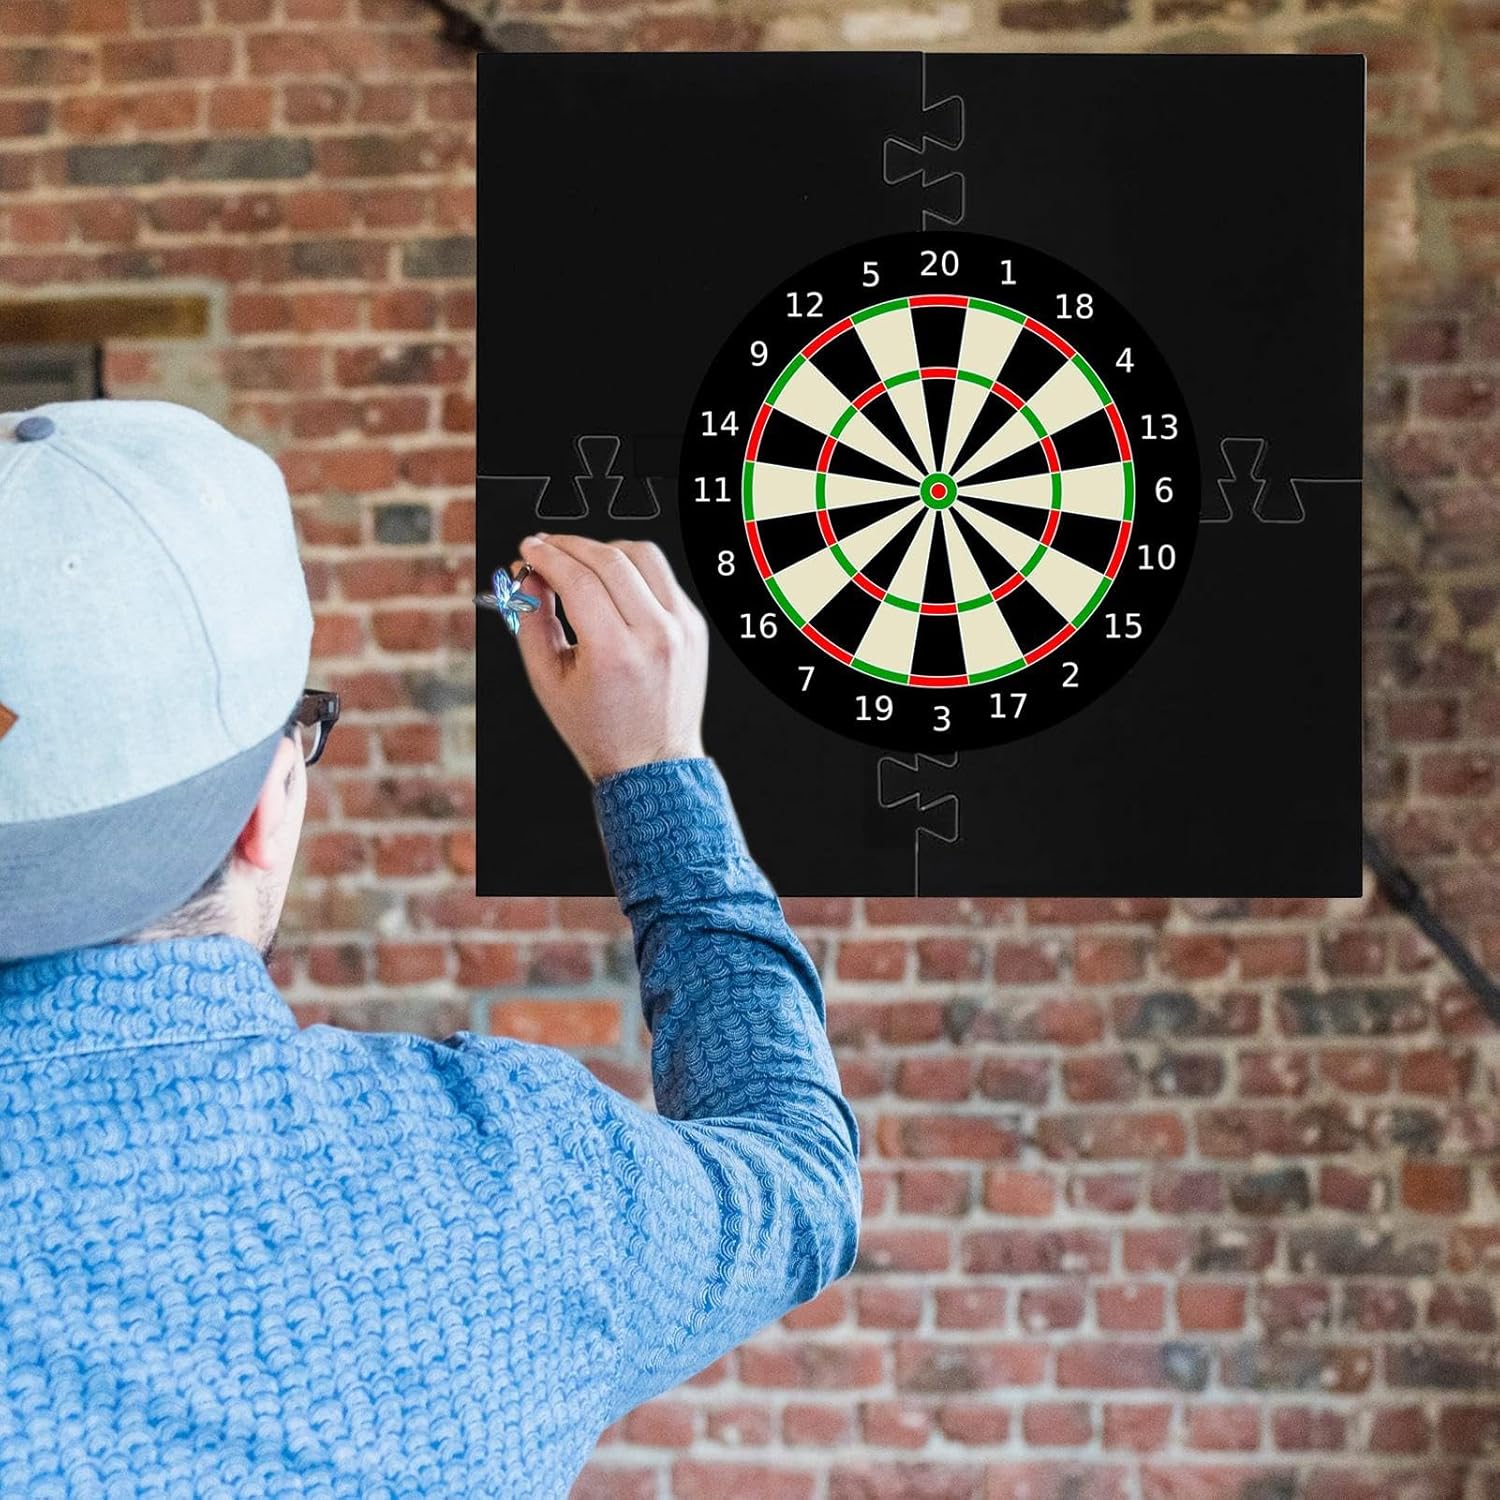
Figure 6.2: The surround effectively protects the wall from stray darts during active play.
7. Maintenance
To ensure the longevity and appearance of your dartboard surround, follow these simple maintenance guidelines:
- Cleaning: Wipe the surface of the EVA foam with a soft, damp cloth. For stubborn marks, a mild soap solution can be used, followed by wiping with a clean, damp cloth. Avoid using abrasive cleaners, solvents, or harsh chemicals, as these can damage the material.
- Storage: If you need to store the surround, it can be easily disassembled into its four pieces. Store in a cool, dry place away from direct sunlight and extreme temperatures to prevent material degradation.
- Inspection: Periodically inspect the surround for any signs of significant wear, tears, or deformation. While the EVA material is durable and self-healing, extreme or repeated impacts in the same spot may cause localized damage over time.
8. Troubleshooting
This section addresses common issues you might encounter with your dartboard surround.
| Problem | Possible Cause | Solution |
|---|---|---|
| Darts are still hitting the wall outside the surround. | Dartboard not centered within the surround; surround not positioned correctly; dartboard size mismatch. | Ensure the 18-inch dartboard is perfectly centered in the surround's opening. Verify the entire assembly is positioned appropriately on the wall to cover the typical impact zone. |
| Surround pieces do not fit together snugly. | Pieces are misaligned; debris in interlocking grooves. | Ensure the puzzle edges are correctly aligned before applying pressure. Check for any small debris or foreign objects in the grooves and remove them. |
| Surround appears warped or deformed. | Exposure to extreme temperatures or prolonged direct sunlight; improper storage. | Store the product in a cool, dry place. Avoid prolonged exposure to direct sunlight or high heat. Minor deformations may self-correct over time in a suitable environment. |
9. Warranty Information
Specific warranty details for this product are not provided in this manual. For information regarding warranty coverage, terms, and conditions, please refer to the product listing on the retailer's website or contact the seller directly at the point of purchase. Please retain your proof of purchase for any warranty claims.
10. Customer Support
If you have any questions, require assistance with assembly, or encounter issues not covered in this manual, please contact the seller or retailer from whom you purchased this product. Provide your model number (Generic-RP1FOX0S85YTV1HDP) and a detailed description of your inquiry to facilitate a quicker resolution.


