Introduction
This manual provides essential information for the safe and effective use of your Head Spa Waterfall Shower Head. Designed for shampoo sinks in hair salons, spas, and barber shops, this accessory enhances the customer experience by providing a gentle, relaxing waterfall massage. Please read these instructions thoroughly before installation and operation.
Safety Information
- Ensure all connections are secure to prevent leaks before operating the device.
- The device is made of special materials that allow it to be bent and adjusted. Handle with care to avoid damage.
- Always ensure the water level in the basin is sufficient for the water pump to operate correctly.
- Disconnect power before performing any maintenance or adjustments.
Package Contents
Verify that all items listed below are included in your package:
- Waterfall Outlet (Y001 Outlet Elbow)
- 60cm Connection Hose
- A01E Tee with Control (3-way Tee Connector)
- Shower Rack
- 60cm Shower with Hose
- Water Pump (if applicable, check your specific model)
- Power Adapter and Switch Controller (if applicable)
- Washers and Tightening Screws
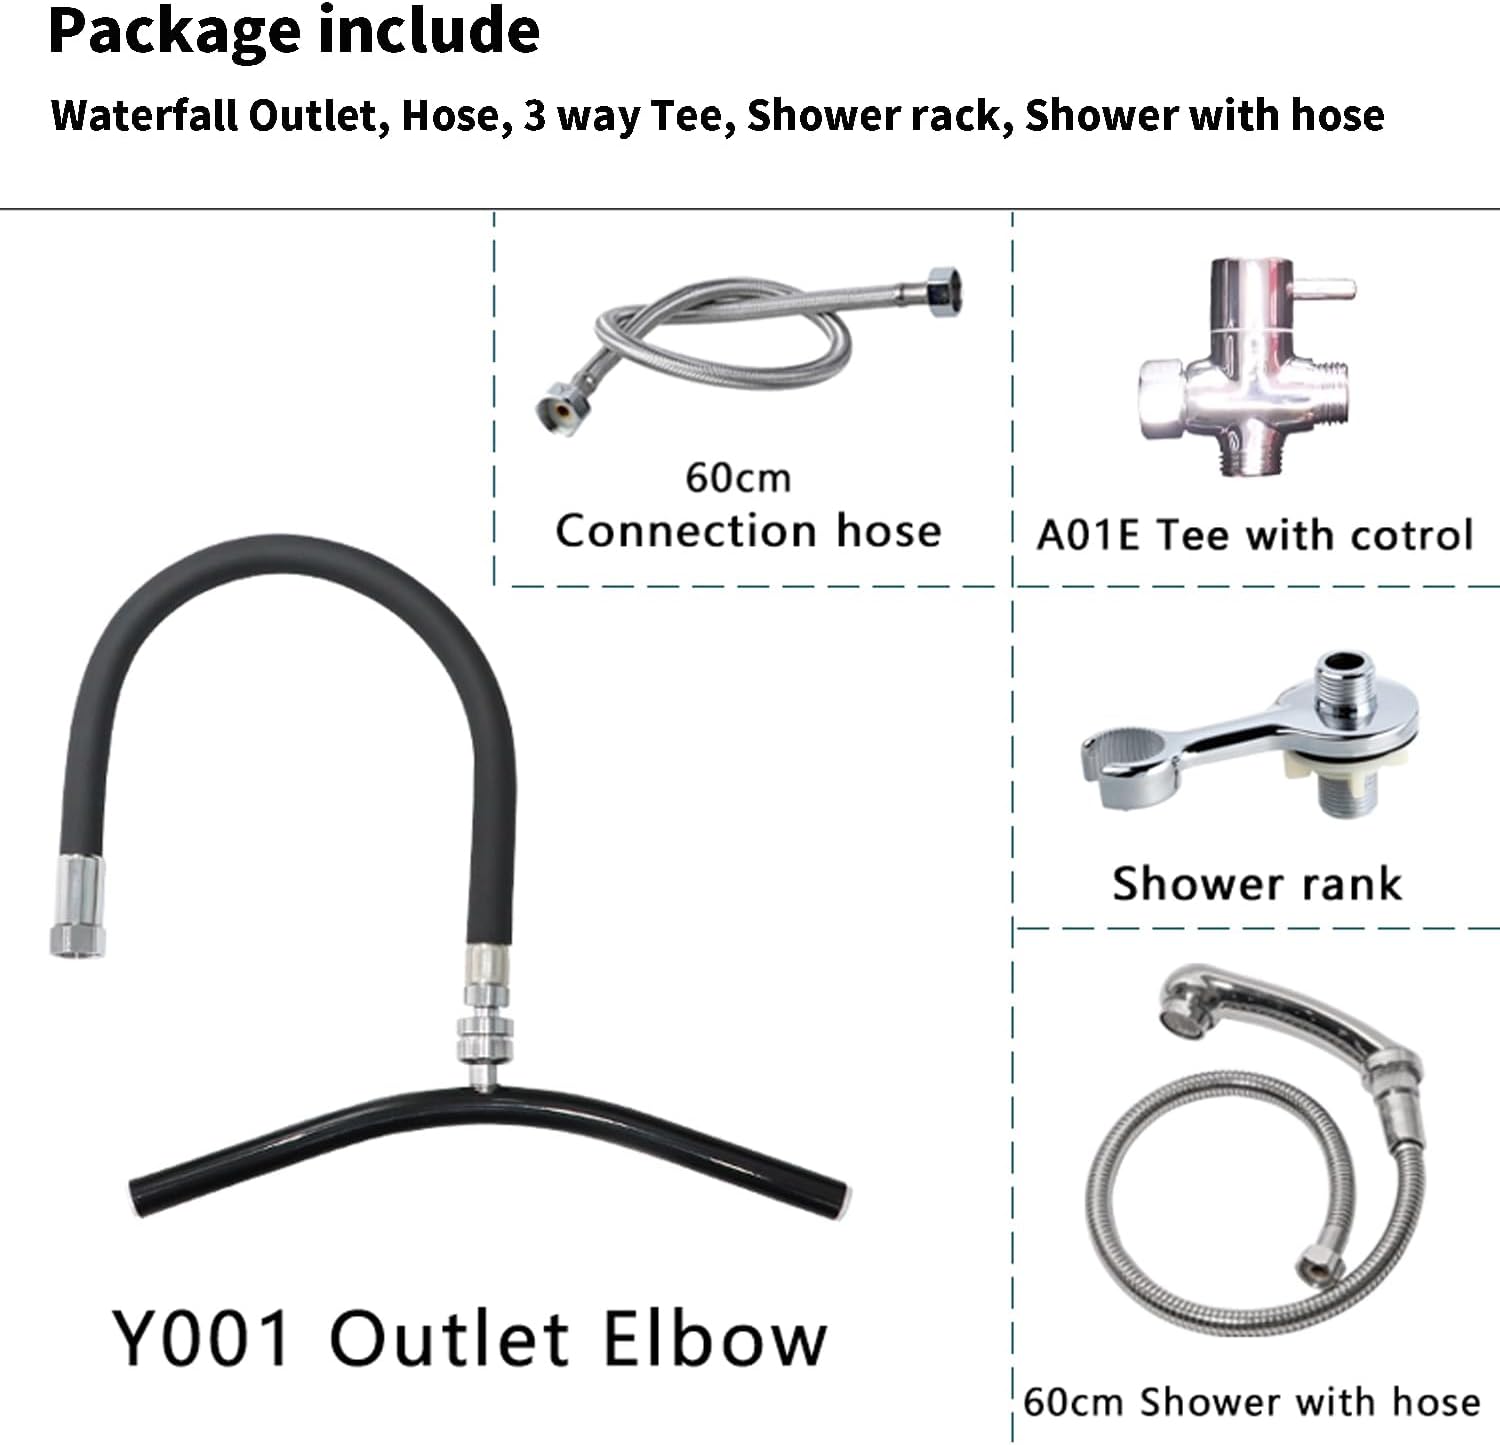
Image 1: Overview of the Head Spa Waterfall Shower Head components.

Image 2: Detailed view of the package contents.
Setup and Installation
Follow these steps to properly install your Head Spa Waterfall Shower Head:
- Check Basin Compatibility: Ensure your shampoo basin has round installation holes. The device is not compatible with square or other non-round hole types.

Image 3: Shampoo basin compatibility guide. Only round holes are suitable for installation.
- Assemble the Main Unit: Connect the waterfall outlet elbow to the regulator and then to the C-clamp. Tighten with the provided screws.
- Connect Hoses: Attach the 60cm connection hose to the 3-way tee connector. Ensure black gaskets are added to the upper and lower connection positions of the three-way tee for a secure, leak-free fit.
- Install Shower Rack and Shower Head: Secure the shower rack to the basin edge. Connect the 60cm shower with hose to the 3-way tee.
- Position the Waterfall Outlet: Place the assembled waterfall outlet into the shampoo basin, ensuring it is securely clamped to the basin edge. The bendable design allows for adjustment to the desired angle.
- Connect Water Pump and Power: If your model includes a water pump, connect it to the appropriate hoses and plug the power adapter into an electrical outlet. Use the switch controller to activate the water pump.
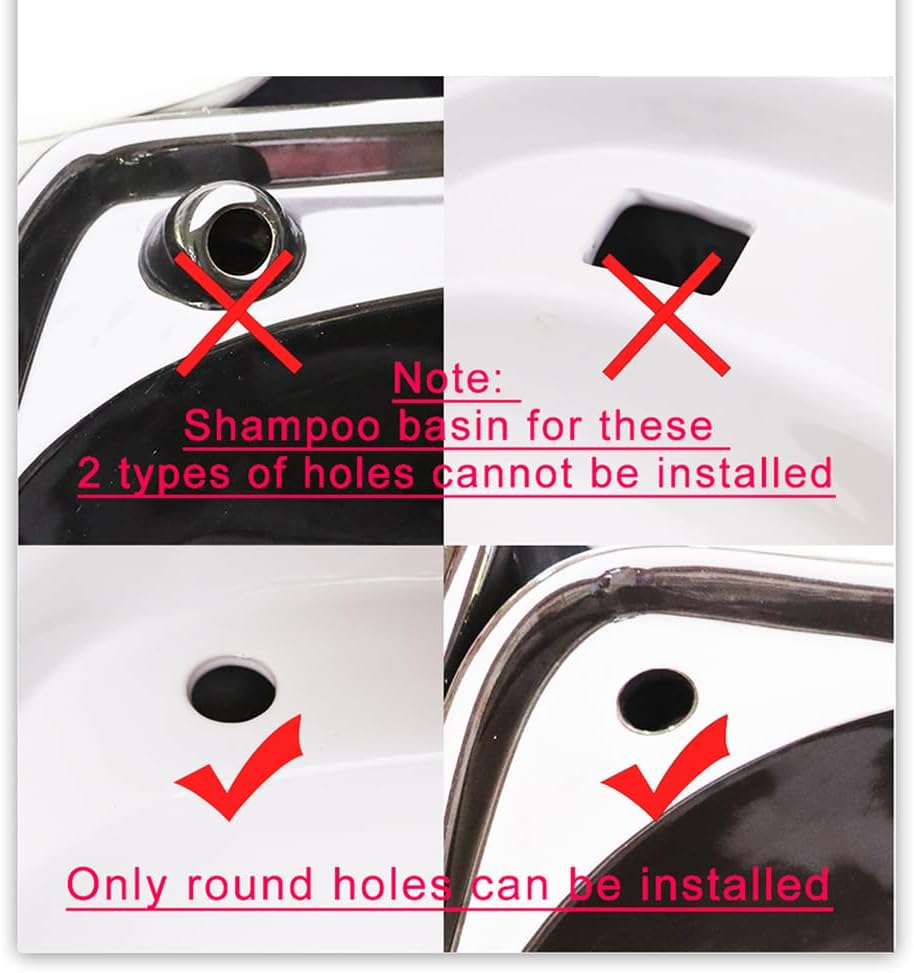
Image 4: Installation diagram for the Head Spa Waterfall Shower Head.

Image 5: Close-up of the secure connection for the waterfall outlet.
Operating Instructions
Once installed, operating the Head Spa Waterfall Shower Head is straightforward:
- Fill the Basin: Ensure the shampoo basin is filled with water to a level that allows the water pump to operate effectively, typically two-thirds full.
- Activate the Waterfall: Turn on the water supply to the shampoo sink. If your model includes a pump, activate it using the switch controller. The water will flow through the 17 outlets, creating a waterfall effect.
- Adjust Angle: The bendable design allows you to adjust the angle of the waterfall outlet to suit the customer's comfort and position.
- Use Hand Shower: The integrated hand shower can be used for targeted rinsing or additional water flow as needed.
Video 1: Demonstration of the water outlet display and waterfall effect in a shampoo basin.
Video 2: Function display of the waterfall shower head in a shampoo bowl, showing water circulation.
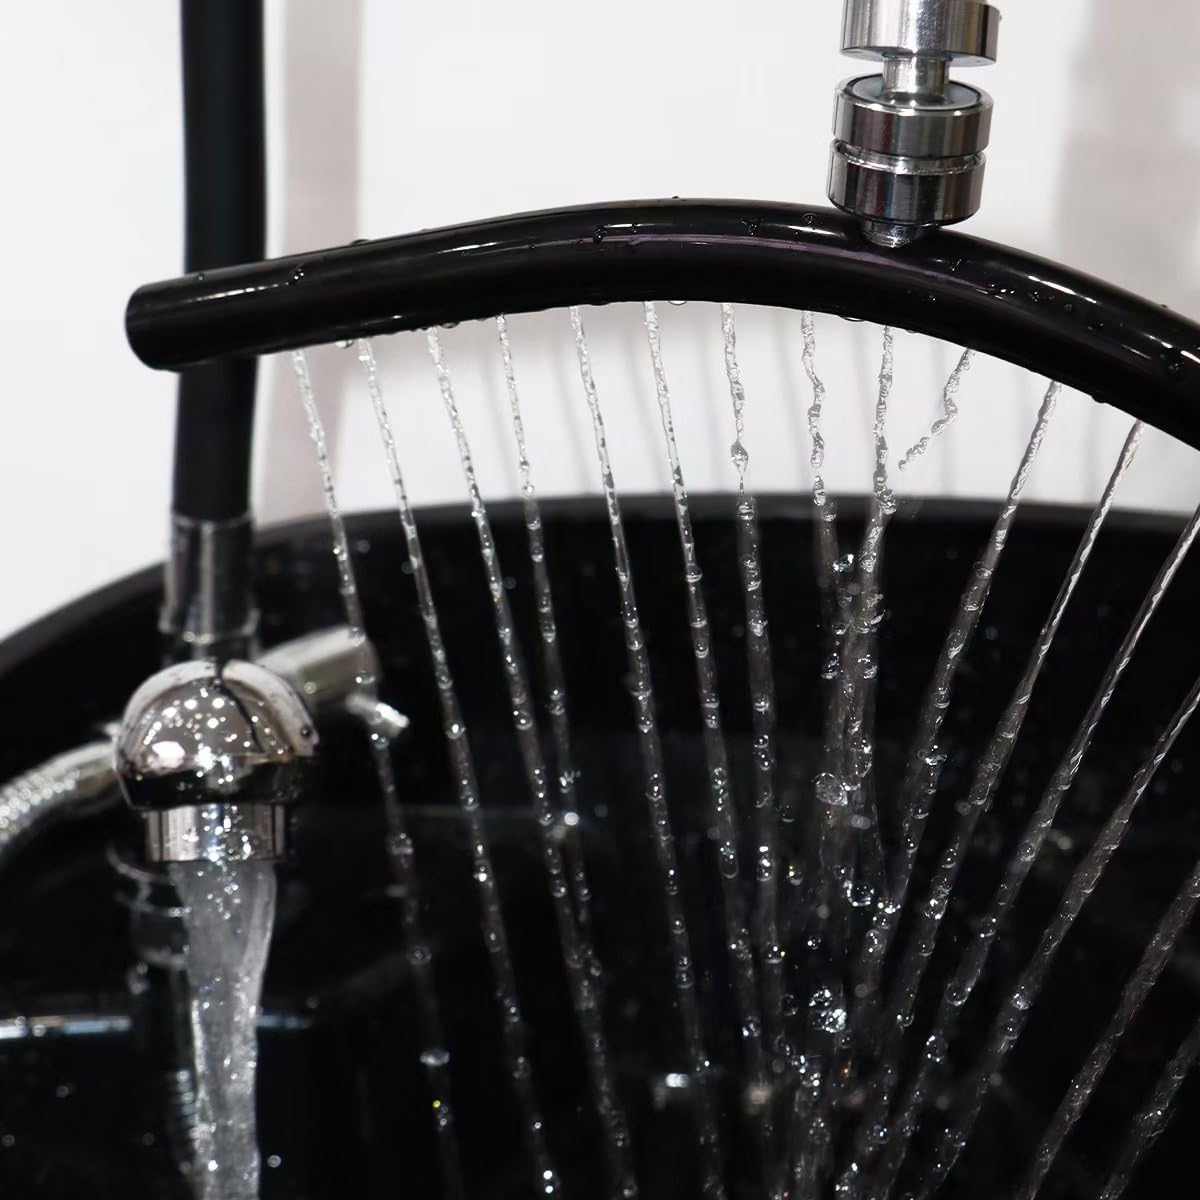
Image 6: Close-up of the waterfall water flow.
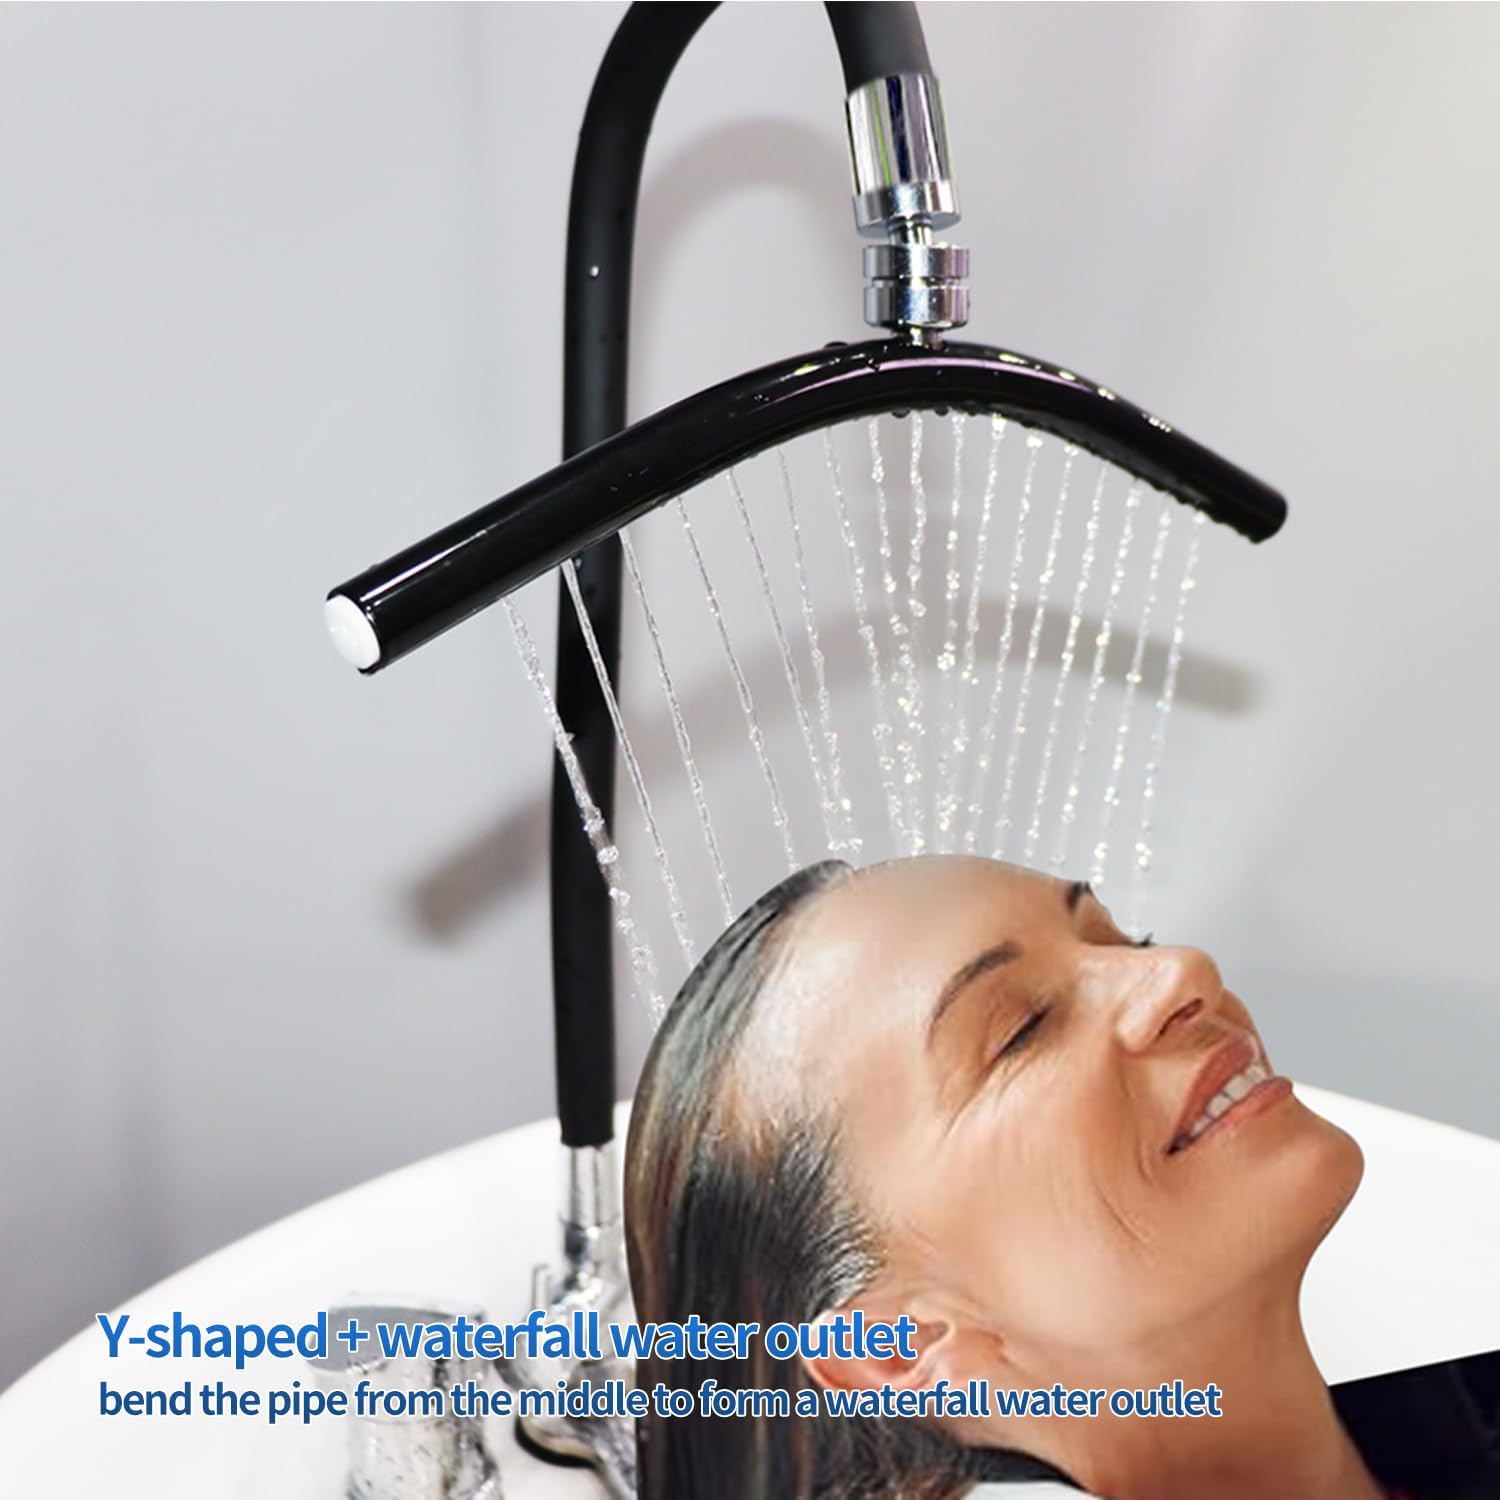
Image 7: Customer enjoying the head spa waterfall.
Maintenance
Regular maintenance ensures the longevity and optimal performance of your Head Spa Waterfall Shower Head:
- Cleaning: Periodically clean the waterfall outlets and hoses to prevent mineral buildup and ensure consistent water flow. Use a soft cloth and mild, non-abrasive cleaner.
- Inspect Connections: Regularly check all hose connections and tightening screws for any signs of loosening or wear. Tighten as necessary.
- Water Pump Care: If your model includes a water pump, ensure it is kept clean and free from debris. Refer to the pump's specific instructions for maintenance.
Troubleshooting
If you encounter issues, try the following solutions:
- Weak Water Flow: Check if the water pump is fully submerged and the basin has sufficient water. Inspect hoses for kinks or blockages. Clean the waterfall outlets for mineral buildup.
- Leaks: Ensure all connections are tightly secured. Check for damaged washers and replace if necessary.
- No Water Flow (with pump): Verify the power adapter is correctly plugged in and the switch controller is turned on. Ensure the water pump is functioning.
Specifications
| Product Dimensions | 0.78 x 0.78 x 23.6 inches |
| Item Weight | 2.2 Pounds (1 Kilogram) |
| Model Number | B07 |
| Material | Plastic |
| Manufacturer | YOYO PLUS |
Warranty and Support
For warranty information and customer support, please refer to the documentation provided at the time of purchase or contact the seller directly. Protection plans may be available for purchase separately.


