1. Introduction
The Daytech Tuya Intelligent Emergency Button is designed to provide quick assistance for individuals who may need help, such as the elderly, disabled, or pregnant individuals. This device allows users to send distress signals to designated contacts via a mobile application, ensuring help can be summoned promptly, regardless of location, as long as the device and smartphone are connected to WiFi.
This manual provides detailed instructions for setting up, operating, and maintaining your emergency button to ensure reliable performance.
2. Safety Information
- Water Resistance: The emergency button is designed to be water-resistant, but it is not fully waterproof. Avoid prolonged submersion in water.
- Charging: Use only the provided USB-C cable and a compatible 5V USB power adapter for charging. Do not use damaged cables or chargers.
- Placement: Ensure the device is within range of a 2.4GHz WiFi network for optimal performance.
- Battery: The device contains a Lithium-ion battery. Do not attempt to replace the battery yourself. Dispose of the device according to local regulations.
- Children: Keep the device out of reach of small children to prevent choking hazards from small parts.
3. Package Contents
Please check the package for the following items:
- Daytech Tuya Intelligent Emergency Button (Model TY-BT010)
- USB-C Charging Cable
- Lanyard (for wearing around the neck)
- Adhesive Pad (for fixed mounting)
- User Manual (this document)
4. Product Overview
The Daytech Emergency Button is a compact, portable device designed for ease of use in emergency situations. It features a prominent call button and integrates with the Tuya Smart Life application for remote monitoring and alerts.

Image 4.1: Overview of the Daytech Emergency Button, illustrating its core functionalities: USB charging, WiFi connectivity, remote app monitoring, and alert sharing.
Key Features:
- Emergency Call: Single press to send an immediate alert.
- Remote Reception: Alerts are received on smartphones anywhere with internet connectivity.
- Sharing Function: Alerts can be shared with multiple family members or caregivers.
- USB Charging: Convenient and rechargeable battery with long standby time.
- App Monitoring: Real-time battery level display and device management via the Tuya app.
- Expandable: Supports connection of multiple buttons to a single mobile phone.
5. Setup Guide
5.1. Charging the Device
Before initial use, fully charge the emergency button. Connect the provided USB-C cable to the charging port on the side of the device and plug the other end into a USB power adapter (not included).

Image 5.1: The emergency button connected to a USB-C charging cable.
5.2. App Installation
The Daytech Emergency Button operates with the Tuya Smart or Smart Life application. Download one of these apps from your smartphone's app store (Google Play Store for Android or Apple App Store for iOS).
- Search for "Tuya Smart" or "Smart Life" in your app store.
- Download and install the application.
- Register for a new account or log in if you already have one.
5.3. Device Pairing
To connect the emergency button to your WiFi network and the app:
- Ensure your smartphone is connected to a 2.4GHz WiFi network. The device does not support 5GHz WiFi.
- Open the Tuya Smart or Smart Life app.
- Tap the "+" icon in the top right corner to add a device.
- Select "Security & Video Surveillance" > "Emergency Button" or search for the device type.
- Follow the on-screen instructions to put the device into pairing mode (usually involves pressing and holding the button until an indicator light flashes).
- Confirm your WiFi network and enter the password in the app.
- Wait for the device to connect. Once connected, the indicator light will stop flashing and remain solid.
5.4. Configuring Alerts and Sharing
After pairing, configure who receives the emergency alerts:
- In the app, select your newly added emergency button.
- Navigate to the settings or "Share Device" option.
- Add family members or caregivers by entering their Tuya app account details. They will receive alert notifications when the button is pressed.
- Ensure all designated recipients have the Tuya app installed and notifications enabled on their smartphones.

Image 5.2: Multiple individuals receiving emergency alerts on their smartphones.
6. Operating Instructions
6.1. Initiating an Emergency Call
In case of an emergency, simply press the large red "CALL" button on the device. The button will illuminate with a green LED to indicate that the signal has been sent successfully.

Image 6.1: Emergency scenario with an alert being sent to a smartphone.
6.2. Receiving Alerts
When the emergency button is pressed, all configured smartphones will receive an immediate alert notification. This notification will appear on the phone's screen, even if the recipient is in a different location, provided their phone has an internet connection.
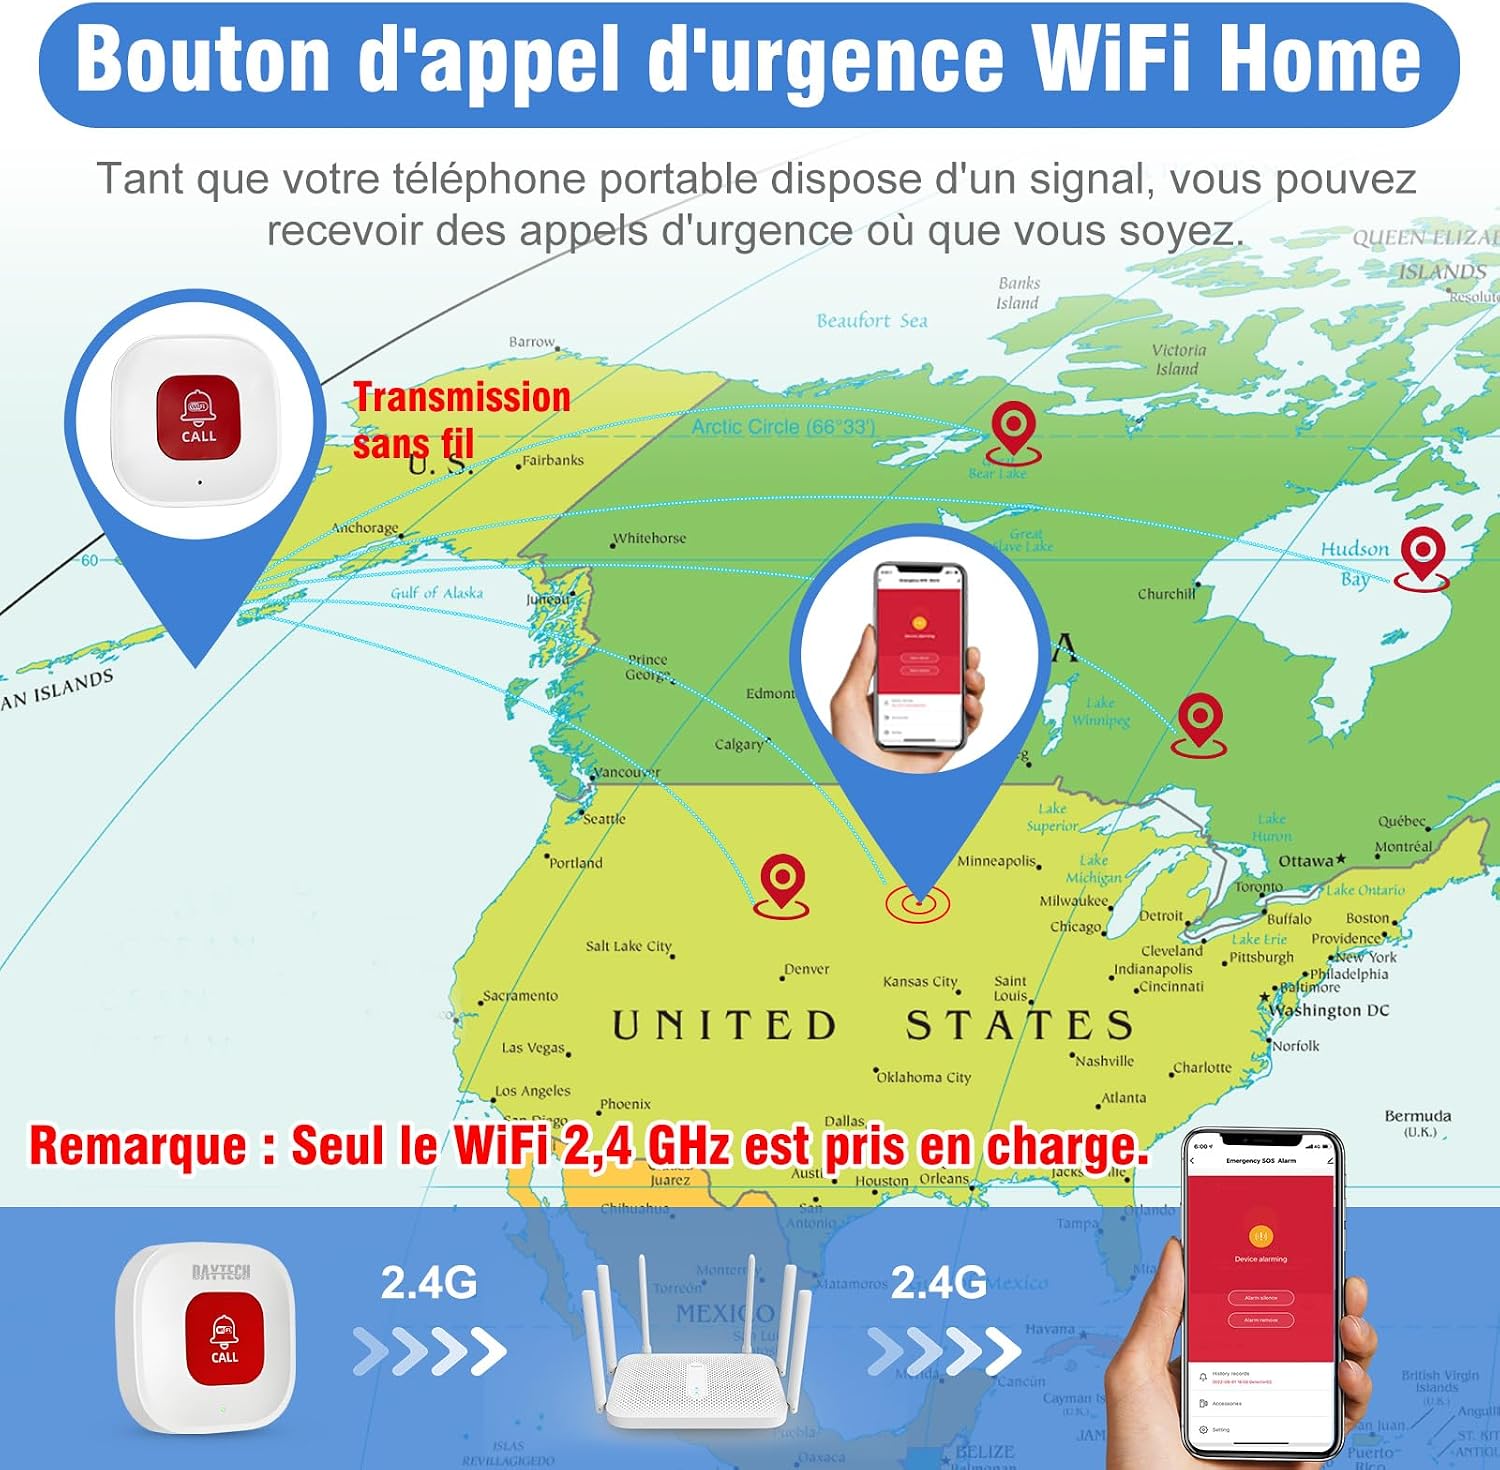
Image 6.2: Remote alert reception capability.
6.3. Battery Monitoring
The Tuya app allows you to monitor the battery level of your emergency button in real-time. The app will also send reminders when the battery is low, ensuring the device is always ready for use.

Image 6.3: Real-time battery status display in the Tuya app.
7. Maintenance
- Cleaning: Wipe the device with a soft, dry cloth. Do not use abrasive cleaners or solvents.
- Charging: Recharge the device when the app indicates a low battery level. Regular charging ensures the device is always operational.
- Storage: Store the device in a cool, dry place when not in use for extended periods.
- Firmware Updates: Periodically check the Tuya app for any available firmware updates for the device to ensure optimal performance and security.
8. Troubleshooting
| Problem | Possible Cause | Solution |
|---|---|---|
| No alert received on smartphone. | Device not connected to WiFi; smartphone not connected to internet; app notifications disabled; low battery. | Check device WiFi connection; ensure smartphone has internet; enable app notifications; check battery level in app and recharge. |
| Device fails to pair with app. | Incorrect WiFi password; 5GHz WiFi network; device not in pairing mode; weak WiFi signal. | Verify WiFi password; ensure connection to 2.4GHz WiFi; re-enter pairing mode; move device closer to router. |
| Green LED does not light up after pressing. | Device not powered on; critically low battery; device malfunction. | Ensure device is charged; recharge the device; if problem persists, contact support. |
| Battery drains quickly. | Frequent use; old battery. | Reduce unnecessary presses; ensure full charge cycles; battery life naturally degrades over time. |
9. Specifications
| Feature | Detail |
|---|---|
| Model Number | TY-BT010 |
| Dimensions (L x W x H) | 3.5 x 2 x 6 cm (1.38 x 0.79 x 2.36 inches) |
| Weight | 73 grams (2.57 ounces) |
| Power Source | Battery Powered (Lithium-ion, Alkaline) |
| Control Method | Application (Tuya Smart / Smart Life) |
| Sensor Technology | Contact Sensor |
| Fixation Type | Table Mount, Wearable (with lanyard) |
| Connectivity | WiFi (2.4GHz only) |
| Compatible Devices | Smartphone |
| Components Included | Emergency Button, USB-C Cable |
10. Warranty Information
This Daytech product is covered by a manufacturer's warranty. Please refer to the warranty card included in your original packaging or contact the retailer for specific warranty terms and conditions. Keep your purchase receipt as proof of purchase for warranty claims.
11. Support
For technical assistance, troubleshooting beyond this manual, or warranty inquiries, please contact Daytech customer support through the following channels:
- Manufacturer Website: Visit the official Daytech website for support resources and contact information.
- Retailer Support: Contact the retailer from whom you purchased the product.
- Tuya App Support: The Tuya Smart or Smart Life app may offer in-app support options for connected devices.
Please have your product model number (TY-BT010) and purchase details ready when contacting support.