
Introduction
The Rolgno Digital Alarm Clock (Model YGH6220) is designed to provide a clear and reliable time display with convenient alarm functions. This manual will guide you through the setup, operation, and maintenance of your new alarm clock, ensuring you can utilize all its features effectively.
Product Overview
The Rolgno Digital Alarm Clock features a sleek, curved design with large, blue LED digits for easy readability. It includes a large snooze button, adjustable display brightness, multiple alarm tones, and volume levels. Its compact size makes it suitable for various settings.

Image: The Rolgno Digital Alarm Clock displaying the time 20:36 with bright blue LED digits.

Image: Diagram illustrating the dimensions of the Rolgno Digital Alarm Clock, showing a width of 15cm and a height of 7.9cm.
Setup
The Rolgno Digital Alarm Clock operates via a power cable. A USB cable is included, but a compatible power adapter is not. For initial setup, connect the USB cable to a power adapter and plug it into a power outlet. The clock includes a built-in CR2032 battery for memory backup, which preserves time and alarm settings during power outages. During a power outage, the display will not be active, and the alarm will not sound, but settings will be retained.
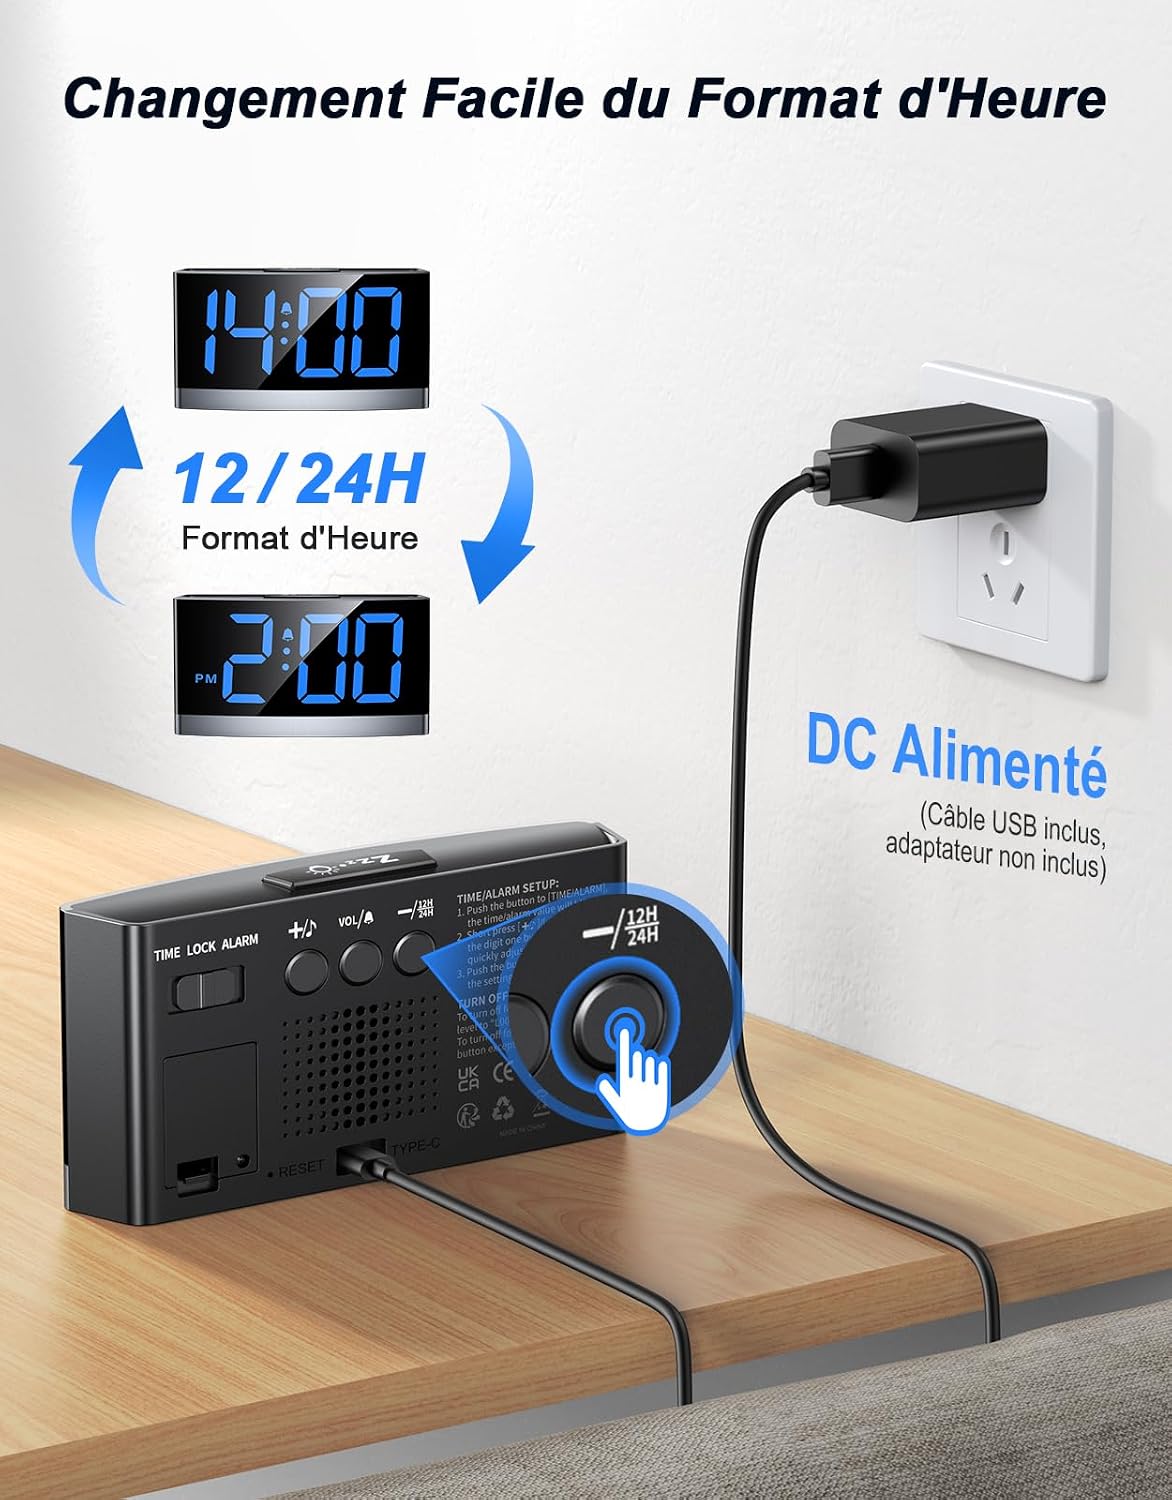
Image: The back of the alarm clock showing the DC power input and a switch for 12/24H format, connected to a wall adapter.
Operating Instructions
Time Setting
- In normal operating mode, locate the switch on the back of the clock and slide it to the [TIME] position.
- Use the [+] or [-] buttons to adjust the digits. Press briefly to change digits one by one, or press and hold for rapid adjustment.
- Adjust the minutes first, then the hours will adjust accordingly.
- After setting the desired time, slide the switch back to the [LOCK] position to save the settings.
Alarm Setting
- In normal operating mode, locate the switch on the back of the clock and slide it to the [ALARM] position.
- Use the [+] or [-] buttons to adjust the alarm hour and minute.
- After setting the desired alarm time, slide the switch back to the [LOCK] position to save the alarm time.
Snooze Function
When the alarm sounds, press the large SNOOZE button located on the top of the clock. This action will temporarily silence the alarm for 9 minutes, allowing for additional rest. Pressing any other button will stop the alarm for the current day, but it will reactivate at the set time on the following day.

Image: A hand reaching to press the large snooze button on top of the alarm clock.
Brightness Adjustment
The display brightness can be adjusted to 5 levels to suit your preference and ambient lighting conditions. In normal mode, press the brightness button (often indicated by a sun icon or similar) to cycle through the available brightness settings, from bright to completely off.

Image: The alarm clock on a bedside table, illustrating the five adjustable brightness levels for the LED display.
Alarm Tone Selection
The clock offers three distinct alarm tones. In normal mode, briefly press the [+] button to cycle through the options: Beep, Music Box, and Toy Soldier March. Each short press selects a tone, and the chosen tone will play a 3-second preview. If no further action is taken, the currently playing tone will be automatically set as the final alarm tone.
Volume Adjustment
The alarm volume can be adjusted to 5 levels. In normal mode, briefly press the [VOL] button to cycle through volume levels L05 (loudest) down to L00 (mute). Please note that setting the volume to L00 will cancel the alarm, and the alarm icon will disappear from the display.

Image: The alarm clock with visual indicators for five volume levels and three alarm tone options: a bell, a music box, and birds singing.
12/24 Hour Format
The clock supports both 12-hour (with AM/PM indicator) and 24-hour time formats. A dedicated switch or button on the back of the clock allows you to toggle between these modes to match your personal preference.
Maintenance
To ensure the longevity and proper functioning of your Rolgno Digital Alarm Clock, follow these maintenance guidelines:
- Cleaning: Wipe the surface of the clock with a soft, dry cloth. Avoid using abrasive cleaners, solvents, or chemical sprays, as these can damage the finish and electronic components.
- Environment: Keep the clock in a dry environment. Protect it from direct sunlight, extreme temperatures, and high humidity.
- Power: Always use the provided USB cable for power. Ensure the power adapter is compatible and provides stable power.
Troubleshooting
| Issue | Possible Cause | Solution |
|---|---|---|
| Display is blank | No power or power interruption. | Check if the USB cable is securely connected to a power source. If power was interrupted, the internal battery saves settings but does not power the display. |
| Alarm not sounding | Alarm is not activated or volume is set to mute (L00). | Ensure the alarm is set and activated. Check the volume level and adjust it above L00. |
| Time is incorrect | Time was not set correctly or reset after power loss. | Re-enter time setting mode and adjust as per the 'Time Setting' instructions. |
| Buttons unresponsive | Temporary software glitch. | Disconnect the power cable for a few seconds, then reconnect to perform a soft reset of the device. |
Specifications
- Brand: Rolgno
- Model Number: YGH6220
- Color: Black
- Product Dimensions (L x W x H): 7.9 x 3.81 x 15 cm
- Item Weight: 240 grams
- Material: Plastic
- Power Source: Electric Cable (USB cable included, adapter not included)
- Battery: 1 CR2032 (included, for memory backup)
- Display Type: Digital LED
- Style: Modern
Warranty and Support
For warranty information, product registration, or customer support, please refer to the documentation included with your product packaging. You may also visit the official Rolgno website or contact their customer service department directly. Please retain your purchase receipt as proof of purchase for any warranty claims.