1. Introduction
This manual provides essential information for the safe installation, operation, and maintenance of your EliteBloom Electric Hoist Crane. Please read this manual thoroughly before using the hoist to ensure proper function and to prevent injury or damage. Keep this manual for future reference.
The EliteBloom Electric Hoist Crane is designed for lifting goods within specified weight limits and lifting heights. It features a reliable and durable structure for stable lifting performance.
2. Safety Instructions
WARNING: Failure to follow these safety instructions may result in serious injury, death, or property damage.
- Always wear appropriate personal protective equipment (PPE) such as safety gloves and eye protection.
- Ensure the hoist is securely mounted to a structure capable of supporting the hoist's weight plus the maximum rated load.
- Do not exceed the rated load capacity of the hoist. Refer to the specifications table for your specific model.
- Inspect the hoist, wire rope, hooks, and controls for damage before each use. Do not operate if any damage is found.
- Keep hands and body clear of moving parts and suspended loads.
- Do not use the hoist to lift people or animals.
- Ensure the load is balanced and securely attached to the hook before lifting.
- Avoid sudden starts or stops when lifting or lowering loads. Operate controls smoothly.
- Do not leave a suspended load unattended.
- Disconnect power before performing any maintenance or adjustments.
- Operate the hoist only in well-lit areas.
- Keep children and unauthorized personnel away from the operating area.
3. Product Components
The EliteBloom Electric Hoist Crane consists of several key components designed for efficient and safe lifting operations.
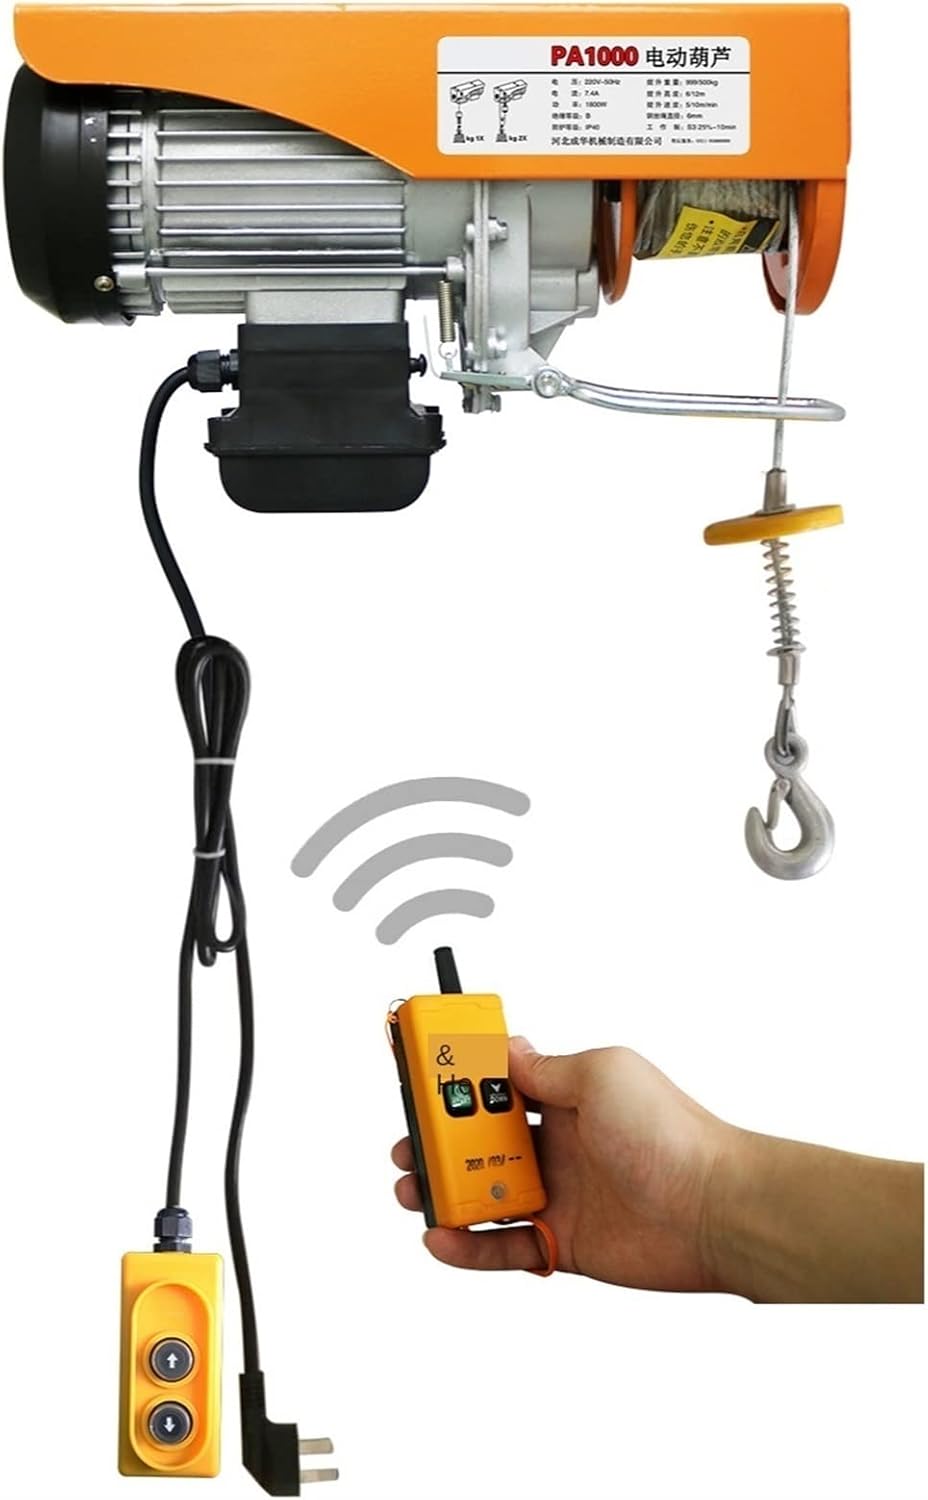
Main Hoist Unit: Contains the motor, gearbox, wire rope drum, and housing.

Motor: The electric motor provides the power for lifting. It is designed for durability and efficient operation.

Wire Rope: High-strength steel wire rope for lifting loads.
Hook Assembly: Includes the main hook and safety latch. For double hanging mode, a pulley block is included.
Control Units: The hoist typically comes with both a wired control pendant and a wireless remote control for operational flexibility.
4. Installation and Setup
Proper installation is critical for the safe operation of the hoist. Ensure all mounting hardware is secure and appropriate for the load.
4.1 Mounting the Hoist
- Select a mounting location that is structurally sound and can support the hoist's weight plus the maximum anticipated load.
- Use appropriate bolts, nuts, and washers to securely fasten the hoist to its support structure.
- Ensure the hoist is level and stable after mounting.
4.2 Single Hanger Mode vs. Double Hanging Mode
The hoist can be configured for two lifting modes: single hanger (single line) for faster lifting and lighter loads, or double hanging (double line with pulley block) for heavier loads at half the speed.

- Single Hanger Mode: The wire rope runs directly from the hoist drum to the hook. This configuration provides the maximum lifting speed but half the load capacity compared to double hanging mode.
- Double Hanging Mode: The wire rope passes through a pulley block attached to the load, then back up to a secondary attachment point on the hoist. This configuration doubles the load capacity but halves the lifting speed and effective lifting height.
- Always ensure the pulley block and hook are correctly installed and secured for the chosen mode of operation.
5. Operating Instructions
Familiarize yourself with the controls before operating the hoist with a load.
5.1 Wired Control Pendant
- Connect the wired control pendant to the hoist's control port.
- The pendant typically has 'UP' and 'DOWN' buttons for lifting and lowering, and a 'STOP' button for emergency stops.
- Press and hold the 'UP' button to lift the load. Release to stop.
- Press and hold the 'DOWN' button to lower the load. Release to stop.
- In case of emergency, press the 'STOP' button to immediately halt all hoist movement.
5.2 Wireless Remote Control

- Ensure the remote control has fresh batteries and is paired with the hoist according to specific instructions (if applicable, refer to separate pairing guide).
- The wireless remote typically includes 'START', 'STOP', 'UP', and 'DOWN' buttons.
- Press 'START' to activate the hoist's control system.
- Use 'UP' and 'DOWN' buttons to control lifting and lowering.
- Press 'STOP' for emergency shutdown.
- Maintain a clear line of sight between the remote and the hoist for optimal signal.
5.3 General Operation Tips
- Always perform a test lift with a light load before lifting heavy items.
- Lift loads slowly and steadily. Avoid swinging the load.
- Do not drag loads with the hoist. The hoist is designed for vertical lifting only.
- Ensure the wire rope is not twisted or kinked during operation.
6. Maintenance
Regular maintenance ensures the longevity and safe operation of your hoist.
- Daily Inspection: Check the wire rope for fraying, kinks, or damage. Inspect the hook and safety latch for deformation or wear. Verify that all controls function correctly.
- Monthly Inspection: Check all bolts and fasteners for tightness. Inspect the motor and gearbox for unusual noises or excessive heat during operation.
- Lubrication: Periodically lubricate the wire rope and moving parts as recommended by the manufacturer (refer to specific product documentation if available).
- Cleaning: Keep the hoist clean and free from dust, dirt, and debris.
- Professional Service: For complex repairs or internal component inspection, contact a qualified service technician.
7. Troubleshooting
This section addresses common issues you might encounter with your electric hoist.
- Hoist does not operate:
- Check power supply and connections.
- Ensure emergency stop button is not engaged.
- Verify remote control batteries are charged and paired.
- Check for tripped circuit breakers or blown fuses.
- Hoist operates slowly or with reduced power:
- Ensure the load does not exceed the rated capacity for the current configuration (single vs. double line).
- Check for proper voltage supply.
- Inspect motor for overheating. Allow it to cool down.
- Unusual noises during operation:
- Stop operation immediately.
- Inspect for mechanical obstructions or damage to gears/bearings.
- Contact qualified service personnel.
- Wire rope damage:
- If the wire rope shows signs of fraying, kinking, or severe wear, it must be replaced by a qualified technician. Do not operate with damaged wire rope.
For issues not covered here, or if troubleshooting steps do not resolve the problem, contact EliteBloom customer support.
8. Technical Specifications
The following table outlines the technical specifications for various EliteBloom Electric Hoist Crane models.

| Crane Model | Single/Double Bearing (kg) | Single/Double Lifting Speed (m/min) | Single/Double Lifting Height (m) | Motor Power (kW) | Motor Capacitance (vf) | Motor Net Weight (kg) | Wire Rope Length (m) |
|---|---|---|---|---|---|---|---|
| PA1000 | 500/1000 | 10/5 | 6/12 | 1.80 | 70 | 29.4 | 12-30 |
| PA800 | 400/800 | 10/5 | 6/12 | 1.45 | 50 | 17.8 | 12-30 |
| PA600 | 300/600 | 10/5 | 6/12 | 1.20 | 40 | 16.8 | 12-30 |
| PA500 | 250/500 | 10/5 | 6/12 | 1.05 | 30 | 16.3 | 12-30 |
| PA400 | 200/400 | 10/5 | 6/12 | 0.80 | 30 | 15.8 | 12-30 |
| PA300 | 150/300 | 10/5 | 6/12 | 0.63 | 16 | 16.0 | 12-30 |
| PA200 | 100/200 | 10/5 | 6/12 | 0.51 | 16 | 16.0 | 12-30 |
Note: All specifications are approximate and may vary slightly. For precise measurements or custom requirements, please contact customer service.
9. Warranty and Support
EliteBloom products are manufactured to high-quality standards. For warranty information, technical support, or service inquiries, please refer to the warranty card included with your product or contact EliteBloom customer service directly.
Please have your model number and purchase date available when contacting support.


