1. Safety Information
Please read all instructions carefully before operating the safe. Retain this manual for future reference.
- Do not store the mechanical keys inside the safe. Keep them in a secure, separate location.
- Ensure the safe is securely mounted to prevent unauthorized removal.
- Keep the safe away from excessive moisture or direct sunlight.
- Do not attempt to force the safe open if the electronic lock malfunctions. Use the mechanical key.
- Replace batteries promptly when the low battery indicator appears to avoid lockouts.
2. Package Contents
Verify that all items are present in the package:
- Greenvelly Depository Safe (1)
- Mechanical Keys (2)
- Mounting Hardware (Expansion Screws)
- User Manual (1)
3. Product Overview
The Greenvelly 80LBS Depository Safe is designed for secure storage of cash, documents, and other valuables. It features a convenient drop slot for deposits without opening the main door, an electronic keypad lock, and a mechanical key override.
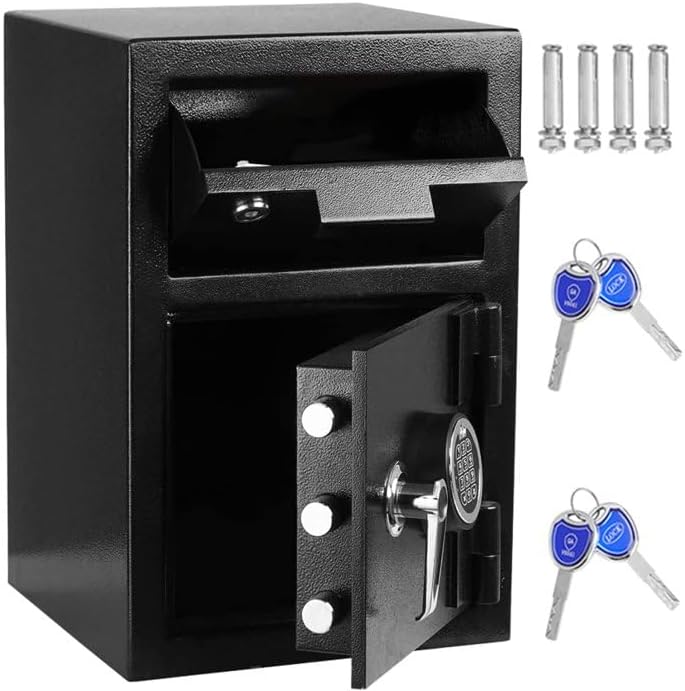
Image 3.1: Front view of the Greenvelly Depository Safe, illustrating the open main compartment, the drop slot, and the included mechanical keys.
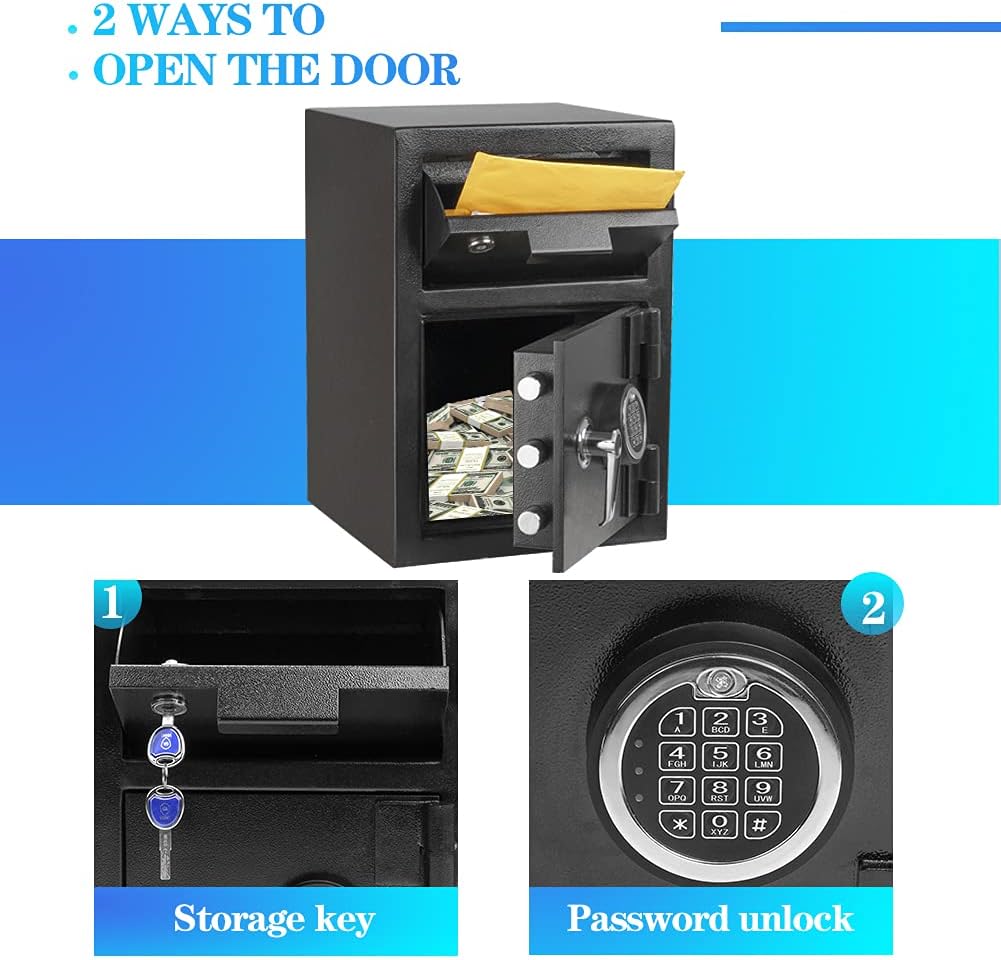
Image 3.2: This image highlights the two primary methods of access: a traditional key for the upper drop slot compartment and an electronic keypad for the main storage area.

Image 3.3: A detailed diagram illustrating the external dimensions of the safe, including height, width, and depth, along with the dimensions of the drop slot opening.

Image 3.4: An exploded view demonstrating the multi-layer construction of the safe's walls, including frosted environmental protection spray, zinc alloy die casting, internal primer, anti-rust galvanized, encrypted steel plate, external primer, and high gloss spray, emphasizing its durability and resistance.

Image 3.5: This image illustrates the safe's dual warning system, which activates an alarm upon detecting violent vibrations or three consecutive incorrect code entries, deterring unauthorized access.
4. Setup and Installation
4.1 Initial Opening
Upon receiving your safe, use one of the provided mechanical keys to open the main door. The keyhole is typically located behind the electronic keypad cover or directly on the lock mechanism. Turn the key clockwise while rotating the handle to open.
4.2 Battery Installation
The electronic lock requires batteries (not included, typically AA or AAA). Locate the battery compartment on the inside of the main door. Insert the batteries according to the polarity markings (+/-). Close the compartment cover securely.
4.3 Mounting the Safe
For enhanced security, it is recommended to mount the safe to a floor or wall. The safe includes pre-drilled holes and mounting hardware.
- Choose a suitable location, ensuring it is a solid surface capable of supporting the safe's weight.
- Position the safe and mark the drilling points through the pre-drilled holes on the back or bottom of the safe.
- Drill pilot holes into the marked locations using an appropriate drill bit for your surface (e.g., masonry bit for concrete).
- Align the safe with the drilled holes and insert the expansion screws.
- Tighten the screws securely to anchor the safe in place.
5. Operating Instructions
5.1 Setting/Changing User PIN (Personal Identification Number)
The safe can store up to 5 user PINs.
- With the door open, press the red reset button located on the inside of the door. The indicator light on the keypad will flash.
- Enter a new 3-8 digit PIN on the keypad.
- Press the 'E' or '#' button to confirm. The indicator light will flash again, confirming the new PIN is set.
5.2 Setting/Changing Master PIN
The master PIN allows overriding user PINs and is typically used for administrative access.
- With the door open, press '00' then the red reset button. The indicator light will flash.
- Enter a new 3-8 digit master PIN.
- Press the 'E' or '#' button to confirm. The indicator light will flash again.
5.3 Opening with Electronic Lock
- Enter your user PIN or master PIN on the keypad.
- Press the 'E' or '#' button. A green light will illuminate, and you will hear a beep.
- Within 5 seconds, turn the handle clockwise to open the door.
5.4 Opening with Mechanical Key (Emergency Override)
In case of battery failure or forgotten PIN, the mechanical key can be used.
- Remove the cover plate over the keyhole (if present, usually in the center of the keypad).
- Insert the mechanical key into the keyhole.
- Turn the key clockwise while simultaneously turning the handle to open the door.
5.5 Using the Drop Slot
The top compartment features a drop slot for depositing items without opening the main safe door.
- Gently pull the delivery slot forward.
- Place items (e.g., cash, envelopes) into the slot.
- Push the delivery slot back into its closed position. Items will drop into the main safe compartment.
5.6 Alarm Function
The safe is equipped with an alarm system that activates under specific conditions:
- Incorrect Entries: If an incorrect PIN is entered three consecutive times, the alarm will sound.
- Violent Vibration: If the safe detects violent movement or tampering, the alarm will activate.
To silence the alarm, enter a correct PIN or use the mechanical key to open the safe.
6. Maintenance
6.1 Battery Replacement
When the low battery indicator light illuminates or the keypad becomes unresponsive, replace the batteries immediately. Use the mechanical key to open the safe if the batteries are completely depleted. Always use new, high-quality batteries of the specified type.
6.2 Cleaning
Clean the exterior of the safe with a soft, damp cloth. Avoid using abrasive cleaners or solvents, as these can damage the finish. Ensure no moisture enters the electronic keypad or lock mechanism.
7. Troubleshooting
- Safe will not open with PIN:
- Ensure batteries are not depleted. Replace if necessary.
- Verify the PIN entered is correct. Try the master PIN if you have forgotten the user PIN.
- If the keypad is unresponsive, use the mechanical key. - Keypad is unresponsive:
- Check battery installation and replace batteries.
- Ensure no debris is obstructing the buttons.
- Use the mechanical key for access. - Alarm sounds unexpectedly:
- The alarm may have been triggered by incorrect PIN entries or physical impact. Enter a correct PIN or use the mechanical key to disarm. - Door does not close properly:
- Check for any obstructions preventing the door from fully closing.
- Ensure the locking bolts are fully retracted before attempting to close.
8. Specifications
| Feature | Specification |
|---|---|
| Brand | Greenvelly |
| Model Number | BXGE-Black |
| Product Dimensions | 14"D x 14"W x 21"H |
| Capacity | 2.6 Cubic Feet |
| Lock Type | Electronic Combination Lock, Key |
| Material | Metal |
| Special Feature | Alarm System, Anti-Theft |
| Mounting Type | Floor Mount |
| Weight | Approximately 80 lbs |
| Water Resistance Level | Water Resistant |
9. Warranty and Support
For warranty information or technical support, please contact Greenvelly customer service. Refer to your purchase documentation or the Greenvelly official website for contact details. Please have your model number (BXGE-Black) and purchase date available when contacting support.


