1. Introduction
Thank you for choosing the Generic Premium 12800 4K Satellite Receiver. This device is designed to provide high-quality satellite television reception with advanced features, including 4K resolution support, a powerful Ali-2661 processor, and versatile connectivity options. This manual will guide you through the setup, operation, and maintenance of your new receiver.
2. Package Contents
Please check the box for the following items:
- Premium 12800 4K Satellite Receiver
- Remote Control
- USB WiFi Dongle
- Power Adapter (not explicitly mentioned but implied for operation)
- User Manual (this document)
3. Product Overview
The Premium 12800 4K Satellite Receiver features a compact design with essential ports for connectivity.
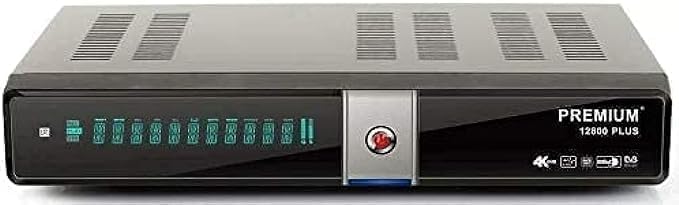
Figure 3.1: Premium 12800 4K Satellite Receiver and its retail packaging.

Figure 3.2: Front and side view of the receiver, highlighting various ports and indicators.
Front Panel
- Power Indicator: Shows the device's power status.
- Display: Channel number or time display.
- USB Port: For connecting USB devices.
Rear Panel
- LNB IN: Connects to your satellite dish.
- HDMI Output: Connects to your TV for video and audio.
- Ethernet Port: For wired network connection.
- USB Port: For additional USB devices.
- SPDIF/Coaxial: Digital audio output.
- Power Input: Connects to the power adapter.
4. Setup Guide
Follow these steps to set up your satellite receiver:
- Connect to TV: Use an HDMI cable (not included) to connect the receiver's HDMI Output port to an HDMI Input port on your television.
- Connect to Satellite Dish: Connect the coaxial cable from your satellite dish LNB to the LNB IN port on the receiver.
- Connect to Network (Optional):
- Wi-Fi: Insert the provided USB WiFi Dongle into one of the receiver's USB ports. You will configure the Wi-Fi connection in the settings menu after powering on.
- Ethernet: Connect an Ethernet cable (not included) from your router to the receiver's Ethernet port.
- Connect Power: Plug the power adapter into the receiver's Power Input port, then plug the adapter into a wall outlet.
- Power On: Turn on your television and select the correct HDMI input source. The receiver should power on automatically or can be turned on using the remote control.
- Initial Setup Wizard: Follow the on-screen instructions for initial setup, which typically includes language selection, time zone, and satellite configuration.
5. Operating Instructions
Basic Navigation
Use the provided remote control to navigate the receiver's menus and control playback.
- Power Button: Turns the receiver on/off or into standby mode.
- CH+/CH-: Changes channels.
- VOL+/VOL-: Adjusts volume.
- MENU: Accesses the main menu.
- EXIT: Exits the current menu or screen.
- OK: Confirms selections.
- Arrow Buttons: Navigates through menus and options.
Channel Scan
After initial setup, you will need to scan for channels.
- Press the MENU button on your remote.
- Navigate to "Installation" or "Channel Search" and press OK.
- Select your satellite and choose "Automatic Scan" or "Blind Scan" for a comprehensive search.
- Wait for the scan to complete. This may take several minutes.
- Save the found channels when prompted.
Using USB Ports
The receiver features two USB ports that support various USB devices, including 2.5" and 3.5" external hard drives. These ports can be used for:
- Media Playback: Play videos, music, and view photos from a connected USB storage device.
- PVR (Personal Video Recorder): Record live TV programs to an external USB hard drive.
- Software Updates: Update the receiver's firmware via USB.
Network Features
With an internet connection (via Wi-Fi dongle or Ethernet), the receiver can access various online features. The device is designed to support services such as Forever Pro Server and Apollo IBTV Apollo Server, with included access periods of 15 months and 12 months respectively. Refer to the on-screen menu for configuration of these services.
6. Maintenance
Cleaning
To clean the receiver, disconnect it from the power supply. Use a soft, dry cloth to wipe the exterior. Do not use liquid cleaners or abrasive materials.
Software Updates
Periodically check for software updates to ensure optimal performance and access to the latest features. Updates can typically be performed via USB or over the internet (if available). Refer to the system settings menu for update options.
7. Troubleshooting
| Problem | Possible Cause / Solution |
|---|---|
| No picture or sound |
|
| "No Signal" message |
|
| Remote control not working |
|
| Network connection issues |
|
8. Specifications
| Feature | Detail |
|---|---|
| Model | Premium 12800 |
| Processor | Ali-2661 New Dual-Core Processor 1GHz (4000 DMIPS) |
| RAM | 512MB High Speed Memory |
| Flash Memory | 16MB |
| Video Resolution Support | Up to 4K (2160 * 3840) at 60fps. Supports 576i/p, 720p, 1080i/p, 1080p, 2160p. |
| Video Codecs | VP9, H.265 (HEVC) with 10-bit depth |
| HDR Support | HDR, HLG, WCG |
| Tuner Type | DVB-S, DVB-S2, DVB-S2X |
| Channel Storage | Up to 20,000 TV and Radio channels |
| Connectivity | HDMI, Ethernet, Wi-Fi (via USB dongle), 2x USB ports, SPDIF/Coaxial |
| USB Support | Supports 2.5" and 3.5" external hard drives, WiFi Dongle 7601 and 5730 |
| Audio Output Mode | Stereo (and potentially others) |
| Supported Audio Format | Dolby Digital, DTS |
| Color | Black |
| Item Weight | 975 Grams |
| Package Dimensions | 29 x 27.5 x 6 cm |
| Manufacturer | Premium Sat |
9. Warranty and Support
For information regarding warranty coverage and technical support, please refer to the documentation provided with your purchase or contact your retailer. Specific warranty terms may vary by region and seller.


