
Introduction
The Samshow 3-Channel Digital Kitchen Timer, Model 382, is designed to assist with precise timing for various activities such as cooking, baking, exercise, homework, and meetings. This device features three independent timers that can operate simultaneously, a large display for easy readability, and an adjustable alarm volume. Its versatile design allows for multiple placement options.
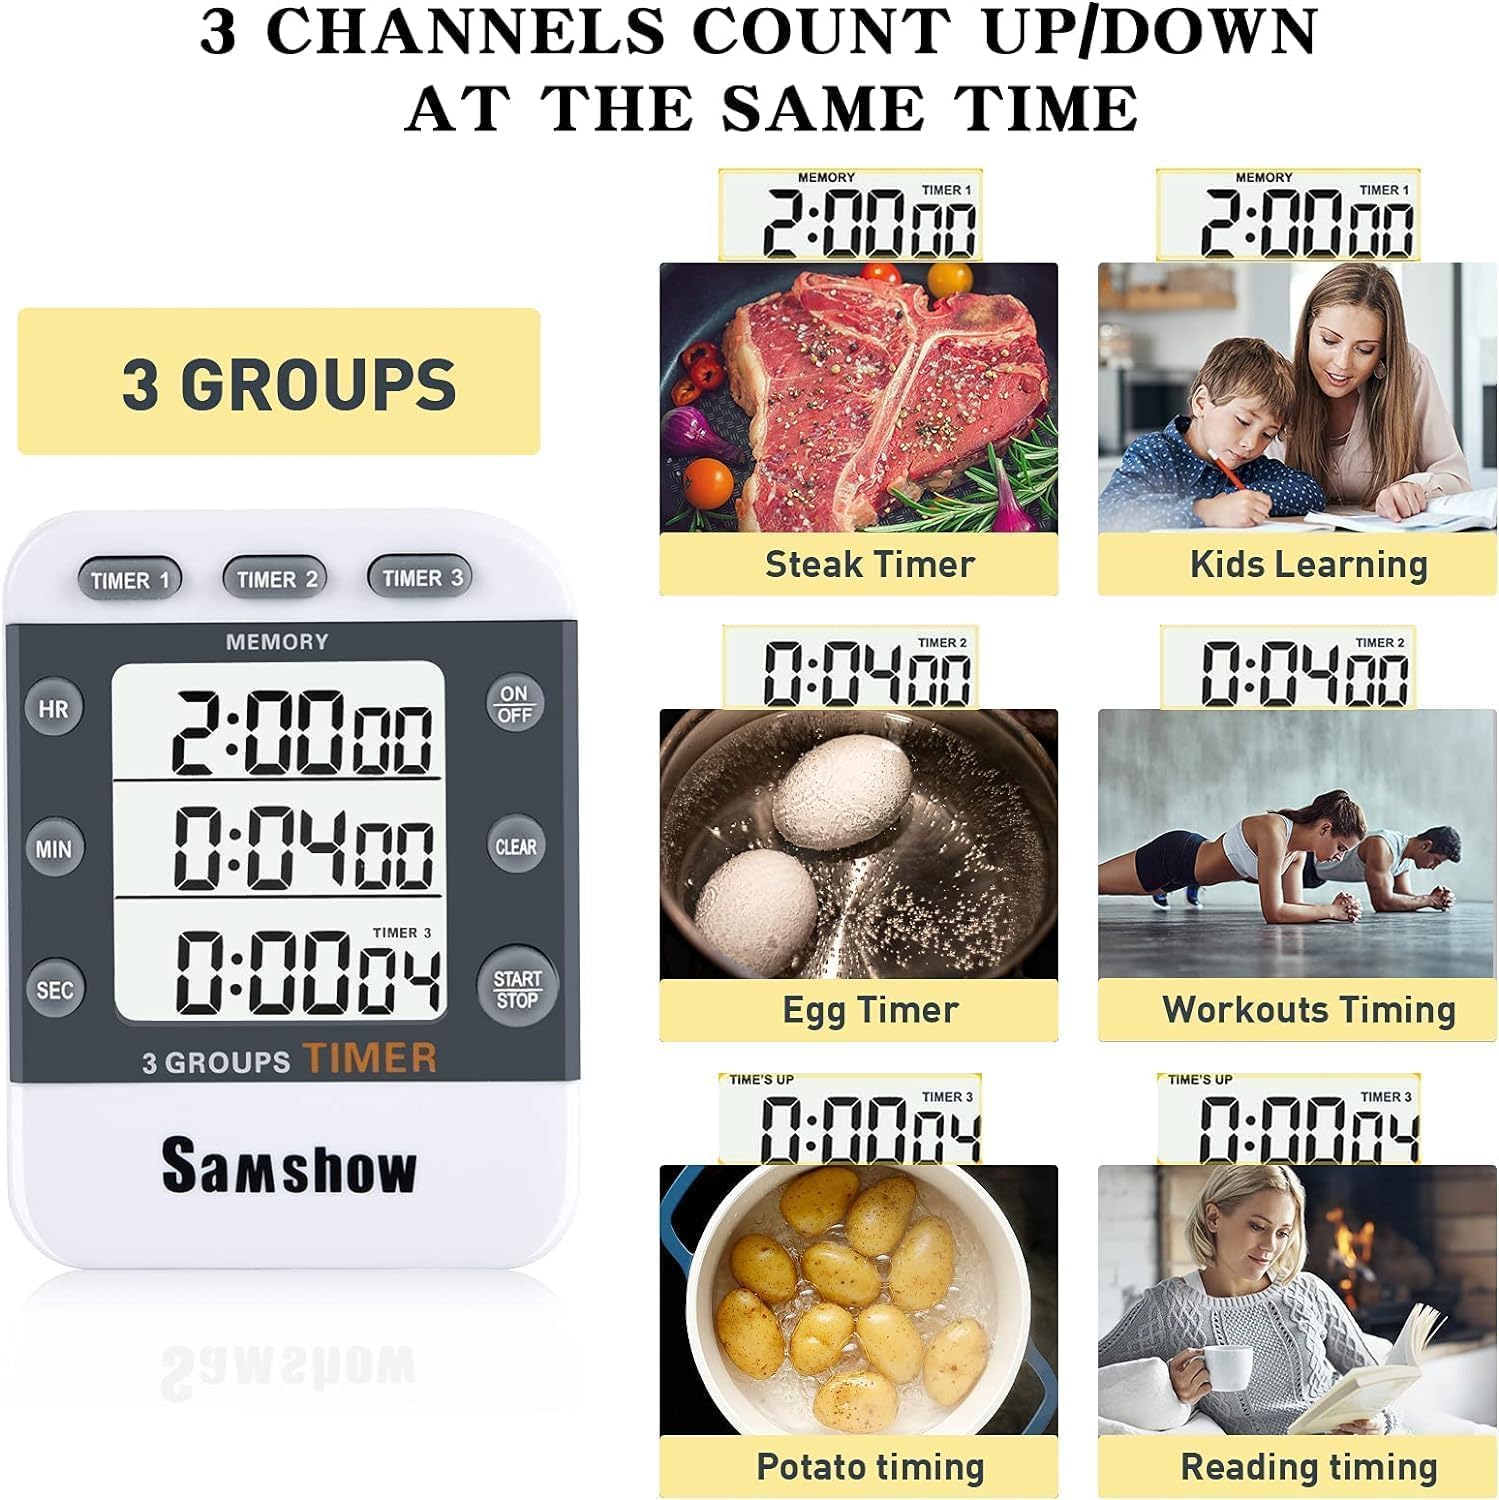
Image: The Samshow 3-Channel Digital Kitchen Timer displaying its capability to manage three separate timing tasks concurrently, suitable for various household and personal activities.
Product Features
- 3 Independent Channels: Allows simultaneous countdown or count-up for three different tasks (Timer 1, Timer 2, Timer 3).
- Wide Timing Range: Each timer can be set from 00:00:00 up to 99 hours, 59 minutes, and 59 seconds.
- Large LCD Display: Provides clear and easy-to-read time information.
- Memory Function: Recalls the last set countdown time for quick reuse.
- Adjustable Alarm Volume: Features a switch on the back to select between high or low alarm sound levels.
- Versatile Placement: Equipped with a strong magnetic back, a pull-out stand, and a hanging hole for flexible mounting options.
- Power Saving: Includes an ON/OFF button to conserve battery life.

Image: Rear view of the timer highlighting the hanging hole, volume adjustment switch, dual magnets for secure attachment, and the battery compartment.
Setup
Battery Installation
- Locate the battery compartment on the back of the timer.
- Slide open the battery door.
- Insert two AAA batteries (included) according to the polarity markings (+/-).
- Close the battery door securely.
Power On/Off
Press the ON/OFF button located on the front panel to turn the timer on or off. Turning the timer off helps conserve battery life when not in use.
Operating Instructions
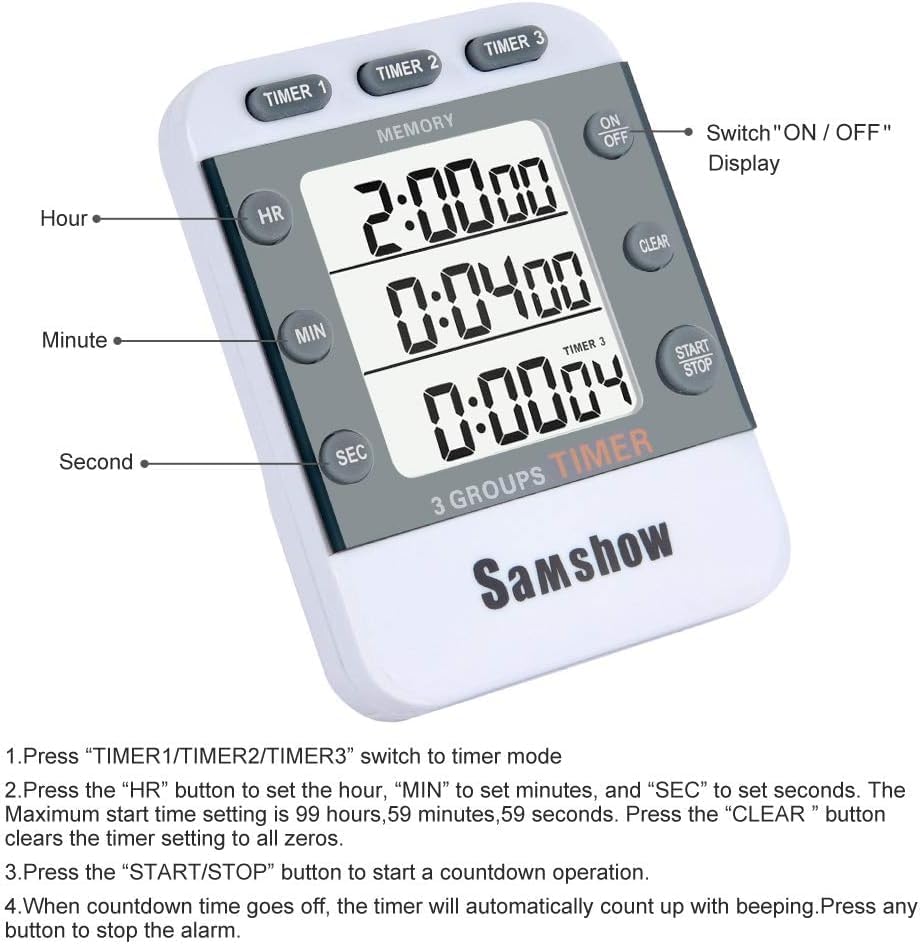
Image: Front view of the timer with button labels and display segments for hours, minutes, and seconds for each of the three timers.
Setting a Countdown Timer
- Press the TIMER 1, TIMER 2, or TIMER 3 button to select the desired timer channel. The selected timer's display will flash.
- Press the HR button to set the hours.
- Press the MIN button to set the minutes.
- Press the SEC button to set the seconds.
- To clear a set time, press the CLEAR button while the timer is selected and not running.
Starting and Stopping a Timer
- After setting the time for one or more timers, press the START/STOP button to begin the countdown for all set timers simultaneously.
- To pause a running timer, press the START/STOP button again. Press it once more to resume.
- When a countdown reaches zero, the alarm will sound, and the timer will automatically begin counting up (stopwatch mode) to show elapsed time since the alarm.
- To stop the alarm and clear the timer, press any button.
Memory Function
The timer automatically saves the last set countdown time for each channel. When you turn the timer off and on, or after an alarm, the last set time will reappear, allowing for quick reuse without re-entering the values.
Adjusting Alarm Volume
On the back of the timer, locate the volume switch. Slide it to select between a high or low alarm sound level according to your preference.
Count-Up Function (Stopwatch)
To use a timer as a stopwatch (count-up), select the desired timer channel and ensure its time is set to 00:00:00. Press the START/STOP button. The timer will begin counting upwards from zero.
Placement Options
The Samshow Digital Kitchen Timer offers multiple ways to be positioned for convenience:
- Magnetic Back: The strong magnets on the back allow the timer to be securely attached to metallic surfaces like refrigerators or oven doors.
- Pull-out Stand: A retractable stand enables the timer to be placed upright on a countertop or table.
- Hanging Hole: Use the integrated hanging hole to suspend the timer from a hook.
- Clip: A clip on the back allows for attachment to clothing or other thin edges.
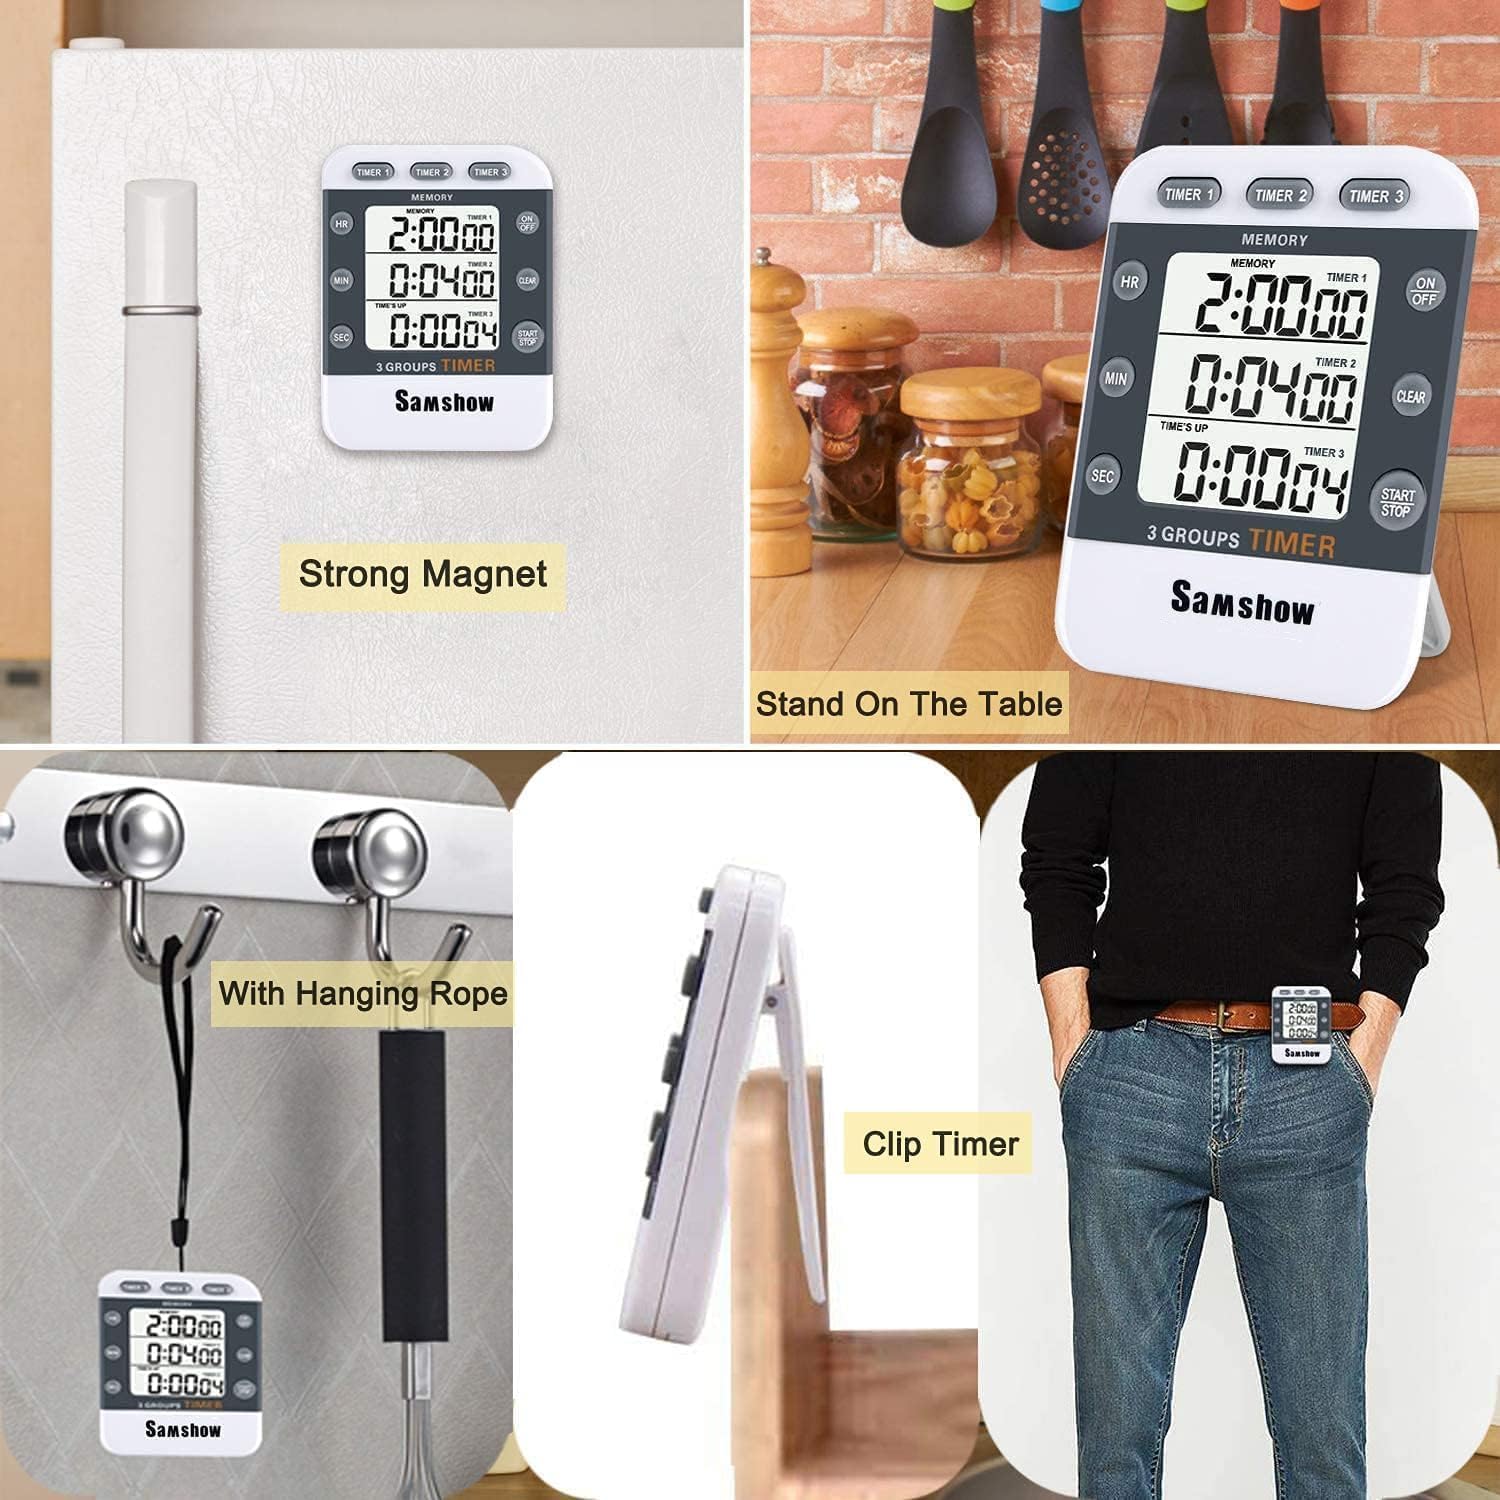
Image: Demonstrates the timer's versatile placement options: magnetic attachment to a refrigerator, standing on a surface, hanging via a rope, and clipped for portability.
Maintenance
Cleaning
Wipe the timer with a soft, damp cloth. Do not use abrasive cleaners or immerse the device in water.
Battery Replacement
When the display dims or the timer functions become erratic, it is time to replace the batteries. Follow the battery installation steps in the Setup section.
Troubleshooting
| Problem | Possible Cause | Solution |
|---|---|---|
| Timer does not turn on. | Batteries are dead or incorrectly installed. | Check battery polarity or replace with new AAA batteries. Ensure the ON/OFF button is pressed. |
| Display is dim or flickering. | Low battery power. | Replace batteries. |
| Alarm is too quiet or too loud. | Volume switch is set incorrectly. | Adjust the volume switch on the back of the timer to the desired level (High/Low). |
| Timer does not start/stop. | START/STOP button not pressed firmly or timer is in an incorrect mode. | Ensure the desired timer channel is selected and press the START/STOP button firmly. |
Specifications
- Brand: Samshow
- Model Number: 382
- Color: White
- Material: Plastic
- Product Dimensions: 12.7 x 5.08 x 10.16 cm (Depth x Width x Height)
- Item Weight: 99.8 grams
- Timing Range: 00:00:00 to 99 hours, 59 minutes, 59 seconds
- Power Source: 2 x AAA Batteries (included)
Warranty and Support
For warranty information or technical support, please refer to the contact details provided with your purchase or visit the official Samshow website. Keep your purchase receipt for warranty claims.