1. Product Overview
The Insoma Sprinkler Timer is designed to automate your garden watering, providing convenience and water efficiency. Featuring durable brass inlet and outlet connections, a large LCD display, and multiple watering modes, it is suitable for various irrigation needs.
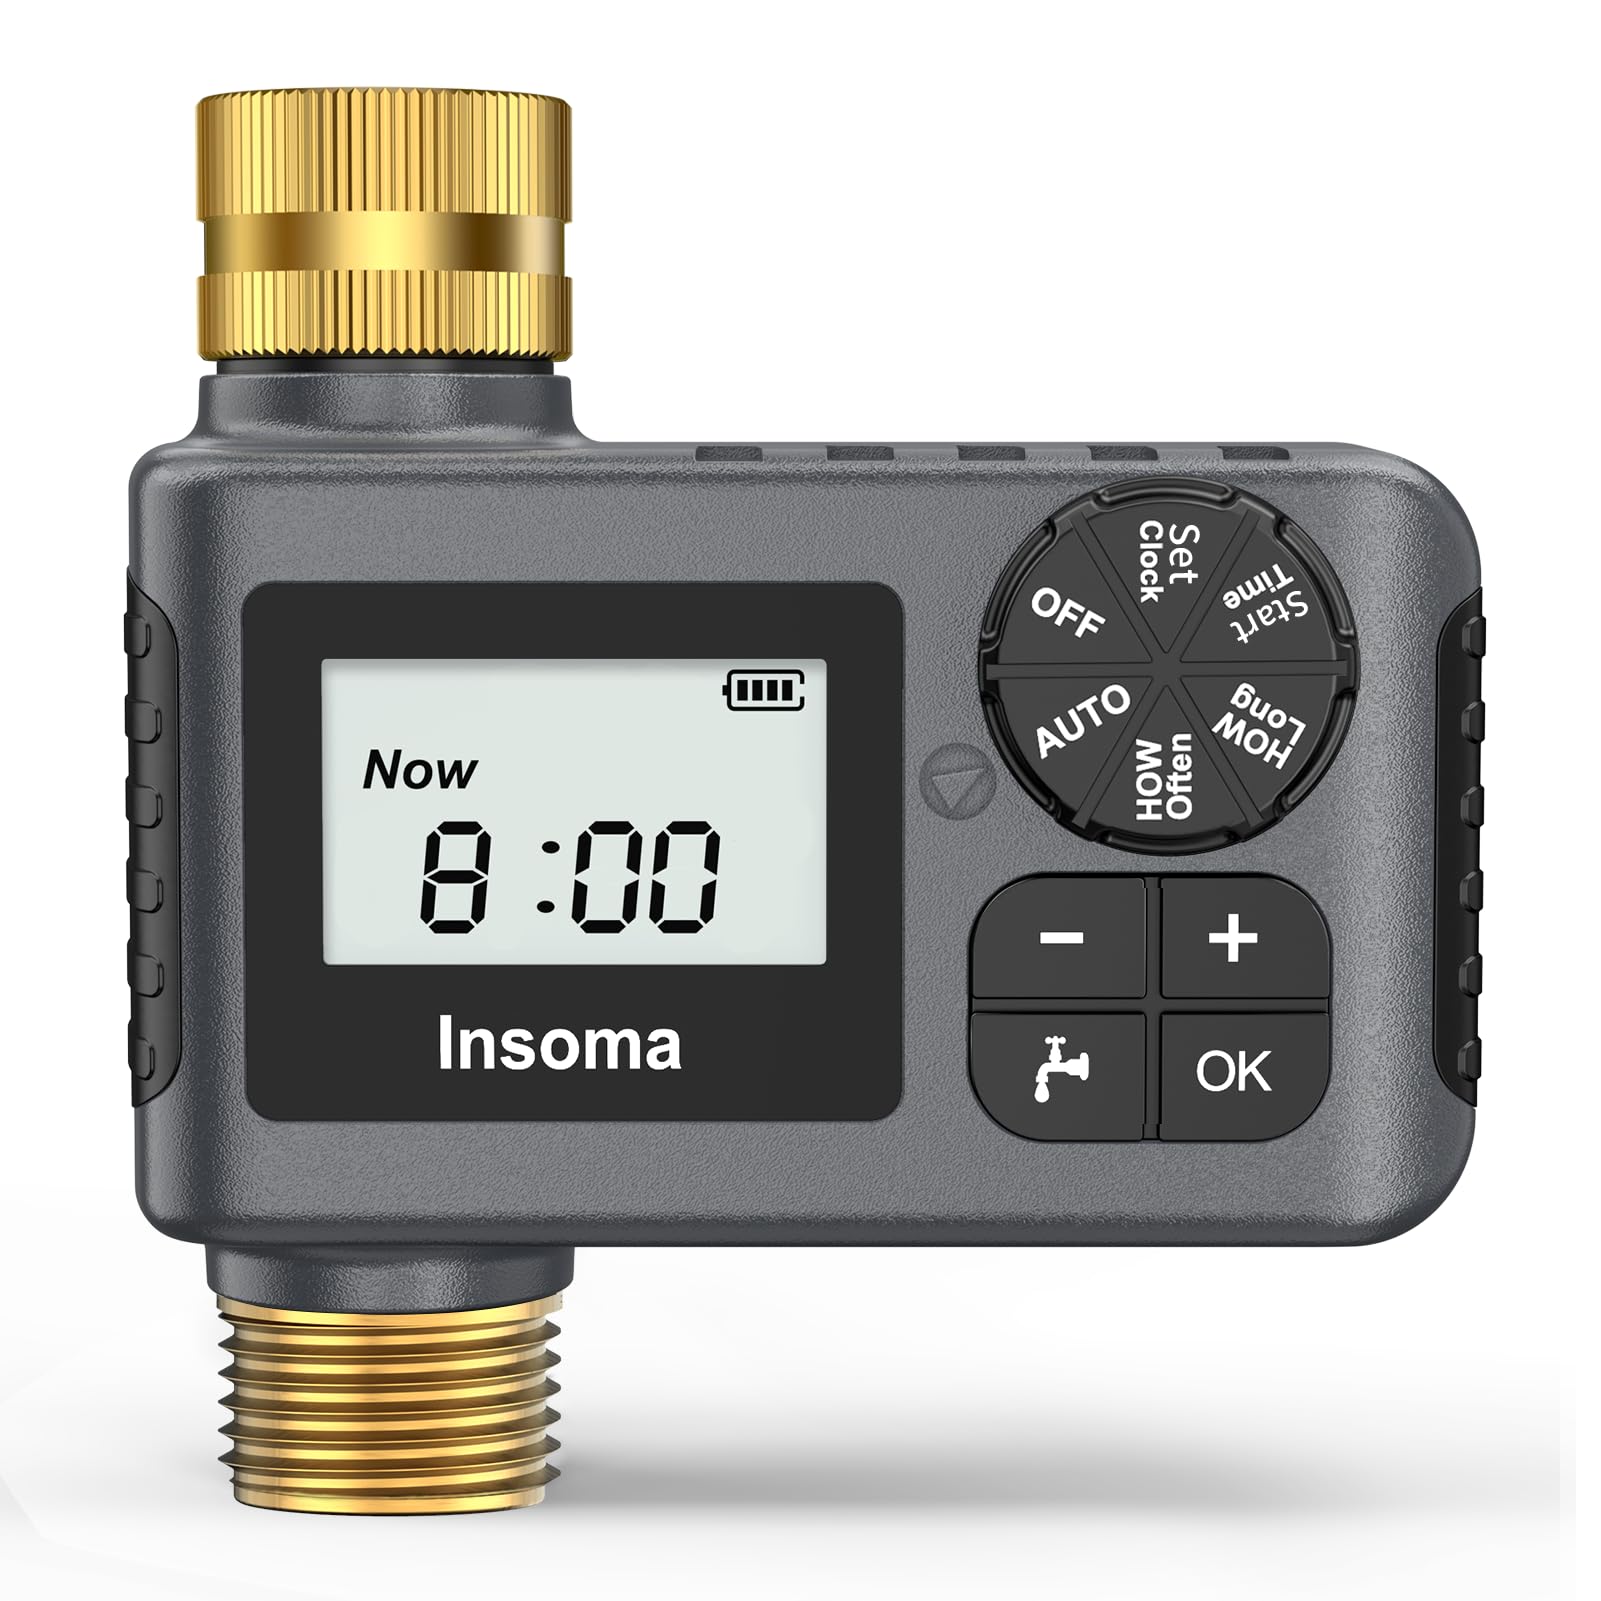
Figure 1.1: Insoma Sprinkler Timer with Brass Inlet and Outlet
2. Setup
2.1 What's in the Box
- Insoma Sprinkler Timer (1 unit)
- Reducing Hex Bushing (3/4" Male NPT to 1/2" Female NPT)
- Thread Seal Tape
- User Manual
2.2 Battery Installation
The timer requires 2 AA 1.5V Alkaline batteries (not included). Ensure correct polarity when inserting batteries.
- Locate the battery compartment on the back of the timer.
- Slide the battery cover open.
- Insert two AA alkaline batteries, observing the + and - markings.
- Close the battery cover securely. The cover includes a seal ring to protect against moisture.

Figure 2.1: Control Panel and Battery Compartment (back view)
2.3 Timer Installation
The timer features a brass inlet and outlet for enhanced durability and pressure resistance.
- Ensure the faucet is turned off.
- Screw the timer's brass inlet onto your outdoor faucet. Hand-tighten only. Use the provided thread seal tape if necessary to prevent leaks.
- Connect your garden hose or drip irrigation system to the timer's brass outlet. Hand-tighten only.
- If your hose or faucet requires a different size, use the included reducing hex bushing.
- Slowly turn on the faucet. Check for any leaks.

Figure 2.2: Easy, Tool-Free Installation

Figure 2.3: Brass Inlet and Outlet for Durability
3. Operation
3.1 Understanding the Control Panel
The timer features a large LCD display and intuitive controls:
- Dial: Rotate to select different settings (SET CLOCK, START TIME, HOW LONG, HOW OFTEN, AUTO, OFF).
- +/- Buttons: Adjust values for time, duration, or frequency. The '+' button also activates Rain Delay. The '-' button also activates Child Lock.
- OK Button: Confirm selections.
- Manual Button: Initiate manual watering.
3.2 Setting the Clock
- Rotate the dial to SET CLOCK.
- Use the +/- buttons to adjust the current time.
- Press OK to confirm and move to the next setting (e.g., minutes).
- Repeat until the clock is set.
3.3 Automatic Watering Mode
This mode allows you to set a recurring watering schedule.

Figure 3.1: Timed Watering Settings (How Often, How Long)
- Rotate the dial to START TIME. Use +/- to set the desired start time for watering. Press OK.
- Rotate the dial to HOW LONG. Use +/- to set the watering duration (1 minute to 23 hours 59 minutes). Press OK.
- Rotate the dial to HOW OFTEN. Use +/- to set the watering frequency (every 1 minute to 23 hours 59 minutes, or every 1 to 7 days). Press OK.
- Rotate the dial to AUTO. The timer will now operate according to your programmed schedule.

Figure 3.2: Automatic Watering in Action
3.4 Manual Watering Mode
To water immediately without interrupting your programmed schedule:
- Press the Manual button.
- Use the +/- buttons to set the desired manual watering duration (1 minute to 23 hours 59 minutes).
- Press OK to start manual watering.
- To stop manual watering, press the Manual button again or rotate the dial to OFF.

Figure 3.3: Manual Watering Anytime
3.5 Rain Delay Function
Pause your watering schedule for 1 to 7 days due to rain or other reasons.
- While in AUTO mode, press the + button (Rain Delay).
- Use the +/- buttons to select the number of days for the delay (1-7 days).
- Press OK to confirm. The timer will pause and automatically resume the schedule after the delay period.
- To cancel Rain Delay, press the + button again and set the delay to 0, or rotate the dial to OFF and then back to AUTO.

Figure 3.4: Rain Delay Function
3.6 Child Lock Mode
Prevent accidental operation by children or pets.
- Press and hold the - button for 3 seconds to activate Child Lock. A lock icon will appear on the display.
- To deactivate, press and hold the - button again for 3 seconds.
4. Maintenance
4.1 Cleaning the Filter
The built-in metal filter prevents sediment from entering your irrigation system. Clean it periodically to ensure optimal performance.
- Turn off the faucet and detach the timer.
- Remove the filter washer from the inlet.
- Rinse the filter under running water to remove any debris.
- Reinsert the clean filter washer and reattach the timer to the faucet.

Figure 4.1: Built-in Stainless Steel Filter
4.2 Winter Storage
To prevent damage from freezing temperatures:
- Remove the timer from the faucet before the first frost.
- Remove the batteries.
- Store the timer in a dry, frost-free location.
5. Troubleshooting
Refer to the table below for common issues and their solutions.
| Problem | Possible Cause | Solution |
|---|---|---|
| Timer does not turn on/display is blank. | Dead or incorrectly installed batteries. | Replace batteries with new AA alkaline batteries. Ensure correct polarity. |
| Water does not flow during scheduled time. | Faucet is off; low water pressure; timer in OFF or Manual mode; clogged filter. | Ensure faucet is fully open. Check water pressure (must be 7.25-116 psi). Set dial to AUTO. Clean the inlet filter. |
| Water leaks from connections. | Loose connections; missing or damaged washer; insufficient thread seal tape. | Tighten connections by hand. Ensure rubber washer is properly seated. Apply more thread seal tape if needed. |
| Timer runs continuously or does not shut off. | Stuck valve; programming error. | Try resetting the timer by removing and reinserting batteries. Re-program the schedule carefully. If issue persists, contact customer support. |
6. Specifications
| Model Number | ISM-SGW05-TT-A |
| Brand | Insoma |
| Material | Brass Inlet & Outlet |
| Product Dimensions (D x W x H) | 2.3" x 4.8" x 4.8" |
| Water Pressure Range | 7.25 psi to 116 psi (0.5 to 8 bar) |
| Watering Frequency | 1 minute to 23 hours 59 minutes, or 1 to 7 days |
| Watering Duration | 1 minute to 23 hours 59 minutes |
| Power Source | 2 x AA 1.5V Alkaline batteries (not included) |
| Waterproof Rating | IP55 |
| Screen Size | 6 Inches (LCD Display) |
7. Warranty and Support
For warranty information or technical support, please refer to the contact details provided with your purchase or visit the official Insoma website.


