1. Introduction
This user manual provides detailed instructions for the setup, operation, and maintenance of your M98-M5 Smart Android TV Box. This device transforms your television into a smart entertainment hub, offering access to various streaming services, applications, and media content. Please read this manual thoroughly before using the product to ensure optimal performance and safety.
2. Package Contents
Please check the package contents upon unboxing. If any items are missing or damaged, contact your retailer.
- M98-M5 Smart Android TV Box
- Remote Control
- Power Adapter
- HDMI Cable
- User Manual

Image: Contents of the M98-M5 Smart Android TV Box package, including the TV box, remote control, power adapter, and cables.
3. Product Overview
3.1 Device Layout
The M98-M5 TV Box features a compact design with essential ports for connectivity.

Image: The M98-M5 Smart Android TV Box and its accompanying remote control, showcasing the device's sleek design.
3.2 Ports and Connections
- HDMI Port: Connects to your TV or display for video and audio output.
- USB Ports: For connecting external storage devices, keyboards, mice, or other USB peripherals.
- Micro SD/TF Card Slot: For expanding storage with a memory card.
- Power Input (DC IN): Connects the power adapter.
- Ethernet Port (LAN): For wired network connection (if available on model).
4. Setup Guide
Follow these steps for initial setup of your M98-M5 Smart Android TV Box.
- Connect to TV: Connect one end of the HDMI cable to the HDMI port on the TV Box and the other end to an available HDMI input on your television.
- Connect Power: Plug the power adapter into the DC IN port on the TV Box, then plug the adapter into a power outlet.
- Power On: The TV Box should automatically power on. If not, press the power button on the remote control.
- Select Input: On your TV, select the correct HDMI input source using your TV's remote control.
- Initial Setup Wizard: Follow the on-screen instructions to complete the initial setup, including language selection, network connection (Wi-Fi or Ethernet), and Google account sign-in.
- Remote Control Pairing (if applicable): Some remotes may require pairing. Follow on-screen prompts or refer to the remote's specific instructions.
5. Operating Instructions
5.1 Navigating the Interface
Use the provided remote control to navigate the Android TV interface. The directional pad (D-pad) is used for moving between items, and the OK button confirms selections.
- Home Button: Returns to the main home screen.
- Back Button: Returns to the previous screen or menu.
- Volume Buttons: Adjusts the volume.
- App Button: Opens the applications menu.
- Power Button: Turns the device on or off.
5.2 Connecting to the Internet
The TV Box supports both Wi-Fi and Ethernet connections.
Wi-Fi Connection:
- Go to Settings > Network & Internet.
- Select your Wi-Fi network from the list.
- Enter the Wi-Fi password and select Connect.
Ethernet Connection:
- Connect an Ethernet cable from your router to the LAN port on the TV Box.
- The device should automatically detect and connect to the wired network.
5.3 Installing Applications
You can download and install applications from the Google Play Store.
- From the home screen, select the Google Play Store icon.
- Search for your desired application (e.g., Netflix, YouTube, Hulu).
- Select Install to download and install the application.
6. Maintenance
Proper maintenance ensures the longevity and optimal performance of your TV Box.
- Cleaning: Use a soft, dry cloth to clean the device. Do not use liquid cleaners or aerosols.
- Ventilation: Ensure the device is placed in a well-ventilated area to prevent overheating. Do not block ventilation openings.
- Software Updates: The device supports OTA (Over-The-Air) updates. Regularly check for and install updates via Settings > About > System Update to ensure the latest features and security patches.
- Storage Management: Periodically clear cache and unnecessary files to free up storage space and improve performance.
7. Troubleshooting
This section addresses common issues you might encounter.
| Problem | Possible Cause | Solution |
|---|---|---|
| No power | Power adapter not connected; Power outlet issue | Ensure power adapter is securely connected and outlet is working. |
| No display on TV | HDMI cable loose; Incorrect TV input selected | Check HDMI cable connection; Select correct HDMI input on TV. |
| Wi-Fi connection issues | Incorrect password; Router too far; Interference | Re-enter password; Move device closer to router; Restart router and TV Box. |
| Remote control not responding | Low batteries; Not paired | Replace batteries; Re-pair remote control if necessary. |
| Applications crashing/slow performance | Insufficient memory; Too many apps running | Close background apps; Clear app cache; Restart device. |
8. Specifications
Key technical specifications of the M98-M5 Smart Android TV Box.
- Operating System: Android 10 Q
- CPU: Allwinner H313 Quad-core ARM Cortex-A53
- GPU: ARM Mali-G31 OpenGL ES3.2
- RAM: 2GB SDRAM
- Internal Storage: 16GB eMMC ROM
- Wireless Connectivity: Wi-Fi IEEE 802.11 b/g/n, Bluetooth 4.2
- Video Output: HDMI 2.0, 4K Resolution Support
- USB Ports: USB 3.0
- Memory Card Slot: Micro SD/TF (SDHC/SDXC)
- Supported Internet Services: Netflix, Hulu, Amazon Prime Video
- Product Dimensions: 20cm x 20cm x 20cm (Length x Width x Height)
- Product Weight: 10 grams

Image: Rear view of the M98-M5 TV Box packaging, highlighting key features and specifications.
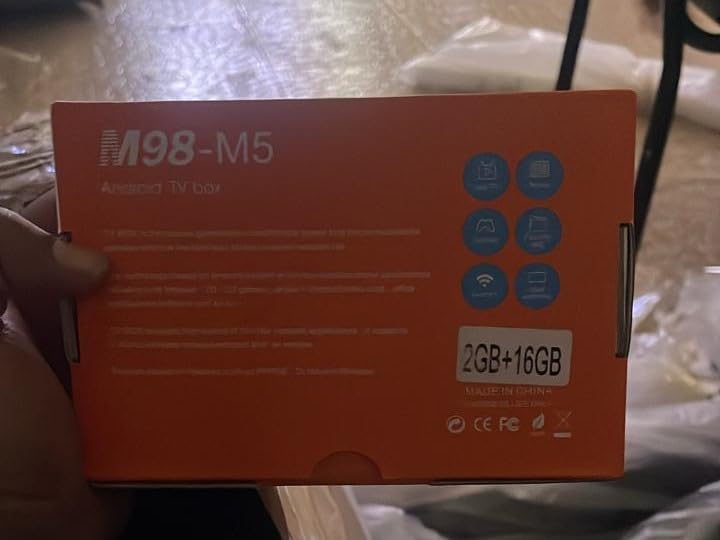
Image: Close-up of the M98-M5 TV Box packaging, confirming the 2GB RAM and 16GB internal storage configuration.
9. Safety Information
Please observe the following safety precautions to prevent damage to the device or injury to yourself.
- Do not expose the device to water, moisture, or extreme temperatures.
- Avoid dropping or subjecting the device to strong impacts.
- Do not attempt to disassemble or repair the device yourself. Refer to qualified service personnel.
- Use only the provided power adapter.
- Keep the device away from direct sunlight and heat sources.
10. Warranty and Support
This product comes with a standard manufacturer's warranty. For warranty claims or technical support, please contact your point of purchase or the manufacturer's customer service. Keep your purchase receipt as proof of purchase.
For further assistance, you may visit the manufacturer's official website or contact their support channels. Information regarding specific warranty periods and support procedures can typically be found on the product packaging or the manufacturer's website.