1. Introduction
This manual provides instructions for the installation, operation, and maintenance of your BV LED Bathroom Exhaust Fan with Light (Model: BV 110CFM). This unit is designed to provide efficient ventilation and customizable lighting for bathrooms up to 110 sq. ft. Please read this manual thoroughly before installation and use, and retain it for future reference.
2. Safety Information
WARNING: To reduce the risk of fire, electric shock, or injury to persons, observe the following:
- Installation work and electrical wiring must be done by qualified person(s) in accordance with all applicable codes and standards, including fire-rated construction codes and standards.
- Use this unit only in the manner intended by the manufacturer. If you have questions, contact the manufacturer.
- Before servicing or cleaning the unit, switch power off at the service panel and lock the service disconnecting means to prevent power from being switched on accidentally. When the service disconnecting means cannot be locked, securely fasten a prominent warning device, such as a tag, to the service panel.
- Do not use this fan with any solid-state speed control device unless specifically approved for use with this model.
- This unit is for general ventilating use only. Do not use to exhaust hazardous or explosive materials and vapors.
- Duct work must always be vented to the outdoors.
- To prevent motor bearing damage and noisy and/or unbalanced impellers, keep drywall spray, construction dust, etc., off power unit.
3. Package Contents
Verify that all components are present before beginning installation:
- BV LED Bathroom Exhaust Fan Unit
- Mounting Bracket
- Hardware (screws, wire nuts, etc.)
- Grille with LED Light
- User Manual
4. Setup and Installation
The BV 110CFM LED Bathroom Exhaust Fan is designed for ceiling mount installation. Ensure the mounting location can support the unit's weight and dimensions.
4.1 Dimensions
The unit measures approximately 13"D x 11"W x 6.7"H. A 4-inch duct collar is integrated for ventilation connections.

Figure 1: Frontal dimensions of the exhaust fan.
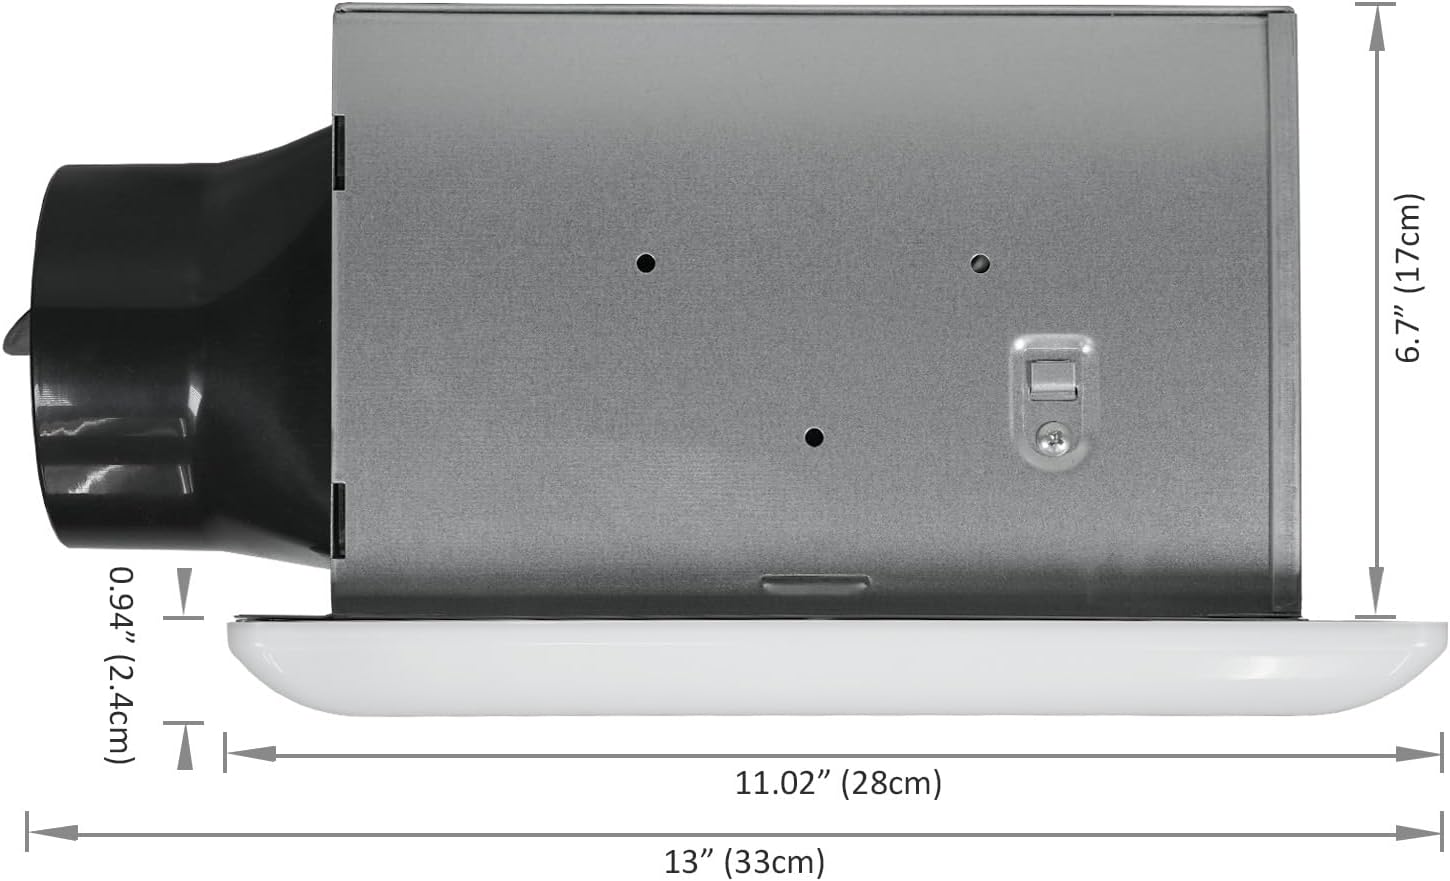
Figure 2: Side dimensions of the exhaust fan.
4.2 Mounting the Fan Housing
- Turn off power at the service panel before starting installation.
- Determine the desired mounting location in the ceiling. Ensure there is sufficient space above the ceiling for the fan housing and ductwork.
- Cut an opening in the ceiling according to the fan housing dimensions.
- Secure the fan housing to the ceiling joists using the provided mounting brackets and hardware.
- Connect the 4-inch ductwork to the fan's duct collar and seal all connections with duct tape or clamps to ensure airtightness.

Figure 3: Internal view of the fan housing before grille installation.
4.3 Electrical Wiring
- Ensure power is OFF at the service panel.
- Route electrical supply wires (120 Volts AC) to the fan housing.
- Connect the fan's wiring to the household wiring according to local electrical codes. Typically, this involves connecting live, neutral, and ground wires. The fan uses a NEMA 5-15 connector type.
- Secure all wire connections with wire nuts.
- Connect the LED light's wiring harness to the fan unit's designated connector.
4.4 Installing the Grille
- Once wiring is complete, attach the grille to the fan housing. The grille typically uses spring clips or screws to secure it in place.
- Ensure the grille is flush with the ceiling surface.

Figure 4: Fan housing and grille components.
5. Operating Instructions
After successful installation, restore power to the unit at the service panel.
5.1 Fan Operation
The exhaust fan operates at 110 Cubic Feet Per Minute (CFM) with a low noise level of 1.2 Sones. It is controlled via a standard wall switch (not included) connected during installation. Turn the switch ON to activate the fan and OFF to deactivate it.
5.2 LED Light Operation and Color Temperature Selection
The integrated LED light provides 800 lumens of illumination and offers three selectable color temperatures: 3000K (Warm White), 4000K (Natural White), and 5000K (Cool White).
- To cycle through the color temperatures, use the wall switch connected to the light circuit.
- Turn the light switch ON. The light will illuminate at the last selected color temperature.
- To change the color temperature, quickly turn the light switch OFF and then ON again within 1-2 seconds. The light will cycle to the next color temperature.
- Repeat this process until your desired color temperature is selected. The fan will remember the last setting.
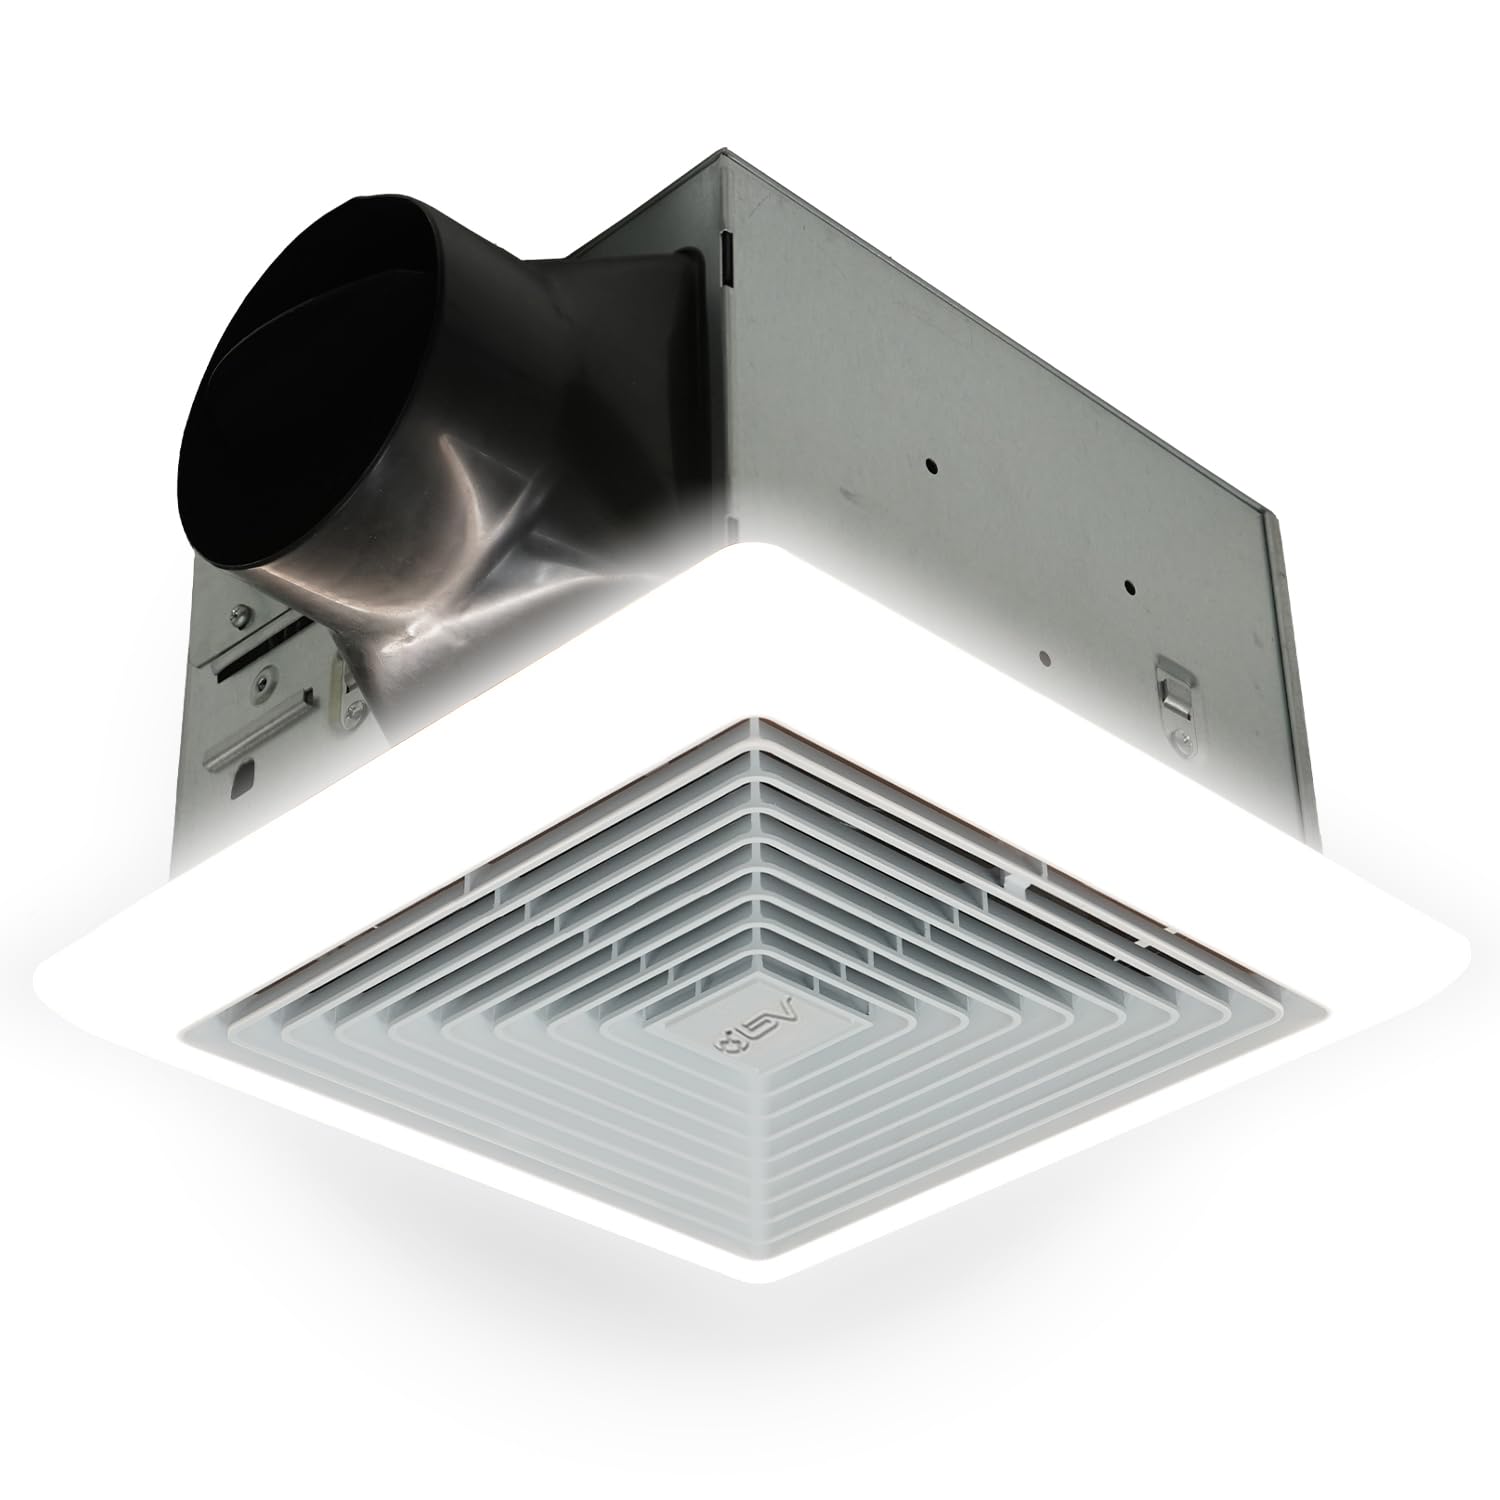
Figure 5: Selectable LED light color temperatures (3000K, 4000K, 5000K).
6. Maintenance
Regular maintenance ensures optimal performance and longevity of your exhaust fan.
6.1 Cleaning the Grille and Fan Blade
- WARNING: Disconnect power at the service panel before cleaning.
- Remove the grille by gently pulling down or releasing its clips/screws.
- Wash the grille with mild soap and water, rinse thoroughly, and dry completely before reinstallation.
- Carefully wipe the fan blade and interior of the housing with a damp cloth. Do not immerse electrical parts in water.
- Reinstall the grille.
6.2 Motor Lubrication
The fan motor features lifetime lubrication and does not require additional oiling.
7. Troubleshooting
| Problem | Possible Cause | Solution |
|---|---|---|
| Fan does not operate. | No power supply; loose wiring; faulty switch. | Check circuit breaker/fuse. Verify all wiring connections are secure. Test or replace wall switch. |
| Light does not turn on. | No power to light circuit; loose LED connector; faulty LED module. | Ensure light switch is ON. Check LED wiring harness connection. If problem persists, contact support. |
| Fan is noisy or vibrates. | Loose mounting; debris in fan blade; damaged impeller. | Ensure fan housing is securely mounted. Disconnect power and clean fan blade. If noise persists, contact support. |
| Poor air movement. | Blocked ductwork; dirty fan blade; incorrect fan size for room. | Check ductwork for obstructions. Clean fan blade. Ensure fan is appropriately sized for the bathroom area (up to 110 sq. ft.). |
| LED light color does not change. | Incorrect operation; faulty LED driver. | Ensure you are cycling the power OFF/ON quickly enough (within 1-2 seconds). If still not changing, contact support. |
8. Specifications
| Feature | Detail |
|---|---|
| Brand | BV |
| Model Name | BV 110CFM |
| Air Flow Capacity | 110 Cubic Feet Per Minute (CFM) |
| Noise Level | 1.2 Sones |
| LED Light Output | 800 Lumens |
| LED Color Temperatures | 3000K (Warm White), 4000K (Natural White), 5000K (Cool White) |
| Power Source | AC |
| Voltage | 120 Volts |
| Wattage | 8 watts (for light) |
| Product Dimensions (D x W x H) | 13"D x 11"W x 6.7"H |
| Duct Collar Size | 4 Inch |
| Room Coverage | Up to 110 sq. ft. |
| Mounting Type | Ceiling Mount |
| Material | Stainless Steel Housing |
| Certifications | Energy Star Certified, HVI 2100-certified, UL Approved |
| Motor Type | Brushless, Lifetime Lubrication, Thermal Protection |
| UPC | 811853034889 |
9. Warranty Information
This BV LED Bathroom Exhaust Fan is covered by a manufacturer's warranty. Please refer to the warranty card included with your product or visit the official BV website for detailed warranty terms and conditions. Retain your proof of purchase for warranty claims.
10. Customer Support
For technical assistance, troubleshooting, or replacement parts, please contact BV customer support. Contact information can typically be found on the product packaging or the official BV website.
Online Resources: Visit the BV Store on Amazon