Introduction
Thank you for choosing the Bailigo 12V 9000 BTU Camper AC Roof Air Conditioner. This manual provides essential information for the safe installation, operation, and maintenance of your new air conditioning unit. Please read this manual thoroughly before installation and retain it for future reference.

Image: The Bailigo 12V 9000 BTU RV Roof Air Conditioner unit mounted on the roof of a camper, with cool air flowing into the interior.
Safety Information
Please read and understand all safety warnings before operating this appliance. Failure to follow these instructions may result in electric shock, fire, property damage, or personal injury.
- Ensure the power supply is disconnected before performing any installation, maintenance, or troubleshooting.
- Installation must be performed by a qualified technician in accordance with all local and national electrical codes.
- Do not operate the unit with damaged wiring or if it is not functioning correctly.
- Keep hands and objects clear of moving parts, such as the fan blades.
- This unit is designed for 12V DC power systems only. Connecting to an incorrect voltage source will cause damage.
- Ensure proper ventilation during operation to prevent overheating.
- Do not block the air intake or exhaust vents.
- Use only manufacturer-approved replacement parts.
Package Contents
Verify that all items listed below are included in your package:

Image: A visual representation of all components included in the package: the outdoor AC unit, the indoor air distribution box, a remote control, pull rods, drain pipes, mounting accessories kit, sealant tape, and an instruction manual.
- Outdoor AC Unit
- Indoor Air Distribution Box
- Remote Control
- Pull Rods (for installation)
- Drain Pipes
- Mounting Accessories Kit (bolts, nuts, washers)
- Sealant Tape
- Instruction Manual
Setup and Installation
1. Pre-Installation Checks
- Roof Opening: Ensure your vehicle has a roof opening suitable for the unit. The recommended minimum skylight size is 320mm x 240mm (approximately 12.6" x 9.5").
- Roof Thickness: Verify your roof thickness is compatible with the mounting hardware.
- Power Supply: Confirm a stable 12V DC power source is available with adequate amperage (30-50A) to support the unit's operation.
- Structural Integrity: Ensure the roof area where the unit will be installed can support its weight (31 KG).

Image: A diagram illustrating the recommended roof opening dimensions for installation, indicating a minimum size greater than 12.6 inches by 9.5 inches, and a roof thickness greater than 9-1/2 inches.
2. Installation Steps (Professional Installation Recommended)
- Prepare the Opening: If a new opening is required, carefully cut the roof opening to the specified dimensions. Ensure the edges are sealed to prevent water intrusion.
- Apply Sealant: Apply the provided sealant tape around the base of the outdoor AC unit where it will contact the roof.
- Position Outdoor Unit: Carefully lift and position the outdoor AC unit over the roof opening. Ensure it is centered and aligned.
- Install Indoor Air Distribution Box: From inside the vehicle, align the indoor air distribution box with the opening.
- Secure the Unit: Use the pull rods and mounting accessories kit to securely fasten the indoor and outdoor units together, sandwiching the roof. Tighten evenly to ensure a watertight seal.
- Connect Drain Pipes: Attach the drain pipes to the designated outlets on the unit and route them to allow for proper water drainage away from the vehicle.
- Electrical Connection: Connect the 12V DC power wires to the unit, ensuring correct polarity (+ to + and - to -). Use appropriate gauge wiring and circuit protection (fuse/breaker) as per electrical standards.
- Test Operation: Once all connections are secure, restore power and test the unit's functionality.
Operating Instructions
The Bailigo RV AC unit can be operated using the included remote control or the control panel on the indoor air distribution box.
1. Remote Control and LCD Display
The remote control allows for convenient adjustment of settings. The LCD display on the indoor unit provides real-time status information.
- Power Button: Press to turn the unit ON or OFF.
- Mode Button: Cycle through operating modes (e.g., Cool, Fan).
- Temperature Adjustment: Use the Up/Down arrows to set the desired temperature.
- Fan Speed: Adjust fan speed (Low, Medium, High, Auto).
- Timer Function: Set a timer for automatic power off.
The unit features a professional-grade 18cc scroll compressor and a 3000-speed motor for rapid cooling, capable of cooling a 29' trailer in under 10 minutes.

Image: A graphic showing the powerful airflow (350 CFM maximum) and high cooling capacity (9000 BTU) of the unit, capable of cooling up to 130 square feet.
2. Inverter Cooling and Low-Noise Operation
The inverter technology adjusts the operating frequency to optimize energy consumption. The unit is designed for quiet operation, typically below 45dB, ensuring a comfortable environment.
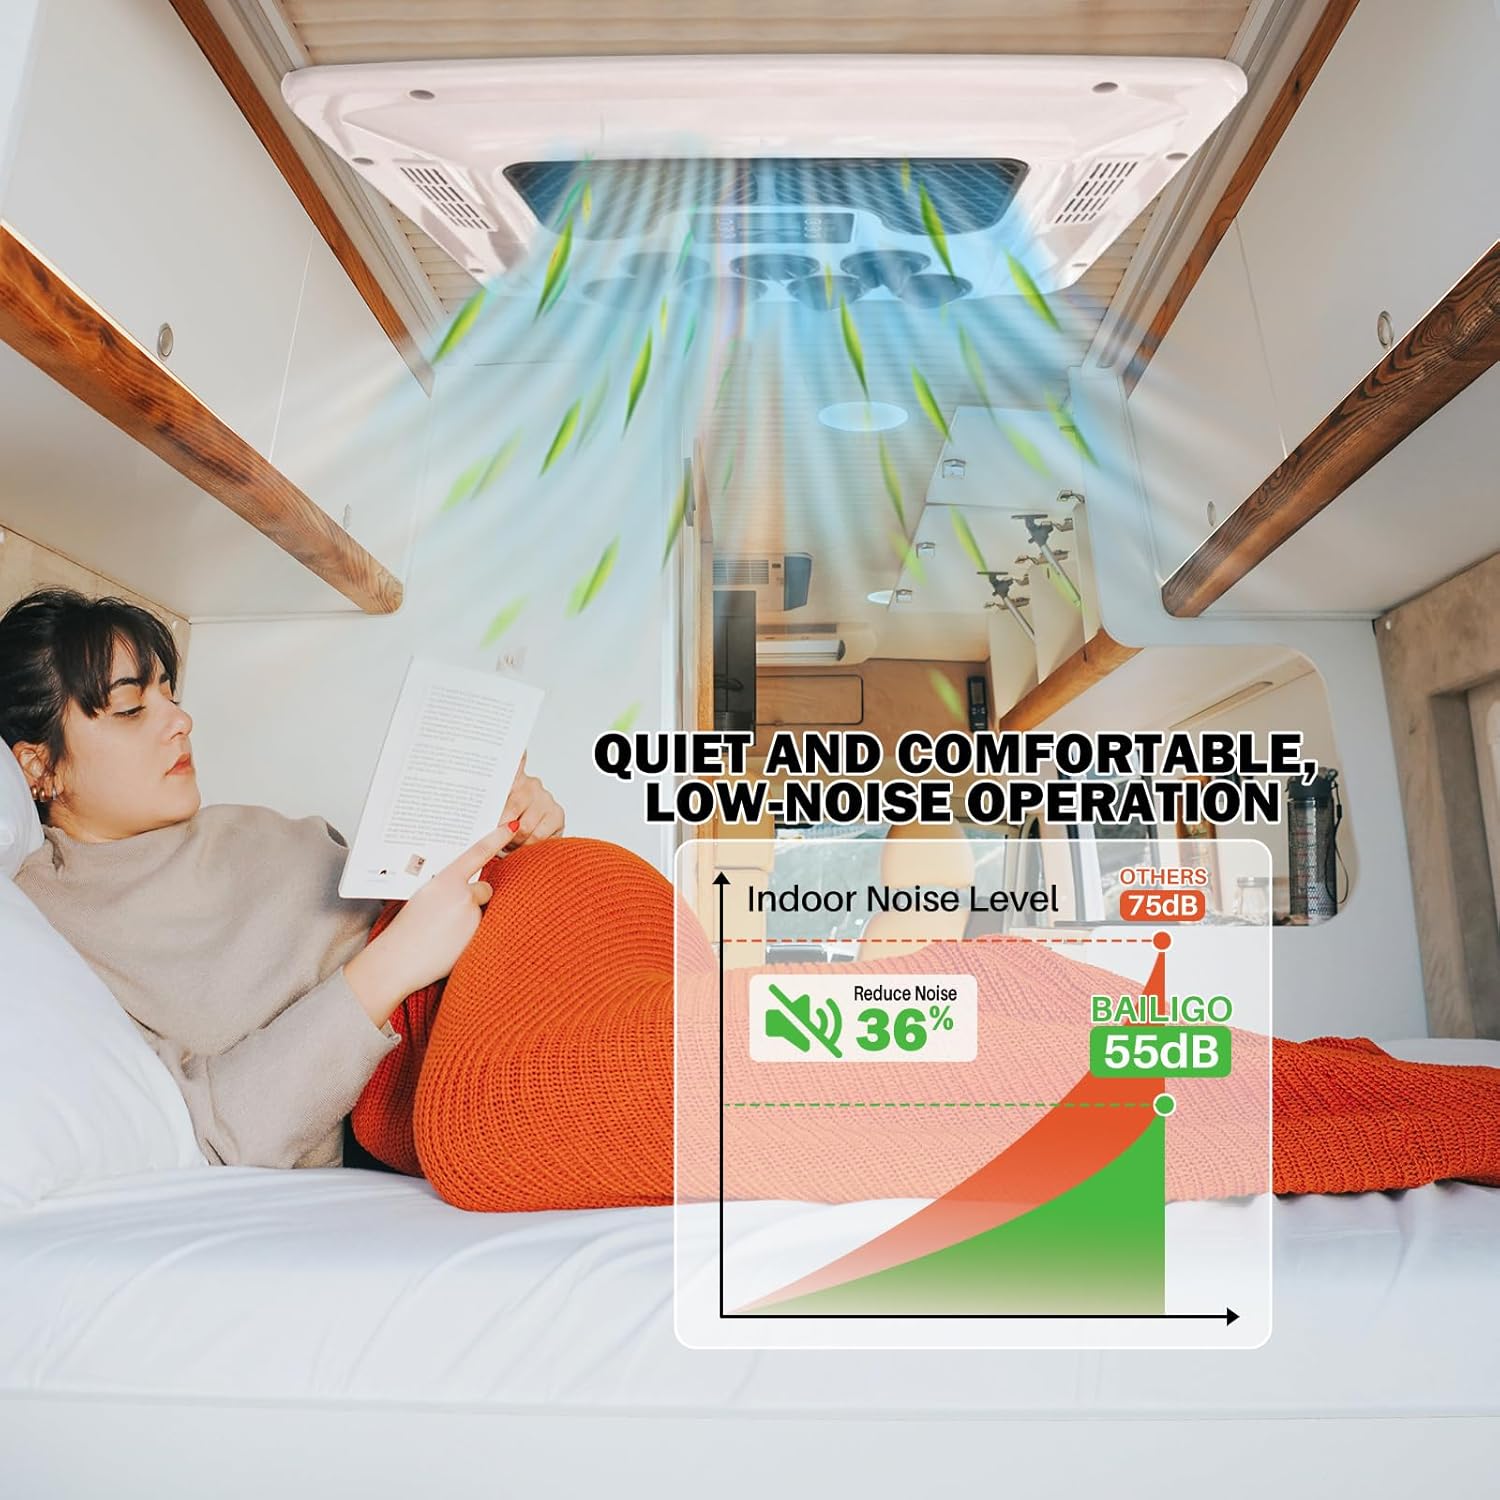
Image: A graph illustrating the low noise operation of the Bailigo unit (compared to other units), highlighting a significant noise reduction.
3. Low Voltage Protection
The unit is equipped with a low voltage protection feature. If the input voltage drops below a safe operating threshold, the air conditioner will automatically shut off to prevent damage to the unit and protect your vehicle's battery from excessive discharge. It also includes over-voltage and over-current protection for enhanced safety.
Maintenance
Regular maintenance ensures optimal performance and extends the lifespan of your AC unit.
- Air Filter Cleaning: Periodically remove and clean the air filters located in the indoor air distribution box. Wash with mild soap and water, rinse thoroughly, and allow to dry completely before reinstallation.
- Exterior Cleaning: Keep the exterior of the outdoor unit clean from dirt, leaves, and debris. Use a soft cloth and mild detergent if necessary. Ensure vents are clear.
- Drainage System: Periodically check the drain pipes for blockages and ensure water can flow freely.
- Electrical Connections: Annually inspect all electrical connections for tightness and signs of corrosion. Ensure the power is disconnected before inspection.
- Winterization: If storing the vehicle in freezing temperatures, ensure the unit is completely drained of any water to prevent damage from freezing. Consult a professional for specific winterization procedures if unsure.
Troubleshooting
Before contacting customer support, please refer to the following common issues and solutions:
| Problem | Possible Cause | Solution |
|---|---|---|
| Unit does not turn on. | No power, blown fuse/breaker, low battery voltage. | Check 12V power supply. Inspect fuses/breakers. Charge vehicle battery. |
| Unit runs but does not cool. | Dirty air filters, blocked condenser/evaporator coils, low refrigerant (professional service required). | Clean air filters. Ensure outdoor unit is clear of debris. Contact a qualified technician for refrigerant issues. |
| Weak airflow. | Dirty air filters, blocked air vents. | Clean air filters. Ensure all air vents are open and unobstructed. |
| Unusual noise during operation. | Loose components, debris in fan, motor issue. | Inspect for loose parts. Carefully check for debris in fan area (with power off). If noise persists, contact support. |
| Water leakage. | Blocked drain pipes, improper installation seal. | Clear drain pipes. Inspect roof seal for integrity; re-seal if necessary. |
Specifications

Image: A detailed table outlining the technical parameters of the RV rooftop AC unit, including rated voltage, current, power, cooling capacity, refrigerant type, and physical dimensions.
| Parameter | Value |
|---|---|
| Brand | Bailigo |
| Model | BL-EAC002.04.12-Z2US |
| Rated Voltage | 12 Volts DC |
| Rated Current | 30-50A |
| Rated Power | 330-1000W |
| Cooling Power | 9000 BTU |
| Refrigerant | R-134A |
| Refrigerant Charge Amount | 650g |
| Noise Level | 50 dB |
| Floor Area Coverage | Up to 130 Square Feet |
| Product Dimensions (Outdoor Unit) | 24.4"D x 26.8"W x 9.5"H (620 x 680 x 240 mm) |
| Inner Machine Size | 500 x 600 mm |
| Product Weight | 31 KG |
| Minimum Skylight Size | 320mm x 240mm (12.6" x 9.5") |
| Special Features | Fast Cooling, Inverter Compressor, Remote Controlled, Low Voltage Protection |
Warranty and Support
Bailigo products are manufactured to high-quality standards. For warranty information, technical support, or to purchase replacement parts, please refer to the contact information provided with your purchase or visit the official Bailigo website. Please have your model number (BL-EAC002.04.12-Z2US) and purchase date available when contacting support.