LATNEX 15MHz to 3.3GHz
RF Explorer PRO Spectrum Analyzer User Manual
Brand: LATNEX | Model: 15MHz to 3.3GHz
1. Introduction
The LATNEX RF Explorer Pro stands as a leading-edge RF instrument, integrating an advanced touch screen, high-resolution display, and cutting-edge RF electronics for precise sweep spectrum analysis. It embodies over 15 years of expertise in developing robust RF instruments, balancing cost efficiency and global utility.
This device offers enhanced flexibility to address diverse scenarios with advanced modes like Zero Span, Waterfall 2D and 3D, and Power Channel. It simplifies the capture and replay of elusive events, enabling optimal monitoring of IoT, radio packets, and continuous modulated and unmodulated signals.

Figure 1.1: The RF Explorer PRO, an all-in-one solution for RF analysis.
Key Features:
- Powerful Multipurpose RF Spectrum Analyzer: Combines Spectrum Analyzer, Signal Tracking Generator, and Power Meter functionalities.
- High-Resolution Interface & Advanced Functionalities: Intuitive touch screen, internal GPS for RF heatmap tracking, and built-in CPU for fast Frequency Coordination calculations, real-time interference checking, and intermodulation analysis.
- Advanced Operation Modes: Includes Zero Span, Waterfall 2D and 3D, wideband Power Channel, Data recording and replay, and data export.
- Wideband Design with Rapid Detection: Resolves 8GHz band events in 100uS, ensuring accurate and fast detection across a broad frequency range.
- Comprehensive Support & Peace of Mind: Includes technical support and a 1-year warranty.
2. What's in the Box
Upon unboxing your RF Explorer PRO, please verify that all the following components are present and in good condition:
- Aluminium Carrying Case
- RF Explorer PRO 15MHz to 3.3GHz baseline unit

Figure 2.1: RF Explorer PRO unit securely stored in its aluminum carrying case.
3. Product Overview
3.1 Device Components
The RF Explorer PRO features a robust design with a high-resolution touch screen and various ports for connectivity and functionality.

Figure 3.1: Front view of the RF Explorer PRO with attached antenna.
3.2 Ports and Connections
Familiarize yourself with the various input/output ports on the device:

Figure 3.2: Detailed diagram of the RF Explorer PRO's ports and connections.
- SMA Spectrum Analyzer Power Meter Input: Main RF input for spectrum analysis and power measurement.
- SMA Auxiliary & Trigger In/Out: For external triggering and auxiliary functions.
- SMA Tracking Generator Signal Generator Output: Output for the signal tracking generator.
- SMA GPS Antenna: Connection for an external GPS antenna for location-based measurements.
- Volume [+]/[-]: Adjusts audio output volume.
- Power On/Off: Button to power the device on or off.
- USB-C: For charging and data transfer.
- HDMI Out: For connecting to an external display.
- USB 3.0: Additional USB port for peripherals.
- Audio Jack: For audio output.
- High Resolution IPS Capacitive Multi-Touch Screen: The primary user interface.
4. Setup
4.1 Initial Charging
Before first use, fully charge the RF Explorer PRO using the provided USB-C cable and a compatible power adapter. The charging indicator will show the charging status.
4.2 Powering On/Off
- To Power On: Press and hold the Power On/Off button until the screen illuminates.
- To Power Off: Press and hold the Power On/Off button until a shutdown prompt appears on the screen. Follow the on-screen instructions to confirm shutdown.
4.3 Antenna Connection
Carefully screw the appropriate antenna (not included, but typically a wideband antenna) into the SMA Spectrum Analyzer Power Meter Input port. Ensure it is finger-tight to avoid damage.
5. Operating Instructions
The RF Explorer PRO offers a variety of modes and functionalities accessible via its touch screen interface.
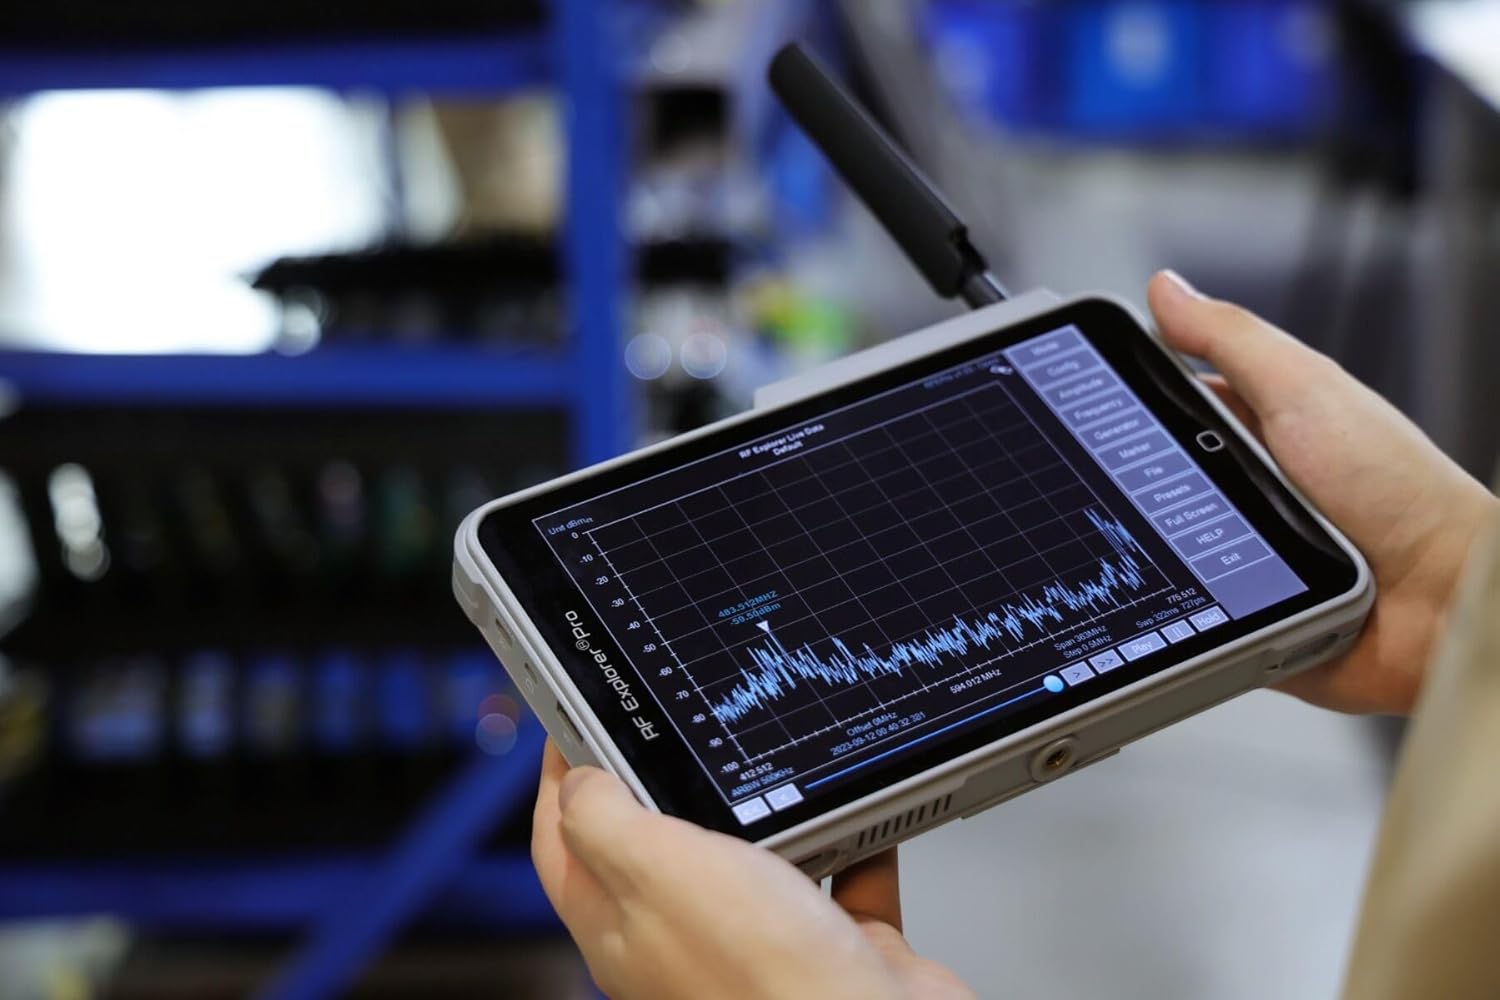
Figure 5.1: The RF Explorer PRO in active use, displaying a spectrum analysis.
5.1 Spectrum Analyzer Mode
This is the primary function for visualizing RF signals across a frequency range.
- Frequency Range: Configure the start and stop frequencies to define the sweep range.
- Amplitude Scale: Adjust the vertical scale (dBm) to optimize signal visualization.
- Markers: Use markers to pinpoint specific frequencies and measure their amplitude.
5.2 Signal Tracking Generator
The tracking generator is used for diagnosing and characterizing RF components like cables, filters, and amplifiers. Connect the output of the tracking generator to the device under test and the input to the spectrum analyzer port.
5.3 Power Meter Capability
Measure the power of RF signals in continuous or trigger modes. The trigger mode is essential for capturing pulse and fast events accurately.
5.4 Advanced Modes
- Zero Span: Focus on a single frequency to observe amplitude changes over time.
- Waterfall 2D and 3D: Visualize spectrum changes over time, useful for identifying intermittent signals or frequency hopping.
- Power Channel: Measure the total power within a defined channel bandwidth.
5.5 WiFi Analyzer
Detect signals across 2.4GHz and 5.8GHz WiFi bands to identify interference, collisions, and noise in WiFi environments. This helps in optimizing wireless network performance.
5.6 Data Management
- Data Recording: The device automatically saves scan data to RAM, allowing for easy replay of events.
- Data Export: Data can be manually or automatically saved in binary and CSV formats. Seamless data export to USB drives enables easy transfer to other software applications (e.g., WSM, WWB6, Excel, Matlab).
6. Maintenance
6.1 Cleaning
Use a soft, dry cloth to clean the device's exterior. For the touch screen, use a microfiber cloth specifically designed for electronics. Avoid abrasive cleaners or solvents.
6.2 Storage
When not in use, store the RF Explorer PRO in its aluminum carrying case in a cool, dry place, away from direct sunlight and extreme temperatures. This protects the device from physical damage and environmental factors.
6.3 Battery Care
To prolong battery life, avoid fully discharging the device frequently. If storing for extended periods, ensure the battery is charged to approximately 50%.
7. Troubleshooting
7.1 Device Not Powering On
- Check Battery: Ensure the device is sufficiently charged. Connect it to a power source and try again.
- Power Button: Confirm you are pressing and holding the power button correctly for a few seconds.
7.2 No Signal Detected
- Antenna Connection: Verify the antenna is securely connected to the SMA input.
- Frequency Range: Ensure the configured frequency range covers the signals you intend to measure.
- Amplitude Settings: Adjust the amplitude scale (dBm) to ensure signals are not off-screen.
- External Interference: Move to a different location to rule out strong local interference.
7.3 Touch Screen Unresponsive
- Restart Device: Perform a soft reset by powering the device off and then on again.
- Clean Screen: Ensure the screen is clean and free of debris or moisture.
8. Technical Specifications
Below are the detailed technical specifications for the RF Explorer PRO (15MHz to 3.3GHz) model:

Figure 8.1: Comprehensive technical specifications for the RF Explorer PRO.
| Parameter | Value Range |
|---|---|
| Frequency Range | 15MHz to 3.3GHz (baseline) |
| Frequency Span | 0 (zero span) to 6GHz (sweep) |
| RBW | 3KHz - 2.5MHz |
| VBW | Automatic |
| Low Frequency Support | 100KHz - 240MHz with external RF Explorer Upconverter module |
| Frequency Resolution | 1KHz (Future firmware upgrade will enable 100Hz) |
| Sweep Time | 3GHz / 280ms (With RBW 2.5MHz) |
| Sweep Points | 512-65,000 |
| Frequency Stability (typical) | TCXO ±0.5ppm |
| Amplitude Stability and Accuracy (typical) | ±1.5dB |
| Factory Calibration | 3K reference points |
| Frequency Accuracy (Internal reference) | TCXO ±1ppm |
| Aging | ±1ppm/year |
| Displayed Frequency Accuracy | Span/(Sweep Points-1) |
| Amplitude Resolution | 0.5dB (Future firmware upgrade will enable 0.25dB) |
| Dynamic Range (Depending on RBW and Band) | Direct: -110dBm to +10dBm Preamplifier LNA: -130dBm to -30dBm Attenuator: -80dBm to +33dBm |
| Absolute Max Input Power | +33dBm internal Attenuator selected |
9. Warranty and Support
Your purchase of the RF Explorer PRO includes comprehensive support and peace of mind.
9.1 Warranty Information
The RF Explorer PRO comes with a 1-year warranty from the date of purchase. This warranty covers manufacturing defects and ensures the product performs as described under normal use conditions.
9.2 Technical Support
Technical support is available to assist you with any questions or issues you may encounter. You can reach our support team via phone and email through Amazon Messages. Please have your product model and purchase details ready when contacting support.
For support inquiries, please visit the Amazon Customer Service Contact Us page and select the appropriate option to send a message to the seller, EMR Shielding Solutions.