1. Introduction
This user manual provides important information for the safe and efficient operation of your new 7.5L Air Fryer. Please read this manual thoroughly before first use and keep it for future reference.
The air fryer utilizes rapid hot air circulation technology to cook food, offering a healthier alternative to traditional deep frying by using significantly less oil. It is designed for frying, grilling, roasting, and baking a variety of foods.
2. Safety Instructions
Always follow basic safety precautions when using electrical appliances to reduce the risk of fire, electric shock, and injury.
- Do not immerse the appliance, cord, or plug in water or other liquids.
- Ensure the voltage indicated on the appliance corresponds to your local mains voltage before connecting.
- Do not operate any appliance with a damaged cord or plug, or after the appliance malfunctions or has been damaged in any manner.
- Keep the appliance and its cord out of reach of children.
- Do not let the cord hang over the edge of a table or counter, or touch hot surfaces.
- Do not place the appliance against a wall or against other appliances. Leave at least 10 cm free space on the back and sides and 10 cm free space above the appliance.
- Do not place anything on top of the appliance.
- Use the appliance only for its intended household purpose.
- Always unplug the appliance after use and before cleaning. Allow it to cool down before handling.
3. Product Components
Familiarize yourself with the parts of your air fryer.

Figure 3.1: Front view of the 7.5L Air Fryer. This image displays the main unit, featuring a sleek design with a gold trim. A transparent window on the front allows visibility of the cooking process, showing a whole chicken inside. The handle for the cooking basket is also visible.
- Main Unit with Control Panel
- Removable Cooking Basket
- Non-stick Crisper Plate (inside basket)
- Power Cord
4. Setup and First Use
- Unpacking: Carefully remove all packaging materials and stickers from the appliance.
- Cleaning: Wash the cooking basket and crisper plate with hot water, dish soap, and a non-abrasive sponge. Wipe the inside and outside of the appliance with a damp cloth.
- Placement: Place the air fryer on a stable, horizontal, and heat-resistant surface. Ensure there is at least 10 cm of free space around the appliance for proper ventilation.
- Pre-heating (Optional): For the first use, it is recommended to run the air fryer empty for about 10 minutes at 180°C (356°F) to eliminate any manufacturing odors. Ensure the area is well-ventilated during this process.
5. Operating Instructions
5.1. General Operation
- Plug the power cord into a grounded wall outlet.
- Carefully pull the cooking basket out of the air fryer.
- Place the ingredients into the cooking basket. Do not exceed the MAX fill line.
- Slide the cooking basket back into the air fryer. Ensure it clicks into place.
- Use the digital touch screen to set the desired temperature and cooking time.
- Press the start button to begin cooking.
- Some ingredients require shaking halfway through the preparation time. Pull the basket out by the handle, shake it, and then slide it back in. The air fryer will resume cooking automatically.
- When the cooking time has elapsed, the appliance will beep. Carefully pull out the basket and remove the food.

Figure 5.1: Digital Control Panel. This image highlights the intuitive digital touch screen interface of the air fryer, showing various temperature and time settings for different food types. The display is clear and easy to read, indicating the appliance's user-friendly design.
5.2. Using Preset Programs
Your air fryer comes with up to 8 automatic digital programs for common dishes. These programs automatically set the optimal temperature and time.
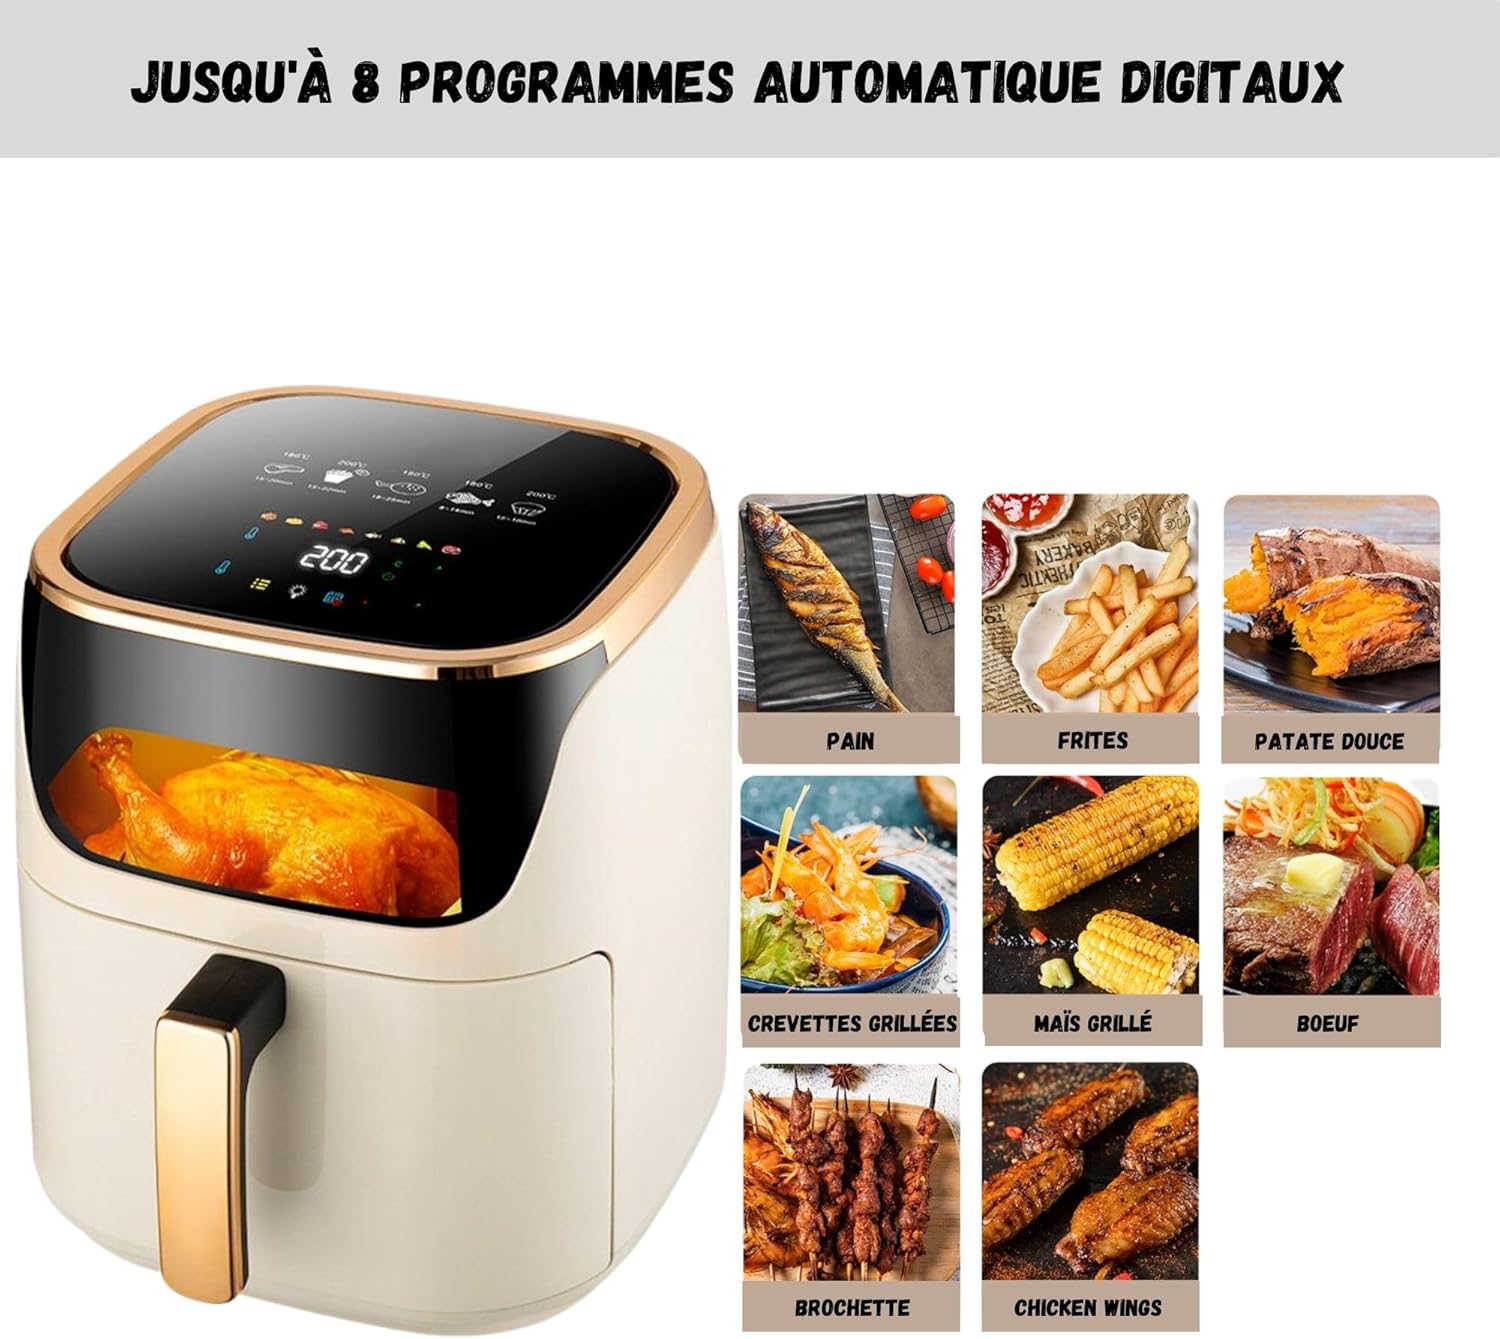
Figure 5.2: 8 Automatic Digital Programs. This image illustrates the variety of cooking options available, showcasing icons for different food categories such as bread, fries, sweet potato, grilled shrimp, grilled corn, beef, skewers, and chicken wings. Each icon represents a pre-programmed setting for convenient cooking.
To use a preset program:
- Place food in the cooking basket.
- Select the desired preset icon on the digital control panel.
- The air fryer will automatically adjust temperature and time. You can manually override these settings if needed.
- Press start to begin.
5.3. Cooking Frozen Foods
The air fryer can efficiently cook frozen foods, transforming them into crispy dishes in minutes.

Figure 5.3: Cooking Versatility. This image demonstrates the air fryer's capability to cook a wide range of dishes, including frozen items, quickly and effectively. The surrounding cooked foods highlight the crispy results achievable with the appliance.
For best results with frozen foods, refer to the food packaging for recommended oven temperatures and times, and adjust for air frying. Generally, air frying times for frozen foods are shorter than conventional oven times.
6. Cleaning and Maintenance
Regular cleaning ensures optimal performance and extends the lifespan of your air fryer.

Figure 6.1: Easy-to-Clean Components. This image illustrates the convenience of cleaning the air fryer's removable parts. It shows the cooking basket being hand-washed and also placed in a dishwasher, highlighting its dishwasher-safe design for effortless maintenance.
- Before Cleaning: Always unplug the appliance and allow it to cool down completely before cleaning.
- Cooking Basket and Crisper Plate: These parts are dishwasher safe. Alternatively, they can be washed with hot water, dish soap, and a non-abrasive sponge. Ensure all food residues are removed.
- Inside of the Appliance: Wipe the inside with a damp cloth and mild detergent. Do not use abrasive cleaners or scouring pads.
- Outside of the Appliance: Clean the exterior with a damp cloth.
- Storage: Store the appliance in a dry, cool place once it is clean and dry.
7. Troubleshooting
| Problem | Possible Cause | Solution |
|---|---|---|
| Air fryer does not turn on. | Appliance not plugged in; Basket not inserted correctly. | Ensure the power cord is securely plugged into a grounded outlet. Push the cooking basket firmly into the appliance until it clicks into place. |
| Food is not cooked evenly. | Too much food in the basket; Food not shaken. | Reduce the amount of food per batch. Shake the basket halfway through cooking time. |
| White smoke coming from the appliance. | Grease residue from previous use; Fatty ingredients. | Clean the basket and crisper plate thoroughly after each use. For fatty ingredients, place a piece of aluminum foil at the bottom of the basket to catch excess oil. |
| Fries are not crispy. | Incorrect potato type; Not enough oil (if used); Too much moisture. | Use fresh potatoes suitable for frying. Ensure potatoes are dried thoroughly before adding a small amount of oil. Cook in smaller batches. |
8. Specifications
- Model: B0D33KMFV3
- Brand: Generic
- Capacity: 7.5 Liters
- Power: 1500 Watts
- Voltage: 230V AC
- Material: Acrylonitrile Butadiene Styrene (ABS)
- Dimensions (L x W x H): 20 x 23 x 32 cm
- Weight: 4.4 kg
- Features: Digital Timer, Preset Programs
9. Warranty and Support
9.1. Warranty Information
This product comes with a 30-day satisfaction guarantee. Please retain your proof of purchase for any warranty claims.
9.2. Customer Support
For any questions, issues, or support needs regarding your air fryer, please contact the retailer or the manufacturer's customer service. Refer to your purchase documentation for specific contact details.