1. Product Overview
The PoDhey Digital Alarm Clock (Model 6637 black white light) is a versatile desktop alarm clock designed for home and office use. It features a clear digital display with adjustable brightness, dual alarm settings, temperature display, and flexible power options. This manual provides detailed instructions for setting up and operating your new alarm clock.
Package Contents:
- 1 × PoDhey Digital Alarm Clock
- 1 × USB Cable
- 1 × Instruction Manual

Figure 1: Front view of the PoDhey Digital Alarm Clock displaying the time.
2. Setup
2.1 Powering the Device
The PoDhey Digital Alarm Clock can be powered by two methods:
- USB Power: Connect the provided USB cable to the clock's USB port and plug the other end into a standard USB power adapter (not included) or a powered USB port. This method allows the display to remain continuously bright.
- Battery Power: Insert 3 AAA batteries (not included) into the battery compartment located on the back of the clock. When powered by batteries, the display will automatically turn off after 16 seconds of inactivity to conserve power, entering power saving mode. The time and temperature settings will be retained.
Note: It is recommended to use USB power for continuous display. When using batteries, the screen will not be always bright. Both power sources can be used simultaneously.

Figure 2: Rear view of the alarm clock, highlighting the USB power input and battery compartment.
3. Operation
3.1 Setting Time and Date
Specific buttons for setting time/date are not explicitly mentioned in the product description, but typically involve a "SET" or "MODE" button. Refer to the physical buttons on the device for exact labels.
- Press and hold the MODE button (or similar) to enter time setting mode.
- Use the UP and DOWN buttons (or similar) to adjust hours, minutes, year, month, and day.
- Press MODE again to confirm each setting and move to the next.
3.2 Setting Alarms
The clock supports two independent alarm settings.
- Press the ALARM button (or similar) to select Alarm 1 or Alarm 2.
- Press and hold the ALARM button to enter alarm setting mode.
- Use the UP and DOWN buttons to set the desired alarm time.
- Press ALARM again to confirm the time.
- Select the alarm frequency:
- Monday to Friday (Weekdays)
- Monday to Saturday
- Monday to Sunday (Daily)
- Press ALARM to exit setting mode.

Figure 3: Illustration of setting two different alarm times for daily routines.
3.3 Snooze Function
When an alarm sounds, press the SNOOZE button (usually a large button on top) to temporarily silence the alarm. The alarm will sound again after a set interval (e.g., 5-10 minutes).
To turn off the alarm completely, press any other button besides SNOOZE.
4. Key Features
4.1 Display Modes
The clock offers two display modes:
- Mode 1: Displays only the current time.
- Mode 2: Cycles through displaying time, date, and temperature.
To switch between display modes, short press the MODE button.
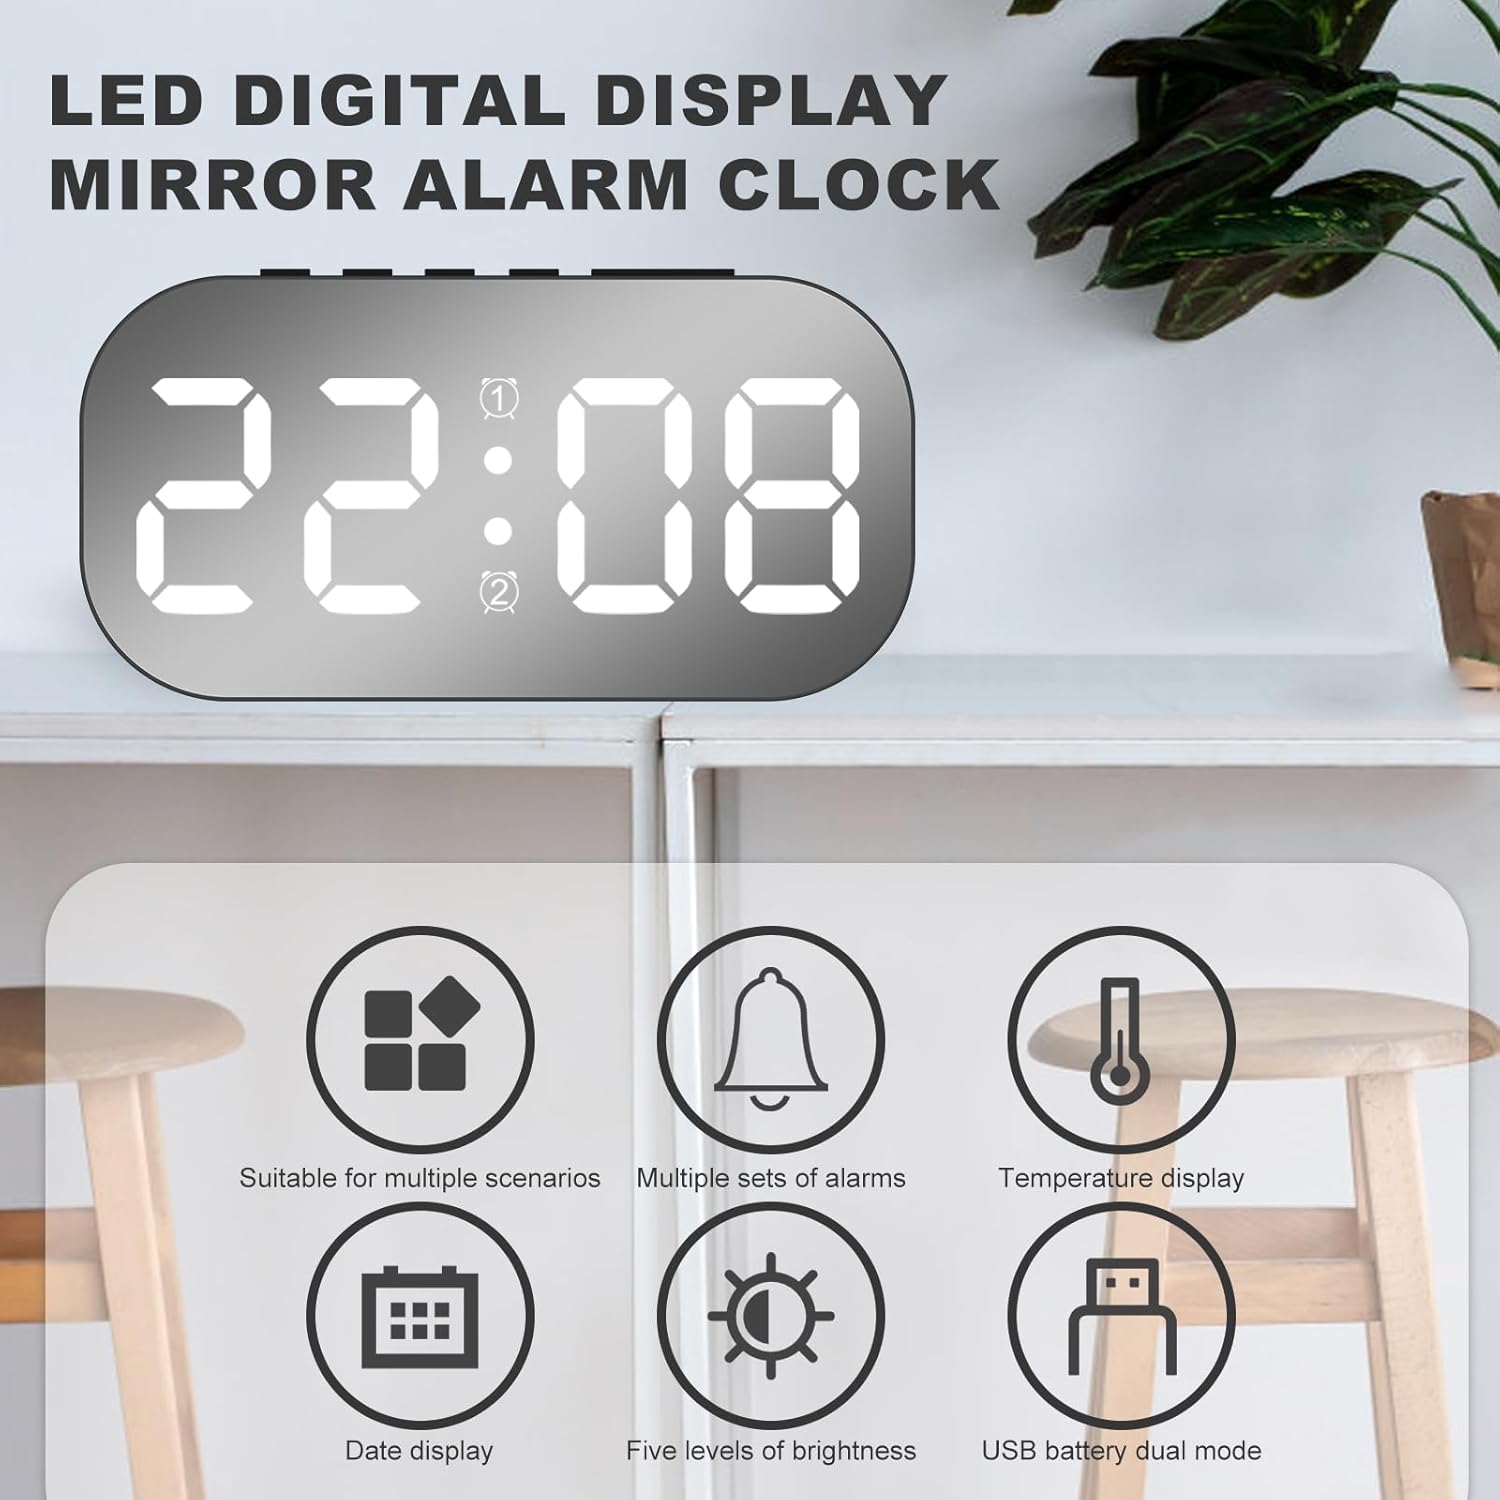
Figure 4: Overview of key features including display modes and power options.
4.2 Brightness Adjustment (5 Levels)
The display brightness can be adjusted to 5 different levels.
- Short press the SNOOZE key to cycle through brightness levels 1 to 5.

Figure 5: Visual representation of the 5-level brightness adjustment feature.
4.3 Night Mode
The clock features a night mode that automatically dims the display during specific hours to prevent disturbance.
- By default, night mode is active from 22:00 (10 PM) to 06:00 (6 AM), during which the display brightness automatically reduces.
- You can customize the night mode time period as needed through the settings (refer to the device's physical buttons for specific "Night Mode" or "Dimmer" settings).

Figure 6: The alarm clock operating in night mode, providing a subtle display.
4.4 Power Saving Mode (Battery Operated)
When the clock is powered by batteries, the display will automatically turn off after 16 seconds of inactivity to conserve power. The internal clock and temperature readings continue to function accurately, and all settings are retained.
To reactivate the display, press any button.
5. Maintenance
- Cleaning: Use a soft, dry cloth to wipe the surface of the clock. Avoid using abrasive cleaners or solvents, as they may damage the finish.
- Battery Replacement: If using battery power, replace all 3 AAA batteries when the display becomes dim or unresponsive. Ensure correct polarity when inserting new batteries.
- Storage: If storing the clock for an extended period, remove the batteries to prevent leakage.
6. Troubleshooting
| Problem | Possible Cause | Solution |
|---|---|---|
| Display is blank or dim. | No power, low batteries, or in power saving mode. |
|
| Alarm does not sound. | Alarm not set, alarm volume too low, or alarm turned off. |
|
| Time is incorrect. | Time not set correctly or power interruption. |
|
7. Specifications
| Feature | Detail |
|---|---|
| Model | 6637 Black White Light |
| Brand | PoDhey |
| Display Type | LED Digital |
| Brightness Levels | 5 levels (adjustable) |
| Display Modes | Time only; Time, Date, Temperature cycle |
| Alarm Function | 2 sets of alarms, Snooze function, Multiple alarm frequencies (Mon-Fri, Mon-Sat, Mon-Sun) |
| Night Mode | Automatic dimming (default 22:00-06:00, customizable) |
| Power Supply | USB powered (continuous display), 3 × AAA batteries (power saving mode) |
| Dimensions | 12.8 × 6.5 × 3.5 cm (approx.) |
8. Warranty and Support
For warranty information and customer support, please refer to the retailer's policy or contact the manufacturer directly. Keep your purchase receipt for warranty claims.
Manufacturer: PoDhey
Date First Available: May 1, 2024
For further assistance, please visit the PoDhey brand store on Amazon.