Bmi Muse M-192-CR
Bmi Muse M-192-CR Radio Alarm Clock
User Instruction Manual
Introduction
Thank you for purchasing the Bmi Muse M-192-CR Radio Alarm Clock. This device combines a PLL FM radio, a dual alarm system, and a convenient USB charging port, all displayed on a large, clear white LED screen. This manual provides detailed instructions for setup, operation, and maintenance to ensure optimal performance and longevity of your product. Please read this manual thoroughly before use and retain it for future reference.
Safety Information
- Do not expose the unit to rain or moisture to prevent fire or electric shock hazards.
- Ensure the power adapter is easily accessible in case of malfunction.
- Only use the power adapter supplied with the unit.
- Do not place objects filled with liquids, such as vases, on the unit.
- Avoid placing the unit near heat sources or in direct sunlight.
- Keep the unit away from strong magnetic fields.
- Do not attempt to disassemble or modify the unit. Refer all servicing to qualified personnel.
- Dispose of used batteries responsibly according to local regulations.
Package Contents
Please check that the following items are included in your package:
- Bmi Muse M-192-CR Radio Alarm Clock
- Power Adapter
- User Manual (this document)
Note: AAA batteries for backup power are not included and must be purchased separately.
Product Overview
Familiarize yourself with the main components and controls of your radio alarm clock.
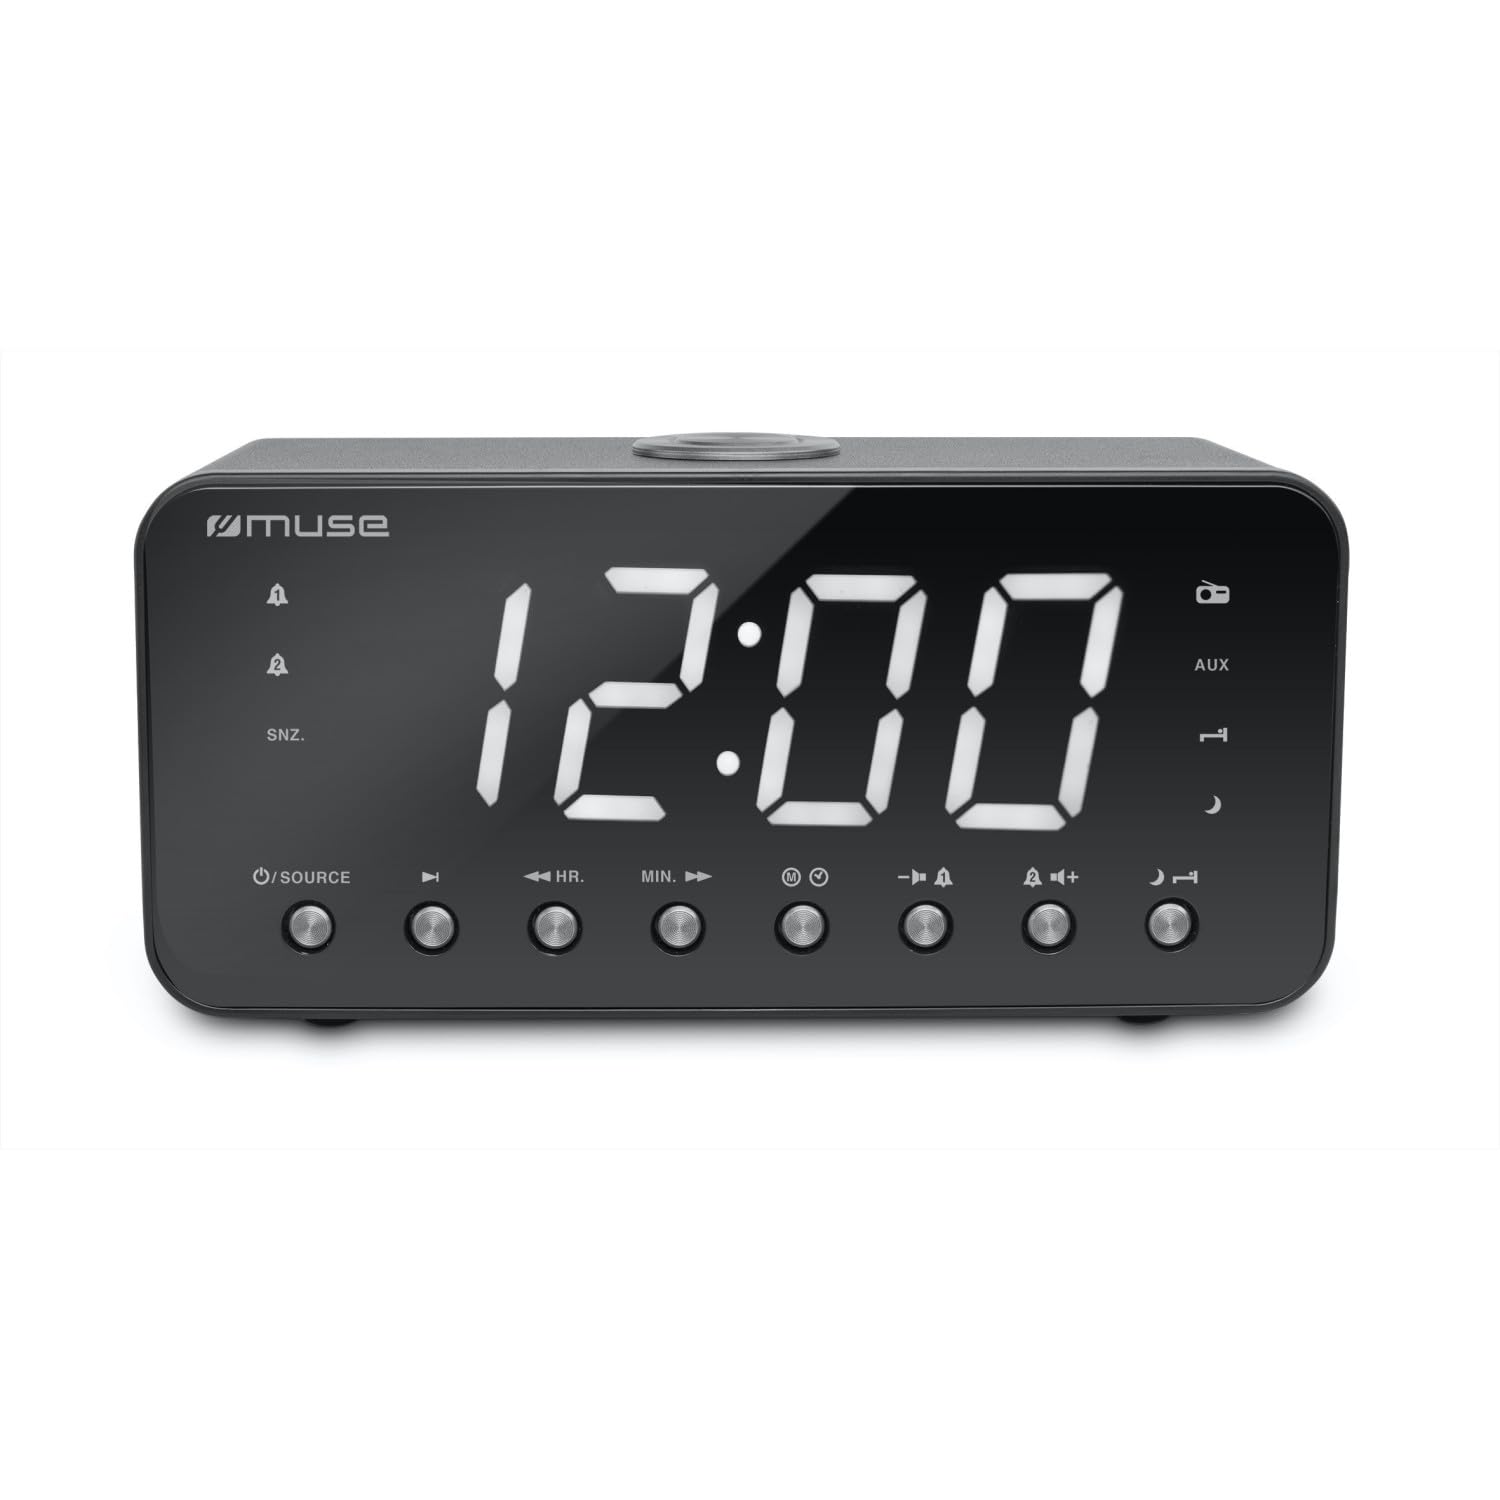
Figure 1: Front view of the Bmi Muse M-192-CR Radio Alarm Clock, showing the large white LED display, speaker grille, and various control buttons on the top panel.
Front Panel
- 1.8-inch White LED Display: Shows time, radio frequency, and alarm status.
- Speaker: For audio output from radio or buzzer.
Top Panel Controls (Typical Layout)
- TIME SET: Press to set the time.
- ALARM 1 / ALARM 2: Press to set or activate Alarm 1 or Alarm 2.
- SNOOZE / SLEEP / DIMMER: Press to activate snooze, set sleep timer, or adjust display brightness.
- VOL - / VOL +: Adjust volume.
- TUNE - / TUNE +: Tune radio frequency or navigate menu options.
- PRESET / MEMORY: Save or recall radio presets.
- RADIO ON/OFF: Turn the radio on or off.
Rear Panel / Side Panel
- DC IN Jack: Connect the power adapter.
- USB Charging Port: For charging external devices (e.g., smartphones).
- AUX IN Jack: Connect external audio devices.
- Battery Compartment: For backup AAA batteries.
- FM Antenna: Extend for better FM reception.
Setup
1. Power Connection
- Insert 2 x AAA batteries (not supplied) into the battery compartment on the bottom of the unit. These batteries provide backup power for time and alarm settings during a power outage.
- Connect the supplied power adapter to the DC IN jack on the rear of the unit.
- Plug the power adapter into a standard AC wall outlet (100-240V, 50/60Hz). The display will light up.
2. Setting the Time
- In standby mode, press and hold the TIME SET button until the hour digits flash on the display.
- Press the TUNE + or TUNE - buttons to adjust the hour.
- Press the TIME SET button again. The minute digits will flash.
- Press the TUNE + or TUNE - buttons to adjust the minutes.
- Press the TIME SET button once more to confirm and exit time setting mode. The time is displayed in 24-hour format.
Operating Instructions
Radio Operation (PLL FM)
- Turning On/Off: Press the RADIO ON/OFF button to turn the radio on or off.
- Tuning Stations:
- Manual Tuning: Press TUNE + or TUNE - repeatedly to adjust the frequency step by step.
- Automatic Tuning: Press and hold TUNE + or TUNE - for a few seconds. The radio will scan and stop at the next available station.
- Adjusting Volume: Press VOL + or VOL - to increase or decrease the volume.
- Saving Presets (20 stations):
- Tune to your desired station.
- Press and hold the PRESET / MEMORY button until "PXX" (XX being the preset number) flashes on the display.
- Use TUNE + or TUNE - to select the desired preset number (1-20).
- Press PRESET / MEMORY again to confirm.
- Recalling Presets: In radio mode, short press the PRESET / MEMORY button repeatedly to cycle through saved stations.
Alarm Settings (Dual Alarm)
The unit features two independent alarms (Alarm 1 and Alarm 2).
- Setting Alarm Time:
- Press and hold ALARM 1 or ALARM 2 button until the alarm hour digits flash.
- Use TUNE + or TUNE - to adjust the hour.
- Press ALARM 1 or ALARM 2 again. The minute digits will flash.
- Use TUNE + or TUNE - to adjust the minutes.
- Press ALARM 1 or ALARM 2 again to confirm the alarm time.
- Setting Alarm Source (Radio or Buzzer):
- After setting the alarm time, press ALARM 1 or ALARM 2 again. The display will show "BUZ" (Buzzer) or a frequency (Radio).
- Use TUNE + or TUNE - to select your desired alarm source. If selecting radio, ensure the desired station is tuned or a preset is selected.
- Press ALARM 1 or ALARM 2 one last time to confirm the alarm settings. An alarm icon will appear on the display.
- Activating/Deactivating Alarm: Short press ALARM 1 or ALARM 2 to toggle the alarm on or off. The alarm icon will appear/disappear.
- Stopping an Active Alarm: When the alarm sounds, press the RADIO ON/OFF button to turn it off for 24 hours.
- Snooze Function: When the alarm sounds, press the SNOOZE button. The alarm will pause for approximately 9 minutes and then sound again.
Sleep Timer Function
The sleep timer allows the radio to play for a set duration before automatically turning off.
- While the radio is playing, press the SLEEP button (often combined with SNOOZE/DIMMER).
- Repeatedly press the SLEEP button to cycle through available sleep times (e.g., 90, 60, 30, 15 minutes, OFF).
- The radio will automatically turn off after the selected duration.
Display Dimmer
Adjust the brightness of the LED display.
- Press the DIMMER button (often combined with SNOOZE/SLEEP) repeatedly to cycle through brightness levels: High, Low, Off.
USB Charging Port
The USB port on the rear of the unit is for charging external devices.
- Connect your smartphone, MP3 player, or other USB-powered device to the USB charging port using a compatible USB cable (not supplied).
- The device will begin charging. Note that this port is for charging only and does not support data transfer.
AUX Input
Connect an external audio source (e.g., MP3 player, smartphone) to play audio through the alarm clock's speaker.
- Connect one end of a 3.5mm audio cable (not supplied) to the AUX IN jack on the rear of the unit.
- Connect the other end of the audio cable to the headphone jack or audio output of your external device.
- The unit should automatically switch to AUX mode, or you may need to press a dedicated "MODE" or "AUX" button if available (refer to specific button layout if different).
- Control playback from your external device and adjust volume using the unit's VOL + / VOL - buttons.
Maintenance
Cleaning the Unit
- Before cleaning, ensure the unit is unplugged from the power outlet.
- Use a soft, dry cloth to wipe the exterior surfaces.
- Do not use abrasive cleaners, waxes, or solvents as they may damage the finish.
- Avoid spraying liquids directly onto the unit.
Battery Replacement
- If the unit experiences frequent power outages or if the time/alarm settings are lost after a power interruption, the backup batteries may need replacement.
- Open the battery compartment on the bottom of the unit.
- Remove the old AAA batteries and insert two new 1.5V AAA batteries, observing the correct polarity (+/-).
- Close the battery compartment securely.
Troubleshooting
| Problem | Possible Cause | Solution |
|---|---|---|
| No power / Display off | Power adapter not connected or faulty. | Ensure the power adapter is securely plugged into the unit and a working wall outlet. |
| Radio reception is poor | FM antenna not extended or unit is in a poor reception area. | Fully extend the FM wire antenna. Try repositioning the unit for better reception. Avoid placing near electronic devices that may cause interference. |
| Alarm does not sound | Alarm not activated, alarm time incorrect, or volume too low. | Check that the alarm icon is displayed. Verify the alarm time and ensure the volume is set to an audible level if using radio alarm. |
| Time/Alarm settings lost after power outage | Backup batteries are dead or not installed. | Install 2 new AAA batteries or replace existing ones in the battery compartment. |
| USB charging not working | USB cable faulty or device not compatible. | Try a different USB cable. Ensure the device you are trying to charge is compatible with standard USB charging. |
Specifications
| Model Number | Muse M-192-CR |
| Brand | Bmi |
| Display | 1.8-inch White LED, 24-hour clock, adjustable brightness |
| Radio Tuner | PLL FM (87.5 - 108 MHz), 20 preset stations |
| Alarm Features | Dual alarm, Wake by Radio or Buzzer, Snooze, Sleep, Nap functions |
| Connectivity | AUX Input, USB Charging Port |
| Power Source | AC 100-240V ~ 50/60Hz (Corded Electric) |
| Backup Battery | 2 x 1.5V AAA batteries (not included) |
| Material | Plastic |
| Color | Black |
| Dimensions (L x D x H) | 226 mm x 86 mm x 108 mm |
| Net Weight | 0.8 kg |
Warranty Information
Bmi products are manufactured to the highest quality standards. This product is covered by a standard manufacturer's warranty against defects in materials and workmanship from the date of purchase. Please retain your proof of purchase for warranty claims. The warranty does not cover damage caused by misuse, accident, unauthorized modification, or normal wear and tear. For specific warranty terms and conditions, please refer to the warranty card included with your product or contact customer support.
Customer Support
If you encounter any issues or have questions regarding your Bmi Muse M-192-CR Radio Alarm Clock that are not addressed in this manual, please contact our customer support team. For the most up-to-date contact information, please visit the official Bmi website or refer to the packaging of your product.