1. Introduction
This manual provides instructions for the Goalake 10-Port Gigabit PoE+ Smart Managed Ethernet Switch, Model GPS208. This device features 8 Gigabit PoE+ ports and 2 Gigabit uplink ports, designed for efficient network expansion and Power over Ethernet (PoE) device management. It supports IEEE802.3af/at standards, delivering up to 30W per PoE port with a total power budget of 120W.
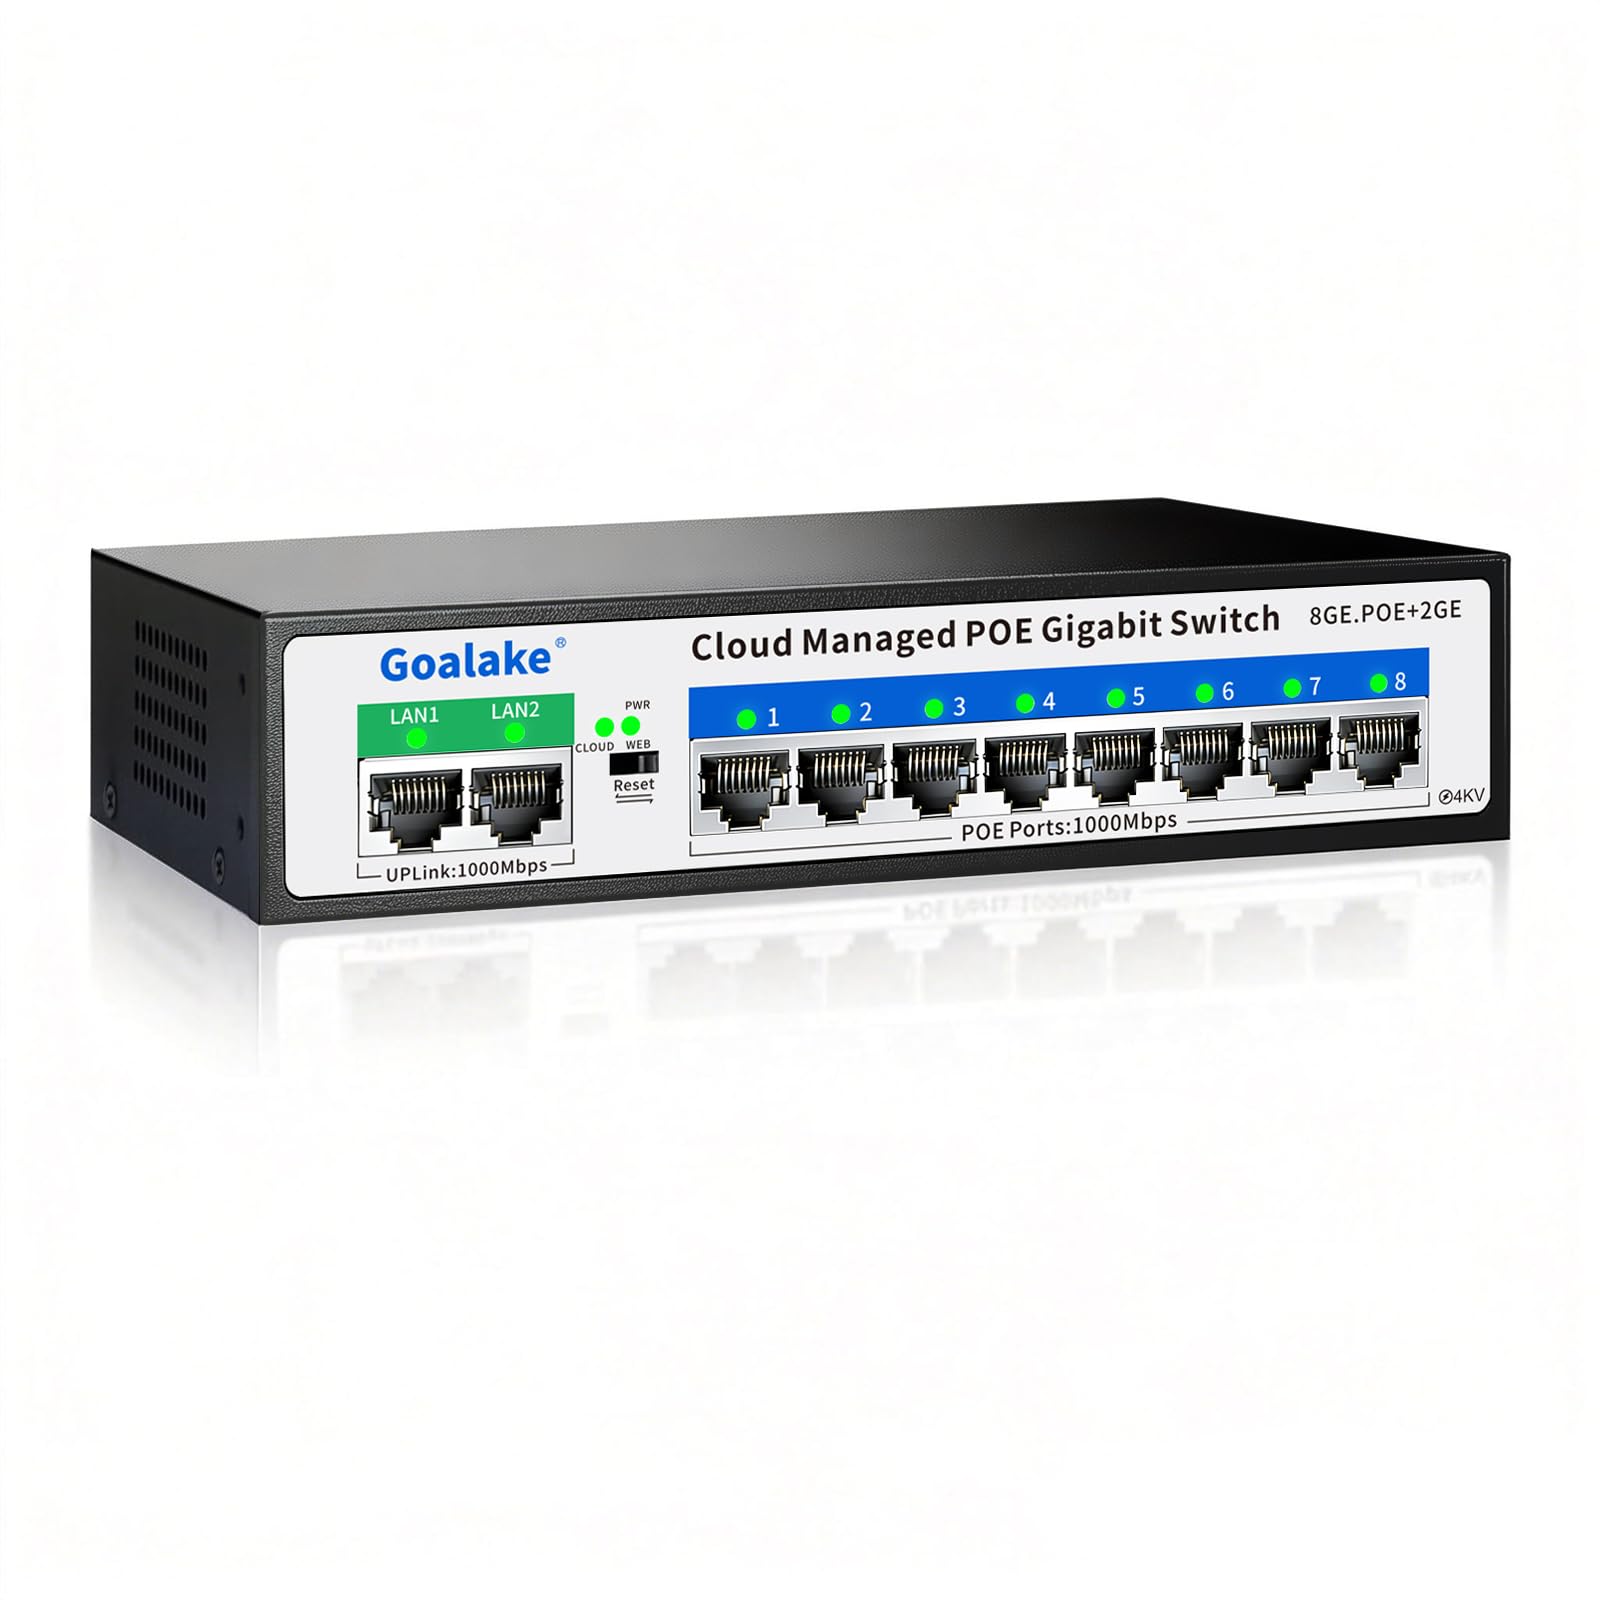
Image 1.1: Goalake 10-Port Gigabit PoE+ Smart Managed Ethernet Switch (Model GPS208).
2. Product Features
- 10-Port Configuration: 8 Gigabit PoE+ ports (1000M) and 2 Gigabit uplink ports (1000M).
- PoE+ Standard: Compliant with IEEE802.3af/at, providing up to 30W per port.
- Total PoE Power Budget: Up to 120W for all PoE ports.
- Smart Management: Easy management via web interface, mobile app, or free software.
- Extend Function: Supports PoE transmission up to 250 meters (820 feet) in Ultra-Far mode.
- Advanced Network Features: VLAN support (802.1Q), QoS optimization, static MAC addressing, storm control, port mirroring, auto MDI/MDI-X, IEEE802.3X flow control.
- Physical Design: Fanless metal housing for silent operation and durability, built-in industrial power supply.
- Installation: Plug-and-play functionality, desktop or wall-mountable.
- Lightning Protection: 4KV professional lightning protection.

Image 2.1: Overview of PoE+ ports and uplink ports supporting 802.3af/at standards.
3. Package Contents
Verify that all items are present in your package:
- 1 x Goalake 10-Port Gigabit PoE+ Smart Managed Ethernet Switch (Model GPS208)
- 1 x Power Cord
- 1 x User Manual

Image 3.1: Contents included in the product packaging.
4. Specifications
| Feature | Description |
|---|---|
| Brand | Goalake |
| Model Number | GPS208 |
| Number of Ports | 10 (8 PoE, 2 Uplink) |
| Data Transfer Rate | 1 Gigabits Per Second |
| PoE Standard | IEEE 802.3af/at |
| Max Power Per PoE Port | 30W |
| Total PoE Power Budget | 120W |
| Interface | RJ45 |
| Switch Type | Cloud Managed PoE Switch |
| Dimensions (L x W x H) | 7.48" x 5.16" x 1.34" (19cm x 13.1cm x 3.4cm) |
| Color | Black |
| Compatible Devices | Cameras, Printers, Access Points, IP Phones, NVRs |

Image 4.1: Physical dimensions of the Goalake PoE Switch.
5. Setup
The Goalake PoE switch is designed for easy plug-and-play installation.
- Connect to Power: Connect the provided power cord to the switch's power input and then to a standard electrical outlet. The power LED indicator will illuminate.
- Connect Devices:
- Connect your network router or main network device to one of the Uplink ports (LAN1 or LAN2) using a standard Ethernet cable.
- Connect your PoE-compatible devices (e.g., IP cameras, wireless access points, IP phones) to the PoE ports (1-8) using Ethernet cables. The switch will automatically detect and power these devices if they are 802.3af/at compliant.
- For non-PoE devices, the switch will only transmit data. An independent power supply or an active PoE splitter may be required for these devices.
- Verify Connection: Check the LED indicators on the front panel. A solid green or amber light typically indicates a successful link and activity.

Image 5.1: Step-by-step guide for basic installation.
6. Operating
6.1 Cloud Management
The Goalake PoE switch supports cloud management, allowing you to monitor and configure your network remotely via a web interface or mobile application.
- Accessing Management: Refer to the included user manual for detailed instructions on accessing the web interface or downloading the mobile app.
- Mobile App: Download the official app for Android or iOS devices.
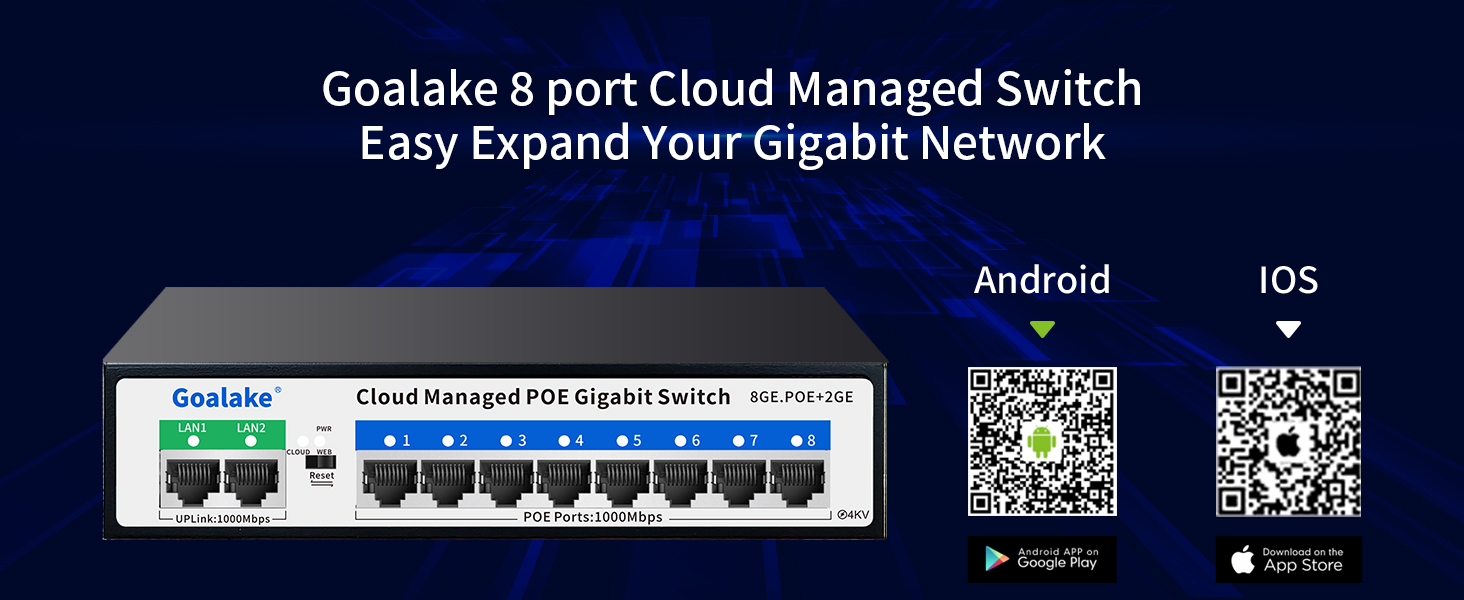
Image 6.1: Cloud management capabilities and mobile app download options.
Download the Android App: Google Play Store
Download the iOS App: Apple App Store
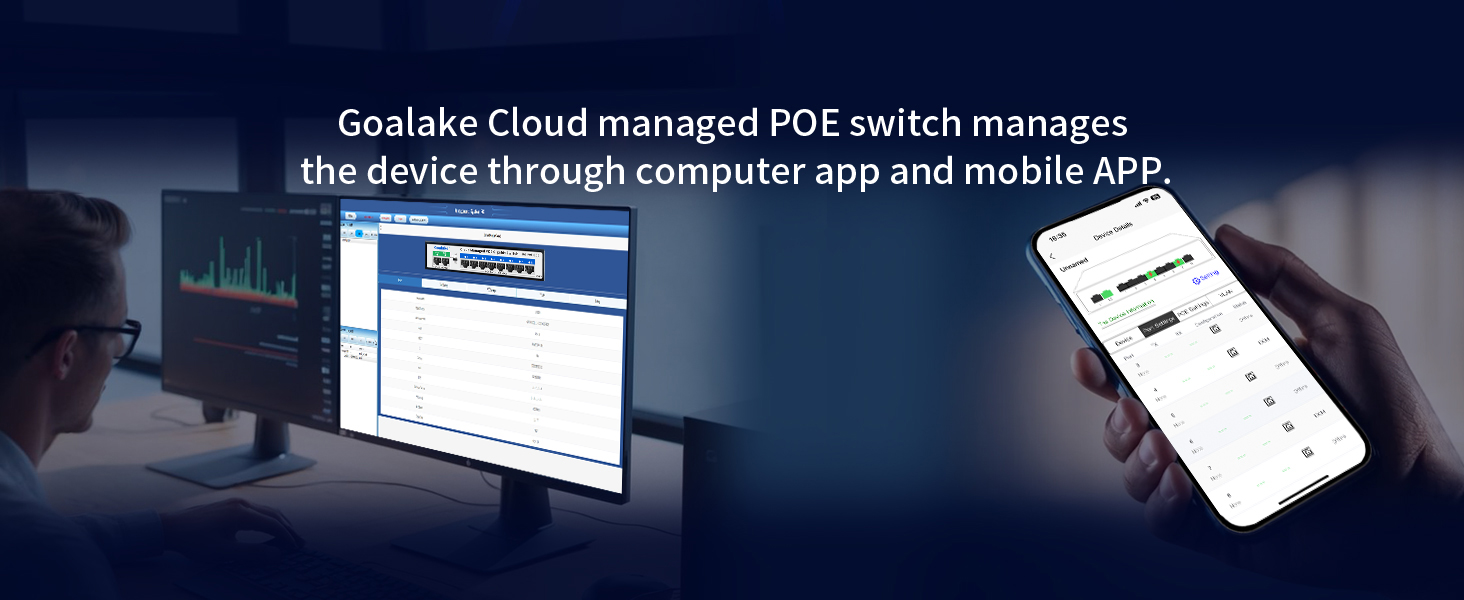
Image 6.2: Remote management interface on desktop and mobile.
6.2 Extend Function (Ultra-Far Mode)
The Extend Function allows for longer PoE transmission distances. When enabled, the switch can deliver power and data up to 250 meters (820 feet) at 10Mbps. This mode is ideal for surveillance cameras or other devices located far from the switch.
- Activation: This function is typically enabled through the switch's management interface (web or app). Look for an "Extend" or "Ultra-Far" setting for individual ports.
- Cable Requirement: For optimal performance in Extend mode, use Category 5e or higher Ethernet cables.

Image 6.3: Enabling Ultra-Far mode for extended PoE range.
6.3 VLAN for Enhanced Security
The switch supports Virtual Local Area Networks (VLANs) to segment your network, improving security and performance by isolating traffic between different groups of devices.
- Configuration: VLANs are configured via the switch's smart management interface. Refer to the detailed software manual for specific steps.
- Benefits: Remote detection, remote restart, remote on/off, and ultra-far mode are supported within a VLAN setup.

Image 6.4: VLAN implementation for network segmentation and security.
6.4 PoE Scheduled Restart
The management interface allows you to schedule sleep or reboot times for the entire device or individual ports. This feature helps clear the cache and maintain stable operation.
- Setting Schedules: Access the "Setting time" or "Timing Reboot" options within the management app or web interface.

Image 6.5: Configuring PoE scheduled restarts for device stability.
6.5 Port Status and Traffic Monitoring
The cloud management interface provides intelligent detection of network cable quality and real-time traffic monitoring for each port.
- Port Icon Description: The interface uses color-coded icons to indicate port status:
- Red Lightning Bolt: Powered
- Green: Good connection
- Yellow: Normal connection
- Orange: Poor connection
- Black: Disconnected
- Traffic Monitoring: View uplink and downlink rates for each port to identify network bottlenecks or abnormalities.
- Bandwidth Control: Set port bandwidth limits and implement port speed limits as needed.

Image 6.6: Port status indicators for network performance monitoring.
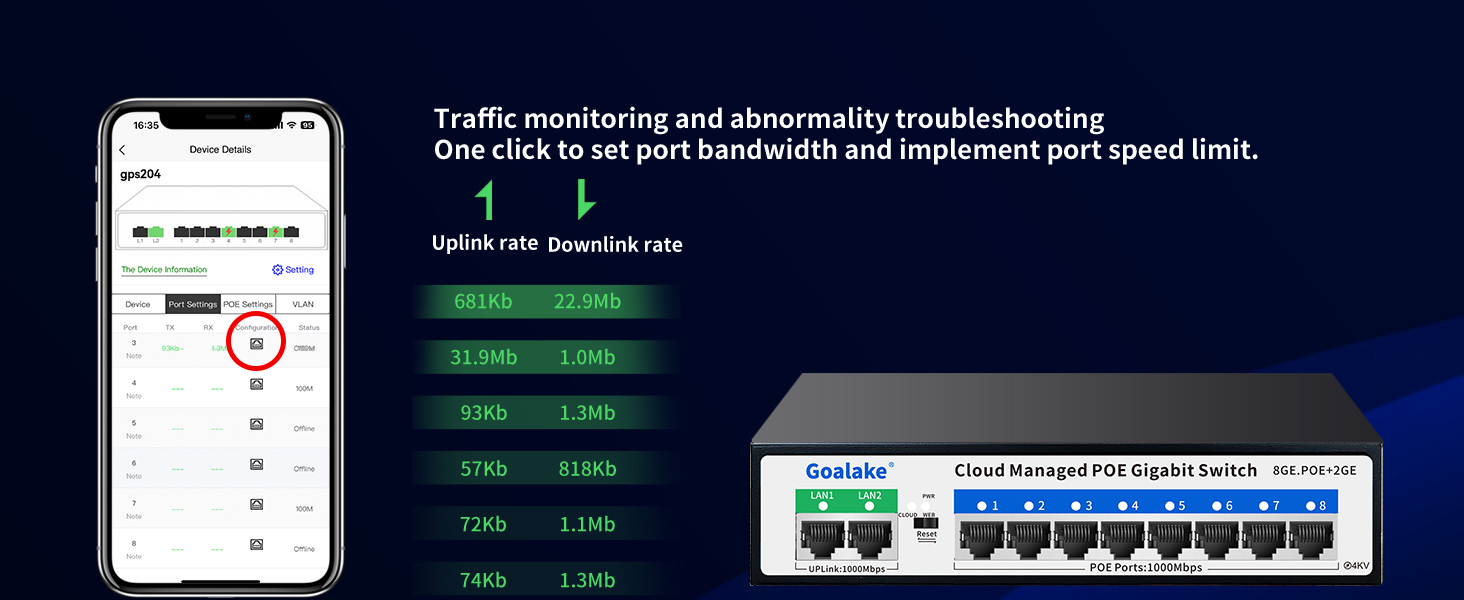
Image 6.7: Traffic monitoring and bandwidth control interface.
7. Placement Methods
The Goalake PoE switch offers flexible placement options to suit various environments:
- Desktop Placement: Place the switch on a flat, stable surface such as a desk or shelf. Ensure adequate ventilation around the device.
- Wall-Mounting: The switch can be mounted on a wall using appropriate screws and anchors (not included). Ensure the mounting surface is sturdy enough to support the device.
- Waterproof Tank/Enclosure: For outdoor or harsh environments, the switch can be installed inside a suitable waterproof enclosure (not included) to protect it from elements.

Image 7.1: Examples of desktop, wall-mount, and waterproof enclosure installations.
8. Troubleshooting
If you encounter issues with your Goalake PoE switch, consider the following:
- No Power: Ensure the power cord is securely connected to both the switch and the power outlet. Verify the power outlet is functional.
- No Link/Connectivity: Check all Ethernet cable connections. Ensure cables are properly seated and not damaged. Try different cables or ports.
- PoE Device Not Powering On: Verify that the connected device is PoE-compatible (IEEE 802.3af/at). Check the power budget of the switch and ensure it's not exceeded. For passive PoE or non-PoE devices, an independent power supply or active PoE splitter is required.
- Slow Network Speed: Check the port status indicators in the cloud management interface for any "Poor" connections. Ensure you are using Category 5e or higher cables. If using Extend mode, note that data speed is reduced to 10Mbps.
- Remote Management Issues: Ensure the switch has an active internet connection. Verify your mobile device or computer is connected to the internet and the management app/web interface is up to date.
- Device Unresponsive: Perform a soft reboot via the management interface. If inaccessible, disconnect the power cord, wait 10 seconds, and reconnect it.
9. Maintenance
The Goalake PoE switch is designed for low maintenance due to its fanless metal design.
- Cleaning: Periodically wipe the exterior of the switch with a soft, dry cloth to remove dust. Do not use liquid cleaners or aerosols.
- Ventilation: Ensure the switch is placed in a location with adequate airflow to prevent overheating. Do not block ventilation openings.
- Firmware Updates: Check the Goalake website or the cloud management platform for any available firmware updates to ensure optimal performance and security.
10. Warranty and Support
Goalake provides comprehensive support for its products.
- Warranty: The Goalake 10-Port Gigabit PoE+ Smart Managed Ethernet Switch comes with a one-year replacement guarantee from the date of purchase.
- Customer Support: For any issues or inquiries within the warranty period, please contact Goalake customer service. Refer to the official Goalake website for contact information.

Image 10.1: Goalake brand logo.