1. Introduction
Thank you for choosing the HAPYTHDA Timer Outlet Plug. This device provides convenient wireless control for your household appliances, featuring a remote control with countdown timer functions and robust safety protections. Please read this manual thoroughly before use to ensure proper operation and safety.

Image 1.1: Overview of the HAPYTHDA Timer Outlet Plug and Remote Control.
2. Package Contents
- 3 x HAPYTHDA Remote Control Outlets
- 1 x Wireless Remote Control
- 1 x CR2032 Battery (pre-installed in remote)
- 1 x Instruction Manual
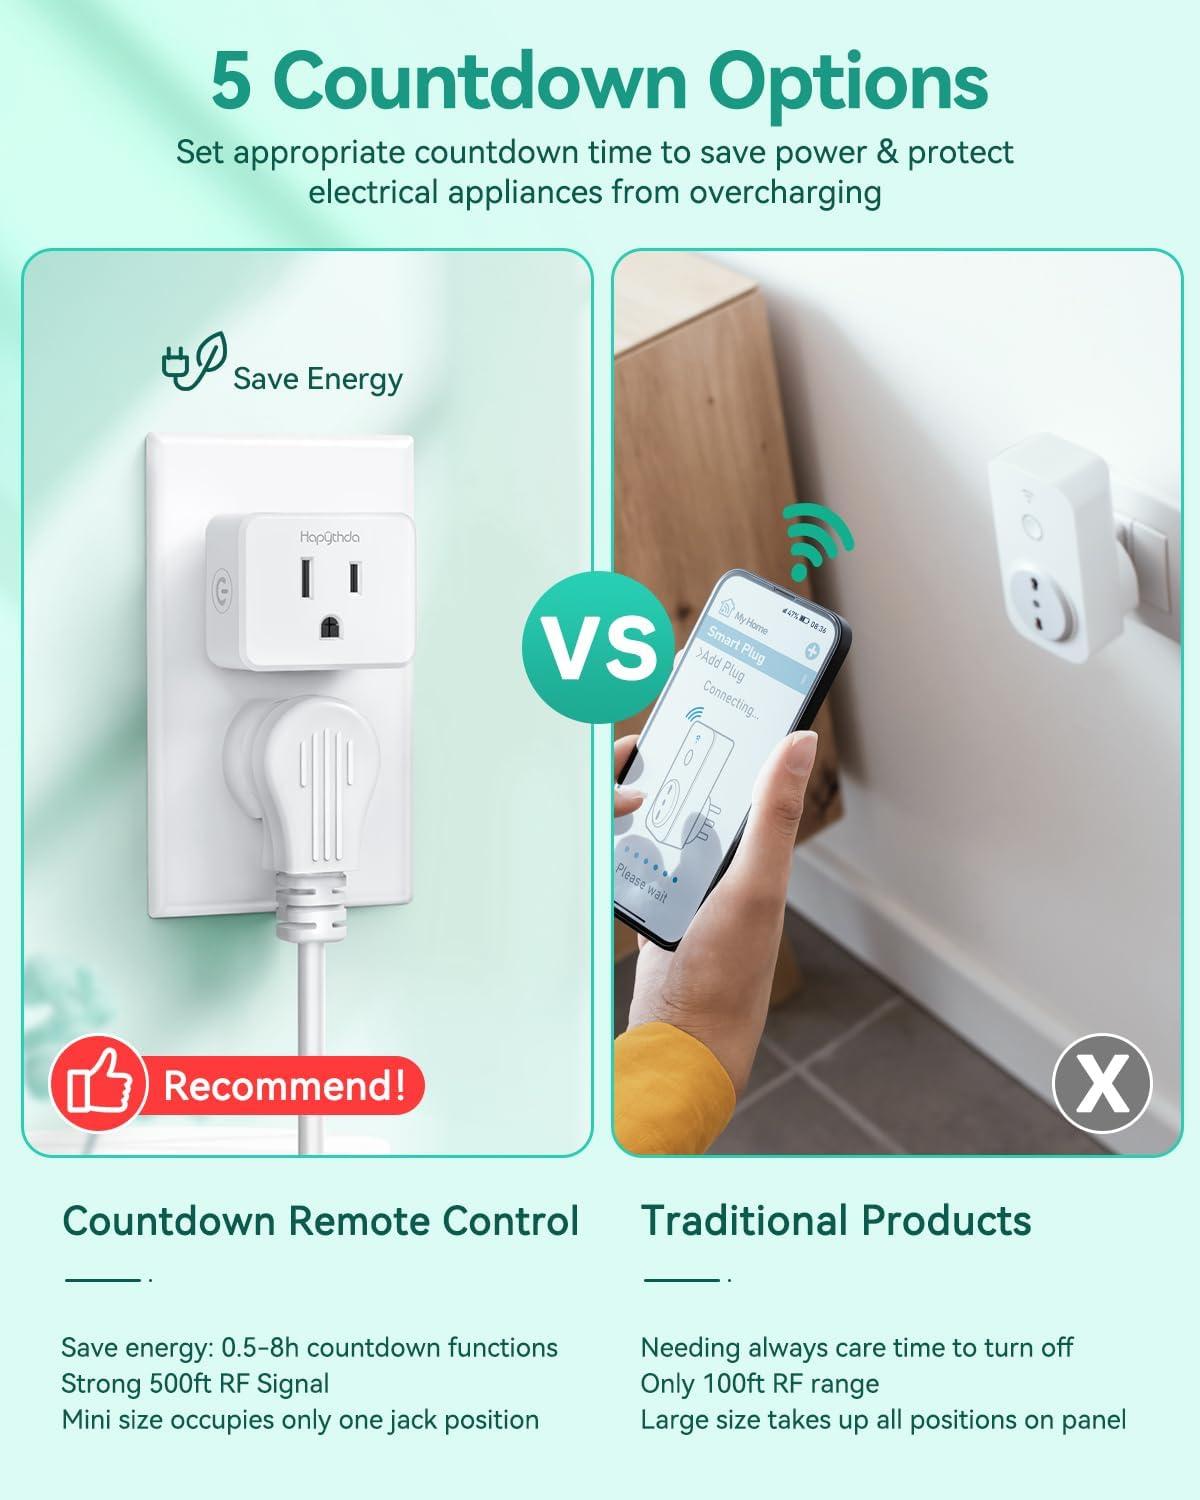
Image 2.1: The package includes three remote control outlets and one remote.
3. Safety Instructions
- Do not exceed the maximum load of 15A/1500W.
- For indoor use only. Avoid exposure to moisture or extreme temperatures.
- Ensure the plug is fully inserted into the wall outlet.
- Do not disassemble or modify the device.
- Keep out of reach of children.
- Unplug the device from the wall outlet before cleaning.
Integrated Safety Features:

Electric Shock-proof: Prevents energization when only one side is plugged in.

Zero Crossing Trigger: Extends appliance life by switching at zero voltage.

Anti-Surge 4000V: Provides enhanced protection against power surges.

V0 Fire-Resistant: Constructed with fireproof PC material for high temperature resistance.
4. Setup and Pairing
Initial Setup:
- Plug the HAPYTHDA remote control outlet into a standard wall socket.
- Connect your appliance to the remote control outlet.
- The remote control is pre-paired with the outlets for immediate use.

Image 4.1: The system requires no wiring for installation.
Pairing Additional Outlets or Remotes:
If you need to pair a new outlet to the remote or re-pair an existing one:
- Plug the outlet into a wall socket.
- Press and hold the small button on the side of the outlet until its indicator light flashes.
- While the light is flashing, press the desired 'ON' or 'OFF' button (e.g., ON-1 or OFF-1) on the remote control.
- The outlet's indicator light will stop flashing and remain solid, indicating successful pairing.

Image 4.2: Simple plug-and-play setup for quick use.
5. Operating Instructions
Basic On/Off Control:
- Press the 'ON' button corresponding to the paired outlet number (e.g., ON-1) to turn the appliance on.
- Press the 'OFF' button corresponding to the paired outlet number (e.g., OFF-1) to turn the appliance off.
- Press the 'ALL ON' button to turn on all paired outlets simultaneously.
- Press the 'ALL OFF' button to turn off all paired outlets simultaneously.
Countdown Timer Function:
The remote control features 5 countdown settings: 0.5, 1, 2, 4, and 8 hours. This function automatically turns off the connected appliance after the selected duration.
- Ensure the appliance is turned on via the remote.
- Press the desired countdown button (0.5H, 1H, 2H, 4H, or 8H) on the remote.
- The outlet's indicator light will blink red to confirm the timer is active.
- The appliance will automatically turn off once the countdown expires.

Image 5.1: Utilize the countdown timer to save energy and prevent overcharging.
Remote Control Range:
The remote control operates using an RF signal, offering a wide range:
- Indoors: 70-160 feet (through walls and doors)
- Outdoors: Up to 500 feet (in open areas)

Image 5.2: The strong RF signal ensures reliable connection across distances.
6. Specifications
| Feature | Specification |
|---|---|
| Model Number | SW-CK2&SW-R06*3 |
| Current Rating | 15 Amps |
| Wattage | 1500 Watts |
| Control Method | Remote Control (RF) |
| Remote Range | Up to 500ft (open area) |
| Countdown Timer Settings | 0.5H, 1H, 2H, 4H, 8H |
| Material | PC (V0 Fire-Resistant) |
| Anti-Surge Protection | 4000V |
| Remote Battery Type | 1 x CR2032 (included) |
| Outlet Dimensions (approx.) | 1.77 x 1.49 x 0.98 inches |
| Remote Dimensions (approx.) | 5.31 x 1.57 x 0.51 inches |

Image 6.1: Compact design of the outlet and remote, showing dimensions.
7. Troubleshooting
- Outlet not responding to remote:
a. Ensure the outlet is properly plugged into a live wall socket.
b. Check if the remote control battery (CR2032) needs replacement. To replace, carefully open the remote's battery compartment.
c. Re-pair the outlet with the remote control following the steps in Section 4. - Appliance not turning on/off:
a. Verify the appliance itself is functioning correctly when plugged directly into a wall socket.
b. Ensure the appliance's power switch is in the 'ON' position if it has one. - Limited remote range:
a. While the system has a strong RF signal, thick walls or metal structures can reduce range. Try repositioning the outlet or remote.
b. Ensure there are no strong sources of electromagnetic interference nearby. - Countdown timer not working:
a. Ensure the outlet was turned ON by the remote before activating the countdown function.
b. The countdown timer needs to be set each time you want to use it; it does not remember previous settings.
8. Warranty and Support
HAPYTHDA provides up to five years of warranty service for this product. For any questions, technical assistance, or warranty claims, please contact HAPYTHDA customer support. We offer lifelong consulting services to ensure your satisfaction.
Contact information can typically be found on the HAPYTHDA official website or through your purchase platform.