1. Introduction
The HUAGZIMO 7-Color Ferris Wheel LED Soldering Practice Kit is an electronic DIY project designed for children, students, and hobbyists to learn and practice soldering skills. This kit allows users to assemble a rotating Ferris wheel adorned with multi-color LEDs, providing an engaging way to understand basic electronics and circuit board assembly. Please note that this is not a finished product and requires assembly and soldering.
2. Safety Information
Warning: This kit involves soldering, which uses heat and can produce fumes. Always follow these safety guidelines:
- Work in a well-ventilated area to avoid inhaling solder fumes.
- Wear appropriate eye protection (safety glasses) to protect against splashes or flying debris.
- Use a soldering iron stand to prevent accidental burns.
- Ensure the soldering iron is properly grounded.
- Avoid touching the hot tip of the soldering iron.
- Keep flammable materials away from your workspace.
- Wash hands thoroughly after handling solder, especially lead-based solder.
- Adult supervision is recommended for children and beginners.
3. Kit Components
Before beginning assembly, verify that all components are present and undamaged. If any components are missing or damaged, please contact customer support for replacements.
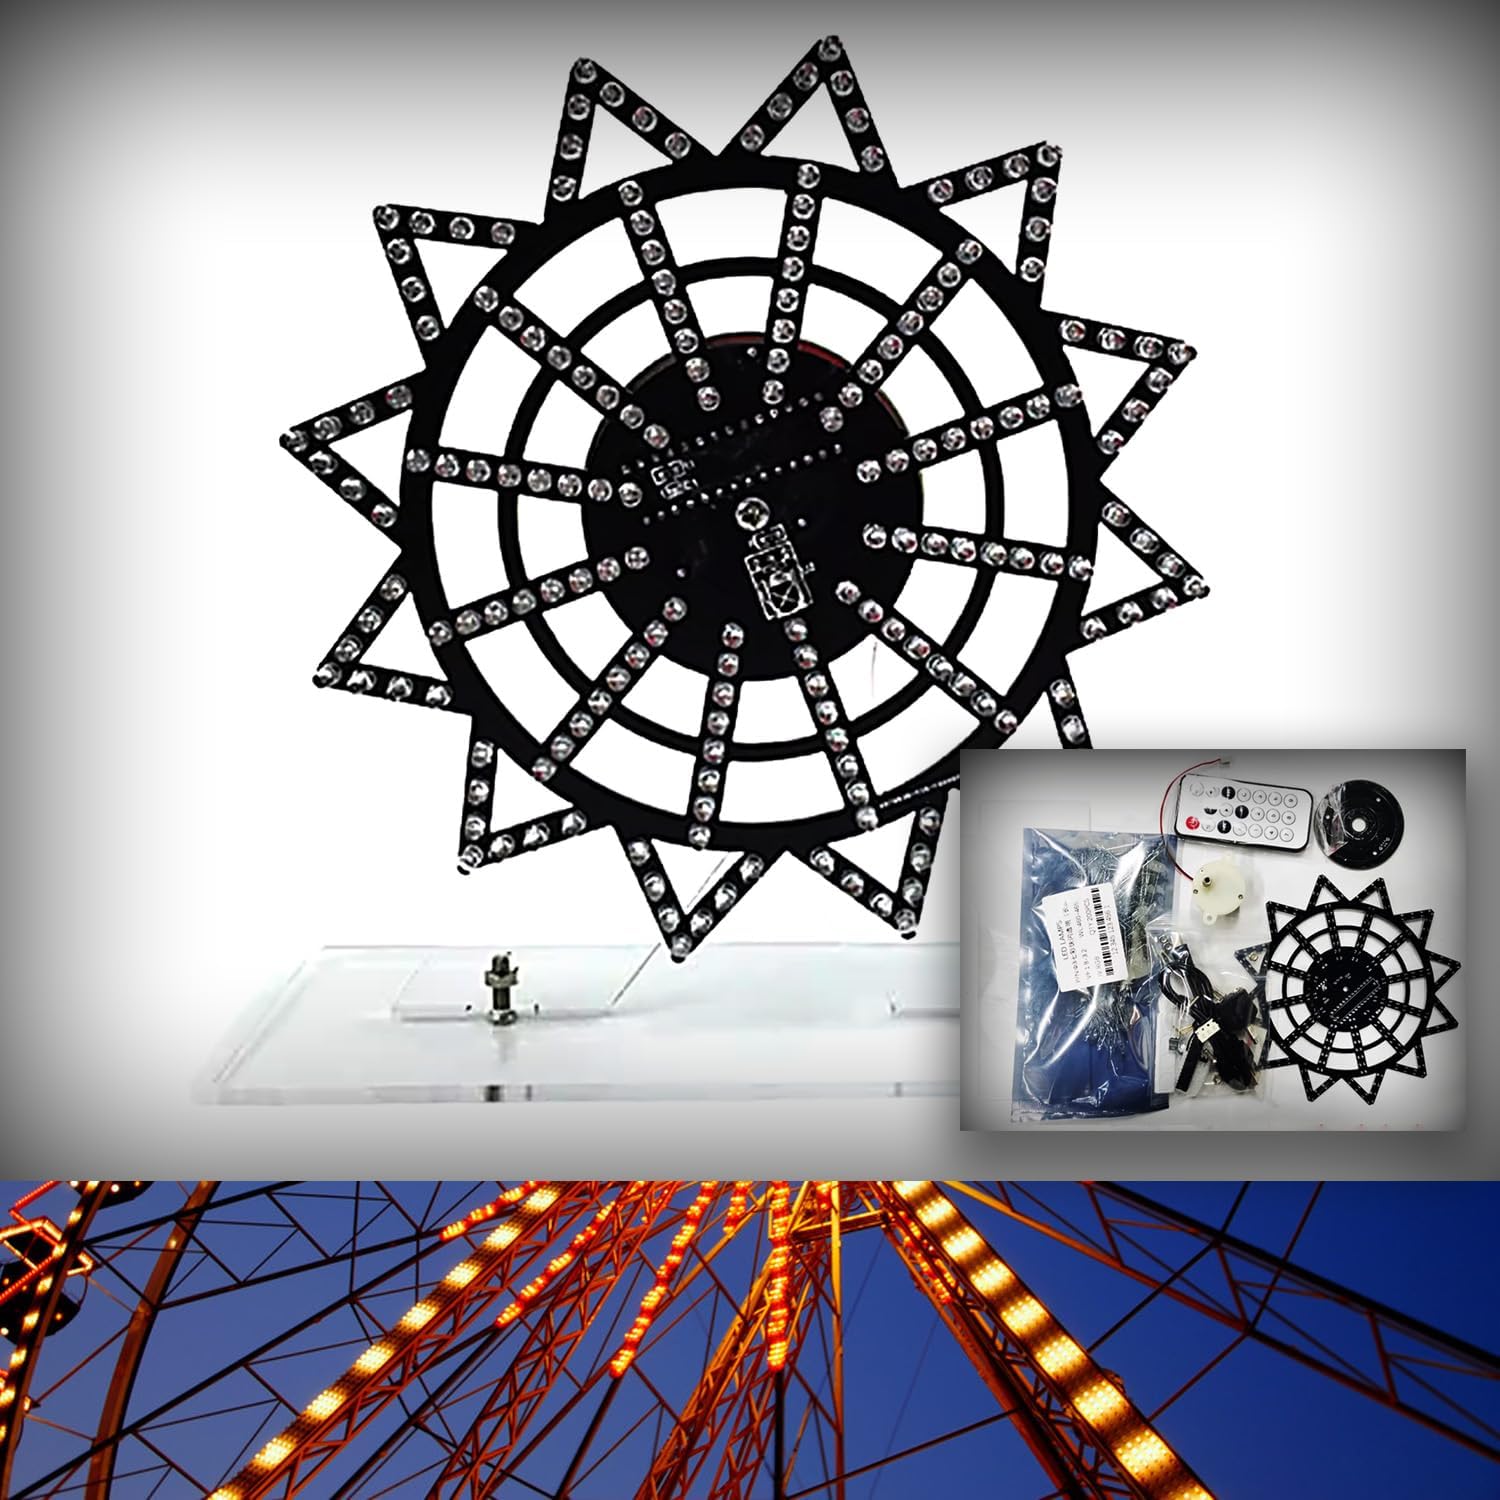
Image 3.1: Overview of the HUAGZIMO 7-Color Ferris Wheel LED Soldering Practice Kit components. This includes the main circuit board, various electronic components like LEDs, resistors, capacitors, a motor, and mounting hardware.
The kit typically includes:
- Main Ferris Wheel PCB (Printed Circuit Board)
- Various LEDs (Light Emitting Diodes)
- Resistors, Capacitors, and other passive components
- Microcontroller/Integrated Circuit
- DC Motor and mounting bracket
- Power input jack
- Remote control (may vary by kit version)
- Acrylic base and support pillars
- Screws and nuts for assembly
- English installation instructions (often via QR code)
4. Setup and Assembly
Assembly of the HUAGZIMO 7-Color Ferris Wheel LED Soldering Practice Kit requires careful attention to detail and basic soldering skills. Detailed instructions are typically provided via a QR code included in the package. Scan the QR code for comprehensive, step-by-step guidance with pictures.
4.1 General Assembly Steps:
- Prepare Workspace: Ensure a clean, well-lit, and well-ventilated area. Gather all necessary tools (soldering iron, solder, wire cutters, tweezers, safety glasses).
- Identify Components: Match each component to its designated spot on the PCB. The board is clearly mapped and labeled to assist with component placement.
- Solder Components: Begin by soldering smaller components (resistors, diodes) first, then move to larger ones (capacitors, IC sockets, LEDs). Pay close attention to polarity for components like LEDs and electrolytic capacitors.
- Assemble Motor and PCB: Mount the DC motor onto the PCB according to the instructions. Ensure secure connections for power and control.
- Attach PCB to Base: Secure the assembled Ferris wheel PCB to the acrylic base using the provided screws and pillars.
- Power Connection: Connect the power input jack.

Image 4.1: Detailed view of the motor and PCB connections, illustrating the soldering points and assembly method for the rotating mechanism.

Image 4.2: Diagram showing the approximate dimensions of the assembled Ferris Wheel kit, including height, width, and base length.
5. Operation
Once assembled and powered, the HUAGZIMO 7-Color Ferris Wheel LED Soldering Practice Kit will display various light patterns. The kit features 16 different LED patterns, creating a dynamic visual effect as the Ferris wheel rotates.
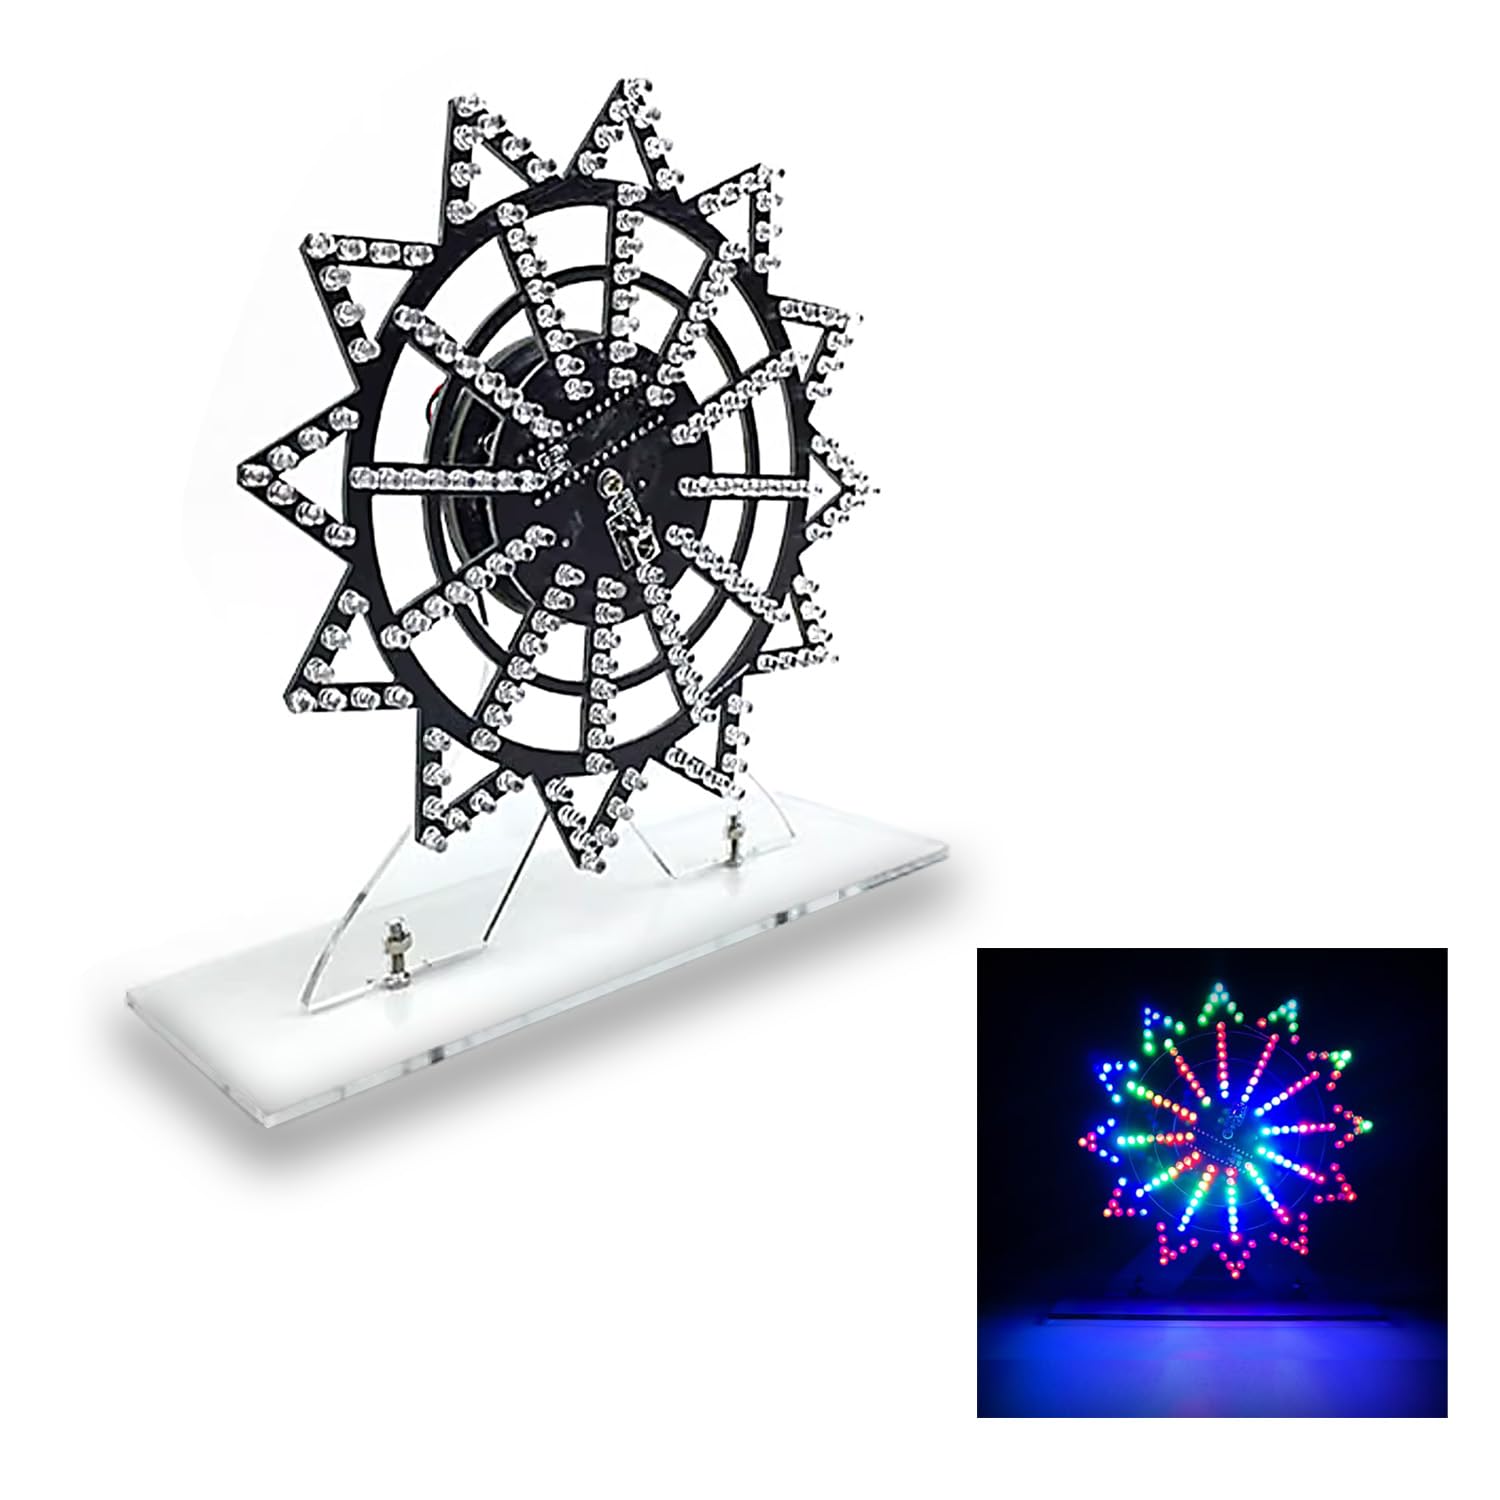
Image 5.1: The assembled HUAGZIMO Ferris Wheel LED kit in operation, showcasing one of its 16 colorful light patterns.
5.1 Using the Remote Control (if included):
Some versions of this kit may include a remote control for changing light patterns or controlling rotation. Refer to the specific instructions provided with your kit for details on remote control functions. Typically, buttons will allow you to cycle through patterns, adjust speed, or turn the unit on/off.

Image 5.2: The assembled Ferris Wheel kit alongside its remote control, used for adjusting display settings.
5.2 Official Product Video:
Video 5.1: An official product video demonstrating the various light patterns and rotation of the HUAGZIMO 7-Color Ferris Wheel Soldering Kit. This video provides a visual overview of the kit's functionality once assembled.
6. Maintenance
To ensure the longevity and optimal performance of your HUAGZIMO 7-Color Ferris Wheel LED Soldering Practice Kit, follow these simple maintenance guidelines:
- Cleaning: Gently wipe the acrylic base and PCB with a soft, dry cloth to remove dust. Avoid using harsh chemicals or abrasive materials.
- Handling: Handle the assembled Ferris wheel with care to prevent damage to the soldered connections or electronic components.
- Storage: When not in use, store the kit in a dry, cool place away from direct sunlight and excessive humidity.
- Power: Disconnect power when not in use for extended periods.
7. Troubleshooting
If your HUAGZIMO 7-Color Ferris Wheel LED Soldering Practice Kit does not function as expected after assembly, consider the following troubleshooting steps:
- No Power:
- Check power supply connection.
- Ensure the power adapter is functioning correctly.
- Verify all power-related solder joints on the PCB are secure and properly made.
- LEDs Not Lighting Up / Incorrect Patterns:
- Inspect each LED for correct polarity (long leg typically positive, short leg negative).
- Check all LED solder joints for cold joints or bridges.
- Verify that resistors and other components are correctly placed and soldered according to their values and polarity.
- Ensure the microcontroller is correctly oriented and soldered.
- Ferris Wheel Not Rotating:
- Check the motor connections for secure soldering.
- Ensure the motor is properly mounted and not obstructed.
- Verify that the motor driver circuit (if applicable) is correctly assembled.
- Remote Control Not Working:
- Check the battery in the remote control.
- Ensure the IR receiver on the PCB is correctly oriented and soldered.
- Verify there are no obstructions between the remote and the receiver.
If you continue to experience issues, please contact customer support for professional assistance.
8. Specifications
| Feature | Detail |
|---|---|
| Brand | HUAGZIMO |
| Model Number | 7-color Ferris Wheel |
| Item Weight | 1.76 ounces (50 Grams) |
| Package Dimensions | 5.9 x 3.9 x 0.39 inches |
| Material | Metal (for components), Acrylic (for base) |
| Power Source | DC |
| Display Type | LED (Multi-color) |
| Number of Patterns | 16 (approximate) |
9. Warranty and Support
HUAGZIMO is committed to providing quality products and customer satisfaction. While this is a DIY kit, we offer support for any issues you may encounter.
- Missing or Damaged Components: If any components are missing from your kit upon arrival or are found to be damaged, please contact us immediately for replacements.
- Technical Assistance: For any questions regarding assembly, operation, or troubleshooting, please contact our customer support team. We are available to provide professional help and guidance.
- Contact Information: Refer to the packaging or the QR code instructions for specific contact details for HUAGZIMO customer support.