
HENGCMM 24V-10000W
Wind Solar Hybrid Charge Controller User Manual
Model: 24V-10000W
Brand: HENGCMM
Introduction
The HENGCMM Wind Solar Hybrid Charge Controller is designed for small off-grid installations, enabling safe and efficient charging of batteries using both wind turbines and solar panels. This manual provides essential information for the proper installation, operation, and maintenance of your hybrid charge controller.
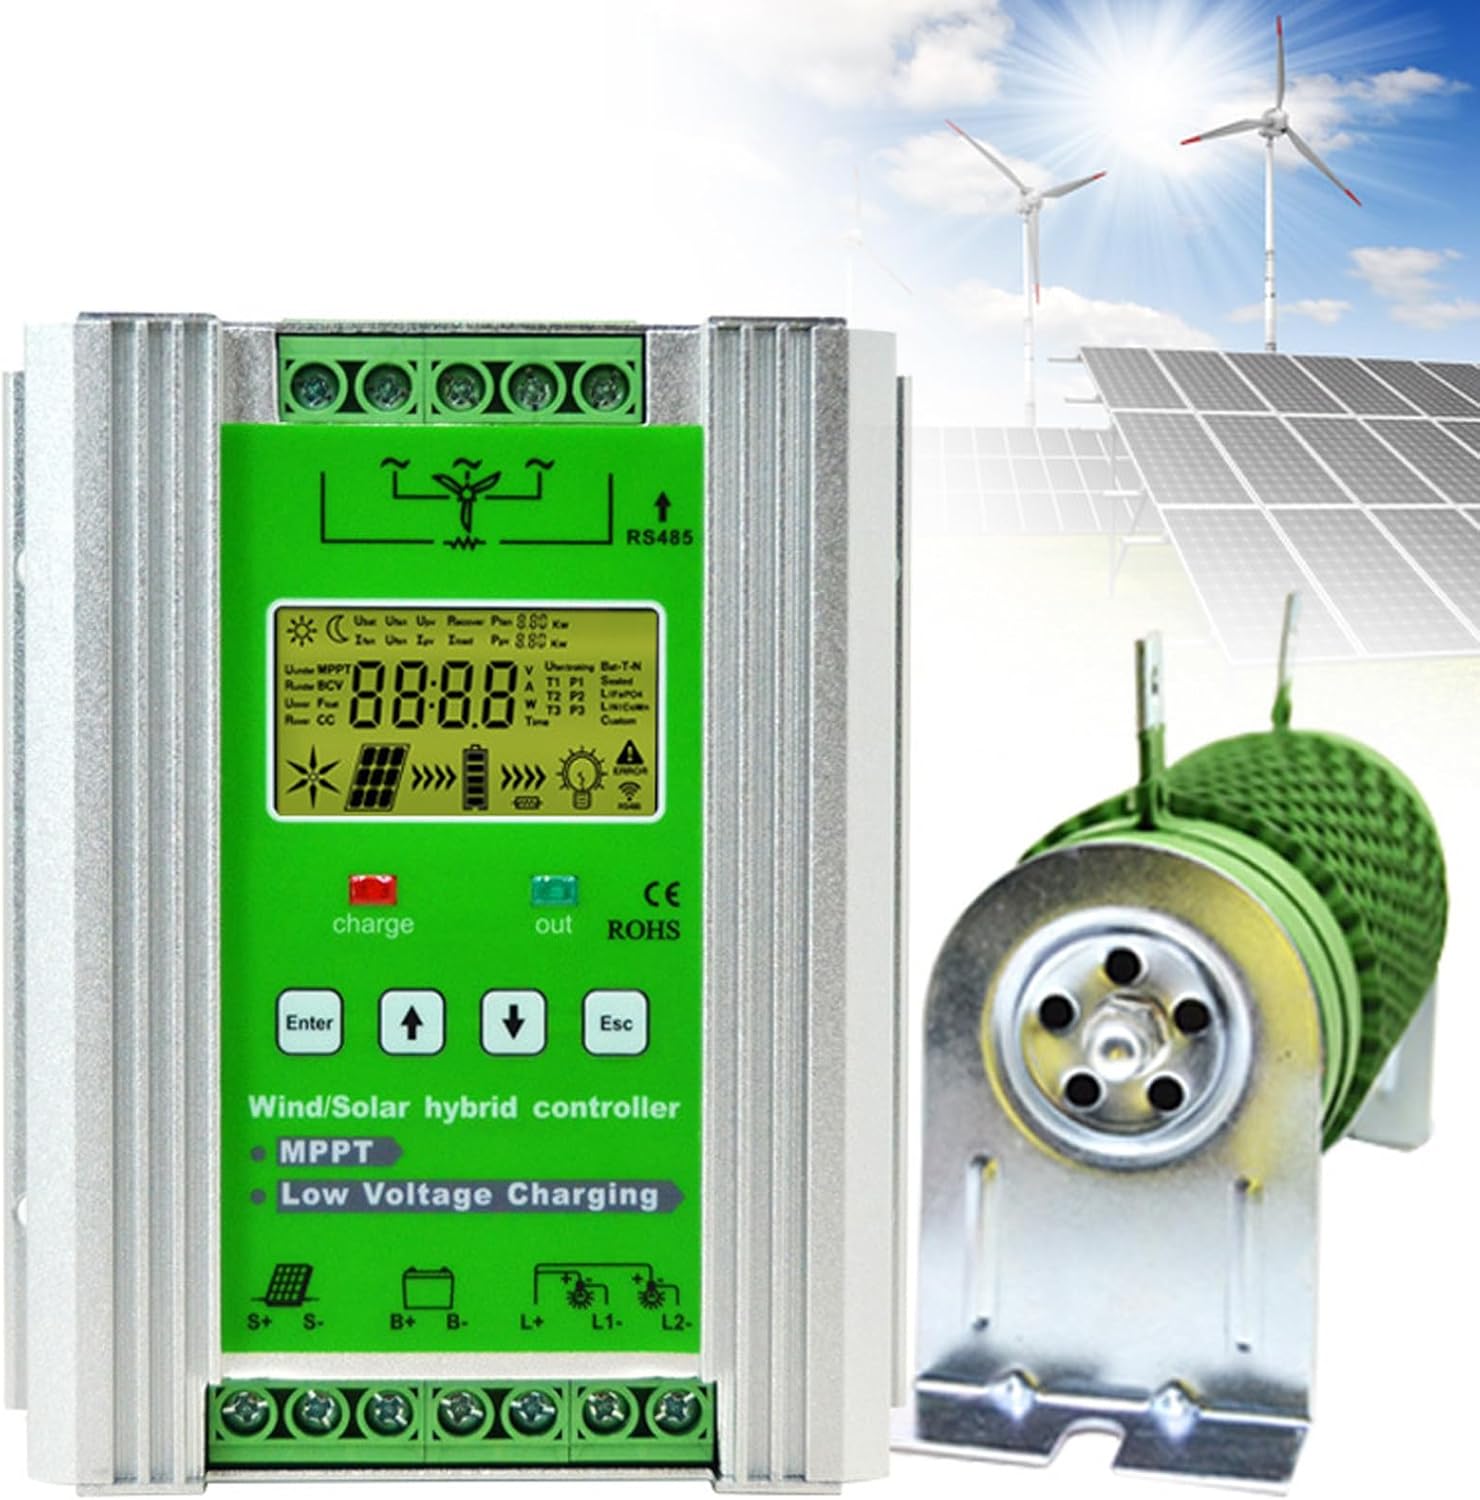
Figure 1: HENGCMM Wind Solar Hybrid Charge Controller. This image shows the main unit of the controller alongside a wind turbine and solar panels, illustrating its application in a hybrid energy system.
Safety Precautions
To ensure safe operation and prevent damage to the device or injury, please observe the following precautions:
- Do not plug or unplug the power adapter with wet hands. This can lead to electric shock.
- When connecting the controller, pay close attention to the specific precautions for different connection methods as outlined in the installation section. Incorrect wiring can cause damage.
- Ensure the installation environment is dry and free from excessive dust to protect the internal components.
- Always disconnect power sources before performing any maintenance or wiring changes.
Product Overview
The HENGCMM Wind Solar Hybrid Charge Controller integrates advanced MPPT (Maximum Power Point Tracking) technology for wind charging and PWM (Pulse Width Modulation) technology for solar charging, optimizing energy harvesting from both sources. It features a robust design with a three-proof paint coating on the internal circuit board for enhanced durability against dust, moisture, and static electricity.
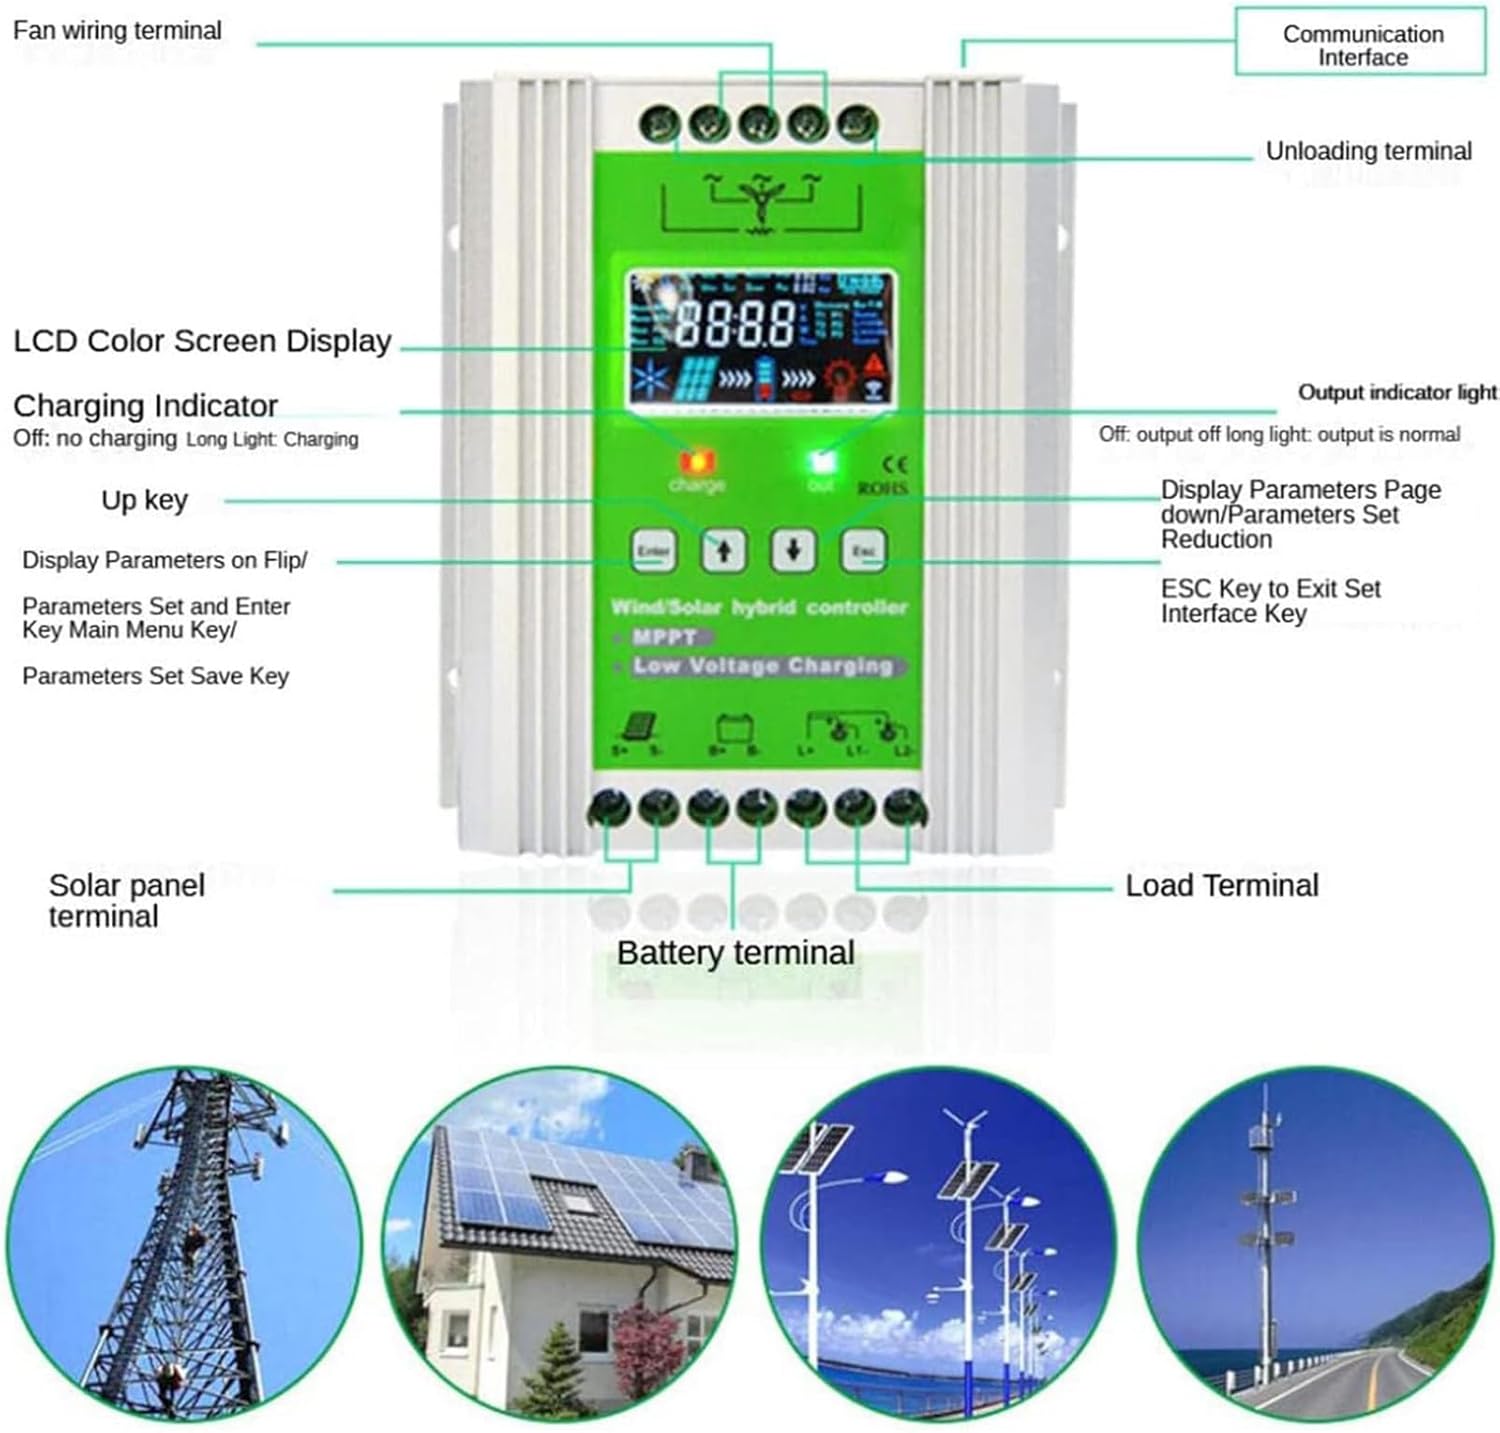
Figure 2: Controller Components and Indicators. This diagram labels key parts of the controller, including the LCD Color Screen Display, Charging Indicator, Up Key, Enter Key, ESC Key, Fan Wiring Terminal, Communication Interface, Unloading Terminal, Solar Panel Terminal, Battery Terminal, and Load Terminal.
The controller supports dual power supply functions (battery + solar energy) and allows for setting different load output working modes, providing flexibility for various off-grid applications.
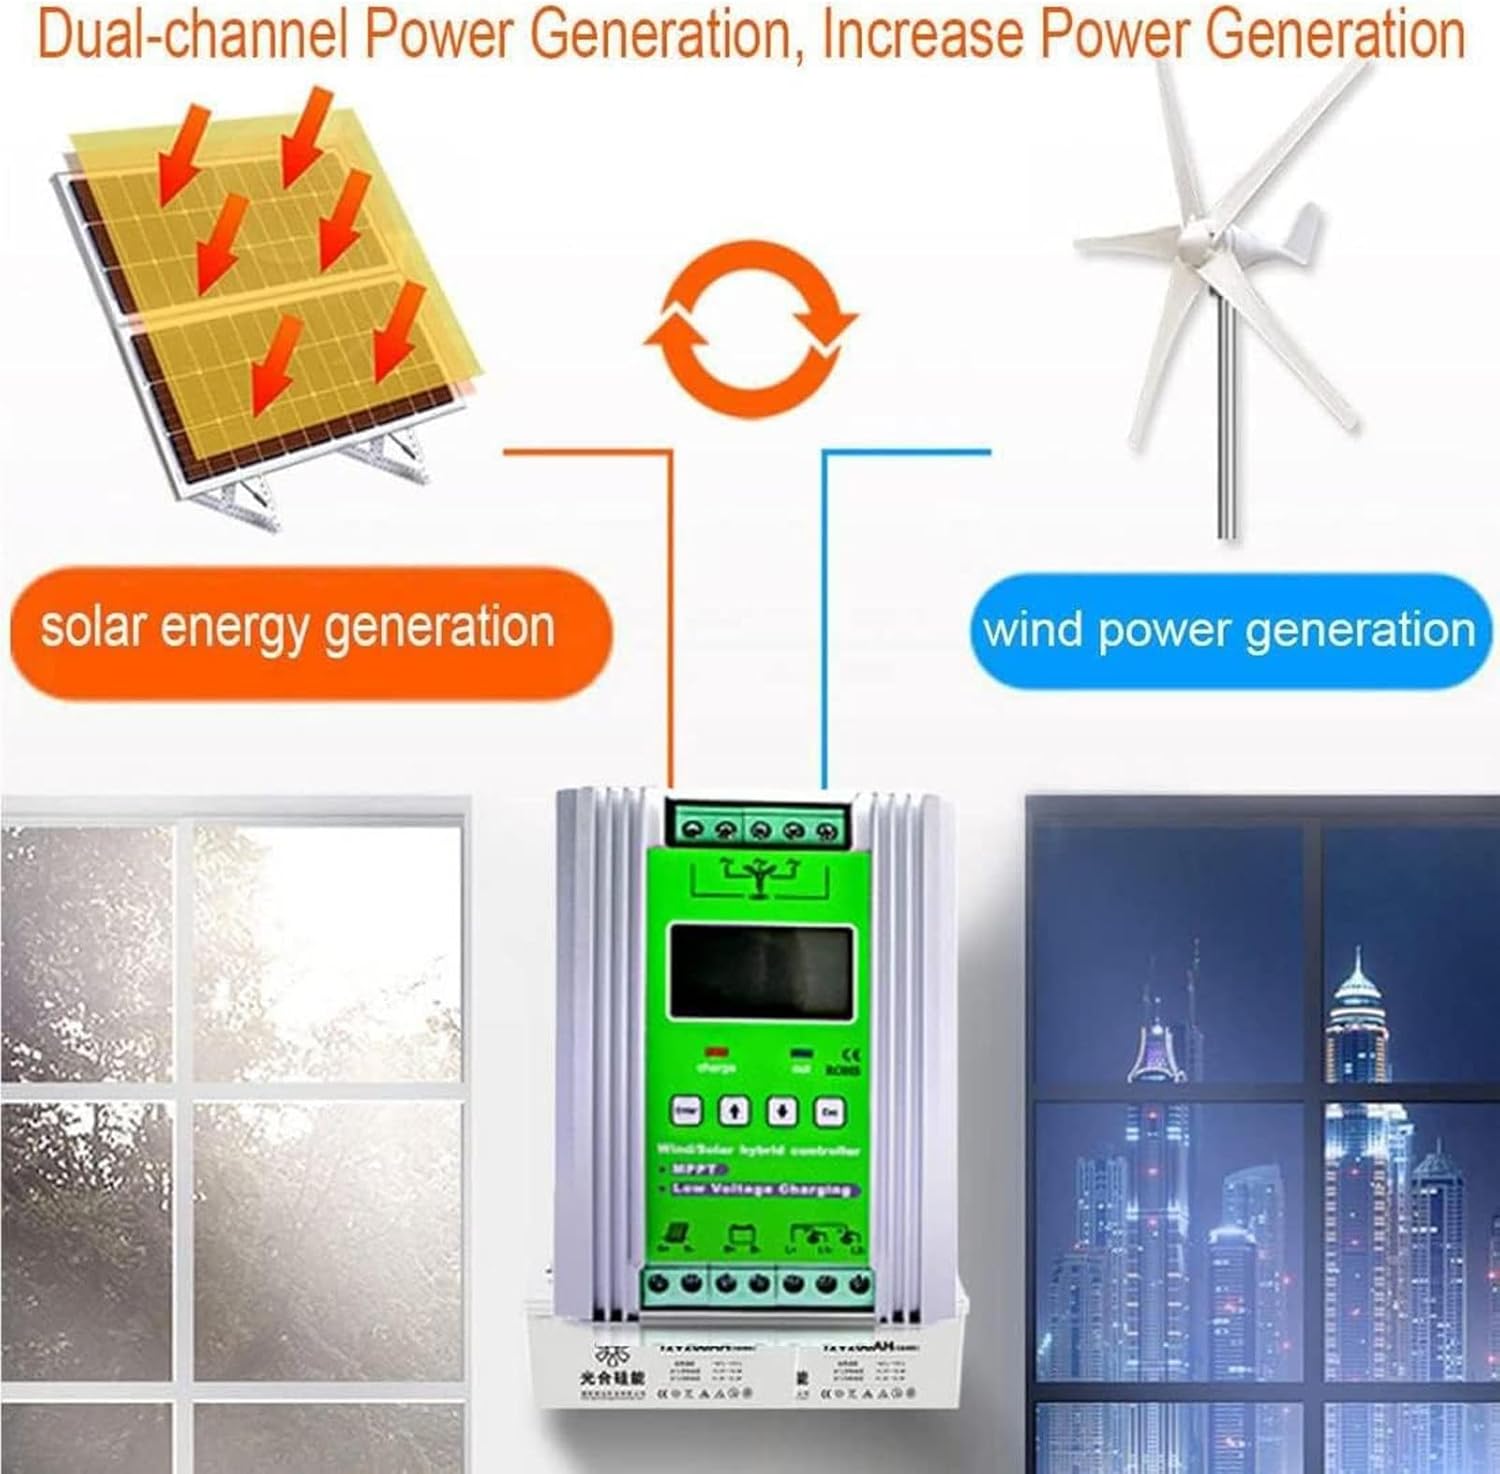
Figure 3: Dual-Channel Power Generation. This illustration demonstrates how the controller integrates both solar energy generation and wind power generation to increase overall power output for battery charging.
Features
- Hybrid Charge Control: Automatically identifies and combines 12V, 24V, or 48V batteries in wind and solar supplement mode for various applications including homes, ships, and street lights.
- MPPT Technology for Wind: Utilizes a boost MPPT control algorithm for the wind turbine charging section, ensuring efficient charging even at low wind speeds. Includes a stepless discharge function with an external unloading resistor.
- PWM Technology for Solar: Solar panel charging employs PWM technology via series MOS tubes for effective power management.
- Stable Information Mode & LCD Display: Compatible with various battery types, allowing parameter adjustments after selection. A large LCD screen provides clear information and visible parameters for easy understanding, operation, and adjustment.
- Multiple Protections: Features comprehensive protection functions including solar reverse connection protection, overcharge, undervoltage, overload protection, battery reverse connection, open circuit protection, and lightning protection. Voltage locking and adjustable output modes are also included.
- Wide Application: Suitable for wind and solar hybrid energy storage power stations, wind and solar hybrid monitoring modes, and general wind/solar hybrid systems for residential, marine, and public lighting uses.
Specifications
| Parameter | Value |
|---|---|
| System Rated Voltage | 12V/24V/48V (Automatic Identification) |
| No-load Current (DC) | ≤0.05A |
| Controller Power Supply Mode | Battery or Photovoltaic Panel |
| Control Method | Fan MPPT Boost, PWM Unloading, PWM Overcurrent |
| Load Working Modes | Pure Light Control, Normally Open, Light Control + Time Control (Four Periods + Morning Light) |
| Display Mode | LCD Display |
| Display Parameters | Voltage, Battery Power, Current, Power, Load Mode, Temperature, etc. |
| Heat Dissipation Method | Aluminum Profile Heat Dissipation and Self-cooling |
| Working Temperature & Humidity Range | -20℃ to +55℃ / 35% to 85%RH (no condensation) |
| Package Dimensions | 3.94 x 3.94 x 3.94 inches |
| Item Weight | 2.2 pounds |
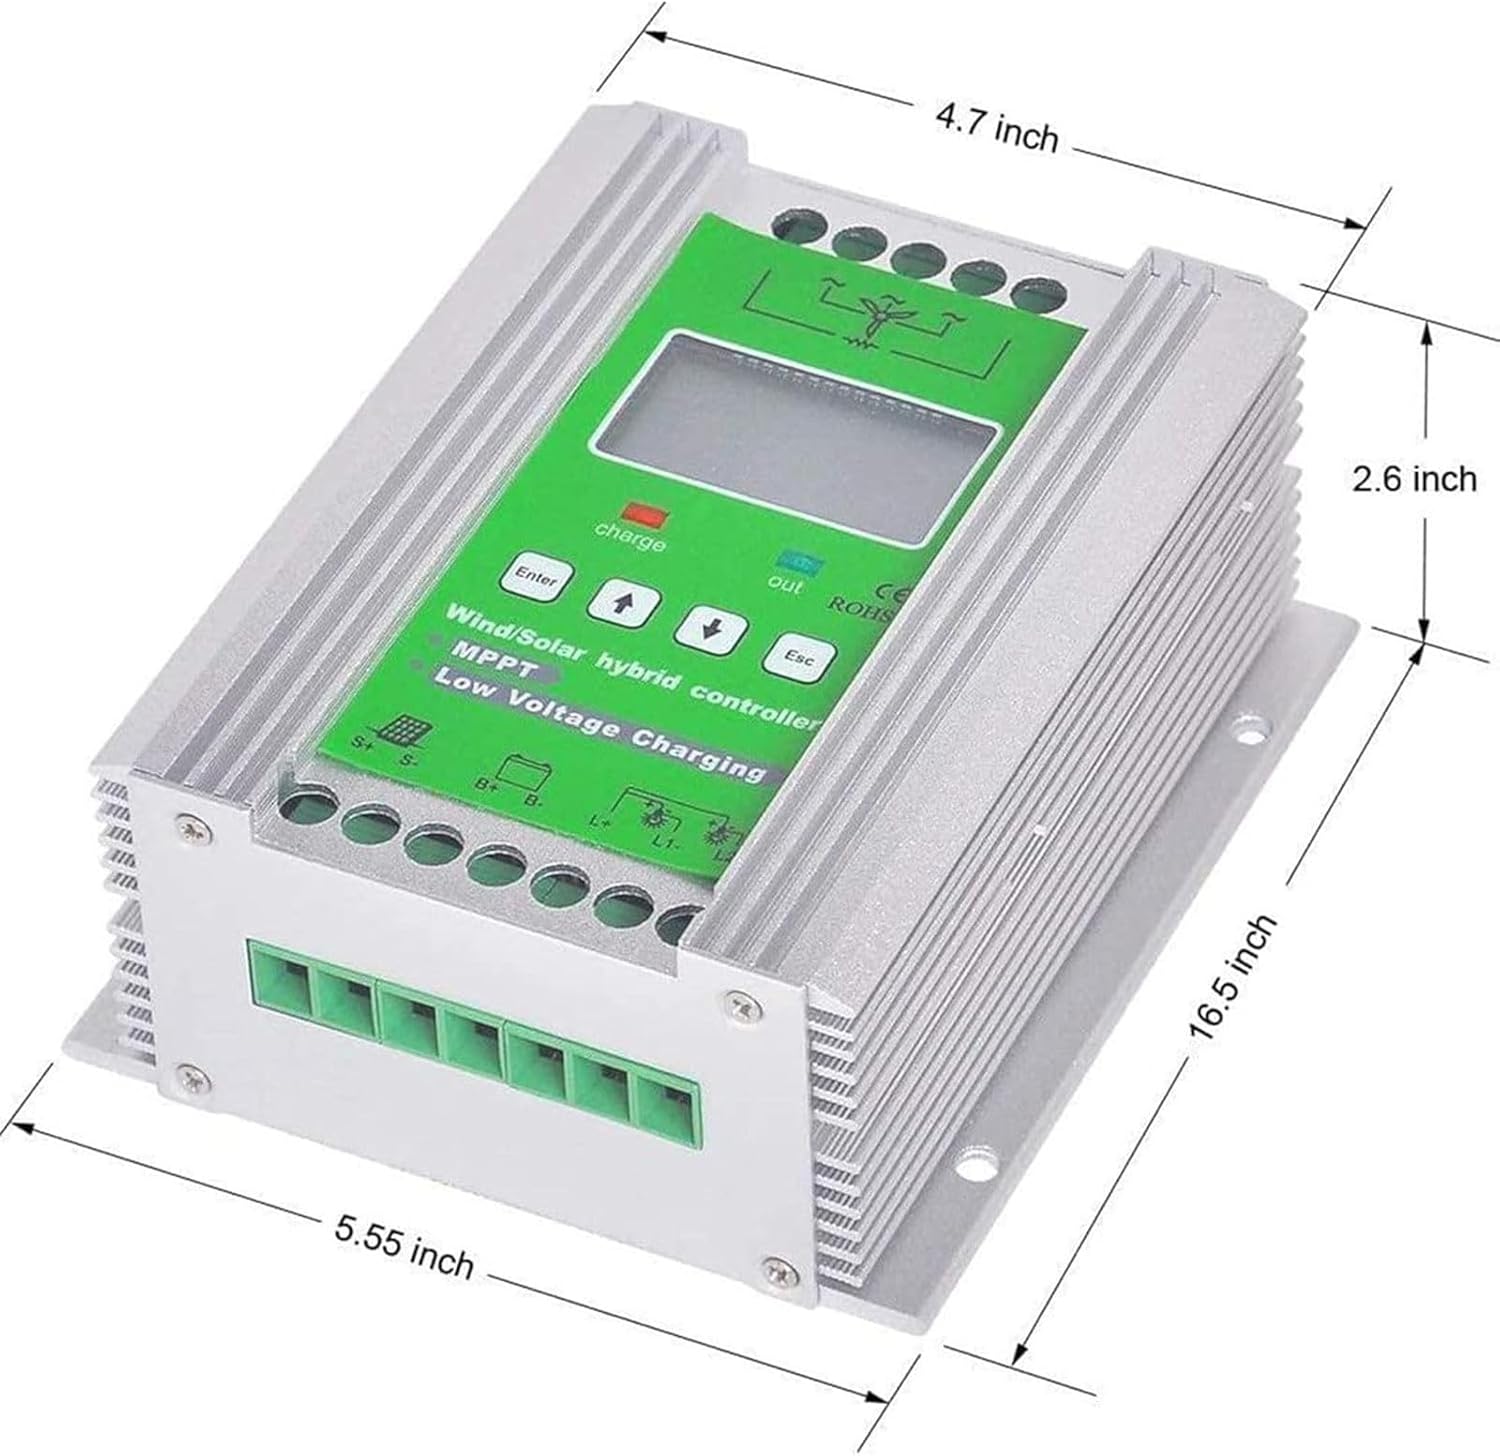
Figure 4: Controller Dimensions. This image provides the physical dimensions of the controller: 16.5 inches in length, 5.55 inches in width, and 2.6 inches in height.
Setup and Installation
Proper installation is crucial for the optimal performance and safety of your Wind Solar Hybrid Charge Controller. Follow the wiring diagram carefully.

Figure 5: Installation Wiring Diagram. This diagram illustrates the connections for the Wind Solar Hybrid Controller, showing how to connect the Fan (wind turbine), PV Array (solar panels), Storage Battery, Unloading Resistor, and Load. It also indicates the RS485 Communication port for external monitoring.
- Mounting: Choose a suitable location for the controller that is dry, well-ventilated, and protected from direct sunlight and extreme temperatures. Ensure adequate space around the unit for heat dissipation.
- Battery Connection: Connect the battery to the controller's battery terminals (B+ and B-). Ensure correct polarity. The controller will draw power from the battery or PV panel to operate its display.
- Solar Panel Connection: Connect your PV array to the solar panel terminals (S+ and S-). Observe correct polarity.
- Wind Turbine Connection: Connect the wind turbine to the fan wiring terminals.
- Unloading Resistor Connection: Connect the external unloading resistor to the designated unloading terminals. This resistor is essential for dissipating excess energy from the wind turbine when the battery is full or during high wind conditions.
- Load Connection: Connect your DC loads to the load terminals (L1 and L2). Ensure the total load current does not exceed the controller's rated capacity.
- Communication (Optional): If using RS485 communication for monitoring, connect the appropriate cable to the RS485 port.
- Verify Connections: Before applying power, double-check all connections for correct polarity and secure fastening.
Operating Instructions
The controller features an LCD display and control buttons for easy operation and monitoring.

Figure 6: LCD Smart Display. This image provides a detailed view of the controller's LCD screen, showing various parameters such as voltage (Ubat, Ufan, Upv), current (Ifan, Ipv, Iload), power (Ppv, Pfan), battery type (Sealed, Gel, Flooded, LiFePO4, LiNiCoMn, Custom), and time. It also shows indicators for charging, output, and error.
- LCD Display: The LCD screen displays real-time operational parameters including battery voltage, wind turbine voltage, solar panel voltage, charging current, load current, power generated, and system temperature. It also indicates the current load mode and battery type.
- Navigation Buttons:
- Up Key (↑): Used to navigate up through menu options or increase values.
- Down Key (↓): Used to navigate down through menu options or decrease values.
- Enter Key: Used to select menu options, confirm settings, or enter a submenu.
- ESC Key: Used to exit a menu or return to the previous screen without saving changes.
- Setting Parameters:
Access the settings menu using the Enter key. Use the Up/Down keys to navigate through parameters such as battery type (Sealed, Gel, Flooded, LiFePO4, LiNiCoMn, Custom), load working modes (Pure Light Control, Normally Open, Light Control + Time Control), and other system configurations. Press Enter to select a parameter and adjust its value, then press Enter again to confirm. Use ESC to exit the settings menu.
- Load Working Modes:
- Pure Light Control Mode: The load output is controlled solely by ambient light conditions.
- Normally Open Mode: The load output is continuously on.
- Light Control + Time Control Mode: The load output is activated by light conditions and then operates for a set duration, with options for four periods and a morning light setting.
Maintenance
The HENGCMM Wind Solar Hybrid Charge Controller is designed for durability with its internal circuit board sprayed with three-proof paint to prevent dust, moisture, and static electricity. Regular maintenance is minimal but important for long-term performance:
- Cleaning: Periodically clean the exterior of the controller with a dry, soft cloth to remove dust and dirt. Do not use liquid cleaners or solvents.
- Connections Check: Annually inspect all wiring connections to ensure they are secure and free from corrosion. Loose connections can lead to power loss or overheating.
- Ventilation: Ensure that the controller's heat dissipation fins are not obstructed to allow for proper self-cooling.
- Environmental Conditions: Verify that the operating environment remains within the specified temperature and humidity ranges.
Troubleshooting
The controller is equipped with multiple protection features to ensure safe and stable operation. If you encounter issues, refer to the LCD display for error codes or status indicators.
- No Display/Power:
- Check battery connections and ensure the battery has sufficient charge. The controller is powered by the battery or PV panel.
- Verify that the power supply mode (battery or photovoltaic panel) is correctly configured.
- No Charging from Solar/Wind:
- Check connections to solar panels and wind turbine for proper polarity and secure fastening.
- Ensure there is sufficient sunlight for solar panels and adequate wind speed for the wind turbine.
- Check for any error indicators on the LCD display related to overcharge, undervoltage, or open circuit protection.
- Load Not Working:
- Verify load connections and ensure the load current does not exceed the controller's capacity.
- Check the selected load working mode (Pure Light Control, Normally Open, Light Control + Time Control) and ensure it matches your requirements.
- Look for overload protection indicators on the display.
- Error Codes/Indicators:
Consult the LCD display for specific error messages or warning icons. Refer to the product's full technical documentation (if available) for a complete list of error codes and their meanings. Common protections include overcharge, undervoltage, overload, battery reverse connection, open circuit, and lightning protection.
If the issue persists after performing these checks, please contact customer support.
Customer Support
For any questions, suggestions, or technical assistance regarding your HENGCMM Wind Solar Hybrid Charge Controller, please feel free to contact us. Our support team is available to help you with installation, operation, and troubleshooting.
Please have your product model number (24V-10000W) and any relevant details about your setup ready when contacting support to facilitate a quicker resolution.
Contact information is typically provided by the seller or manufacturer at the point of purchase or on their official website.
Related documents24V-10000W


Ask a question about this manual
Ask about setup, troubleshooting, compatibility, parts, safety, or missing instructions. Manuals+ will review the question and use this page’s manual context to help answer it.