1. Product Overview
The XRDZYXGS Automatic Chicken Coop Door (Model XR-JM001) is designed to provide a convenient and secure solution for managing poultry access to their coop. This innovative door features multiple operating modes, including light-sensing, timed, remote control, and manual options, ensuring flexibility for various user needs. It is equipped with a built-in 6000mAh rechargeable battery, supported by both solar and USB-C charging, offering reliable operation without constant power concerns. The door also incorporates an anti-pinch safety mechanism and a clear LCD display for easy monitoring and control. Constructed from durable aluminum alloy and ABS, it is built to withstand diverse weather conditions.
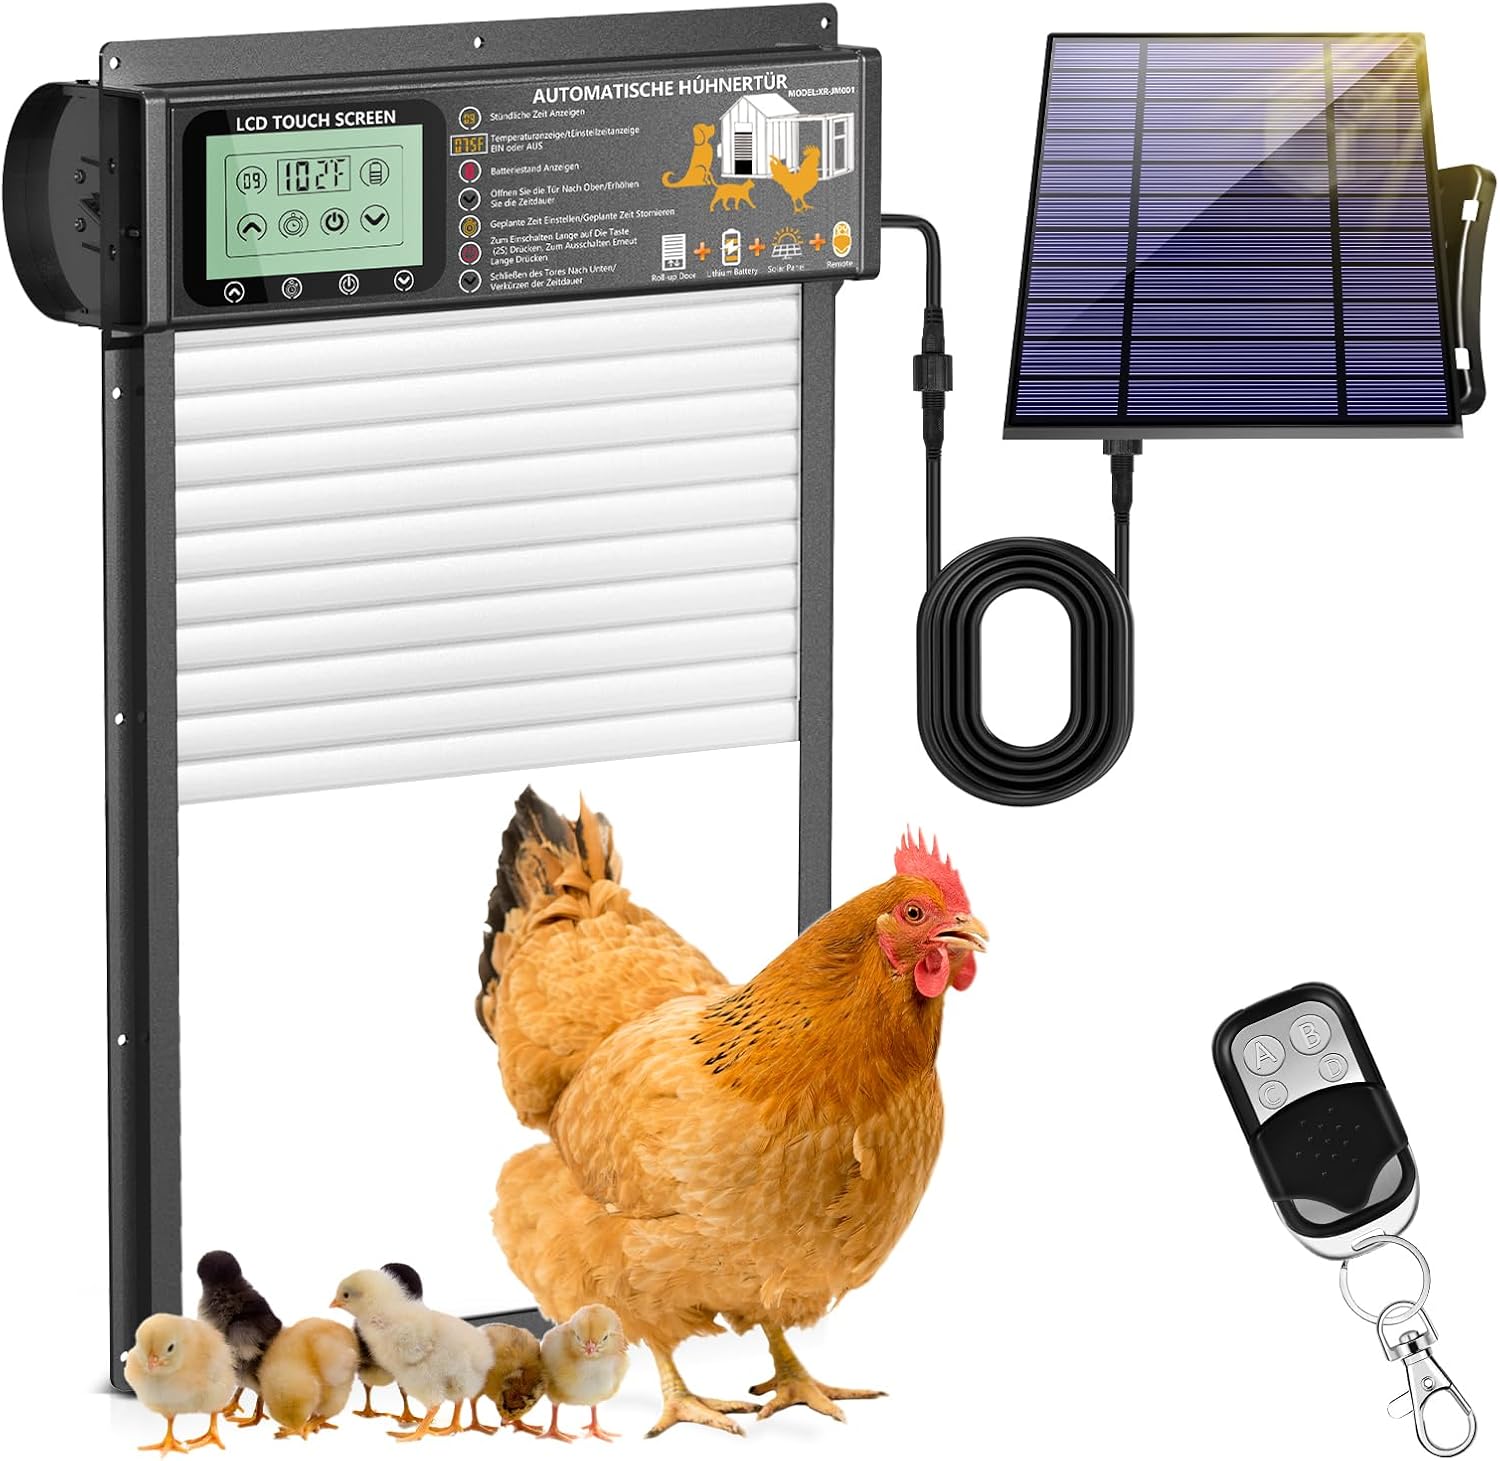
Figure 1.1: The Automatic Chicken Coop Door system, including the main unit, solar panel, and remote control, with poultry for scale.
2. Setup and Installation
Proper installation ensures optimal performance and longevity of your automatic chicken coop door. Follow these steps carefully:
- Unpack Contents: Verify all components are present as listed in the "Package Contents" section.
- Choose Installation Location: Select a flat, vertical surface on your chicken coop where the door can operate freely. Ensure there is enough space above the door for the roll-up mechanism and for the solar panel to receive adequate sunlight.
- Mark and Cut Opening:

Figure 2.1: Installation steps for the automatic chicken coop door.
Measure the dimensions of the door unit (approximately 13.4 inches high and 10 inches wide for the opening, total unit 18.9 inches high and 11.8 inches wide). Mark the desired opening on your coop wall. Carefully cut out the marked section using appropriate tools. Ensure the edges are smooth to prevent obstruction.
- Mount the Door Unit: Position the automatic chicken coop door unit over the cut opening. Use the provided screws and screw accessories to securely fasten the door to the coop wall. Ensure it is level and firmly attached.
- Install Solar Panel: Mount the solar panel in a location that receives maximum direct sunlight throughout the day. Connect the solar panel cable to the designated port on the main door unit.
- Initial Charging: Before first use, it is recommended to fully charge the built-in 6000mAh battery using the included USB-C cable. This ensures the door has sufficient power for initial setup and operation, especially if solar charging is limited.

Figure 2.2: The automatic chicken coop door installed on a coop, highlighting its solar and USB charging capabilities.
3. Operating Instructions
The automatic chicken coop door offers four distinct operating modes, accessible via the intuitive LCD touch screen and remote control.
3.1. LCD Touch Screen Interface

Figure 3.1: Detailed view of the LCD touch screen and its functions.
- Time Display: Shows the current time in full hours.
- Temperature Display: Indicates the current ambient temperature.
- Power Display: Shows the current battery level.
- Manual Open/Increase Setting: Use to manually open the door or increase time/setting values.
- Manual Close/Reduce Setting: Use to manually close the door or reduce time/setting values.
- Power ON/OFF: Toggles the device power.
- Timer Settings: Press to access timer configuration (calibrate local time, set door opening time, set closing time, cancel setting).
3.2. Control Modes

Figure 3.2: Overview of the four available control modes.
- Light-Sensing Mode:
The door automatically opens when it detects dawn (sufficient light) and closes when it detects darkness. This mode is ideal for natural light cycles.
- Timer Control Mode:
Allows you to set specific opening and closing times. Use the LCD touch screen to program the desired schedule. The door will operate automatically according to the set times.
- Remote Control Mode:
Use the provided remote control for convenient operation.
- A Key: Turns the power ON.
- B Key: Turns the power OFF.
- C Key: Opens the door.
- D Key: Closes the door.
- Manual Mode:
Operate the door directly using the up and down arrow keys on the LCD touch screen. This mode provides immediate control for specific situations.
3.3. Anti-Pinch Safety Feature
The door is equipped with built-in safety sensors. If an obstruction (like a chicken) is detected while the door is closing, it will automatically retract for a few seconds before attempting to close again. This prevents injury to your poultry.

Figure 3.3: The roll-up design and anti-pinch safety feature of the door.
4. Maintenance
Regular maintenance ensures the longevity and reliable operation of your automatic chicken coop door.
- Cleaning: Periodically wipe down the door unit and solar panel with a damp cloth to remove dirt, dust, and debris. Ensure the LCD screen is clean for clear visibility. Avoid using harsh chemicals or abrasive materials.
- Track Inspection: Check the door tracks for any obstructions, such as feathers, straw, or ice, that might impede smooth operation. Clear any blockages immediately.
- Battery Monitoring: Monitor the battery level on the LCD display. While the solar panel provides continuous charging, use the USB-C cable for charging during prolonged cloudy periods or if the battery level is consistently low.
- Weather Protection: Although the door is weatherproof (rated for -26°C to 60°C), ensure the solar panel is clear of snow or heavy ice in winter to maintain charging efficiency.
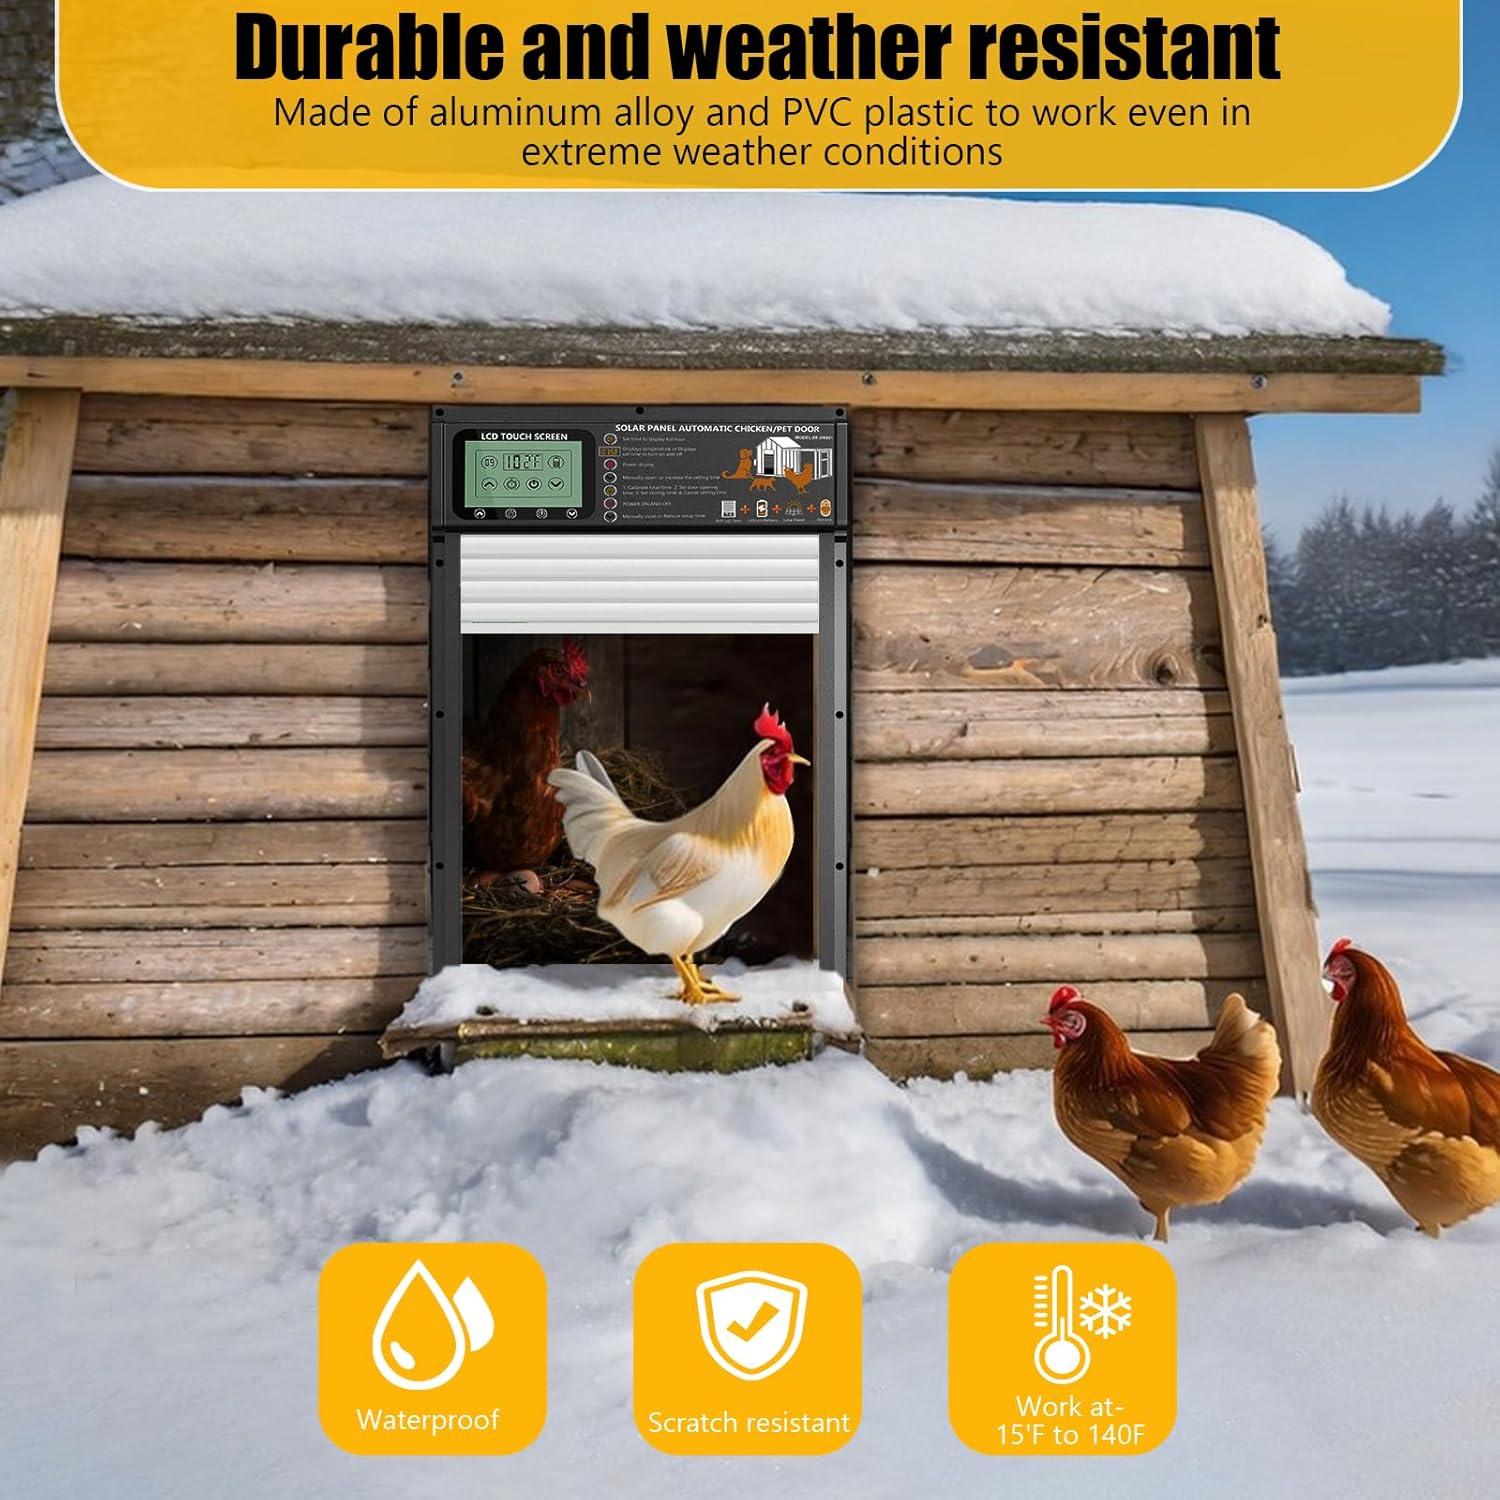
Figure 4.1: The door's robust construction allows it to operate effectively in various weather conditions, including snow.
5. Troubleshooting
If you encounter issues with your automatic chicken coop door, refer to the following common problems and solutions:
| Problem | Possible Cause | Solution |
|---|---|---|
| Door not opening/closing automatically. | Low battery, light sensor obstructed, incorrect timer settings, mode not selected. | Check battery level and charge if necessary. Ensure light sensor is clean and unobstructed. Verify timer settings are correct. Confirm the desired operating mode is active. |
| Door stops mid-operation or reverses. | Obstruction in the door path (anti-pinch activated), track blockage. | Check for any objects or poultry in the door's path. Clear any debris from the door tracks. |
| Remote control not working. | Remote battery dead, out of range, interference. | Replace the AAA battery in the remote control. Ensure you are within effective range. Minimize potential signal interference. |
| LCD display is dim or unresponsive. | Low battery, extreme temperatures. | Charge the battery. Ensure the unit is operating within its specified temperature range (-26°C to 60°C). |
If the problem persists after attempting these solutions, please contact customer support for further assistance.
6. Product Specifications
| Feature | Detail |
|---|---|
| Model Name | Automatic Coop Door (XR-JM001) |
| Brand | XRDZYXGS |
| Material | Aluminum Alloy, ABS |
| Color | Grey |
| Product Dimensions (L x W x H) | 12 x 5 x 19 inches (Door opening: 10 x 13.4 inches) |
| Item Weight | 7.7 pounds (3.5 Kilograms) |
| Battery | Built-in 6000mAh rechargeable battery |
| Charging Methods | Solar Panel, USB-C Cable |
| Operating Modes | Light-Sensing, Timer, Remote Control, Manual |
| Special Features | Anti-Pinch Safety, LCD Display, Weatherproof (-26°C to 60°C) |
| Included Components | Automatic Coop Door Unit, Solar Panel, Remote Control, USB Charging Cable, Screw Accessories |
| Target Audience | Birds, Chickens, Ducks, Geese, Rabbits, Dogs (for habitat access) |
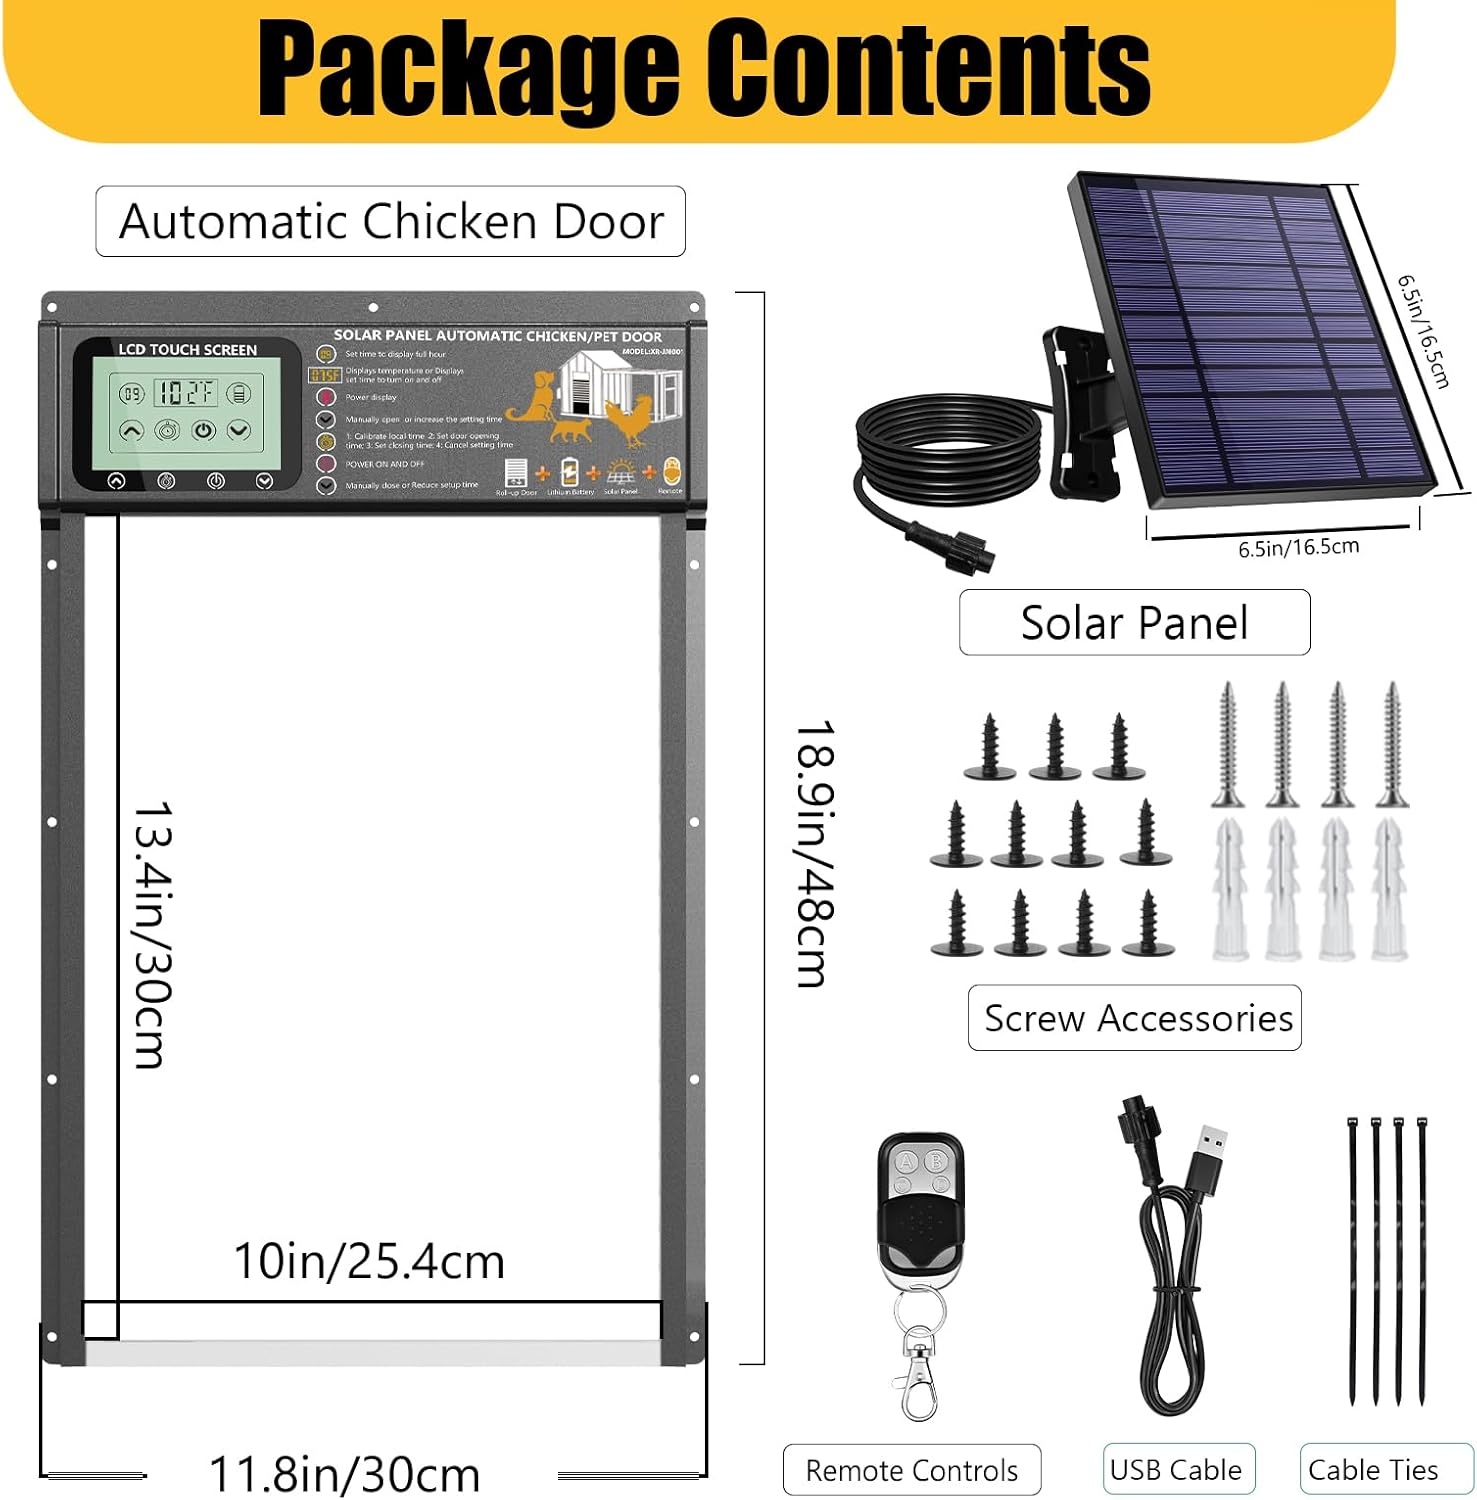
Figure 6.1: Contents included in the product package.
7. Warranty & Support
7.1. Warranty Information
This product comes with a limited warranty. For specific details regarding the warranty period and coverage, please refer to the documentation included with your purchase or contact customer support.
7.2. Customer Support
For any questions, technical assistance, or replacement parts, please do not hesitate to contact XRDZYXGS customer service. Our team is dedicated to ensuring your complete satisfaction.
Please have your model number (XR-JM001) and purchase details ready when contacting support to facilitate a quicker resolution.