iBUYPOWER FAN-IBP-005-W-R
iBUYPOWER AW4 240mm Radiator CPU AIO Liquid Cooler User Manual
Model: FAN-IBP-005-W-R
Introduction
This manual provides comprehensive instructions for the installation, operation, and maintenance of your iBUYPOWER AW4 240mm Radiator CPU AIO Liquid Cooler. This liquid cooler is designed to provide efficient thermal management for your CPU, featuring performance-oriented PWM radiator fans, a durable hydraulic bearing, and an RGB display for customizable aesthetics. Please read this manual thoroughly before installation and use to ensure optimal performance and longevity of your product.

Figure 1: iBUYPOWER AW4 240mm AIO Liquid Cooler showing the radiator, two 120mm fans, and the pump with RGB lighting.
Setup and Installation
Proper installation is crucial for the performance and safety of your liquid cooler. Ensure your system is powered off and unplugged before beginning the installation process.
Package Contents
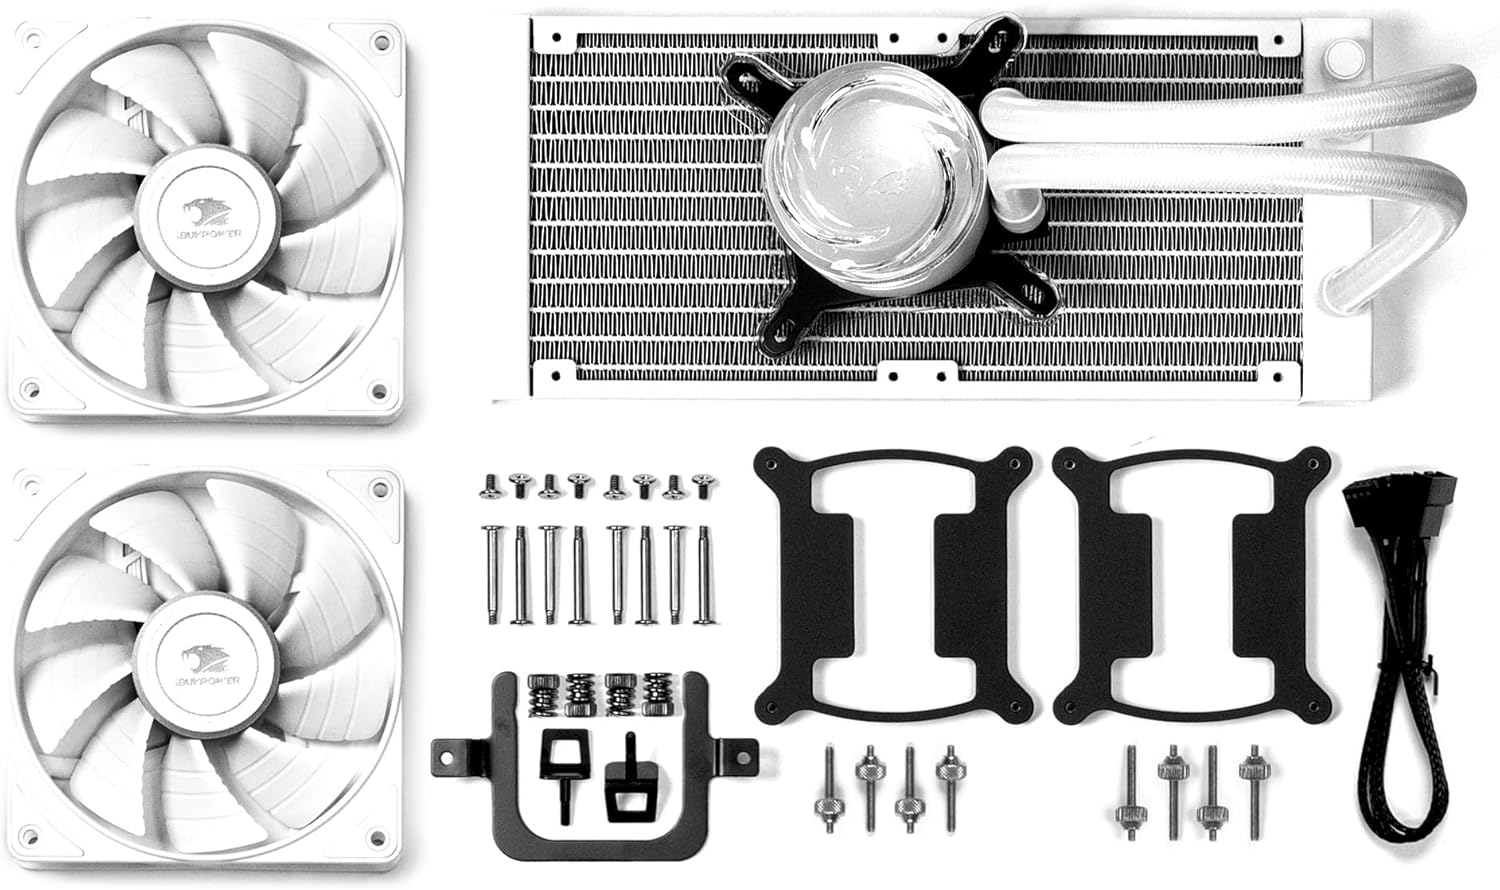
Figure 2: All components included in the iBUYPOWER AW4 AIO Liquid Cooler package, showing fans, radiator, pump, and mounting brackets/screws.
Verify all components are present before proceeding:
- 240mm Radiator with integrated pump and tubing
- Two 120mm PWM Fans
- Mounting hardware for Intel (LGA 1700/1150/1151) and AMD (AM5/AM4) sockets
- Thermal paste (pre-applied or in a tube)
- Fan and RGB cables
Installation Steps
- Prepare the Motherboard: Install the appropriate backplate for your CPU socket (Intel or AMD) onto the motherboard.
- Mount the Radiator: Secure the 240mm radiator to an available fan mount in your PC case (typically top or front) using the provided screws. Ensure adequate airflow.
- Install the Fans: Attach the two 120mm fans to the radiator. Ensure the fan airflow direction is optimized for your case's cooling setup (intake or exhaust).
- Apply Thermal Paste: If not pre-applied, apply a small amount of thermal paste to the center of your CPU's integrated heat spreader (IHS).
- Mount the Pump: Carefully align the pump block with the CPU socket and secure it using the appropriate mounting brackets and thumb screws. Apply even pressure.
- Connect Cables:
- Connect the pump's 3-pin or 4-pin connector to the CPU_FAN or AIO_PUMP header on your motherboard.
- Connect the fan cables to the CPU_FAN or SYS_FAN headers on your motherboard.
- Connect the RGB cable from the pump to an available RGB header on your motherboard or a dedicated RGB controller.
- Cable Management: Route all cables neatly to ensure proper airflow within the case.
Operating Instructions
Once installed, the iBUYPOWER AW4 liquid cooler operates automatically based on CPU temperature and motherboard settings.
Fan Operation
The 120mm PWM fans operate with a speed range of 700 to 2000 RPM (+/-10%), providing a maximum airflow of 65 CFM. The fan speed is controlled by the motherboard's PWM signal, which adjusts based on CPU temperature to maintain optimal cooling and noise levels. The hydraulic bearings ensure quiet operation and extended lifespan.
RGB Display
The pump features an integrated RGB display. The lighting effects can typically be controlled via your motherboard's RGB software (e.g., ASUS Aura Sync, MSI Mystic Light, Gigabyte RGB Fusion, ASRock Polychrome Sync) or a dedicated RGB controller if connected. Refer to your motherboard's manual for specific RGB software instructions.

Figure 3: Pump with dynamic RGB lighting.

Figure 4: Pump with static white RGB lighting.

Figure 5: Pump with static blue RGB lighting.
Maintenance
Regular maintenance helps ensure the longevity and optimal performance of your liquid cooler.
- Dust Cleaning: Periodically clean dust from the radiator fins and fan blades using compressed air or a soft brush. Dust accumulation can impede airflow and reduce cooling efficiency.
- Check Connections: Ensure all cables (fan, pump, RGB) are securely connected to the motherboard and power supply.
- Inspect Tubing: Occasionally check the braided sleeved tubing for any signs of kinks, leaks, or damage. The swivel fittings are designed for flexibility, but extreme bends should be avoided.
- Monitor Temperatures: Use monitoring software to keep an eye on your CPU temperatures. Significant increases may indicate a need for cleaning or further inspection.
Troubleshooting
If you encounter issues with your iBUYPOWER AW4 liquid cooler, refer to the following common problems and solutions:
| Problem | Possible Cause | Solution |
|---|---|---|
| High CPU Temperatures | Insufficient thermal paste, poor pump contact, dust buildup on radiator, fans not spinning. | Reapply thermal paste, reseat pump, clean radiator/fans, check fan connections. |
| Fans Not Spinning | Loose fan cable, incorrect header connection, faulty fan. | Ensure fan cables are securely connected to motherboard fan headers. Try connecting to a different header. |
| Pump Not Working (No Flow/Noise) | Loose pump cable, incorrect header connection, faulty pump. | Ensure pump cable is securely connected to the CPU_FAN or AIO_PUMP header. Check BIOS settings for pump control. |
| RGB Lighting Not Working | Loose RGB cable, incorrect RGB header connection, software issue. | Check RGB cable connection to motherboard or controller. Ensure RGB software is installed and configured correctly. |
| Excessive Noise | Air bubbles in loop, fan rattling, pump noise. | Orient radiator correctly to allow air bubbles to settle in the radiator. Check fan screws for tightness. |
Specifications
Detailed technical specifications for the iBUYPOWER AW4 240mm Radiator CPU AIO Liquid Cooler:
| Feature | Specification |
|---|---|
| Model Number | FAN-IBP-005-W-R |
| Radiator Size | 240mm |
| Fan Size | 2 x 120mm |
| Fan Speed | 700 - 2000 RPM (+/-10%) |
| Airflow Volume | Max 65 CFM |
| Noise Level | 38 dB (Max) |
| Bearing Type | Hydraulic Bearing |
| Cooling Method | Liquid (Water) |
| Compatible Devices | Desktop PCs |
| CPU Socket Compatibility | Intel: LGA 1700/1150/1151 AMD: AM5/AM4 |
| Power Connector Type | 4-Pin (PWM for fans, typically 3-pin/4-pin for pump) |
| Color | White |
| Item Weight | 821 g |
| Package Dimensions | 32.6 x 20.9 x 14.3 cm |
Warranty and Support
For warranty information and technical support, please refer to the official iBUYPOWER website or contact their customer service directly. Keep your proof of purchase for warranty claims.
While extended warranty options may be available from third-party providers, the standard product warranty is provided by the manufacturer.