1. Introduction
The Irfora YR2050 is a handheld, high-accuracy 4-wire milliohm meter designed for precise resistance measurements. This instrument is suitable for quick testing of wire length, resistivity, and assessing the quality of power cords in motors and transformers. Its portable size makes it convenient for various applications.
This meter is particularly useful for detecting the resistance of precision current-sense resistors and verifying the qualification of transformer windings.

Figure 1.1: Irfora YR2050 Milliohm Meter with test clips. This device is designed for quick testing of wire length, resistivity, and quality assessment of power cords in motors and transformers.
2. Safety Information
Please read and understand the following safety precautions before operating the Irfora YR2050 Milliohm Meter to prevent injury and avoid damage to the instrument.
- Prohibited Measurements: It is strictly prohibited to measure any live parts. Do not apply AC or direct current voltage input to the test interface, as this may severely damage the instrument and pose a safety risk.
- Battery Internal Resistance: This YR2050 model cannot measure battery internal resistance. Attempting to do so may yield inaccurate results or damage the device.
- Operating Environment: Use the instrument within the specified working temperature range of 10 ℃ to 40 ℃.
- Storage: Store the instrument in a dry environment within the specified storage temperature range of -20℃ to 60℃.
- Authorized Personnel: Only qualified personnel should perform maintenance or repairs on the instrument.

Figure 2.1: Important safety notes displayed on the product image, emphasizing that the YR2050 cannot measure battery internal resistance and prohibits measuring live parts.
3. Product Overview
3.1 Components
The Irfora YR2050 Milliohm Meter package includes the following items:
- YR2050 Tester Unit
- Test Clips (4-wire Kelvin clips)
- USB Cable (for charging/data, if applicable)
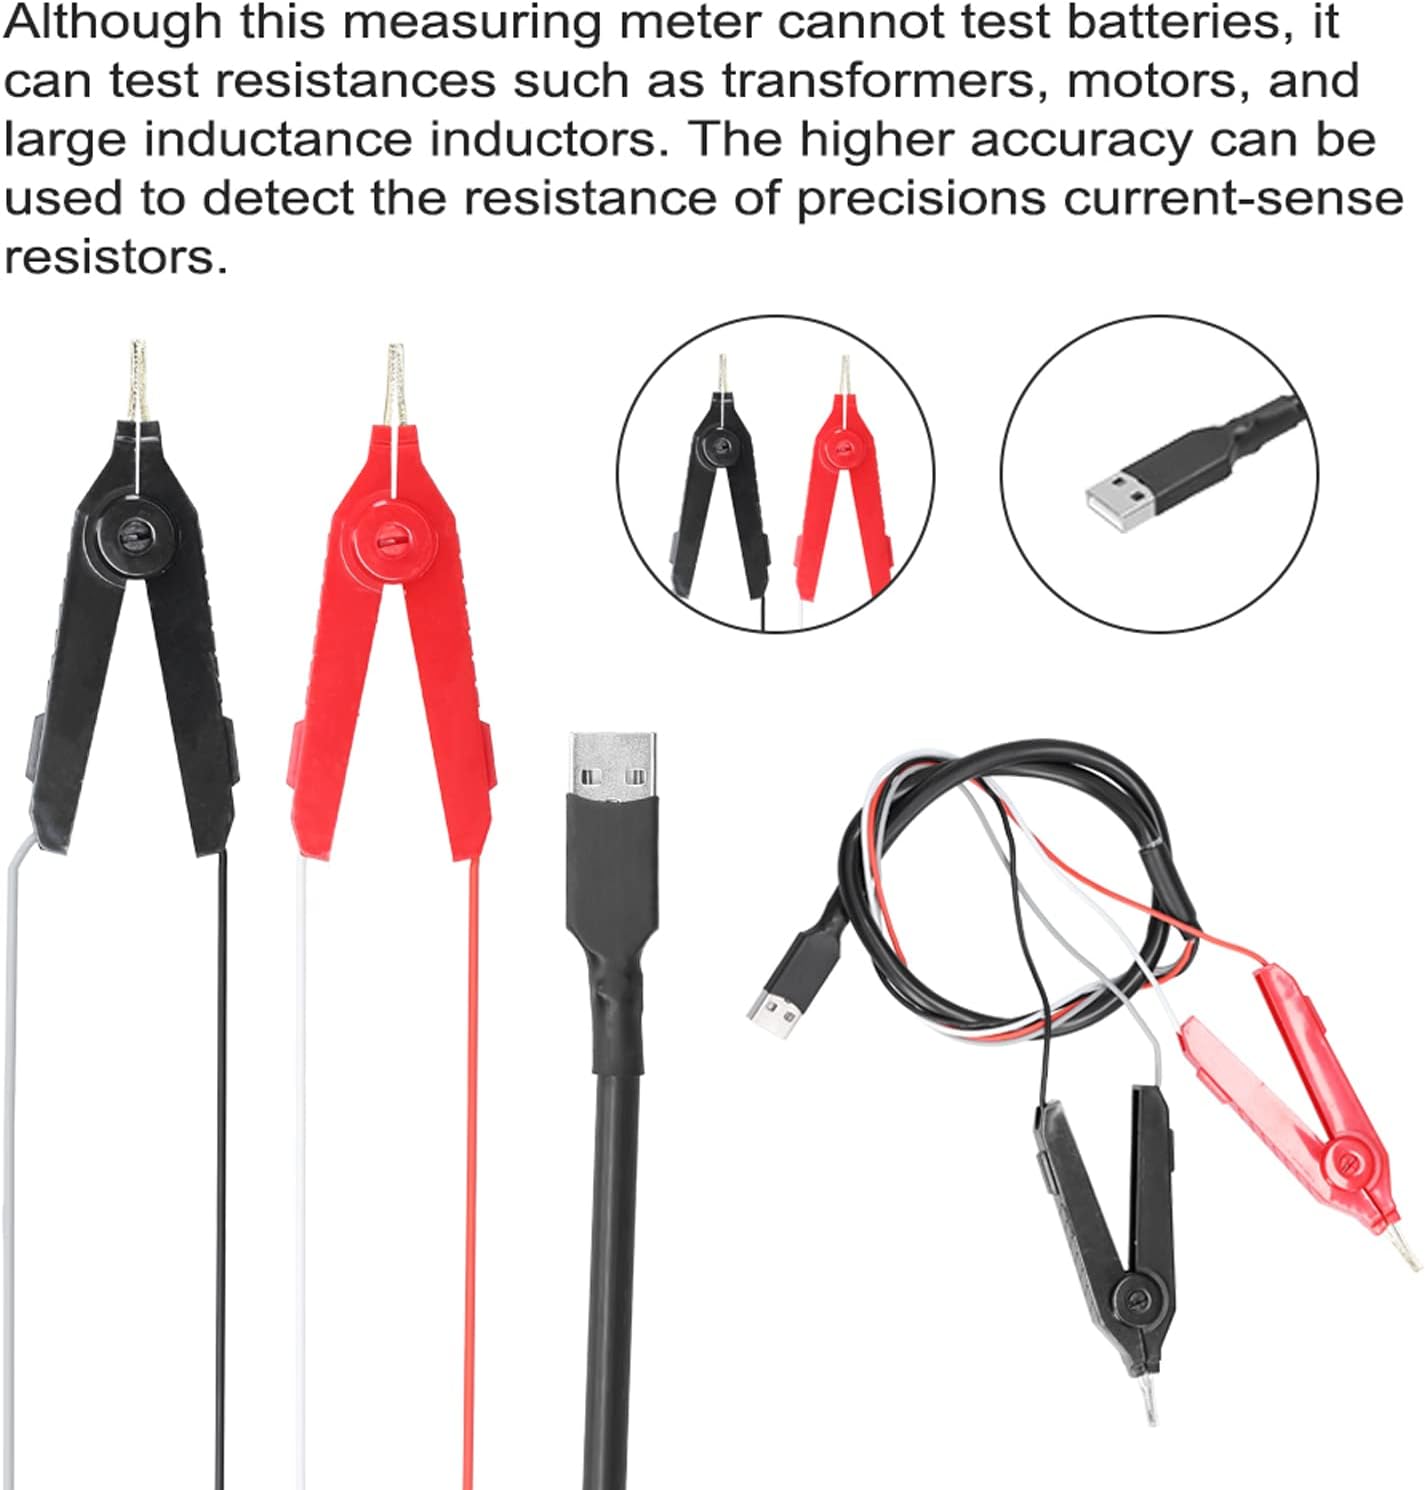
Figure 3.1: Included accessories: 4-wire test clips (red and black) and a USB cable. These are essential for connecting the meter to the test subject.
3.2 Controls and Display
The YR2050 features a clear display and intuitive buttons for operation.

Figure 3.2: Front panel controls of the YR2050, indicating buttons for 'menu', 'range', 'hold', and 'choose' functions.
- Display: Shows measurement readings, units, and operational status.
- Menu Button: Accesses instrument settings and modes.
- Range Button: Manually selects measurement range or enables auto-ranging.
- Hold Button: Freezes the current measurement on the display.
- Choose/Navigation Buttons: Used for selecting options within menus and adjusting parameters.
4. Specifications
| Parameter | Value |
|---|---|
| Model | YR2050 |
| Resolution (Display Counts) | 120,000 |
| Fusing Current | 0.5A |
| Working Temperature | 10 ℃ ~ 40 ℃ (50 ℉ ~ 104 ℉) |
| Storage Temperature | -20 ℃ ~ 60 ℃ (-4 ℉ ~ 140 ℉) |
| Battery | 1 x Lithium battery, 2000mAh |
| Dimensions (L x W x H) | 120 x 60 x 40 mm (4.72 x 2.36 x 1.57 inches) |
| Weight | 300 g (10.6 ounces) |
5. Setup
5.1 Initial Charging
Before first use, ensure the internal lithium battery is fully charged. Connect the provided USB cable to the meter and a suitable USB power source (e.g., computer USB port, USB wall adapter).
5.2 Connecting Test Clips
The YR2050 uses 4-wire (Kelvin) test clips for accurate low resistance measurements. Connect the red and black test clips to the corresponding ports on the meter. Ensure a secure connection.
Figure 5.1: The 4-wire test clips and USB cable. Connect the test clips firmly to the meter's input terminals.
6. Operating Instructions
6.1 General Operation
- Power On: Press the power button to turn on the meter.
- Select Mode: Use the 'Menu' button to navigate through different measurement modes if available.
- Connect to DUT: Connect the 4-wire test clips to the Device Under Test (DUT). Ensure good contact for accurate readings.
- Read Measurement: The resistance value will be displayed on the screen.
- Hold Reading: Press the 'Hold' button to freeze the current reading on the display.
6.2 Wire Length and Resistivity Test
This function allows for the determination of wire resistivity and material purity.
- Prepare Wire: Intercept a specific length of the wire to be tested.
- Measure Diameter: Accurately measure the diameter of the wire to calculate its cross-sectional area.
- Enter Parameters: Enter the instrument's detection mode and input the measured wire length and cross-sectional area.
- Measure Resistance: Connect the test clips to the prepared wire and measure its resistance.
- Calculate Resistivity: The instrument will calculate the resistivity based on the input parameters and measured resistance. This resistivity value can help determine if the wire material is pure copper or another material.

Figure 6.1: The YR2050 in use for wire resistivity measurement. The process involves intercepting a wire, calculating its cross-sectional area, and then measuring its resistance to determine resistivity.
6.3 Transformer Winding Qualification Test
The YR2050 can be used to determine if a transformer winding is qualified by comparing its resistance to predefined limits.
- Access Normal Mode: Enter the normal measurement mode on the instrument.
- Set Limits: Open the upper and lower limit settings. Input the acceptable upper and lower resistance limits for the transformer winding.
- Measure Winding: Connect the test clips to the transformer winding.
- Evaluate: The instrument will measure the winding resistance and indicate if it falls within the set limits, thereby determining its qualification.

Figure 6.2: The YR2050 being used to test transformer winding qualification. The meter allows setting upper and lower resistance limits for comparison.
6.4 Precision Current-Sense Resistor Test
The high accuracy of the YR2050 makes it suitable for detecting the resistance of precision current-sense resistors.
- Connect Resistor: Connect the 4-wire test clips directly to the terminals of the current-sense resistor.
- Read Measurement: The meter will display the precise resistance value.
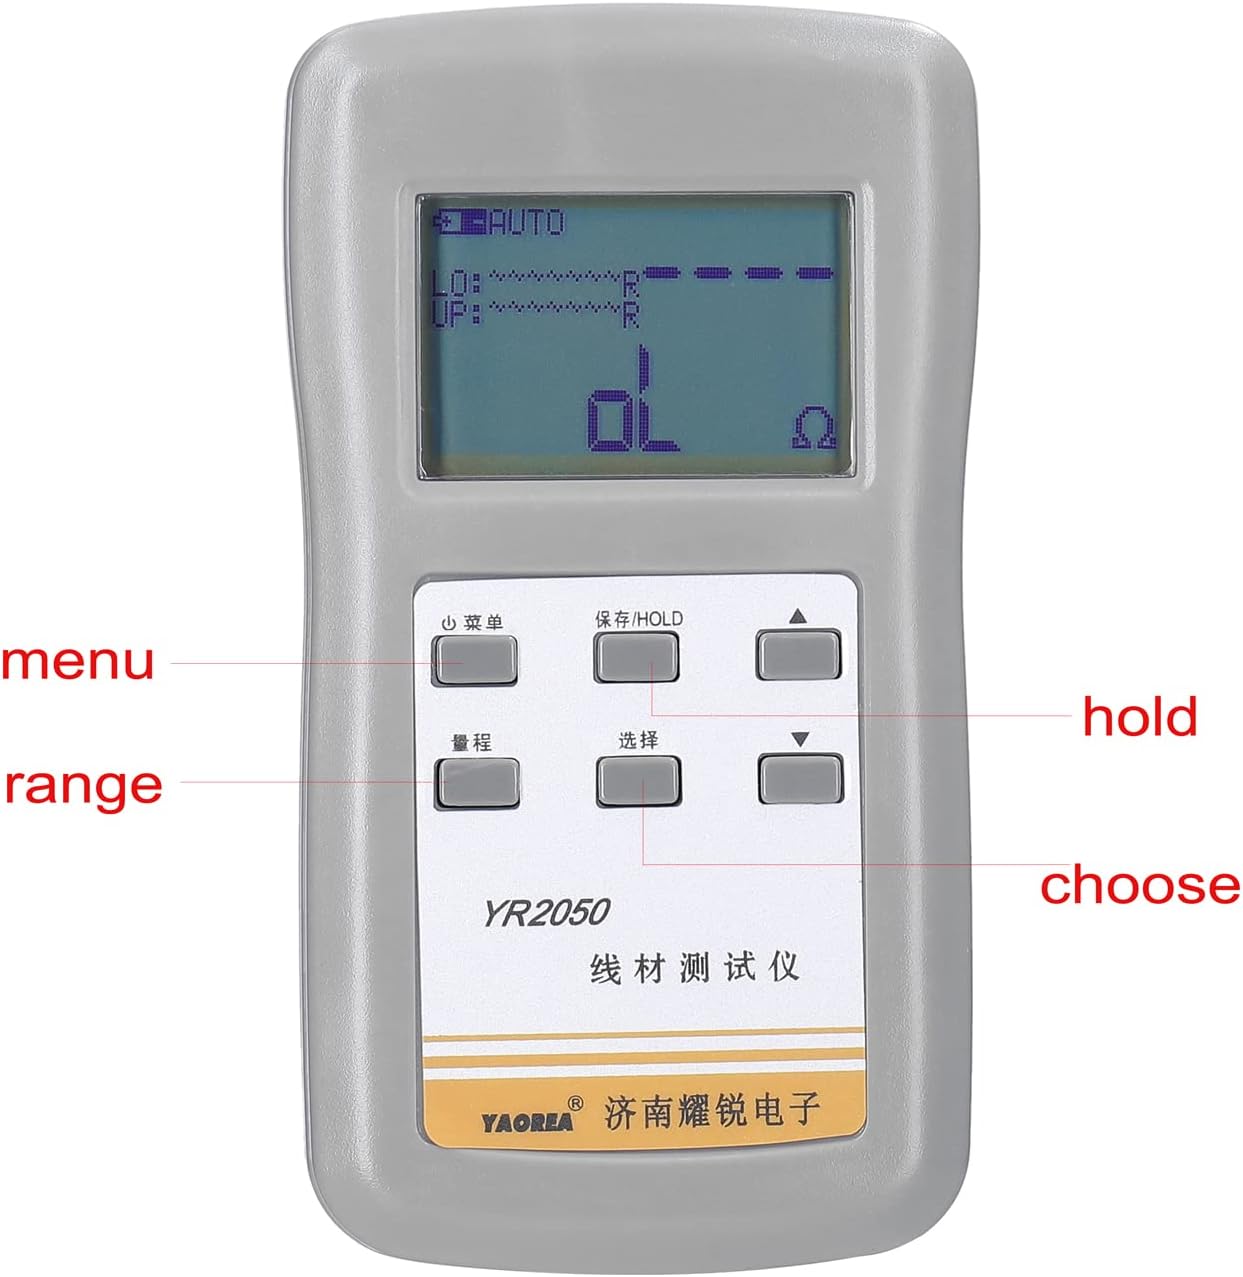
Figure 6.3: The YR2050's high accuracy is beneficial for measuring the resistance of precision current-sense resistors.
7. Maintenance
- Cleaning: Use a soft, dry cloth to clean the instrument's casing. Do not use abrasive cleaners or solvents.
- Battery Care: Recharge the battery regularly, especially if the instrument will not be used for an extended period, to maintain battery health.
- Storage: When not in use, store the meter in a cool, dry place, away from direct sunlight and extreme temperatures.
- Test Leads: Inspect test leads and clips for any signs of wear or damage before each use. Replace damaged leads immediately.
8. Troubleshooting
If you encounter issues with your Irfora YR2050, refer to the following common troubleshooting steps:
- No Power: Ensure the battery is charged. Connect the meter to a USB power source and allow it to charge for some time before attempting to power it on again.
- Inaccurate Readings:
- Check that the test clips are securely connected to both the meter and the DUT.
- Ensure the test clips are making good contact with the measurement points.
- Verify that the measurement mode is appropriate for the test being performed.
- Clean the test points on the DUT and the tips of the test clips.
- Display Shows 'OL' (Overload): This indicates that the measured resistance is outside the meter's current range or that there is an open circuit. Check connections and ensure the DUT is not an open circuit.
- Instrument Not Responding: Try turning the unit off and on again. If the issue persists, allow the battery to fully discharge and then recharge it.
9. Warranty and Support
For warranty information or technical support, please refer to the documentation provided with your purchase or contact your retailer. Keep your purchase receipt as proof of purchase.