Introduction
This manual provides detailed instructions for the assembly, operation, and maintenance of your Kooyon 4-Drawer Lockable Lateral File Cabinet. Please read all instructions carefully before assembly and use to ensure proper function and safety.
Safety Information
- Always follow the assembly instructions provided.
- Use caution when opening and closing drawers to avoid pinching fingers.
- Keep the cabinet away from heat sources to prevent warping.
- Do not overload the cabinet, as this can cause it to tip over.
- Always use the locking mechanism when the cabinet is not in use to prevent unauthorized access.
Package Contents
Parts List
- Left Side Panel (1 pc)
- Right Side Panel (1 pc)
- Back Panels (4 pcs)
- Top Panel (1 pc)
- Drawer Panels (4 sets)
- Drawer Bottoms (4 sets)
- Drawer Slides (8 sets)
- Long Hanging File Bars (4 pcs)
- Short Hanging File Bars (4 pcs)
- Front Bottom Bracket (1 pc)
- Rear Bottom Bracket (1 pc)
Hardware List
- M4x8mm Screws (various quantities)
- M4x16mm Screws (various quantities)
- M5x30mm Screws (2 pcs)
- M8 Expansion Bolts (2 pcs)
- M5 Nuts (3 pcs)
- L-Shape Pads (4 pcs)
- Keys (2 pcs)
- Screwdriver (1 pc)
- Gloves (1 pair)
- Anti-tipping straps (2 pcs)
Setup and Assembly
Please refer to the detailed assembly video below for visual guidance. Wear gloves during installation to avoid injury.
Official Assembly Video for Kooyon 4-Drawer Lateral File Cabinet.
Unpacking and Identifying Components
Carefully unpack all components from the box. Lay them out on a soft, clean surface to prevent scratches. Identify each part using the provided parts list and the assembly instructions diagram.

Image: Assembly diagram showing tools and instructions for easy assembly.
Step 1: Assemble the Cabinet Base Frame
Connect the left and right side panels with the front and rear bottom brackets. Ensure the panels are aligned correctly before securing them with the designated screws and L-shape pads. (Refer to video 0:15 - 0:50)
Step 2: Attach Back Panels
Carefully slide and secure the back panels into the assembled frame. Use the specified screws to fasten them firmly. (Refer to video 0:50 - 1:05)
Step 3: Assemble Drawer Boxes
For each drawer, fold and secure the sides of the drawer bucket. Ensure all tabs and slots are properly engaged to form a sturdy box. (Refer to video 1:05 - 1:30)
Step 4: Install Drawer Slides
Separate the inner and outer parts of each drawer slide. Attach the outer slides to the cabinet frame and the inner slides to the assembled drawer boxes. Ensure they are level and aligned for smooth operation.
Video: Detailed instructions on how to correctly install the drawer slides.
Step 5: Attach Drawer Fronts
Attach the drawer fronts to the assembled drawer buckets. Make sure they are centered and securely fastened. (Refer to video 1:50 - 2:10)
Step 6: Insert Assembled Drawers
Carefully align the inner drawer slides with the outer cabinet slides and push each assembled drawer into its respective position until it clicks into place. (Refer to video 2:10 - 2:30)
Step 7: Install Anti-Tipping Straps
For safety, attach the anti-tipping straps to the back panel of the cabinet using the provided screws. Then, secure the other end of the straps to a wall stud using expansion screws to prevent accidental tipping. (Refer to video 2:30 - 2:45)
Operating Instructions
Using the Drawers
The drawers feature ball-bearing full suspension for smooth and quiet operation. Simply pull the drawer handle to open and push to close. The full extension design allows easy access to the entire drawer contents.

Image: Full extension drawer demonstrating ample storage space.
Adjustable Hanging File Bars
Each drawer is equipped with adjustable hanging file bars to accommodate various file sizes including Letter, Legal, F4, and A4. Adjust the bars by sliding them to fit your desired file type.

Image: Adjustable hanging bars configured for various file sizes.
Locking Mechanism
The cabinet is equipped with a built-in interlock system that secures all drawers simultaneously. Insert the key into the lock on the top drawer and turn to lock or unlock all drawers. This mechanism also prevents more than one drawer from opening at a time, enhancing stability.
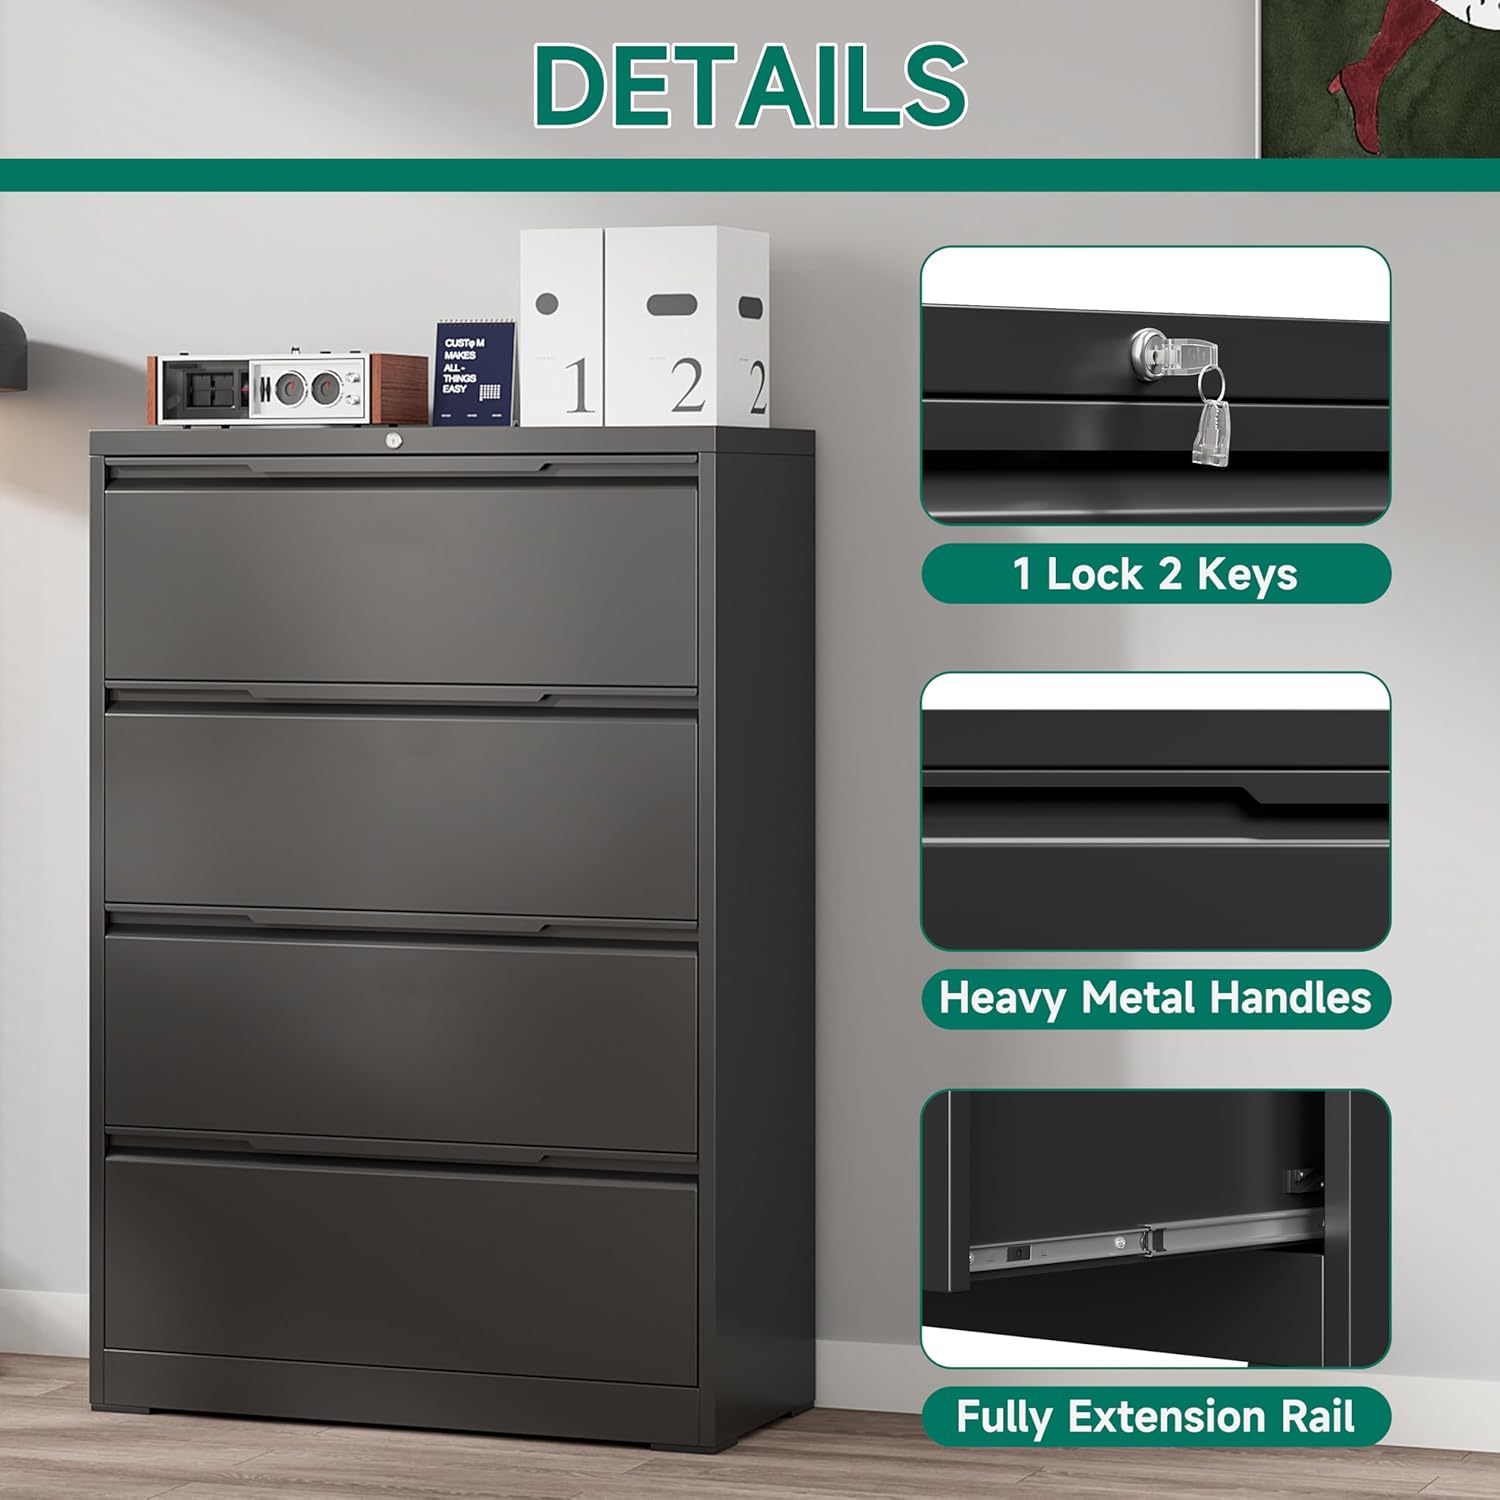
Image: Detail of the lock and included keys for securing the cabinet.
Maintenance
Cleaning
The metal surface has a smooth coating that is waterproof and easy to clean. Wipe with a damp cloth and mild detergent. Avoid abrasive cleaners that could damage the finish.
General Care
Regularly check all screws and connections to ensure they are tight. Re-tighten if necessary. Avoid placing heavy objects on top of the cabinet that exceed its load capacity to prevent damage or instability.
Troubleshooting
Drawers Not Closing Smoothly
- Check if the drawer slides are properly aligned and free of obstructions.
- Ensure the drawer is not overloaded beyond its capacity.
- Verify that all assembly screws for the slides are tightened.
Cabinet Instability
- Ensure the cabinet is placed on a flat, level surface.
- Verify that the anti-tipping straps are securely installed to the wall.
- Do not open more than one drawer at a time to maintain stability.
Specifications
| Feature | Detail |
|---|---|
| Brand | Kooyon |
| Model | 4 Drawer-36"W |
| Color | Black |
| Material | Alloy Steel |
| Product Dimensions | 15.7"D x 35.4"W x 52"H |
| Drawer Size | 13.5"D x 32.6"W x 9.8"H |
| Item Weight | 109 Pounds |
| Maximum Load Capacity | 440 lbs (110 lbs per drawer) |
| Lock Type | Key (Built-in interlock system) |
| Assembly Required | Yes |

Image: Detailed product dimensions for planning your space.
Warranty and Support
For warranty information or customer support, please refer to the product packaging or contact Kooyon customer service directly. Keep your purchase receipt for any warranty claims.