Introduction
This manual provides essential instructions for the installation, operation, and maintenance of your ToiCottage JR1922RXS 12V Remote Control Car Motor Controller and 2.4GHz Remote Control Receiver Mainboard. This product is designed as a replacement part for children's electric ride-on vehicles.
Please read this manual thoroughly before installation and use to ensure proper function and safety.
What's in the Box
Upon opening the package, please verify that all components are present and undamaged:
- 1 x JR1922RXS 12V Control Box (Motor Controller)
- 1 x 2.4GHz Remote Control

Image: The JR1922RXS 12V Control Box, showing its main features and label.
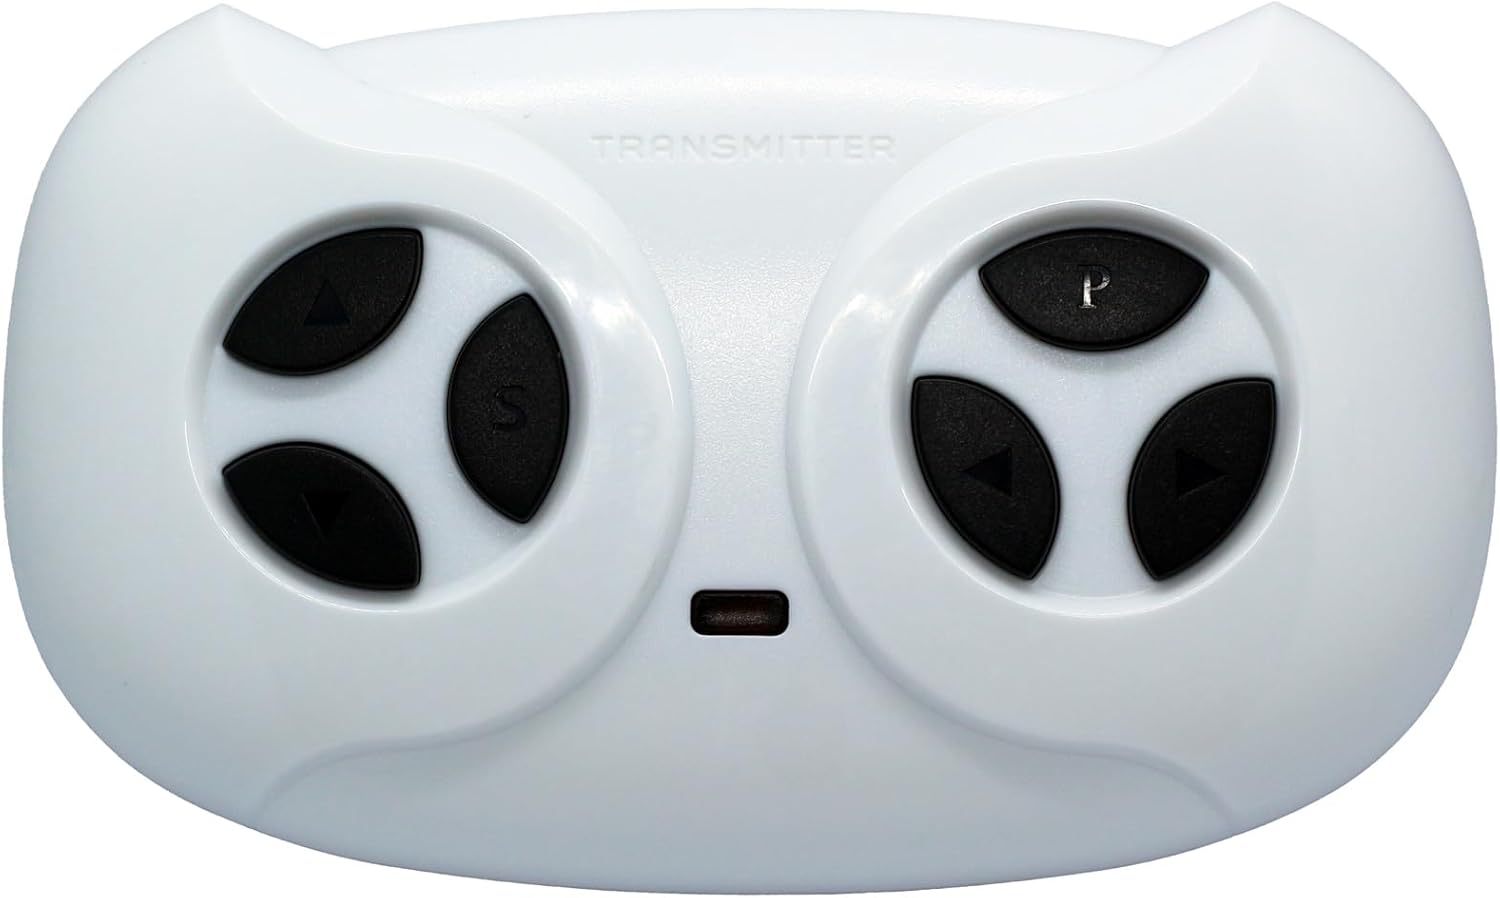
Image: The included 2.4GHz Remote Control with its distinct button layout.
Compatibility
This control box and remote control system is compatible with the following universal models:
- JR1922RXS
- JR1922RXS-2
- JR1922RXS-3
- JR1922RXS-4
Important: This system is incompatible with the following models:
- JR1922RXS-D2
- JR1922RXS-AD
- JR1922RXS-3W-12V
Please ensure your existing control box model matches one of the compatible models listed above before installation.
Setup and Pairing Instructions
After replacing the old control box with the new JR1922RXS 12V Control Box, the remote control must be paired with the new controller. Follow these steps carefully:
- Step 1: Install Batteries in Remote Control.
The remote controller requires two AAA (1.5V) batteries. Open the battery compartment on the back of the remote control and insert the batteries, ensuring correct polarity.

Image: Diagram showing how to loosen the screw and load two AAA batteries into the remote control.
- Step 2: Turn Off Vehicle Power.
Ensure the power switch on the children's electric vehicle is in the OFF position.
- Step 3: Initiate Pairing Mode.
On the remote control, simultaneously hold down the "▲" (Forward) and "▼" (Back) keys for approximately 3 seconds. The first LED indicator on the remote control will begin to flicker, indicating it is in pairing mode.
- Step 4: Turn On Vehicle Power.
While the remote control LED is flickering, turn the power switch on the vehicle to the ON position.
- Step 5: Confirm Pairing.
The red indicator light on the remote control should stop flashing, and the pairing process is successful. If pairing is unsuccessful, turn off the vehicle and remote, then repeat steps 2-5. You may need to try up to three times for successful pairing.

Image: Detailed instructions for 2.4G remote control pairing, including button functions and LED indicators.
Operating Instructions (Remote Control)
Once paired, the remote control allows you to operate the children's electric vehicle. Familiarize yourself with the button functions:
- ▲ (Forward): Moves the vehicle forward.
- ▼ (Back): Moves the vehicle backward.
- S (Speed): Adjusts the vehicle's speed.
- 1 LED lit: Low speed
- 2 LEDs lit: Medium speed
- 3 LEDs lit: High speed
- Left Arrow: Turns the vehicle left.
- Right Arrow: Turns the vehicle right.
- P (Brake): Holds the brake, stopping the vehicle. All LEDs will flicker when the brake is engaged.
Image: The 2.4GHz remote control, highlighting the various control buttons for movement, speed, and braking.
Maintenance
To ensure the longevity and optimal performance of your JR1922RXS control box and remote control, follow these general maintenance guidelines:
- Cleaning: Use a soft, dry cloth to clean the control box and remote control. Avoid using harsh chemicals or abrasive cleaners.
- Storage: Store the components in a dry environment, away from direct sunlight and extreme temperatures.
- Battery Replacement: Replace remote control batteries promptly when they are depleted to prevent corrosion. Remove batteries if the remote will not be used for an extended period.
- Connections: Periodically check all wiring connections to the control box to ensure they are secure and free from corrosion or damage.
Troubleshooting
If you encounter issues with your JR1922RXS system, refer to the following troubleshooting tips:
- Remote Control Not Responding:
- Check if the remote control batteries are correctly installed and have sufficient charge. Replace if necessary.
- Ensure the remote control is properly paired with the control box. Refer to the "Setup and Pairing Instructions" section and attempt to re-pair.
- Verify that the vehicle's power switch is ON.
- Vehicle Not Moving:
- Confirm the control box is correctly installed and all wiring connections are secure.
- Check the vehicle's main battery for charge.
- Ensure the remote control is paired and functioning.
- Intermittent Operation:
- Check for loose wiring connections on the control box or within the vehicle's electrical system.
- Ensure there are no strong interference sources nearby (e.g., other 2.4GHz devices).
If problems persist after following these steps, please contact customer support.
Specifications
| Feature | Detail |
|---|---|
| Model Number | JR1922RXS (Universal models: JR1922RXS-2, JR1922RXS-3, JR1922RXS-4) |
| Supply Voltage | DC 12V |
| Load Current | Max 35A |
| Frequency | 2.407GHz - 2.473GHz |
| Product Dimensions | 0.5 x 1.5 x 2 inches |
| Item Weight | 0.48 ounces |
| Manufacturer Recommended Age | 20 months - 5 years |

Image: Rear view of the JR1922RXS Control Box, showing connection ports and the product label with key specifications.
Warranty and Support
Specific warranty information for this replacement part is not provided in the product details. Please refer to the original manufacturer's warranty for your children's electric vehicle or contact the seller, ToiCottage, for details regarding replacement part warranties.
For further assistance or inquiries, you may search for other parts from ToiCottage or contact their customer service directly if available.