1. Introduction
Thank you for choosing the VAXMAY 4.2 Gallon Battery Powered Backpack Sprayer. This electric garden sprayer is designed for efficient and comfortable application of various liquids, including weed killers, fertilizers, and cleaning solutions. It features a powerful 100 PSI pump, a telescopic wand, and compatibility with Makita 18V batteries for extended use. Please read this manual thoroughly before operation to ensure safe and effective use of your new sprayer.
2. Setup
2.1. Component Overview
Before assembly, ensure all components are present:
- 4.2 Gallon Tank with Backpack Straps
- Electric Pump Assembly
- Telescopic Wand with Trigger
- Hose
- 5 Assorted Nozzles (Windproof, F-Type Dual, Cone, Fan, Stream)
- 2.6 Ah 21V Lithium-Ion Battery
- 110-240V Charger
- Filter Screen

Figure 1: VAXMAY 4.2 Gallon Battery Powered Backpack Sprayer with all components.
2.2. Assembly
- Connect the Hose: Attach one end of the hose to the outlet port at the bottom of the sprayer tank and the other end to the trigger handle of the telescopic wand. Ensure connections are secure to prevent leaks.
- Attach the Nozzle: Select the desired nozzle from the 5 included types and securely screw it onto the end of the telescopic wand.

Figure 2: User operating the backpack sprayer, demonstrating the hose and wand connection.

Figure 3: The five interchangeable nozzles and the convenient storage area on the sprayer's top.
2.3. Battery Installation and Charging
- Install Battery: Locate the battery compartment on the side of the sprayer. Insert the 2.6 Ah 21V lithium-ion battery into the slot until it clicks securely into place. The sprayer is compatible with Makita 18V batteries.
- Check Battery Level: The sprayer features a digital voltage display to monitor battery usage. Press the small button next to the display to check the current voltage.
- Charge Battery: If the battery level is low, remove the battery by pressing the release button and sliding it out. Connect the battery to the provided 110-240V charger. The charger will indicate when the battery is fully charged.
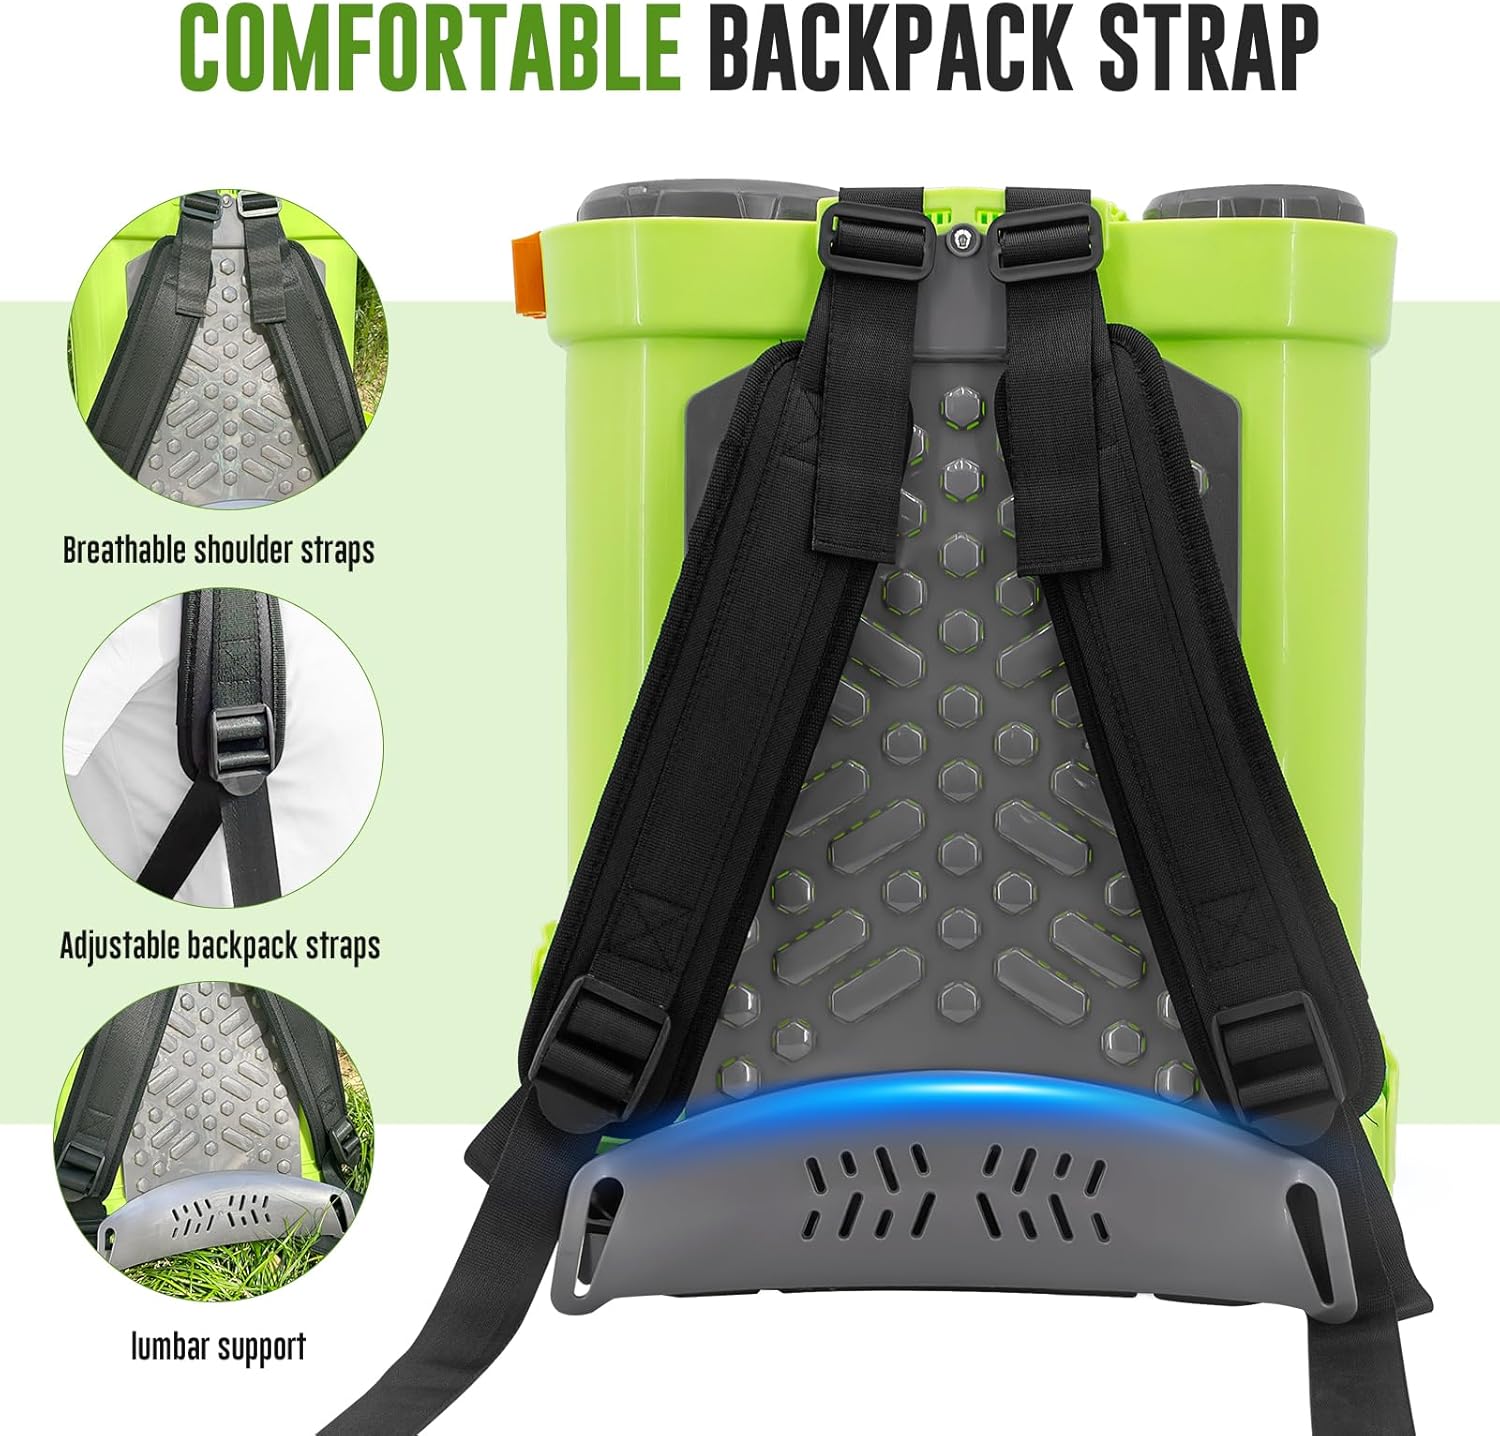
Figure 4: The battery compartment, designed for easy insertion and removal of the lithium-ion battery.

Figure 5: The included 2.6 Ah 21V battery and its dedicated charger.
3. Operating Instructions
3.1. Filling the Tank
Unscrew the tank cap and pour your desired liquid into the 4.2-gallon tank. Use the translucent water tank scale on the side of the sprayer to monitor the remaining liquid level. Ensure the filter screen is in place to prevent debris from entering the pump system.

Figure 6: The translucent tank allows for easy monitoring of liquid levels during operation.
3.2. Powering On and Pressure Adjustment
Turn on the main power switch located near the base of the sprayer. Adjust the spray pressure using the PSI knob, which allows for a range of 0-100 PSI. This enables precise control for various tasks, from delicate misting to powerful streams.
Video 1: Official VAXMAY video demonstrating the sprayer's features, including the PSI adjustment knob and various spray patterns.
3.3. Nozzle Selection and Spraying Techniques
Choose from the five different nozzles to suit your application needs. The telescopic wand can be extended up to 39.3 inches for hard-to-reach areas. The trigger handle features a lock mechanism to reduce hand fatigue during prolonged use.

Figure 7: The telescopic wand extends to provide reach for various spraying tasks.
4. Maintenance
4.1. Cleaning
After each use, thoroughly rinse the tank, hose, and wand with clean water. Operate the sprayer with clean water for a few minutes to flush out any chemical residues from the pump and nozzles. Clean the filter screen regularly to prevent clogging.
4.2. Storage
Store the sprayer in a cool, dry place away from direct sunlight and freezing temperatures. Ensure the tank is empty and clean before storage. Remove the battery if storing for extended periods.
5. Troubleshooting
- No Spray/Low Pressure: Check battery charge, ensure hose connections are tight, clean nozzles for clogs, and verify the filter screen is clear.
- Leaking: Inspect all connections (hose to tank, hose to wand, nozzle to wand) for tightness. Check for any cracks or damage to the tank or hose.
- Pump Not Activating: Ensure the main power switch is in the 'ON' position and the battery is properly installed and charged.
6. Specifications
- Brand: VAXMAY
- Model Name: XAR4000G
- Tank Volume: 4 Gallons (16 Liters)
- Maximum Pressure: 100 PSI (7 Bar)
- Power Source: Battery Powered (Compatible with Makita 18V batteries)
- Battery: 2.6 Ah 21V Lithium Ion (included)
- Hose Length: 39.3 Inches
- Material: Nylon, High Density Polyethylene (HDPE), Polypropylene (PP)
- Item Weight: 8.93 pounds (4.06 Kilograms)
- Product Dimensions: 8"W x 19"H
- Included Components: 4 Gallon tank, VAXMAY 100 PSI electric pump, telescopic wand, 5 nozzles, 2.6 Ah 21V battery, 110-240V charger
7. Warranty and Support
The VAXMAY Battery Powered Backpack Sprayer comes with a worry-free One-year Warranty. For any questions or assistance with your product, please feel free to contact our 7/24 online service. Refer to the contact information provided with your purchase documentation for support details.