1. Introduction
This manual provides detailed instructions for the setup, operation, and maintenance of your NEW BAXS CT80S Professional 8-Channel DJ Audio Mixer. Please read this manual thoroughly before using the device to ensure proper functionality and to maximize your experience.
2. Safety Information
- Power Supply: Use only the specified power adapter. Ensure the voltage matches your local power supply.
- Water and Moisture: Do not expose the mixer to water, rain, or excessive moisture. Avoid placing liquid containers on or near the unit.
- Ventilation: Ensure adequate ventilation around the mixer. Do not block ventilation openings.
- Heat Sources: Keep the unit away from heat sources such as radiators, heat registers, stoves, or other heat-producing appliances.
- Cleaning: Disconnect the power before cleaning. Use a dry, soft cloth. Do not use liquid cleaners or aerosols.
- Servicing: Refer all servicing to qualified service personnel. Do not attempt to repair the unit yourself.
3. Package Contents
Verify that all items are present in the package:
- NEW BAXS CT80S Audio Mixer
- Power Adapter
- User Manual (this document)
4. Product Overview
The NEW BAXS CT80S is an 8-channel professional audio mixer designed for various audio applications, including DJing, live performances, and studio recording. It features Bluetooth connectivity, a USB interface for playback and recording, DSP effects, and phantom power for condenser microphones.

Image: Front view of the NEW BAXS CT80S 8-Channel DJ Audio Mixer, showcasing all controls and input/output ports.
4.1 Control Panel Layout
The mixer's control panel is intuitively designed for ease of use. Below is a diagram highlighting key components and their functions.

Image: Detailed diagram of the NEW BAXS CT80S mixer, labeling various inputs, outputs, and control knobs such as Gain, EQ, FX, Pan, Volume faders, USB port, MP3 controls, and main output controls.
- XLR/Line Inputs (Channels 1-8): For connecting microphones (XLR) or line-level instruments (1/4 inch jack).
- Gain Knobs: Adjust the input sensitivity for each channel.
- EQ Controls (High, Mid, Low): Adjust the frequency response for each channel.
- FX Send: Controls the amount of signal sent to the internal effects processor.
- Pan Control: Adjusts the stereo position of the channel signal.
- Channel Faders: Control the volume level of individual channels.
- Main Output (L/R): XLR and 6.5mm outputs for connecting to main speakers.
- Headphone Jack: For monitoring audio.
- USB Interface: For connecting USB flash drives for MP3 playback or recording.
- Bluetooth Module: For wireless audio streaming.
- +48V Phantom Power Button: Activates phantom power for condenser microphones.
- PFL/AFL Buttons: Pre-Fader Listen / After-Fader Listen for monitoring individual channels.
5. Setup
Follow these steps to set up your NEW BAXS CT80S mixer:

Image: Diagram illustrating various devices connected to the mixer, including a computer, condenser microphone, wireless microphone, musical instrument, U disk, phone, speaker, amplifier, and headphones.
- Power Connection: Connect the provided power adapter to the mixer's power input and then to a suitable power outlet. Do not power on the unit yet.
- Connecting Microphones:
- For dynamic microphones, connect an XLR cable from the microphone to an XLR input on the mixer.
- For condenser microphones, connect an XLR cable from the microphone to an XLR input. You will need to activate +48V phantom power (see Section 5.4).
- Connecting Line-Level Devices: Connect instruments (e.g., keyboards, guitars via DI box) or other audio sources (e.g., CD players) to the 1/4 inch LINE inputs using appropriate cables.
- Connecting Main Outputs: Connect the L/R MAIN OUT XLR or 6.5mm jacks to your powered speakers or amplifier inputs.
- Connecting Headphones: Plug your headphones into the PHONES jack for monitoring.
- Connecting to a Computer: To use the mixer as an audio interface for recording or playback with a computer, connect a USB cable from the mixer's USB port to your computer.
- Power On: Once all connections are made, power on your main speakers/amplifier first, then power on the NEW BAXS CT80S mixer.

Image: A NEW BAXS CT80S mixer connected via USB to a laptop, illustrating its use for audio recording and playback with a computer.
6. Operating Instructions
This section covers the basic operation of the mixer.
6.1 Adjusting Input Levels (Gain)
For each channel, use the GAIN knob to set the input level. Adjust it so that the signal peaks are strong but do not consistently clip (indicated by the PEAK LED lighting up). This ensures a clean signal without distortion.
6.2 Equalization (EQ)
Each channel features HIGH, MID, and LOW EQ controls. Use these to shape the tone of your audio source. Turn clockwise to boost frequencies and counter-clockwise to cut them.

Image: A hand adjusting an EQ knob on the mixer, with a graphic representation of frequency response curves before and after adjustment, demonstrating finer adjustments for accurate sound.
6.3 Channel Volume and Panning
- Use the individual channel FADERS to control the volume of each input in the main mix.
- The PAN control adjusts the stereo position of the channel's signal, moving it between the left and right main outputs.
6.4 Master Volume
The MAIN L/R FADERS control the overall output volume of the mixer. Adjust these to achieve the desired listening level from your speakers.
7. Effects Adjustment
The CT80S mixer includes a built-in DSP effects processor with 16 preset effects. Use the dedicated controls to apply and adjust these effects:
- FX Knob (per channel): Determines how much of that channel's signal is sent to the effects processor.
- FX Level: Controls the overall volume of the effects return.
- DLY (Delay): Adjusts the delay time of the effect.
- REF (Reverb/Feedback): Controls the decay or feedback of the effect.
- Program Selector: Allows you to choose from the 16 available preset effects.
8. Bluetooth Connectivity
The mixer features Bluetooth 5.0 for wireless audio streaming from compatible devices.

Image: A smartphone displaying a music player interface, wirelessly connected via Bluetooth to the NEW BAXS CT80S mixer, demonstrating audio input adjustment.
- Activate the Bluetooth function on the mixer (refer to the MP3/USB section on the mixer's display).
- On your mobile device (phone, tablet, laptop), enable Bluetooth and search for available devices.
- Select "NEW BAXS" or a similar name from the list to pair.
- Once connected, you can stream audio from your device to the mixer. Adjust the volume using your device and the mixer's dedicated Bluetooth/USB channel controls.
9. USB Playback and Recording
The USB interface allows for direct playback of MP3/WAV/WMA files from a USB flash drive and recording of the main mix to a USB flash drive.

Image: A USB flash drive inserted into the USB port of the NEW BAXS CT80S mixer, indicating its capability for direct playback and recording without drivers or complex setup.
9.1 USB Playback
- Insert a USB flash drive containing audio files into the USB port.
- Use the MP3 player controls (MENU, Play/Pause, Skip) on the mixer to navigate and play tracks.
- Adjust the volume using the dedicated USB channel fader.
9.2 USB Recording
The mixer can record the main stereo mix directly to a USB flash drive. Refer to the mixer's display and controls for specific recording functions (e.g., REC button, file format selection).
10. Phantom Power (+48V)
The CT80S provides +48V phantom power for condenser microphones on channels 1-8.
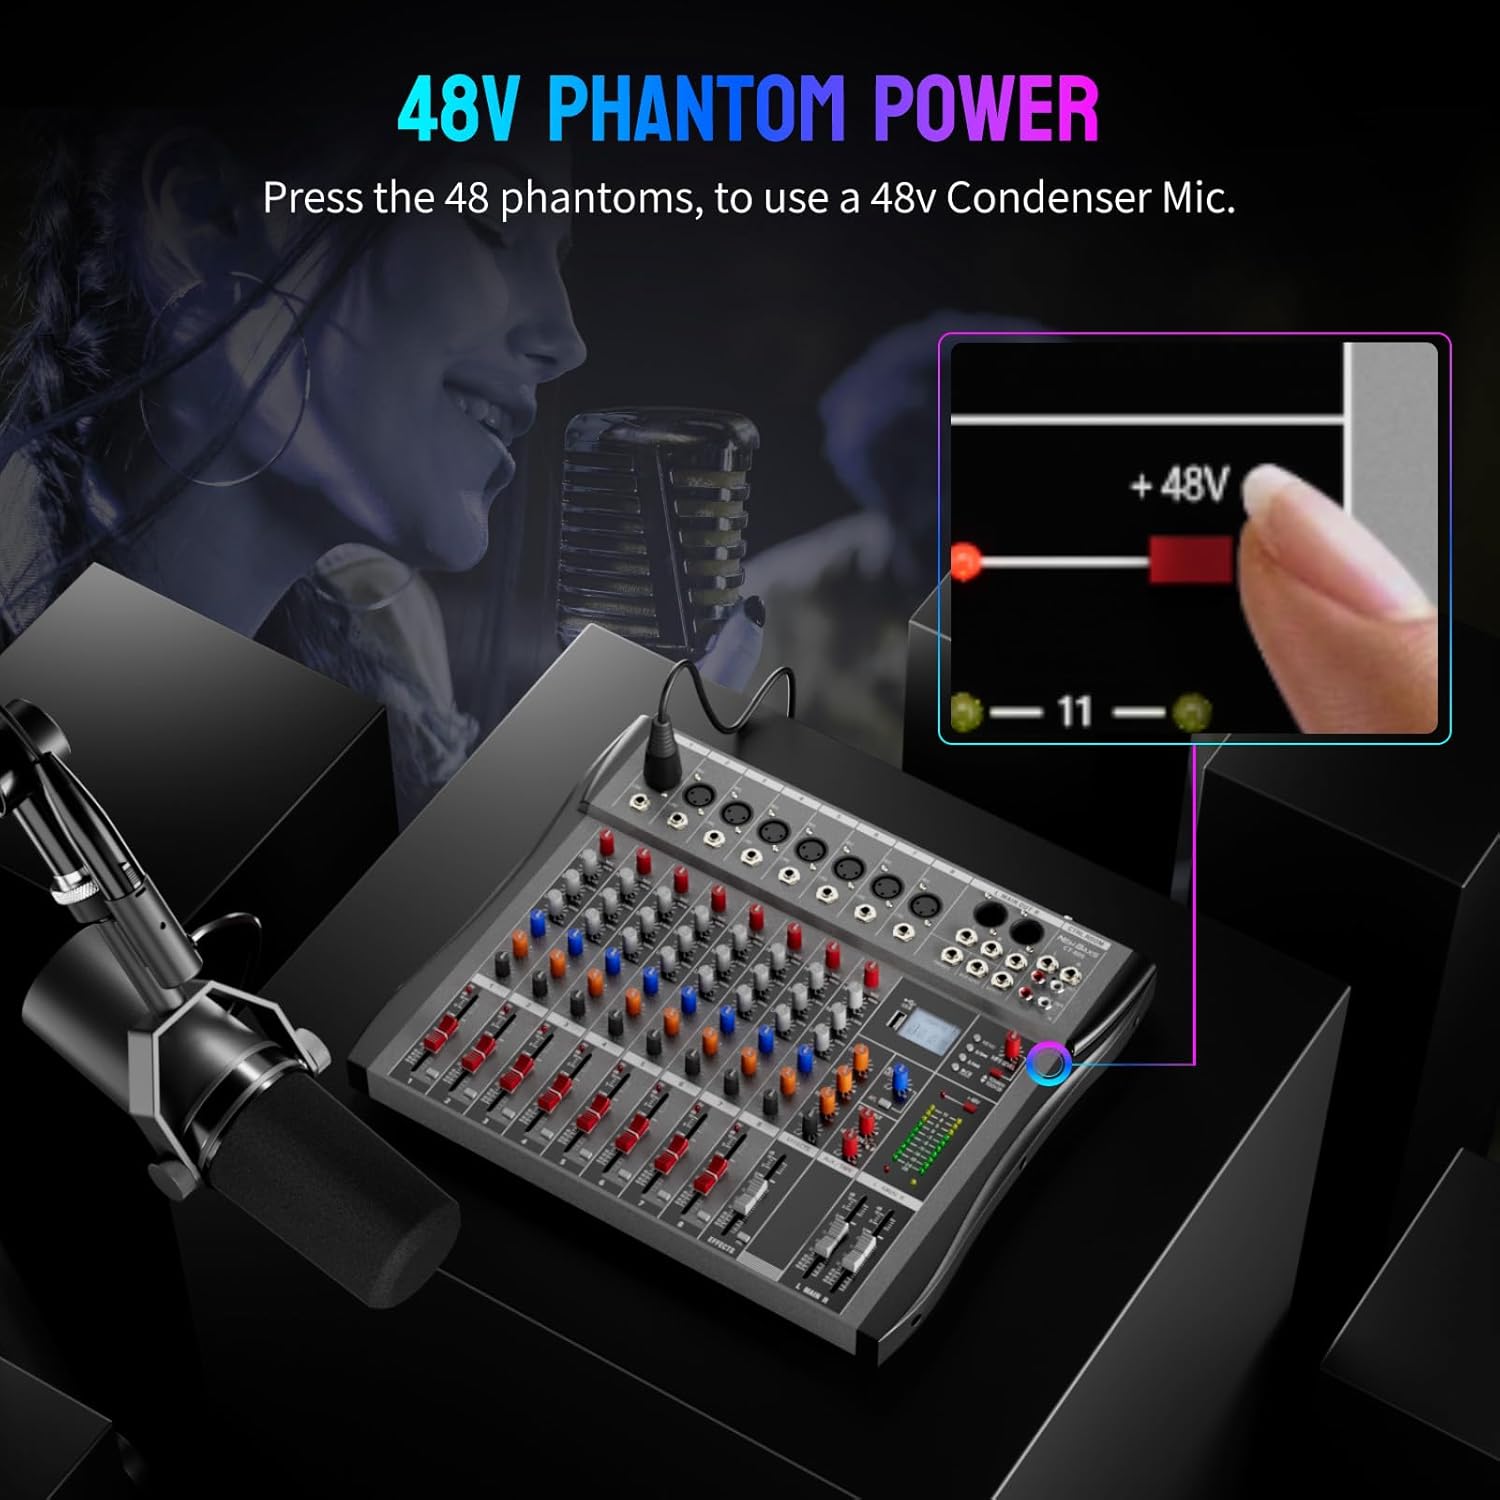
Image: A finger pressing the +48V phantom power button on the mixer, with an illuminated indicator, demonstrating how to activate phantom power for condenser microphones.
- Ensure your condenser microphone is connected via an XLR cable to one of the input channels (1-8).
- Press the +48V button located near the main output section. An indicator light will illuminate, confirming phantom power is active.
- Caution: Do not activate phantom power for dynamic microphones or ribbon microphones unless specifically designed to handle it, as this can cause damage. Always connect/disconnect microphones with phantom power off.
11. Monitoring Features (PFL/AFL)
The mixer offers Pre-Fader Listen (PFL) and After-Fader Listen (AFL) for precise monitoring of individual channels.

Image: Two hands interacting with the mixer, one activating PFL monitoring on a channel and the other activating AFL monitoring on another, illustrating independent channel monitoring capabilities.
- PFL (Pre-Fader Listen): When activated, the signal from that channel is sent to the headphones before the channel fader and EQ. This allows you to check the raw input signal and set gain levels without affecting the main mix.
- AFL (After-Fader Listen): When activated, the signal from that channel is sent to the headphones after the channel fader and EQ. This allows you to monitor the channel's contribution to the mix, including its volume and EQ adjustments.
12. Maintenance
- Cleaning: Regularly wipe the mixer's surface with a soft, dry cloth. Avoid using harsh chemicals or abrasive materials.
- Dust Protection: When not in use, cover the mixer to protect it from dust and debris.
- Storage: Store the mixer in a cool, dry place away from direct sunlight and extreme temperatures.
- Detachable Anti-Collision Strip: The mixer features a detachable anti-collision strip for added protection. This can be removed for cleaning or if embedding the mixer into a custom setup.

Image: A diagram showing the detachable anti-collision strip being removed from the mixer, highlighting its design for protection and customization.
13. Troubleshooting
If you encounter issues with your mixer, refer to the following common problems and solutions:
| Problem | Possible Cause | Solution |
|---|---|---|
| No sound output |
|
|
| Distorted sound |
|
|
| Microphone not working |
|
|
| Bluetooth connection issues |
|
|
14. Specifications
- Model: CT80S
- Number of Channels: 8
- Connectivity Technology: Bluetooth, USB
- Power Source: Corded Electric
- Voltage: 220 Volts
- Item Weight: 8.38 pounds (3.8 kg)
- Product Dimensions: 15.74"D x 1.33"W x 12.99"H (40cm x 3.38cm x 33cm)
15. Warranty and Support
NEW BAXS provides a 12-Month Worry-Free After-sales Service for this product. This includes 24-hour prompt customer service to ensure your complete satisfaction. If you encounter any issues, please contact us directly.
15.1 How to Contact Support
For support or warranty claims, please contact the seller through the Amazon platform:

Image: A visual guide demonstrating the steps to contact the seller on Amazon, typically found on the product page under 'Sold by' or 'Ask a question'.
- Go to the product page on Amazon.
- Locate the 'Sold by' section (e.g., 'Sold by MoKenTao').
- Click on the seller's name to visit their storefront or contact page.
- Look for an option like 'Ask a question' or 'Contact Seller' to send a message.