Introduction
The Poly Edge E300 IP Phone is a versatile and feature-rich communication device designed for modern office environments. It combines high-quality audio with an intuitive user interface, making it suitable for various professional settings, from hot-desking to home offices. This manual provides detailed instructions for setting up, operating, maintaining, and troubleshooting your Poly Edge E300 IP Phone.
What's in the Box
Carefully unpack the contents and ensure all items are present:
- Edge E300 IP Phone
- Handset with Protection
- Handset Cord
- Network (LAN) Cable - CAT-5E
- Desk Stand
- Setup Sheet
Product Overview

Figure 1: Front view of the Poly Edge E300 IP Phone, showing the display, keypad, and handset.
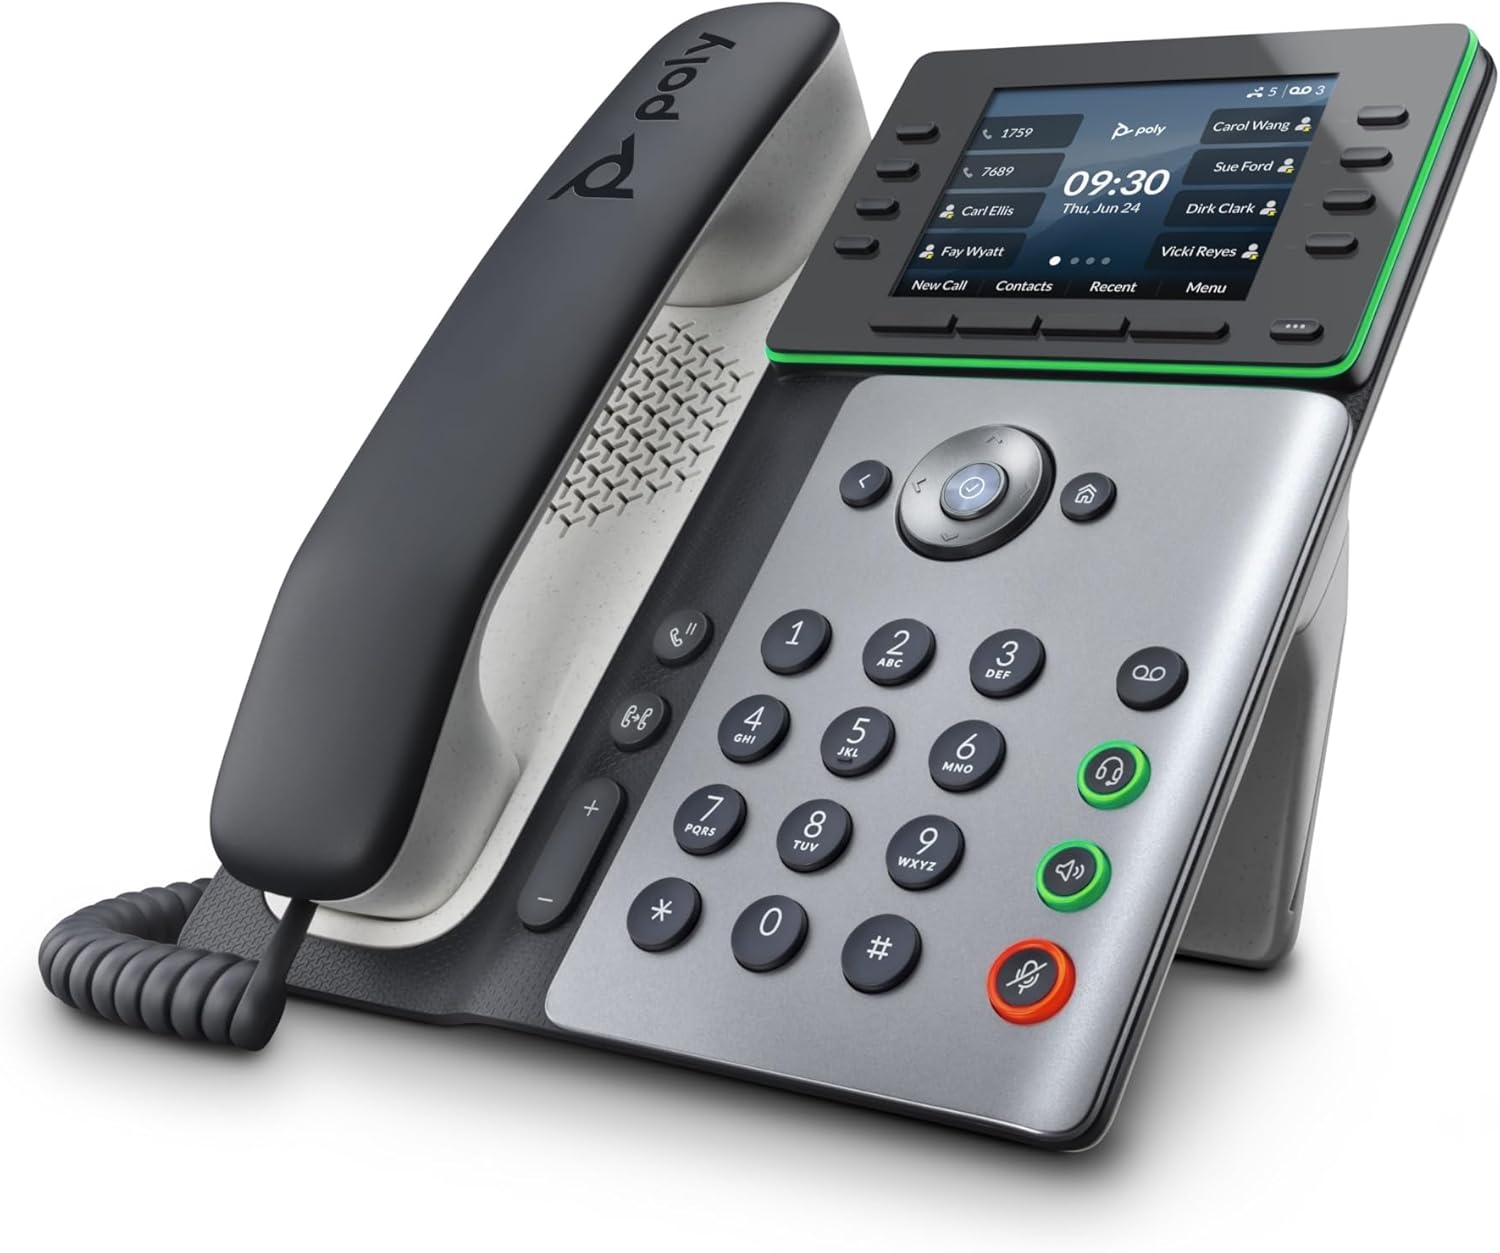
Figure 2: Angled view of the Poly Edge E300 IP Phone, highlighting its ergonomic design and display angle.
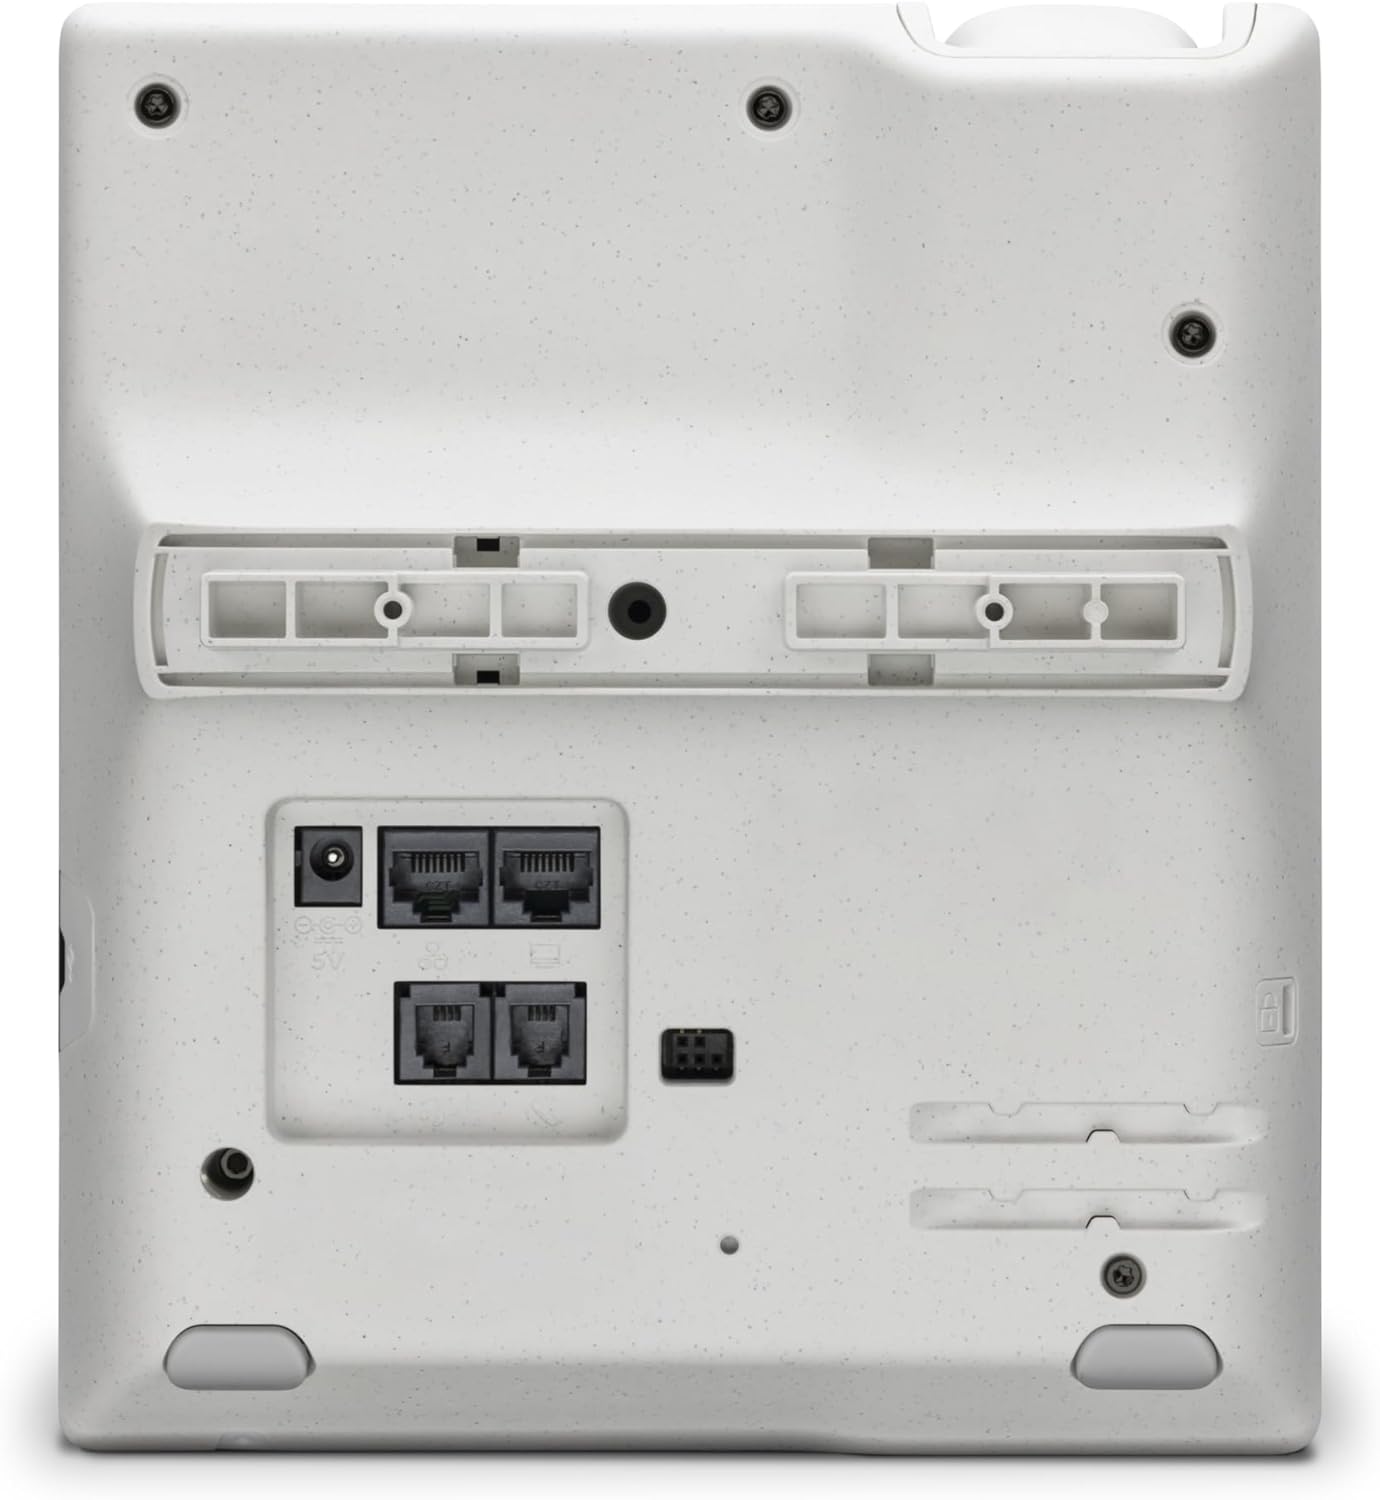
Figure 3: Rear view of the Poly Edge E300 IP Phone, displaying the various connectivity ports including LAN, PC, and headset jacks.
Setup
1. Attaching the Desk Stand
- Align the tabs on the desk stand with the slots on the back of the phone.
- Gently push the stand into place until it clicks securely.
2. Connecting the Handset
- Plug one end of the coiled handset cord into the handset.
- Plug the other end of the coiled handset cord into the handset port on the back of the phone (refer to Figure 3).
3. Connecting to the Network (PoE)
The Poly Edge E300 supports Power over Ethernet (PoE), eliminating the need for a separate power adapter if your network switch provides PoE.
- Connect one end of the provided Ethernet cable (CAT-5E) to the LAN port on the back of the phone (refer to Figure 3).
- Connect the other end of the Ethernet cable to a PoE-enabled port on your network switch or router.
- The phone will power on automatically.
4. Connecting to a PC (Optional)
If you wish to connect your computer through the phone, use the PC port:
- Connect one end of an Ethernet cable to the PC port on the back of the phone (refer to Figure 3).
- Connect the other end of the Ethernet cable to the Ethernet port on your computer.
5. Initial Configuration
Upon first power-up, the phone may automatically connect to your network and retrieve configuration settings from your VoIP provider or IT administrator. Follow any on-screen prompts for initial setup, such as language selection or network settings if required.
Operating the Phone
Making Calls
- Dialing: Pick up the handset, press the speakerphone button, or press a line key. Dial the number using the keypad.
- Speed Dial: Use programmed speed dial keys or access contacts via the display.
- Redial: Press the Redial button to call the last dialed number.
Answering Calls
When the phone rings, pick up the handset, press the speakerphone button, or press the flashing line key.
Using the Display and Soft Keys
The 3.5-inch color IPS LCD display shows call information, features, contacts, and speed dials. The soft keys located directly below the display change functionality based on the current context (e.g., during a call, idle).
- Navigation: Use the directional keys around the center select button to navigate menus.
- Line Keys: The 8-line keys support up to 32 lines and contacts, with a pagination key to view additional lines/contacts.
- Status Indicator: A surround light status indicator provides visual cues for call status or messages.
Audio Features
- Poly HD Voice: Provides clear, high-definition audio for calls.
- Poly NoiseBlockAI: Reduces background noise during calls.
- Acoustic Fence: Creates a virtual