Introduction and Overview
Thank you for choosing the UNIKOO Duchess Series UKD06-6072-CH Semi-Frameless Bypass Double Sliding Shower Door. This manual provides essential information for the safe and proper installation, operation, and maintenance of your new shower door. Please read all instructions carefully before beginning installation and keep this manual for future reference.
This shower door features a semi-frameless design with stainless steel components and 5/16-inch (8mm) certified tempered clear glass, ensuring durability and a modern aesthetic. The bypass double sliding mechanism allows for smooth and convenient entry.
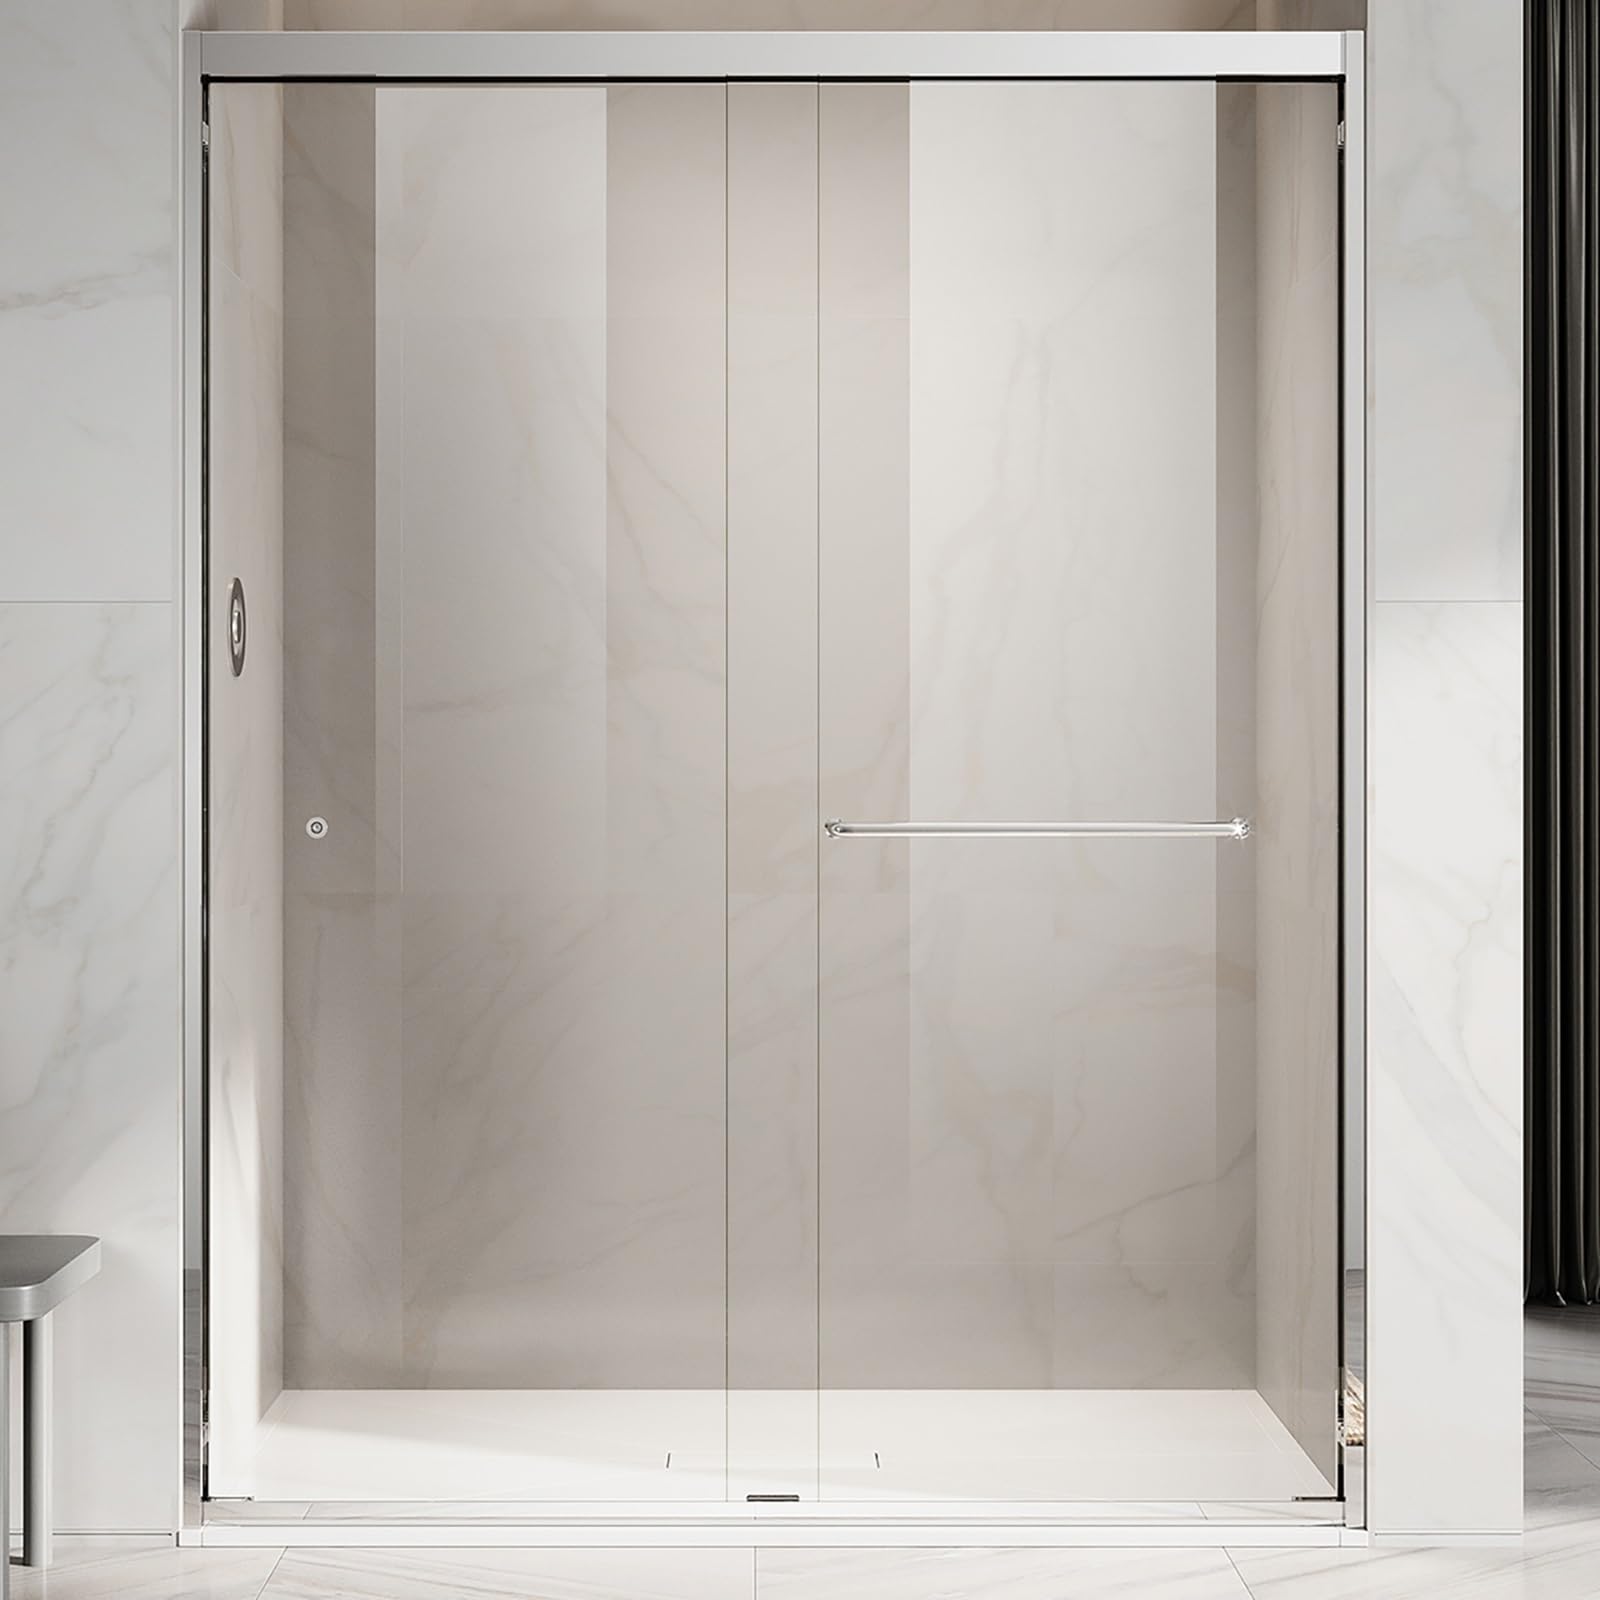
Figure 1: UNIKOO Duchess Series UKD06-6072-CH Semi-Frameless Bypass Double Sliding Shower Door.
Safety Information
- Professional Installation Recommended: This product is recommended to be installed by two professional installers due to its weight and complexity.
- Wear Safety Glasses: Always wear safety glasses during installation to protect your eyes from debris.
- Handle Glass with Care: Tempered glass, while strong, can shatter if struck at the edges or corners. Handle with extreme care.
- Check Wall Condition: Ensure the wall surface is even and smooth before installation to prevent misalignment and potential issues.
- Secure All Fasteners: Ensure all screws and fasteners are tightened securely to prevent instability.
- Allow Adhesive to Cure: If glass adhesive is used, allow the recommended curing time (typically 24 hours) before using the shower door.
Video 1: UNIKOO Shower Door UKD06 Installation Guide. This video provides a visual walkthrough of the installation process, emphasizing safety precautions and proper techniques.
Package Contents and Tools Required
Package Contents:
The package includes all necessary parts and mounting hardware for installation. Refer to the parts listing diagram for a complete overview of components.

Figure 2: Overall dimensions and a visual representation of the parts included for the UKD06-60X72 model. This diagram helps identify each component before assembly.
Tools Required:
- Spirit Level
- Power Drill
- Pencil
- Silicone Sealant
- Mallet
- Tape Measure
- Screwdriver
- Drill Bits (6mm or 1/4" for ceramic tiles)
- Hacksaw
- Safety Glasses
Installation Instructions
Part 1: Installing Stainless Steel Frame on Wall and Bottom
- Inspect Wall Surface: Before starting, ensure the wall surface is even and smooth.
- Position Wall Profiles: Take out the wall stainless steel frames from the packaging. Position one against the wall, ensuring vertical alignment using a spirit level. Use a marker to mark the hole positions.
- Drill Holes and Insert Anchors: Using a 1/4-inch drill bit (or 6mm for ceramic tiles), drill the marked holes and insert the wall anchors into them.
- Repeat for Opposite Side: Position the second wall stainless steel frame on the opposite side of the wall. Use a level to confirm vertical positioning, then mark and drill the holes, inserting anchors.
- Install Bottom Track: Take out the lower stainless steel piece (bottom track) from the packaging. Measure the required dimensions and cut the track to the correct size using a saw, ensuring the edges are smooth and even. To ensure the guide block is centrally mounted, use the center point as a reference and measure equally to both sides.
- Secure Wall Profiles: Insert the left wall stainless steel piece into the bottom track. Secure it by tightening the screws and place the bumper rubber block over the hole. Repeat this process for the right wall stainless steel piece.
- Install Guide Blocks: Take out the center glass bottom guide from the packaging. Position it on the bottom stainless steel track, secure it with screws, and then press down the cover plate to finish. Repeat this process for the side glass guide block on the other side.
Part 2: Installing the Top Rail
- Prepare Top Rail: Take out the top rail from the packaging. Measure the required length and cut the stainless steel bar to the correct size using a saw, ensuring the edges are smooth and even.
- Insert Top Rail: Insert the top rail into the center of the wall stainless steel frame on both sides. Ensure it is securely seated.
Part 3: Installing the Glass Panels and Pulls
This installation process requires extra care to avoid glass damage and ensure safety for personnel involved. Please proceed with caution.
- Determine Glass Orientation: Before installing the glass, determine how it will be positioned based on the location of your showerhead. The small knob should be mounted on the inside of the bathroom near the showerhead, while the long handle is mounted on the outside for towel access.
- Install Pulleys on Left Door: Disassemble the pulley wheel. Take two pulley accessories, ensuring correct orientation for outer installation. Insert them sequentially into the glass holes, then tighten the screws using a hexagonal wrench.
- Position Left Glass Door: Securely position the left glass door in the outer track. Ensure both side pulleys are correctly attached to prevent any risk of detachment. Ensure the glass is fully seated in the bottom guide at the base. Use a level to check the vertical alignment of the glass. If it's not vertical, adjust the eccentric on the pulley to ensure it aligns correctly before tightening the screws with an Allen wrench.
- Install Pulleys on Right Door: For the right glass door pulley, take two pulley accessories, ensuring correct orientation for inner installation. Insert them sequentially into the glass holes, then tighten the screws using a hexagonal wrench.
- Position Right Glass Door: Position the right glass door in the inner track and use a level to ensure it is perfectly vertical.
- Install Anti-Jump Fittings: To ensure safe usage, make sure that anti-jump fittings are properly installed at the pulleys. Choose the cover marked with the letter "L" and insert it into each of the pulleys located on the left side. Choose the cover marked with the letter "R" and insert it into each of the pulleys located on the right side.
- Stabilize Glass (if unsteady): If the glass feels unsteady after installation, tighten the screws on both ends of the guide to stabilize it securely.
- Install Pull Handle: Disassemble the pull handle. Attach the pull handle to the outer glass. Insert the parts into the glass holes one by one, then tighten the inner screws using an Allen key.
- Install Knob: Disassemble the knob. Attach the knob to the inner glass. Insert the parts into the glass holes one by one, then tighten the outer screw using an Allen key.
- Apply Glass Adhesive: Finally, apply glass adhesive along the seams and let it set for 24 hours before using the shower door.
Operation
The UNIKOO Duchess Series shower door features a smooth sliding system for easy operation. To open or close the door, gently push or pull the handle or knob. The bypass design allows both panels to slide, providing flexible access to your shower space.

Figure 3: Illustration of the smooth and quiet movement mechanism of the shower door, highlighting the aluminum suspension wheel and tunnel-shaped rail.
Maintenance and Care
Proper maintenance will ensure the longevity and appearance of your UNIKOO shower door.
- Glass Cleaning: The tempered glass is coated with Enduro Shield for easy cleaning. Use a soft cloth and mild, non-abrasive cleaner. Avoid harsh chemicals or abrasive pads that can damage the coating.
- Frame Cleaning: Clean the stainless steel frame with a soft cloth and a mild, non-abrasive cleaner. Avoid cleaners containing ammonia, bleach, or abrasive particles.
- Regular Inspection: Periodically check all screws and fasteners to ensure they remain tight. Re-tighten if necessary.
- Lubrication: If the sliding mechanism becomes stiff, apply a silicone-based lubricant to the rollers and tracks. Do not use oil-based lubricants.
- Water Leakage Prevention: The L-shaped bottom frame is designed to keep water inside the shower unit. Ensure it is free from debris to maintain its effectiveness.
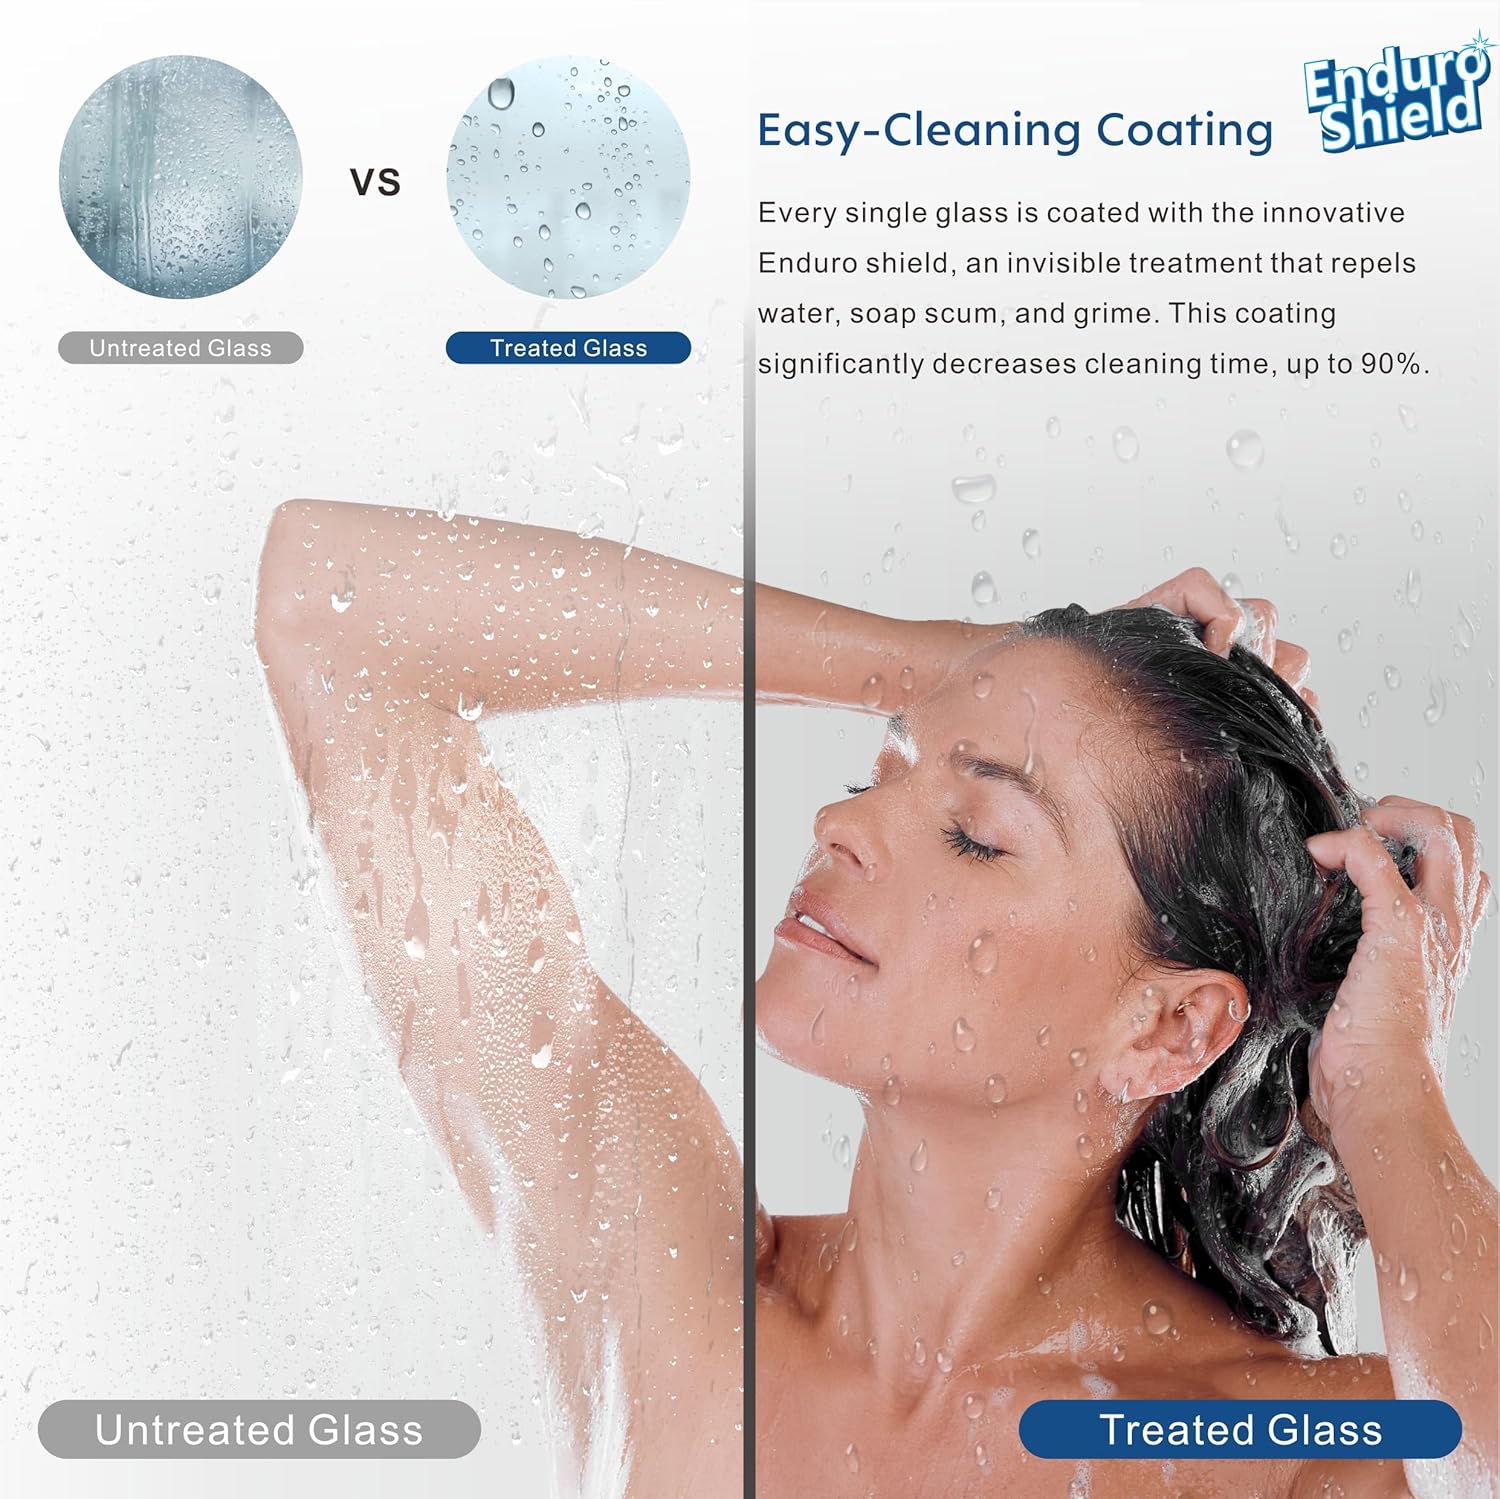
Figure 4: Demonstration of the Enduro Shield easy-cleaning coating on the tempered glass, which repels water and reduces cleaning time.
Troubleshooting
| Problem | Possible Cause | Solution |
|---|---|---|
| Door does not slide smoothly. | Debris in track, dry rollers, misaligned track. | Clean tracks, apply silicone lubricant to rollers, check track alignment. |
| Water leaks from the bottom. | Improper sealing, debris in bottom track, damaged seal. | Ensure proper silicone application, clear debris from track, inspect and replace damaged seals. |
| Glass feels unsteady. | Loose guide screws, improper installation of anti-jump fittings. | Tighten guide screws on both ends, ensure anti-jump fittings are correctly installed. |
| Door does not close completely. | Obstruction in track, misaligned glass panels. | Remove any obstructions, check vertical alignment of glass panels and adjust pulleys if necessary. |
Specifications
- Brand: UNIKOO
- Model: UKD06-6072-CH
- Dimensions: 56"- 60" W × 72" H (Adjustable Width)
- Glass Thickness: 5/16" (8mm) Certified Tempered Clear Glass
- Material: Stainless Steel, Glass
- Color: Bright Chrome
- Style: Modern, Semi-Frameless Bypass Double Sliding
- Certifications: SGCC
- Special Features: Enduro Shield Easy-Cleaning Coating, Smooth Sliding System, Anti-Jump Fittings, L-shaped Bottom Frame for Water Leakage Prevention.
- Assembly Required: Yes
- Item Weight: Approximately 280 Pounds

Figure 5: Close-up view of the 5/16" (8mm) tempered safety glass, highlighting ANSI & SGCC certifications for quality and safety.
Warranty and Support
UNIKOO is committed to providing high-quality products and excellent customer service. For any shipping, sales, or technical questions, the UNIKOO online consulting service is always accessible. Please refer to your purchase documentation for specific warranty details.
You may also visit one of our distributors located throughout the United States for assistance.
For further assistance, please contact UNIKOO customer support through the vendor information provided at the point of purchase or visit the official UNIKOO store online.