Introduction
The RoadKing RKCBFM Dual-Mode AM/FM CB Radio is designed for reliable communication, particularly for truckers. This radio features both AM and FM reception modes, offering improved audio clarity and reduced static, especially in close-range communications. With 4 watts of power and access to all 40 CB channels, it is well-suited for standard CB operations, including AM Channel 19 for truckers. The unit integrates an SWR meter for optimizing antenna performance, along with noise reduction features and adjustable RF and microphone gain controls. Its large digital display and external speaker port enhance usability, all within a durable construction.

Figure 1: RoadKing RKCBFM Dual-Mode AM/FM CB Radio with attached microphone.
What's in the Box
- CB Radio
- DC power cord
- Owner's guide
- Dynamic microphone
- Microphone mounting bracket
- Radio mounting bracket kit
Product Features
- Dual AM-FM Mode for improved audio clarity and reduced static.
- Built-in Microphone for convenient communication.
- Full-featured design for comprehensive CB radio functionality.
- Integrated SWR meter for optimizing antenna performance.
- NB (Noise Blanker) and ANL (Automatic Noise Limiter) for effective noise reduction.
- Easy-to-use controls for intuitive operation.
- RF gain control to adjust receiver sensitivity.
- Mic gain control to adjust microphone sensitivity.
Controls and Functions
The RoadKing RKCBFM CB Radio features a user-friendly front panel with various controls to manage its functions. Refer to the diagram below for the location of each control.
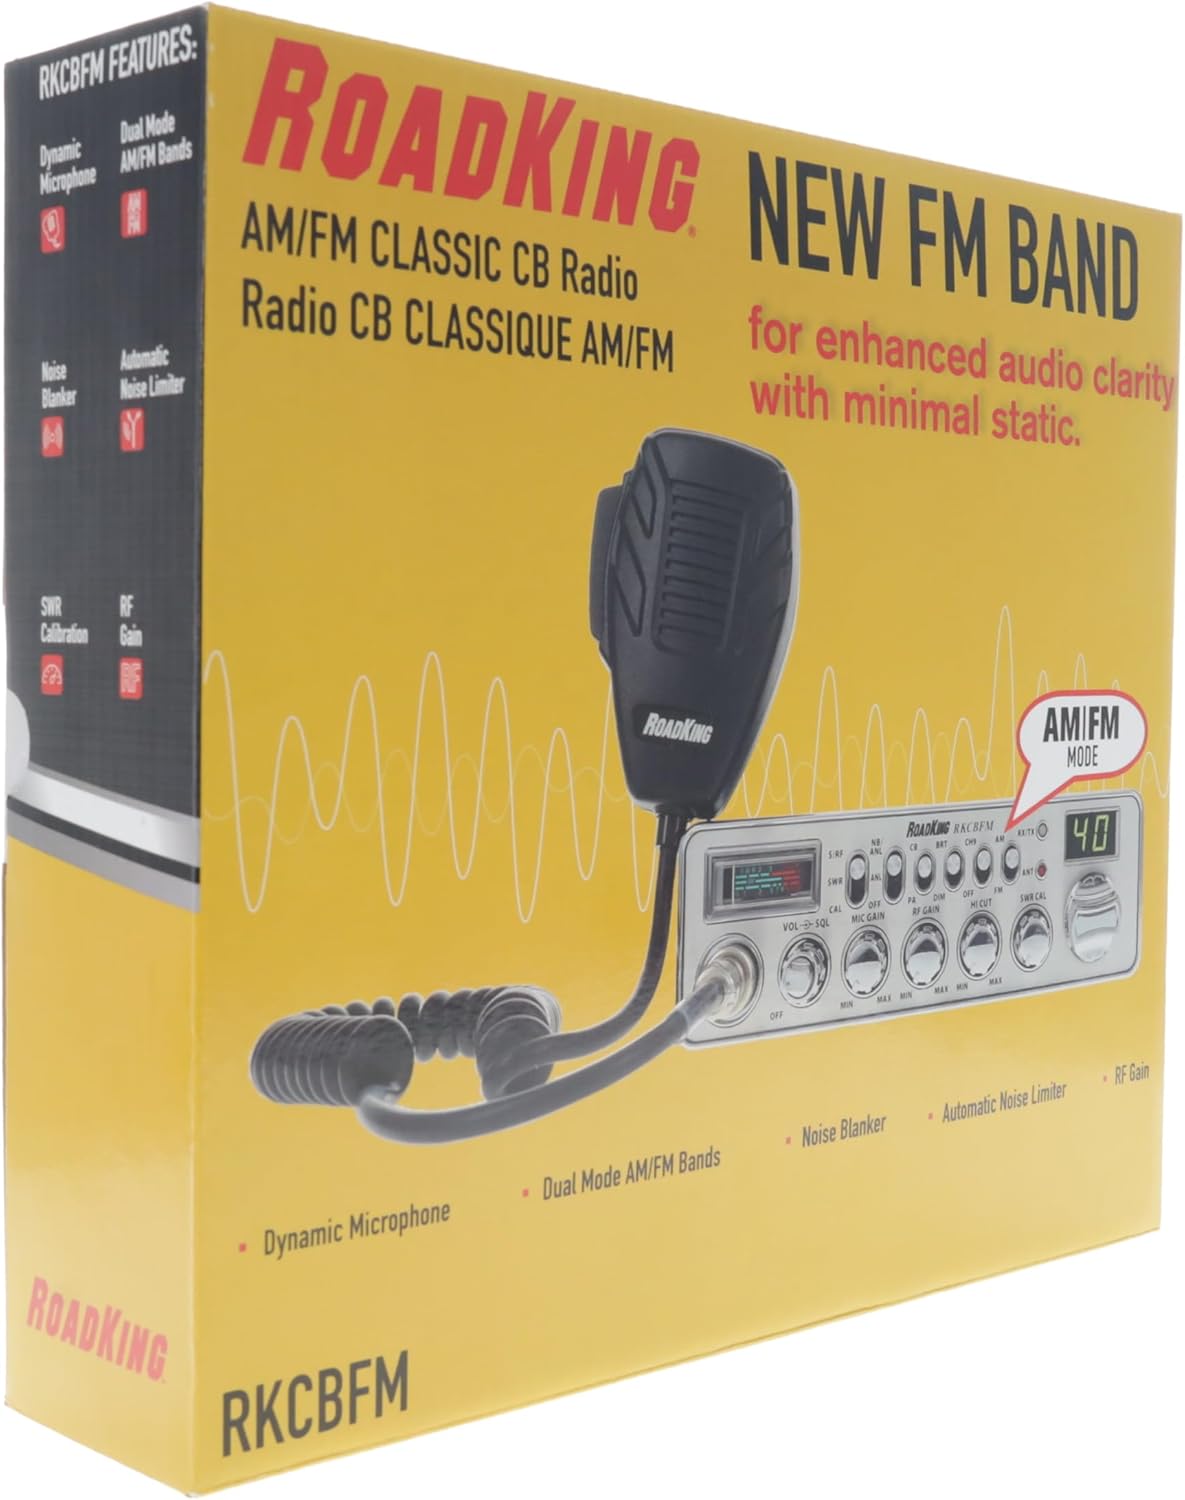
Figure 2: Front and Rear Panel Controls and Functions.
- MICROPHONE JACK: 4-Pin connector for the dynamic microphone.
- ON/OFF-VOLUME: Turns the radio on or off and adjusts the speaker volume.
- SQUELCH: Reduces background noise when there is no incoming signal.
- MIC GAIN: Adjusts the microphone sensitivity.
- RF GAIN: Improves reception in strong signal areas.
- HI CUT: Cuts out high frequency interferences and should be used in accordance with reception conditions.
- SWR CAL: Calibrates the meter for Standing Wave Ratio (SWR).
- CHANNEL KNOB: Selects the operating channel.
- CHANNEL DISPLAY: Displays the current channel selection.
- ANT/LED: Indicates a high SWR condition in the antenna system. Check antenna, cable, and connections.
- RX/TX INDICATOR: Red indicates transmitting; Green indicates receiving.
- AM/FM: Toggles between AM or FM modulation.
- CH9/OFF: Instantly tunes to emergency CB Channel 9. Turns Channel 9 on or off to resume regular channel operations.
- BRT/DIM: Adjusts the brightness of the LED Channel Display and RF Signal Meter.
- CB/PA SWITCH: Selects PA (Public Address) or CB (Citizens Band) mode.
- NB/ANL-ANL/OFF: Reduces external noise and interference from vehicle ignition systems.
- S/RF-SWR/CAL SWITCH: Selects meter function. S/RF - normal; SWR and CAL are for SWR measurements only. See page 8 of the owner's guide for calibration procedures.
- Multi-Function Meter: Measures SWR, RF, and S signal strength.
- EXTERNAL SPEAKER: Connects an optional 8 Ohm 4 Watt speaker to remotely monitor the receiver.
- PA SPEAKER: Connects an external 8 Ohm, 4 Watt speaker to use as a public address system.
- ANTENNA: Connects the antenna cable to the transceiver.
- POWER: Connects the DC power to the transceiver.
Setup
Proper setup is crucial for optimal performance and safety. Follow these steps for initial installation:
- Mounting the Radio: Use the provided radio mounting bracket kit to securely install the CB radio in your vehicle. Ensure it is placed in a location that does not obstruct your view or interfere with vehicle controls.
- Power Connection: Connect the DC power cord to the radio's POWER input (22). Ensure the red wire connects to the positive (+) terminal of your vehicle's 12V DC power source and the black wire connects to the negative (-) terminal or chassis ground.
- Antenna Connection: Connect your CB antenna cable to the ANTENNA port (21) on the rear of the radio. A properly tuned antenna is vital for efficient transmission and reception.
- Microphone Connection: Plug the dynamic microphone into the MICROPHONE JACK (1) on the front panel.
- SWR Calibration: After installation, it is highly recommended to calibrate your SWR meter (7) to ensure your antenna system is properly matched to the radio. Refer to page 8 of the owner's guide for detailed calibration procedures.

Figure 3: RoadKing RKCBFM CB Radio installed in a truck.
Operating Instructions
Familiarize yourself with the radio's controls for effective communication:
- Power On/Volume: Turn the ON/OFF-VOLUME knob (2) clockwise to power on the radio and adjust the desired listening volume.
- Channel Selection: Use the CHANNEL KNOB (8) to select your desired operating channel. The CHANNEL DISPLAY (9) will show the selected channel.
- AM/FM Mode: Press the AM/FM button (12) to switch between Amplitude Modulation (AM) and Frequency Modulation (FM) modes. FM offers clearer audio with less static, especially for local communications.
- Squelch Adjustment: Adjust the SQUELCH knob (3) to eliminate background noise when no signal is present. Turn it clockwise until the background hiss disappears.
- Mic Gain: Adjust the MIC GAIN knob (4) to control your microphone's sensitivity. Set it to a level that provides clear outgoing audio without distortion.
- RF Gain: Use the RF GAIN knob (5) to adjust the receiver's sensitivity. This is useful in areas with strong signals to prevent overloading the receiver.
- Noise Blanker/Automatic Noise Limiter (NB/ANL): Engage the NB/ANL-ANL/OFF switch (16) to reduce impulse noise from vehicle ignition systems or other sources.
- Emergency Channel 9: Press the CH9/OFF button (13) to quickly access emergency Channel 9. Press it again to return to your previous channel.
- Transmitting: To transmit, press and hold the Push-to-Talk (PTT) button on the microphone. The RX/TX INDICATOR (11) will turn red. Release the PTT button to receive.

Figure 4: Using the microphone for communication.
Video 1: Official product video demonstrating the RoadKing RKCBFM Dual-Mode AM/FM CB Radio.
Maintenance
To ensure the longevity and optimal performance of your RoadKing RKCBFM CB Radio, regular maintenance is recommended:
- Cleaning: Regularly wipe the radio's exterior with a soft, damp cloth. Avoid using harsh chemicals or abrasive cleaners.
- Connection Checks: Periodically inspect all cable connections (power, antenna, microphone, external speaker) to ensure they are secure and free from corrosion or damage.
- Antenna Condition: Check your antenna for any physical damage or signs of wear. Ensure it is securely mounted and properly tuned.
- Ventilation: Ensure the radio's ventilation openings are not blocked to prevent overheating.
Troubleshooting
If you encounter issues with your RoadKing RKCBFM CB Radio, try these troubleshooting steps before seeking professional service:
- No Power:
- Check the power cable connections to the radio and the vehicle's power source.
- Verify the vehicle's 12V DC power source is active.
- Check the inline fuse on the power cable. Replace if blown.
- No Reception/Poor Reception:
- Ensure the antenna is properly connected and calibrated (SWR).
- Adjust the SQUELCH knob (3) fully counter-clockwise to ensure it's not blocking signals.
- Adjust the RF GAIN knob (5) to maximum for weaker signals.
- Check the antenna cable for damage or kinks.
- Poor Transmission:
- Check microphone connection (1).
- Adjust MIC GAIN knob (4).
- Verify antenna SWR calibration. High SWR (indicated by ANT/LED (10) or SWR meter) can severely impact transmission.
- Excessive Noise:
- Engage NB/ANL-ANL/OFF switch (16).
- Adjust SQUELCH knob (3) to filter out background noise.
- Check vehicle's electrical system for interference sources.
Specifications
| Specification | Value |
|---|---|
| Product Dimensions | 11.4 x 10.3 x 2.8 inches |
| Item Weight | 4.1 pounds |
| Item Model Number | RKCBFM |
| Number of Channels | 40 |
| Special Feature | Dual Mode (AM/FM) |
| Frequency Range | 26.965 MHz to 27.991 MHz |
| Talking Range Maximum | 3 Mile |
| Voltage | 12 Volts (DC) |
| Water Resistance Level | Not Water Resistant |
Warranty and Support
For warranty information, technical support, or service inquiries, please refer to the contact details provided in your owner's guide or visit the official RoadKing website. Keep your purchase receipt as proof of purchase for warranty claims.


