
1. Introduction
The UIBI X3 is a versatile, all-in-one portable device designed for automotive emergencies and outdoor use. It integrates a powerful 1500A peak current jump starter, a 150PSI smart air compressor, a 12000mAh portable power bank, and a multi-mode LED flashlight. This manual provides comprehensive instructions for the safe and efficient operation, maintenance, and troubleshooting of your UIBI X3 device.
2. Safety Information
Please read and understand all safety warnings and instructions before using this product. Failure to follow these instructions may result in electric shock, fire, and/or serious injury.
- The UIBI X3 features 10 built-in safety protections including overcharge, over current, short circuit, reverse polarity, over-voltage, low/high-temperature, overload, reverse charging, and spark proofing.
- Always ensure the smart jumper cable indicator is green before attempting to jump start a vehicle. A timely beep indicator will alert you to connection issues.
- Do not expose the device to extreme temperatures outside of -4°F to 140°F (-20°C to 60°C).
- If the jump starter has not been used for a long time, it is recommended to charge it every 2-3 months to maintain battery health.
- Keep out of reach of children.
- Do not disassemble the unit. Refer all servicing to qualified personnel.

Figure 2.1: UIBI X3's 10 Smart Protections for enhanced safety during operation.
3. Package Contents
Verify that all items are present in your package:
- 1 x UIBI X3 Jump Starter with Air Compressor
- 1 x Smart Jumper Cable
- 1 x USB-A to USB-C Charging Cable (wall charger not included)
- 1 x Carrying Bag
- 1 x Pump Tube
- 3 x Versatile Air Nozzles
- 1 x Instruction Manual
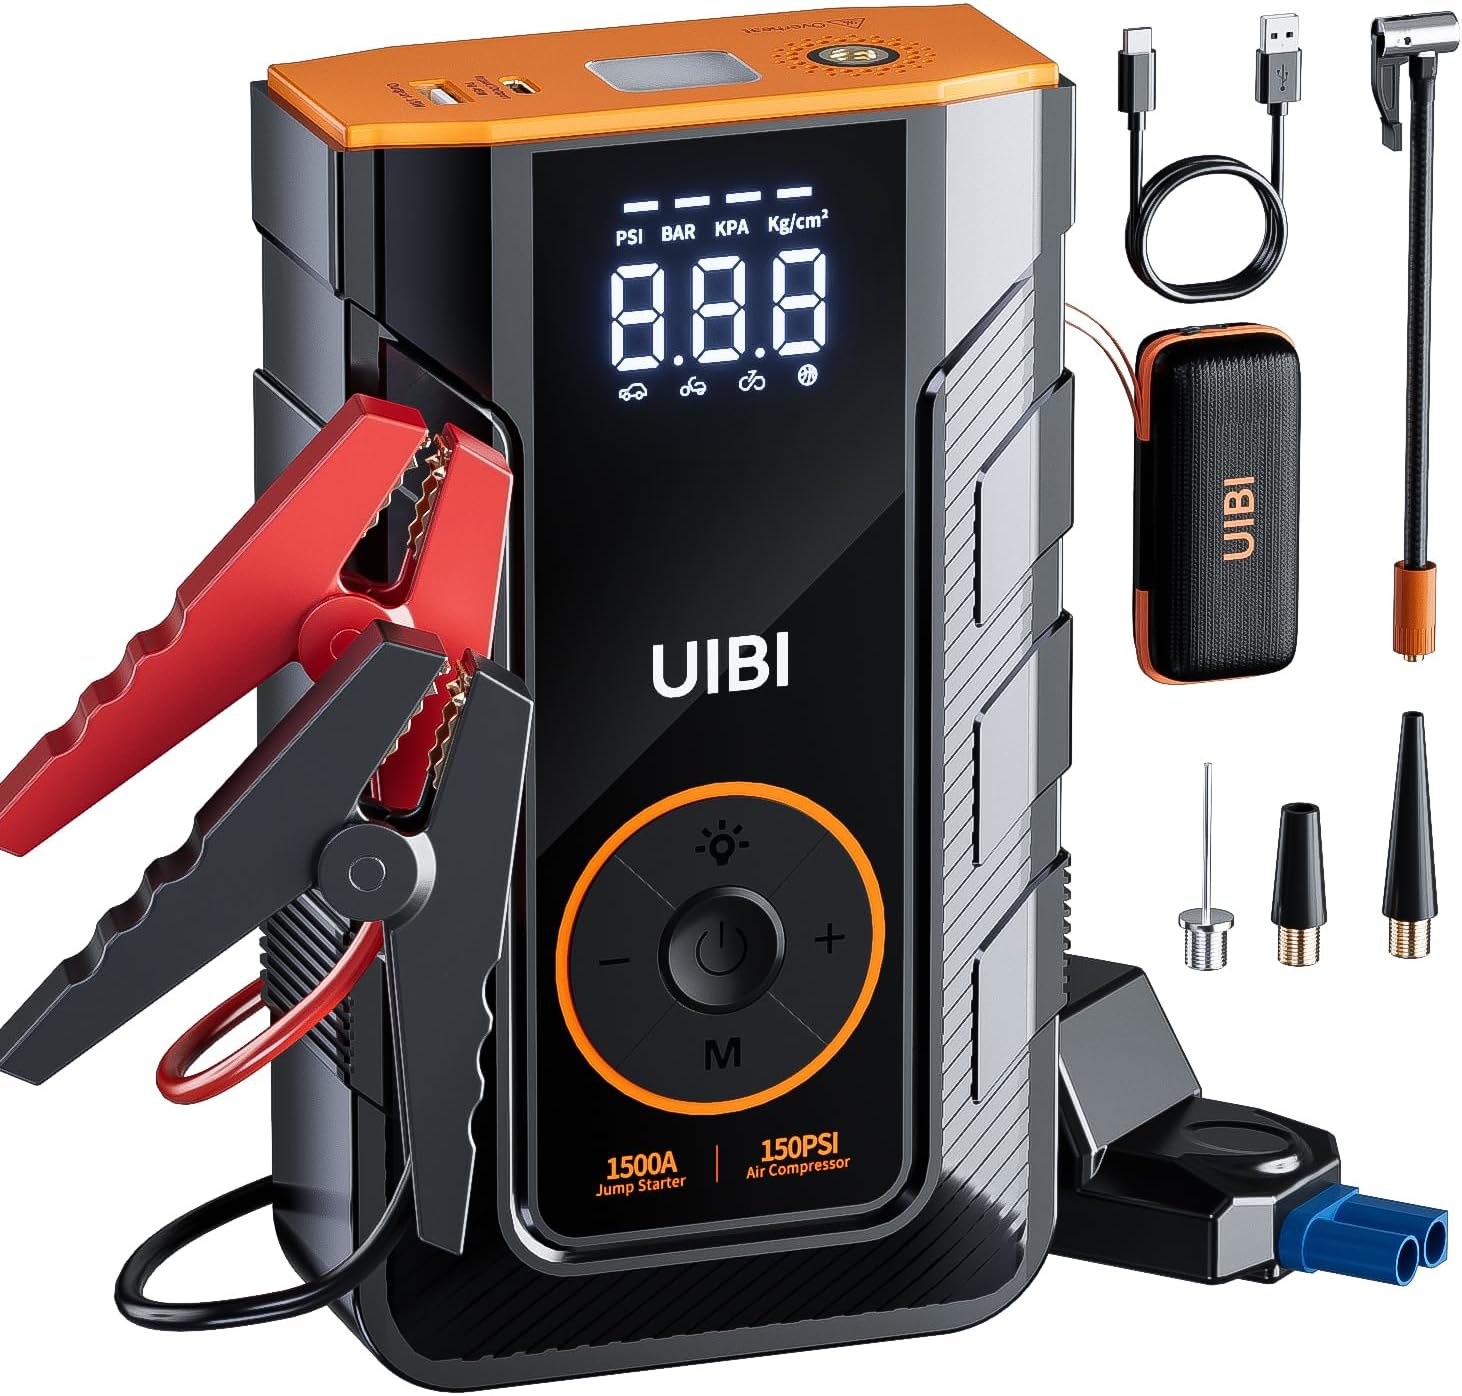
Figure 3.1: The UIBI X3 Jump Starter and its complete set of accessories.
4. Product Overview
The UIBI X3 is a compact and powerful device. Familiarize yourself with its main components and features:
- Main Unit: Houses the battery, jump starter circuitry, air compressor, and control panel.
- LCD Display: Large and clear display showing battery level, inflator mode, and real-time tire pressure.
- Control Buttons: Power button, mode selection (M), and pressure adjustment (+/-).
- Jump Start Port: Dedicated port for connecting the smart jumper cables.
- Air Hose Port: Connection point for the air pump tube.
- USB-C PD 45W Port: For fast charging the unit and outputting power to devices.
- USB-A QC3.0 Port: For fast charging external devices.
- LED Flashlight: Integrated light with Stable, Strobe, and SOS modes.

Figure 4.1: The large and intuitive LCD display for monitoring device status and pressure.

Figure 4.2: The 45W Two-Way Type-C PD port for rapid charging and power delivery.
5. Setup
5.1 Initial Charging
Before first use, fully charge the UIBI X3. It can be recharged from 0% to 100% within 1 hour using the 45W USB-C input.
- Connect the provided USB-A to USB-C charging cable to the USB-C PD 45W port on the UIBI X3.
- Connect the other end of the cable to a compatible USB wall charger (not included) or a power source.
- The LCD display will indicate the charging status. Charge until the battery indicator shows full.

Figure 5.1: Charging the UIBI X3 via its USB-C port for rapid replenishment.
6. Operating Instructions
6.1 Jump Starting a Vehicle
The UIBI X3 can jump start 12V vehicles (up to 7.5L gas/5.5L diesel engines) up to 40 times on a single charge.
- Insert the Jump Cable: Plug the smart jumper cable into the jump start port on the UIBI X3.
- Attach the Clamps: Connect the red (+) clamp to the positive terminal of the car battery and the black (-) clamp to the negative terminal.
- Ensure Indicator is Green: Wait for the indicator light on the smart jumper cable to turn solid green. If it beeps or shows red, check connections or refer to troubleshooting.
- Start Your Car Engine: Once the indicator is green, start your car's engine immediately.
- Remove Clamps: After the engine starts, remove the clamps from the car battery, then unplug the smart jumper cable from the UIBI X3.

Figure 6.1: Step-by-step guide for jump starting your vehicle.

Figure 6.2: The heavy-duty metal clamps ensure secure and efficient connection.
Video 6.1: Official UIBI X3 Jump Starter demonstration, showing the quick start process and features.
6.2 Using the Air Compressor
The built-in 150PSI air compressor can inflate car tires, bicycles, motorcycles, balls, and other inflatables with high accuracy (±1 psi).
- Assemble: Connect the pump tube to the air hose port on the UIBI X3. Attach the appropriate nozzle for your item.
- Mode/Unit: Short press the "M" key to select the inflation mode (car, motorcycle, bicycle, ball). Long press "M" to switch pressure units (PSI, BAR, KPA, Kg/cm²).
- Preset Value: Short press the "+" or "-" keys to adjust the target pressure. Long press to quickly adjust the value.
- Inflate: Press the power button to start inflation. The compressor will automatically shut off when the preset pressure is reached.

Figure 6.3: The UIBI X3 functioning as a 150PSI multi-use air pump.

Figure 6.4: Detailed steps for operating the air compressor function.

Figure 6.5: The included versatile air nozzles to meet all your inflation needs.
6.3 Using as a Portable Power Bank
The UIBI X3 features a 45W Type-C PD input/output and a QC3.0 USB-A output, allowing you to charge your electronic devices quickly.
- Connect your device's charging cable to either the Type-C PD 45W port or the USB-A QC3.0 port on the UIBI X3.
- The UIBI X3 will automatically begin charging your device.

Figure 6.6: The UIBI X3 functions as a portable power bank to keep your devices charged.

Figure 6.7: High-speed power delivery for your electronic devices.
6.4 Using the LED Flashlight
The integrated LED flashlight offers three modes for various situations:
- Stable Light: Press the flashlight button once for continuous illumination.
- Strobe Light: Press the flashlight button a second time for a flashing strobe effect.
- SOS Light: Press the flashlight button a third time for the SOS signal.
- Press the flashlight button a fourth time to turn off the light.

Figure 6.8: The 3-mode LED light provides illumination for various emergency situations.
7. Maintenance
- Store the UIBI X3 in its carrying bag in a cool, dry place when not in use.
- Recharge the unit every 2-3 months, even if not used, to maintain optimal battery health and extend its lifespan.
- Clean the exterior with a soft, damp cloth. Do not use harsh chemicals or abrasive cleaners.
- Inspect the smart jumper cables and air hose for any damage before each use.
8. Troubleshooting
| Problem | Possible Cause | Solution |
|---|---|---|
| Unit does not turn on. | Battery is depleted. | Charge the unit fully. |
| Smart jumper cable indicator is red/beeping. | Incorrect connection, reverse polarity, or short circuit. | Ensure clamps are connected correctly (red to positive, black to negative). Check for short circuits. |
| Vehicle does not start after jump attempt. | Vehicle battery is severely damaged, or other vehicle issues. | Attempt jump start again. If unsuccessful, consult a mechanic. |
| Air compressor not inflating or inaccurate pressure. | Hose not securely connected, wrong mode selected, or nozzle blockage. | Ensure hose is tightly screwed. Select correct inflation mode. Check nozzles for debris. |
| External devices not charging. | Charging cable issue, device not compatible, or unit battery low. | Try a different cable. Ensure unit has sufficient charge. |
9. Specifications
| Feature | Detail |
|---|---|
| Brand | UIBI |
| Model Number | X3 |
| Peak Output Current | 1500 Amps |
| Engine Compatibility | Up to 7.5L Gas / 5.5L Diesel |
| Air Compressor Pressure | 150 PSI (Max) |
| Power Bank Output 1 | Type-C PD 45W (5V/3A, 9V/3A, 12V/3A, 20V/2.25A) |
| Power Bank Output 2 | USB-A QC3.0 (5V/3A, 9V/2A, 12V/1.5A) |
| Dimensions (D x W x H) | 2.13"D x 4.45"W x 7.6"H |
| Item Weight | 1.78 Pounds |
| Operating Temperature | -4°F to 140°F (-20°C to 60°C) |
10. Warranty and Support
The UIBI X3 portable battery jump box includes a 12-month guarantee. UIBI is committed to providing hassle-free service and technical support.
If you have any questions or require assistance, please contact our expert team. Our customer support is always ready to assist you.
For further assistance, please visit the official UIBI store: UIBI Official Store on Amazon.


