1. Introduction
This user manual provides comprehensive instructions for the operation, maintenance, and troubleshooting of your ELECTROPRIME HOCO EQ6 True Wireless Bluetooth Earphones. Please read this manual carefully before using the product to ensure proper functionality and to extend the lifespan of your device.
2. Product Overview
The ELECTROPRIME HOCO EQ6 earphones are designed for high-quality audio and convenient wireless connectivity. Key features include:
- Bluetooth 5.3 for stable and efficient wireless connection.
- Compact charging case with a 320mAh battery capacity.
- Earphones with 40mAh battery capacity each, providing up to 7 hours of use time.
- Transparent charging compartment with a digital power display for easy battery monitoring.
- Support for master-slave switching, allowing independent use of either earbud.
- Ability to summon voice assistants like Siri.
- Noise Cancellation feature for an enhanced listening experience.
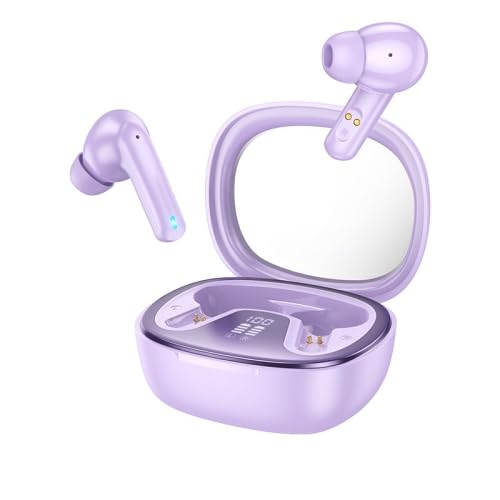
Figure 2.1: ELECTROPRIME HOCO EQ6 True Wireless Bluetooth Earphones (Purple) with charging case. The image displays the two earbuds alongside their open charging case, which features a digital battery level indicator.

Figure 2.2: Various color options for the ELECTROPRIME HOCO EQ6 earphones. This image showcases the product in white, black, purple, and light blue, each with its corresponding charging case.
3. Setup
3.1 Charging the Earphones and Case
Before first use, fully charge both the earphones and the charging case. The charging case has a 320mAh battery, and each earphone has a 40mAh battery.
- Place the earphones into the charging case, ensuring they are correctly seated in their respective slots.
- Connect the charging case to a power source using a compatible USB cable.
- The digital power display on the charging case will indicate the charging status and battery level.
- Once fully charged, the display will show 100% or a full battery indicator. Disconnect the charging case from the power source.
3.2 Pairing with a Bluetooth Device
The earphones use Bluetooth 5.3 for a quick and stable connection.
- Ensure the earphones are charged and placed inside the charging case.
- Open the lid of the charging case. The earphones will automatically enter pairing mode, indicated by a flashing LED light on the earbuds.
- On your device (smartphone, tablet, etc.), go to the Bluetooth settings and turn Bluetooth on.
- Search for available devices. You should see "HOCO EQ6" or a similar name appear in the list.
- Select "HOCO EQ6" to connect. Once connected, the LED indicator on the earphones will stop flashing, and a voice prompt may confirm the connection.
- For subsequent uses, the earphones will automatically connect to the last paired device when removed from the case, provided Bluetooth is enabled on the device.
4. Operating Instructions
The HOCO EQ6 earphones feature touch controls for easy management of calls and music playback.
4.1 Touch Controls (General)
- Play/Pause: Single tap on either earbud.
- Next Track: Double tap on the right earbud.
- Previous Track: Double tap on the left earbud.
- Volume Up: Triple tap on the right earbud.
- Volume Down: Triple tap on the left earbud.
- Answer/End Call: Single tap on either earbud during an incoming call or active call.
- Reject Call: Press and hold either earbud for 2 seconds during an incoming call.
- Activate Voice Assistant (Siri/Google Assistant): Press and hold either earbud for 3 seconds.
Note: Specific touch control functions may vary slightly based on firmware updates or connected device.
4.2 Master-Slave Switching
The earphones support master-slave switching, meaning either earbud can be used independently. Simply remove one earbud from the case, and it will automatically connect to your device. The other earbud can be used later or kept in the case.
5. Maintenance
Proper maintenance ensures the longevity and optimal performance of your earphones.
- Cleaning: Regularly clean the earbuds and charging case with a soft, dry, lint-free cloth. Do not use abrasive cleaners, alcohol, or chemical solvents.
- Charging Contacts: Ensure the charging contacts on both the earbuds and inside the case are clean and free of debris to ensure proper charging.
- Storage: When not in use, store the earphones in their charging case to protect them from dust and damage. Avoid extreme temperatures.
- Water Resistance: These earphones are not specified as water-resistant. Avoid exposure to water, sweat, or high humidity.
6. Troubleshooting
If you encounter issues with your earphones, refer to the following common solutions:
| Problem | Possible Cause | Solution |
|---|---|---|
| Earphones not pairing. | Bluetooth off on device, earphones not in pairing mode, interference. |
|
| No sound from one or both earbuds. | Low battery, not connected, volume too low. |
|
| Charging case display not working. | Case battery depleted, charging cable issue. |
|
7. Specifications
| Feature | Detail |
|---|---|
| Brand | ELECTROPRIME |
| Model | EDA006045501D |
| Bluetooth Version | 5.3 |
| Bluetooth Chip | Jerry AC6973D4 |
| Charging Case Battery Capacity | 320mAh |
| Earphone Battery Capacity | 40mAh (each) |
| Use Time | Up to 7 hours |
| Standby Time | Up to 180 hours |
| Special Features | Noise Cancellation, Digital Power Display, Master-Slave Switching, Siri Support |
| Form Factor | In Ear |
| Mounting Hardware | Ear Cushions, Protective Case |
| Package Weight | 0.16 kgs / 0.36 lb |
| Package Size | 14cm x 11cm x 5cm / 5.51inch x 4.33inch x 1.97inch |
8. Warranty and Support
Your ELECTROPRIME HOCO EQ6 True Wireless Bluetooth Earphones come with a standard warranty. For detailed information regarding warranty coverage and terms, please refer to the warranty policy provided at the time of purchase or visit the official ELECTROPRIME support website.
For technical support, troubleshooting assistance, or any other inquiries, please contact ELECTROPRIME customer service through the contact information provided on the product packaging or the official brand website. Please have your product model number (EDA006045501D) and purchase details ready when contacting support.
You can find more information about the warranty policy here.