Retekess TD175S
Retekess TD175S Restaurant Pager System User Manual
Model: TD175S | Brand: Retekess
1. Introduction
This manual provides comprehensive instructions for the installation, operation, and maintenance of your Retekess TD175S Restaurant Pager System. This wireless calling system is designed to enhance service efficiency and customer experience in various settings, including restaurants, food courts, food trucks, and church nurseries. Please read this manual thoroughly before using the system to ensure proper functionality and longevity.

Image: The Retekess TD175S system, showing the main transmitter base with multiple pagers docked, and two pagers held separately.
2. Package Contents
Verify that all items listed below are included in your package. If any items are missing or damaged, please contact customer support.
- 1 x Transmitter (Keypad Base)
- 10 x Pagers (Guest Pagers)
- 1 x Power Adapter
- 1 x Antenna
- 1 x English User Manual

Image: A visual representation of the Retekess TD175S package contents, showing each component clearly labeled.
3. Product Overview and Features
The Retekess TD175S system offers several features designed for efficient operation:
- Extended Range: Operates up to 1000 meters (3280 feet) in open areas and 100-300 meters indoors, allowing guests freedom of movement.
- Multiple Prompt Modes: Pagers can alert guests using a combination of vibration, beep, and flash, adaptable to various environments.
- User-Friendly Operation: Factory-paired for immediate use with intuitive controls.
- Adjustable Keypad Modes: The transmitter keypad can be set to mute, vibrate, beep, or a combination, preventing disturbance in quiet settings.
- Durable Construction: Pagers are made from ABS material, designed for easy cleaning and resistance to wear.
- Long Standby Time: Each pager includes a 200mAh lithium battery, providing up to 15 hours of continuous standby time on a full charge.
- Call Record Query: The system stores and displays the last 10 call records for easy reference.
- Customizable Reminder Time: Pager alert duration can be set from 1 to 999 seconds.
- Expandable System: Supports expansion with up to 998 additional pagers to accommodate growing business needs.
- Flexible Calling: Supports one-to-many or many-to-one calling configurations.
- One-Button Shutdown: Simplifies system management.
3.1 Key Components
- Transmitter (Keypad Base): Used to call pagers. Features a numeric keypad, display, and charging slots.
- Pagers (Guest Pagers): Handheld devices that receive calls and alert guests.
- Antenna: Connects to the transmitter to ensure optimal signal transmission.

Image: Long range capability of the pager system, illustrating signal reach from a restaurant to a customer in a car.

Image: The seven distinct alert modes available on the pagers, including beep, vibration, and flash, and their combinations.

Image: Details on the pager's 200mAh battery and its 15-hour standby duration.

Image: The transmitter's ability to display the last 10 call records for quick review.
4. Setup Instructions
4.1 Initial Setup
- Connect Power: Plug the power adapter into the transmitter base and then into a standard electrical outlet.
- Attach Antenna: Screw the antenna securely into the designated port on the back of the transmitter base. Ensure it is upright for optimal signal.
- Charge Pagers: Place all pagers into the charging slots on the transmitter base. The pagers will begin charging automatically. Allow sufficient time for a full charge before first use (approximately 3-4 hours).

Image: Illustration of attaching the detachable antenna to the transmitter base.
4.2 Pager Pairing (If needed)
The pagers are typically factory-paired. If you need to add new pagers or re-pair existing ones, follow these steps:
- Enter F1 Setting: On the transmitter keypad, press the Setting key (gear icon). The display will show "000".
- Select Pager ID: Take the pager you wish to pair. On the transmitter, enter the desired new ID number for the pager using the numeric keys (e.g., "001", "002").
- Confirm Pairing: While the pager is near the transmitter, press the Call key (phone icon) on the transmitter. The pager will beep and/or vibrate, indicating successful pairing.

Image: Step-by-step visual instructions for pairing pagers with the transmitter.
5. Operating Instructions
5.1 Calling a Pager
- Ensure the pager is charged and powered on.
- On the transmitter keypad, enter the 3-digit ID number of the pager you wish to call (e.g., "001", "010").
- Press the Call key (phone icon). The corresponding pager will activate its alert mode.
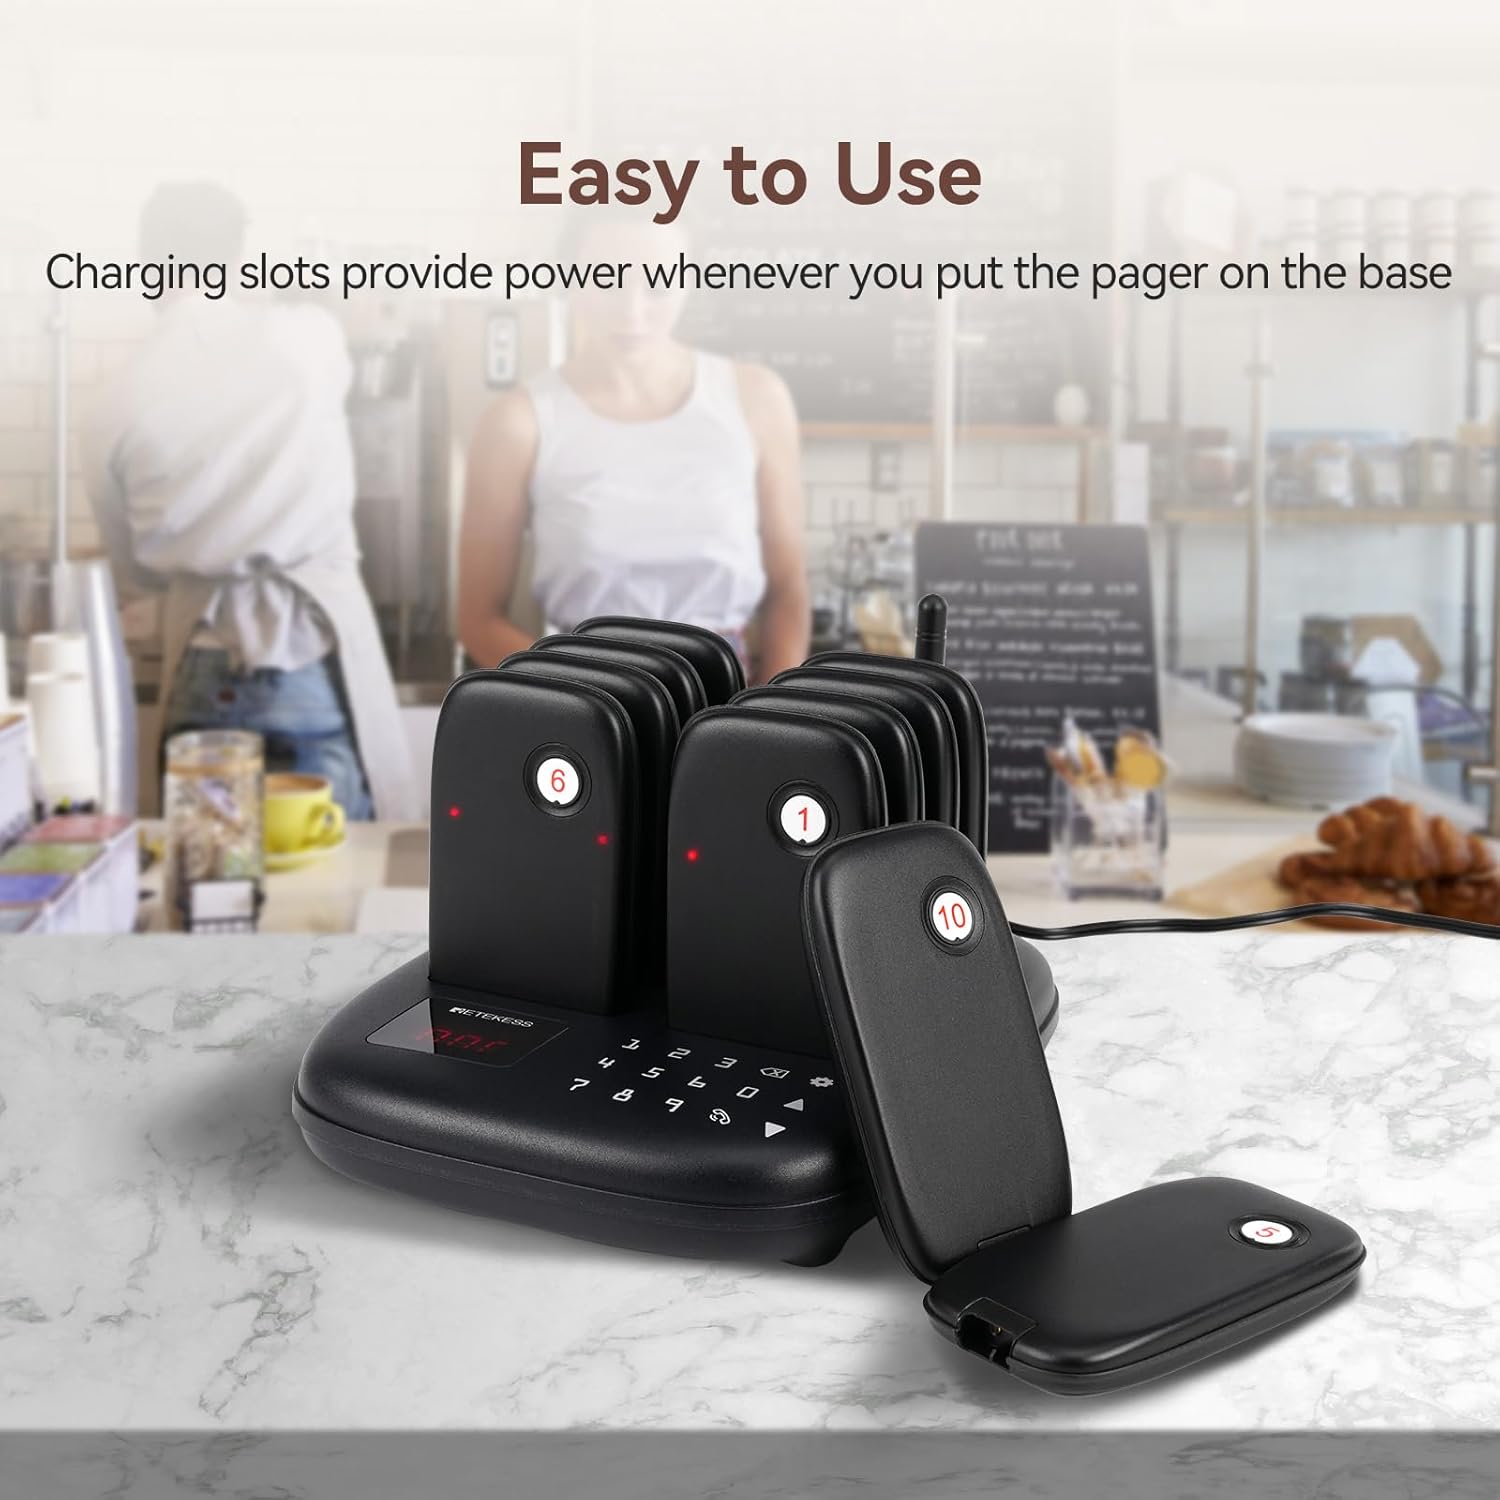
Image: The transmitter base with pagers docked, demonstrating the ease of use and charging functionality.
5.2 Adjusting Pager Prompt Modes
The pager alert modes (beep, vibration, flash) can be combined. Refer to the system's settings menu (accessed via the Setting key) for detailed configuration options. The available modes are:
- Beep only
- Vibration only
- Flash only
- Beep + Vibration
- Beep + Flash
- Vibration + Flash
- Beep + Vibration + Flash

Image: Visual representation of the 7 customizable alert modes for the pagers.
5.3 Adjusting Reminder Time
The duration of the pager alert can be set from 1 to 999 seconds. Access this setting through the transmitter's menu to customize the alert length according to your operational needs.

Image: The transmitter display showing the adjustable prompt time setting, from 1 to 999 seconds.
5.4 Querying Call Records
To view the last 10 pagers called, use the appropriate function on the transmitter keypad. This allows for quick verification of recent calls.
5.5 One-Key Shutdown
To power off all pagers simultaneously, enter "999" on the transmitter keypad and then press the Call key (phone icon).

Image: Instructions for performing a one-key shutdown of all pagers.
6. Maintenance
6.1 Cleaning
The pagers and transmitter base are constructed from durable ABS material, making them easy to clean. Use a soft, damp cloth to wipe down surfaces. Avoid abrasive cleaners or solvents that could damage the finish or electronic components.
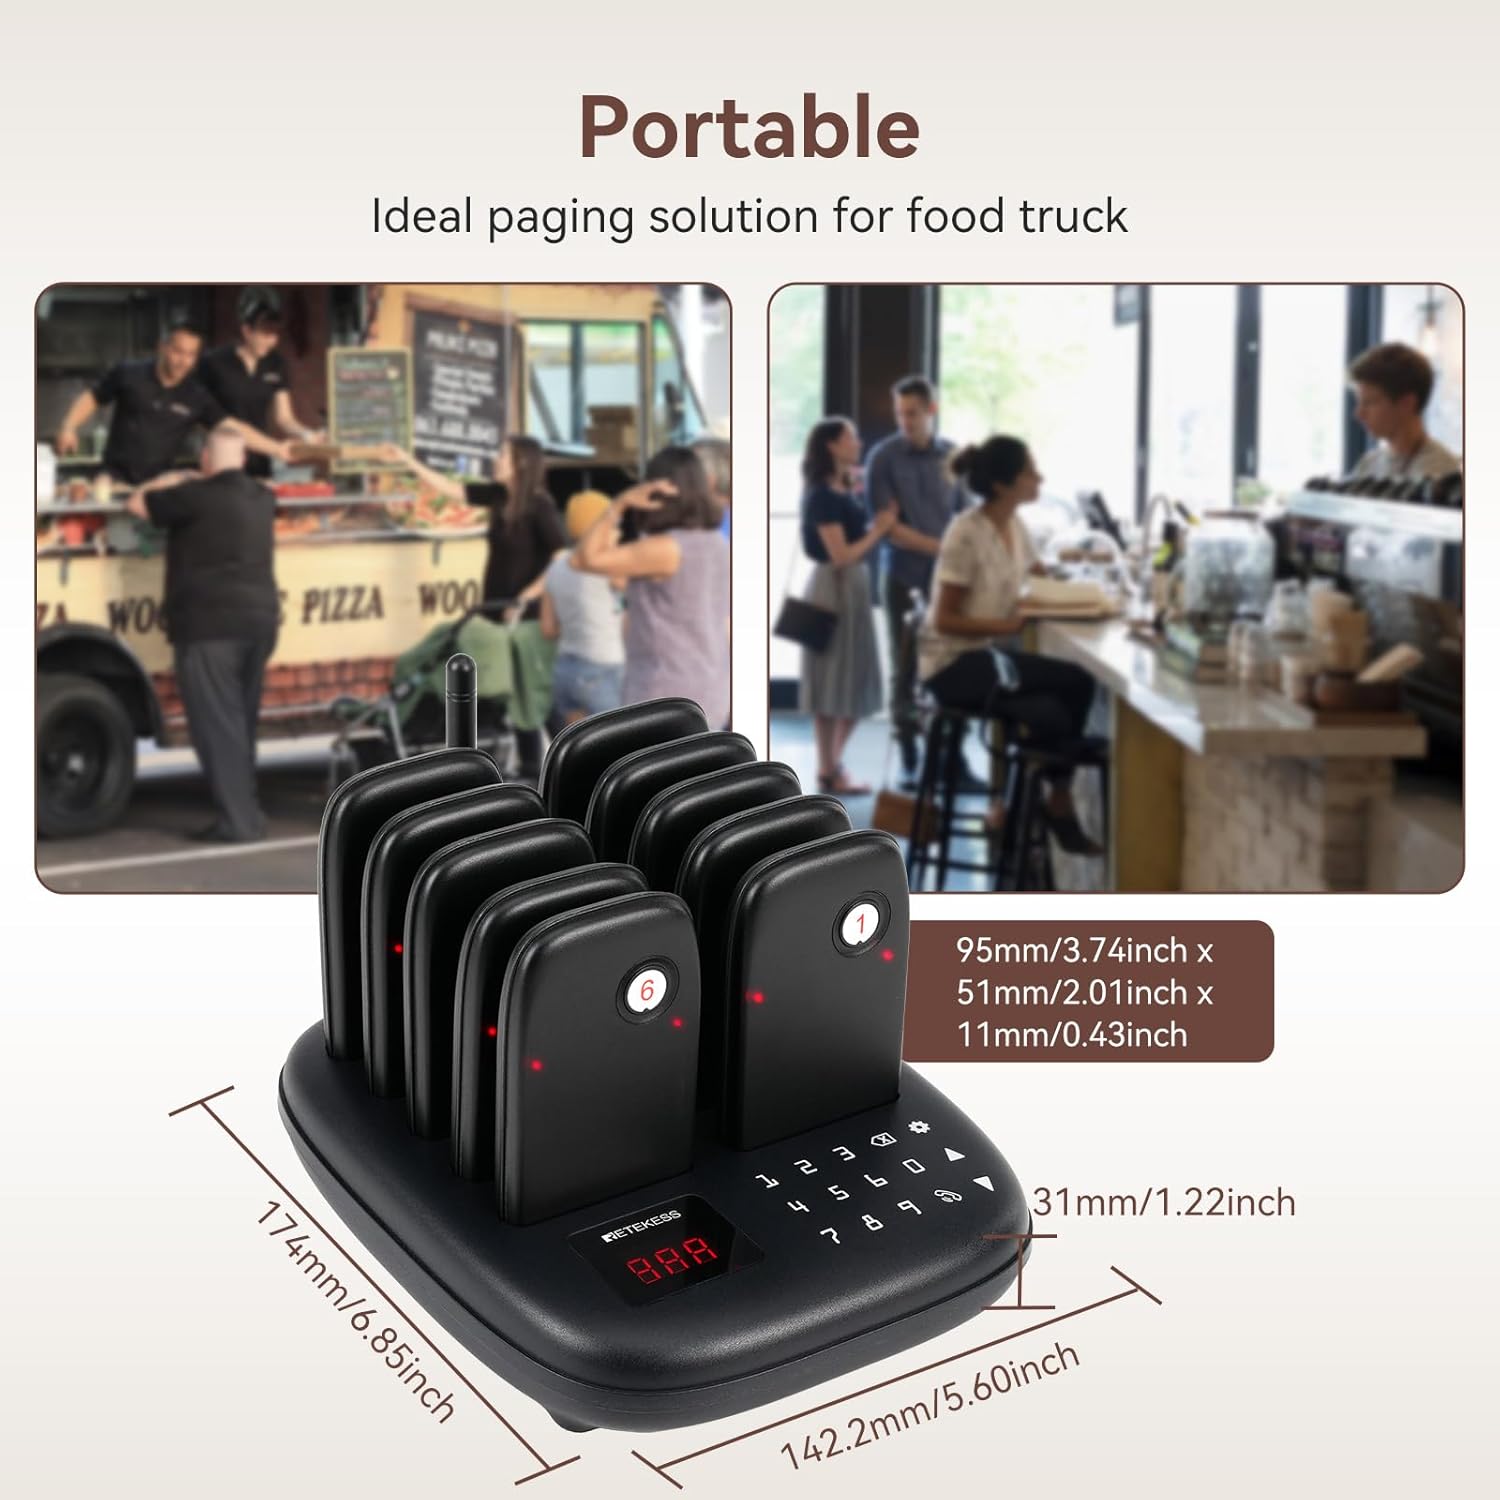
Image: The keypad of the transmitter, emphasizing its durable and easy-to-clean design.
6.2 Battery Care
Each pager contains a built-in 200mAh lithium battery. To maximize battery life:
- Always place pagers back on the charging base when not in use.
- Avoid fully discharging the batteries frequently.
- Store the system in a cool, dry place if not used for extended periods.
7. Troubleshooting
If you encounter issues with your Retekess TD175S system, refer to the following common problems and solutions:
| Problem | Possible Cause | Solution |
|---|---|---|
| Pager not responding to calls. |
|
|
| Short transmission range. |
|
|
| Pagers not charging. |
|
|
If the problem persists after attempting these solutions, please contact Retekess customer support for further assistance.
8. Specifications
| Feature | Detail |
|---|---|
| Model Number | TD175S |
| Brand | Retekess |
| Product Dimensions | 6.14 x 7.36 x 3.66 inches (Transmitter) |
| Item Weight | 2.05 pounds (Total system) |
| Maximum Range | 1000 meters (3280 feet) in open areas |
| Pager Battery | Built-in 200mAh Lithium Battery |
| Pager Standby Time | Up to 15 hours |
| Number of Pagers (Included) | 10 |
| Expandability | Up to 998 pagers |
| Material | ABS |
| Date First Available | April 18, 2024 |

Image: A comparison table detailing specifications across different Retekess TD175 models.
9. Warranty and Support
For specific warranty information, please refer to the warranty card included with your product or visit the official Retekess website. Retekess is committed to providing quality products and customer satisfaction.
Customer Support:
If you require technical assistance, have questions about your product, or need to report a defect, please contact Retekess customer support through their official channels. Contact information can typically be found on the manufacturer's website or in the product packaging.
Website: www.retekess.com (Example, replace with actual if available)
Email: support@retekess.com (Example, replace with actual if available)
Ask a question about this manual
Ask about setup, troubleshooting, compatibility, parts, safety, or missing instructions. Manuals+ will review the question and use this page’s manual context to help answer it.