Introduction
This manual provides essential information for the safe operation, assembly, and maintenance of your XJD 12V Baby Bumper Car. Please read all instructions carefully before use and retain this manual for future reference.
Safety Information
- Adult Supervision Required: Always supervise children when operating the bumper car.
- Age and Weight Limits: Suitable for toddlers aged 18 months to 4 years. Maximum weight capacity is approximately 66 lbs (30 kg).
- Seat Belt Use: Ensure the child is securely fastened with the provided safety belt before operation.
- Operating Environment: Use on flat, dry surfaces. Avoid slopes, stairs, public roads, and areas near water.
- Battery Safety: Only use the provided charger. Do not modify the electrical system. Keep the battery compartment dry.
- Avoid Obstacles: Clear the play area of any potential hazards.
What's in the Box
The package typically includes the following components:
- Bumper Car Body (main unit)
- Steering Column/Handlebars
- Backrest/Handle
- Wheels and Axle
- Remote Control
- Charger
- Seat Cushion
- Assembly Hardware (screws, washers, nuts)
- Instruction Manual

Image: The XJD 12V Baby Bumper Car in pink, showcasing its design and features.
Assembly Instructions
Follow these steps to assemble your XJD Baby Bumper Car. Refer to the assembly video for visual guidance.
- Install Rear Wheels: Attach the rear wheels to the axle, securing them with the provided nuts and washers. Ensure they are firmly in place.
- Attach Steering Column: Connect the steering column to the main body. Ensure all electrical connectors are properly plugged in before securing with screws.
- Install Backrest: Secure the backrest to the rear of the car body using the designated slots and screws.
- Connect Battery: Locate the battery compartment, typically under the seat. Connect the battery terminals (red to red, black to black).
- Secure Seat: Place the seat cushion over the battery compartment and secure it with screws.
- Attach Safety Belt: Ensure the safety belt is properly installed and accessible for use.
Video: Detailed assembly guide for the XJD bumper car, demonstrating each step from unboxing to final setup.
Operating Instructions
The XJD Baby Bumper Car offers two primary driving modes: manual control by the child and parental remote control.
- Power On/Off: Locate the power button, usually near the seat. Press to turn the car on or off.
- Manual Operation: The child can use the joysticks/steering wheel to control movement. Pushing both forward moves the car forward, pulling both back moves it backward. Pushing one forward and one back allows for 360-degree spins.
- Music and Lights: The car features built-in music and colorful LED light strips. Buttons on the dashboard or steering wheel control these functions.

Image: A child seated in the XJD bumper car, demonstrating the independent riding experience.
Charging Instructions
To ensure optimal battery life and performance, follow these charging guidelines:
- Locate Charging Port: The charging port is typically found on the dashboard or side panel of the car.
- Connect Charger: Plug the charger into a standard wall outlet, then connect the charging plug to the car's charging port.
- Charging Indicator: A light on the charger or car will indicate charging status (e.g., red for charging, green for fully charged).
- Charging Time: For the first use, charge the battery for 8-12 hours. Subsequent charges typically take 4-6 hours. Do not overcharge.
- Battery Type: The car uses a 12V 4.5Ah battery.
Remote Control Operation
Parents can use the remote control to safely guide the bumper car, especially for younger children.
- Pairing: Ensure the remote control is paired with the car according to the instructions in the remote control manual (if separate).
- Controls: The remote control typically has buttons for forward, backward, left, right, and a stop function.
- Safety Override: The remote control usually has priority over manual controls for safety.
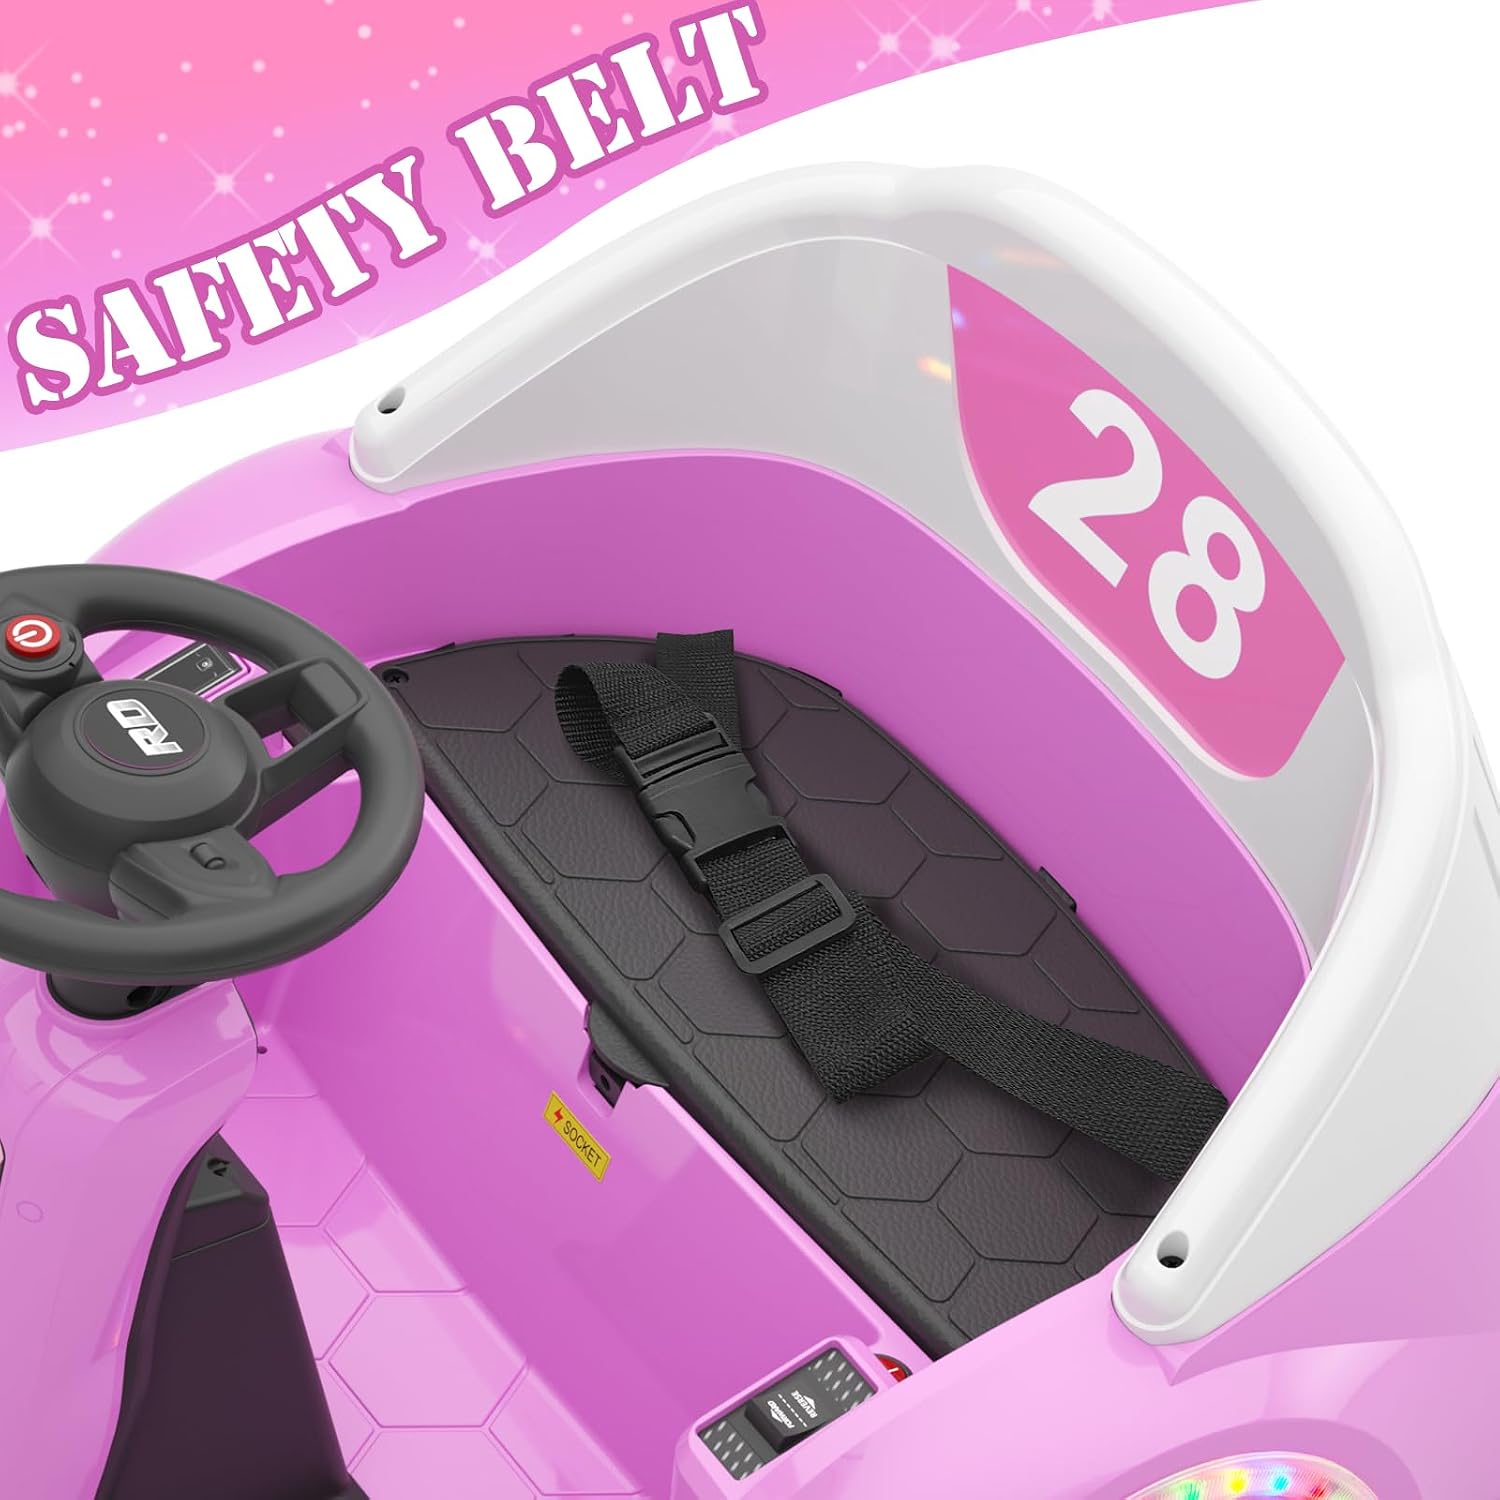
Image: A parent demonstrating the use of the remote control to operate the XJD bumper car.
Maintenance
- Cleaning: Wipe the car with a damp cloth. Do not use harsh chemicals or abrasive cleaners.
- Storage: Store the car in a dry, cool place away from direct sunlight when not in use.
- Battery Care: Charge the battery regularly, even during periods of non-use, to prolong its lifespan.
- Inspections: Periodically check all screws, connections, and moving parts for tightness and wear.
Troubleshooting
| Problem | Possible Cause | Solution |
|---|---|---|
| Car does not move | Battery not connected or low charge; power switch off. | Check battery connections, charge battery, ensure power switch is on. |
| Remote control not working | Remote not paired; low remote battery. | Re-pair remote control, replace remote batteries. |
| Lights not working | Light switch off; loose connection. | Check light switch, inspect connections. |
Specifications
- Product Dimensions: 25 x 24.5 x 17.9 inches
- Battery: 12V 4.5Ah
- Recommended Age: 18 months - 4 years (Manufacturer recommended age: 36 months - 4 years)
- Maximum Weight Capacity: ≤66 lbs (30 kg)
- Speed: Approximately 2 km/h
- Features: 360° Spin, MP3 interface, Colorful LED Light Strip, 2 Driving Modes (Manual & Remote Control)
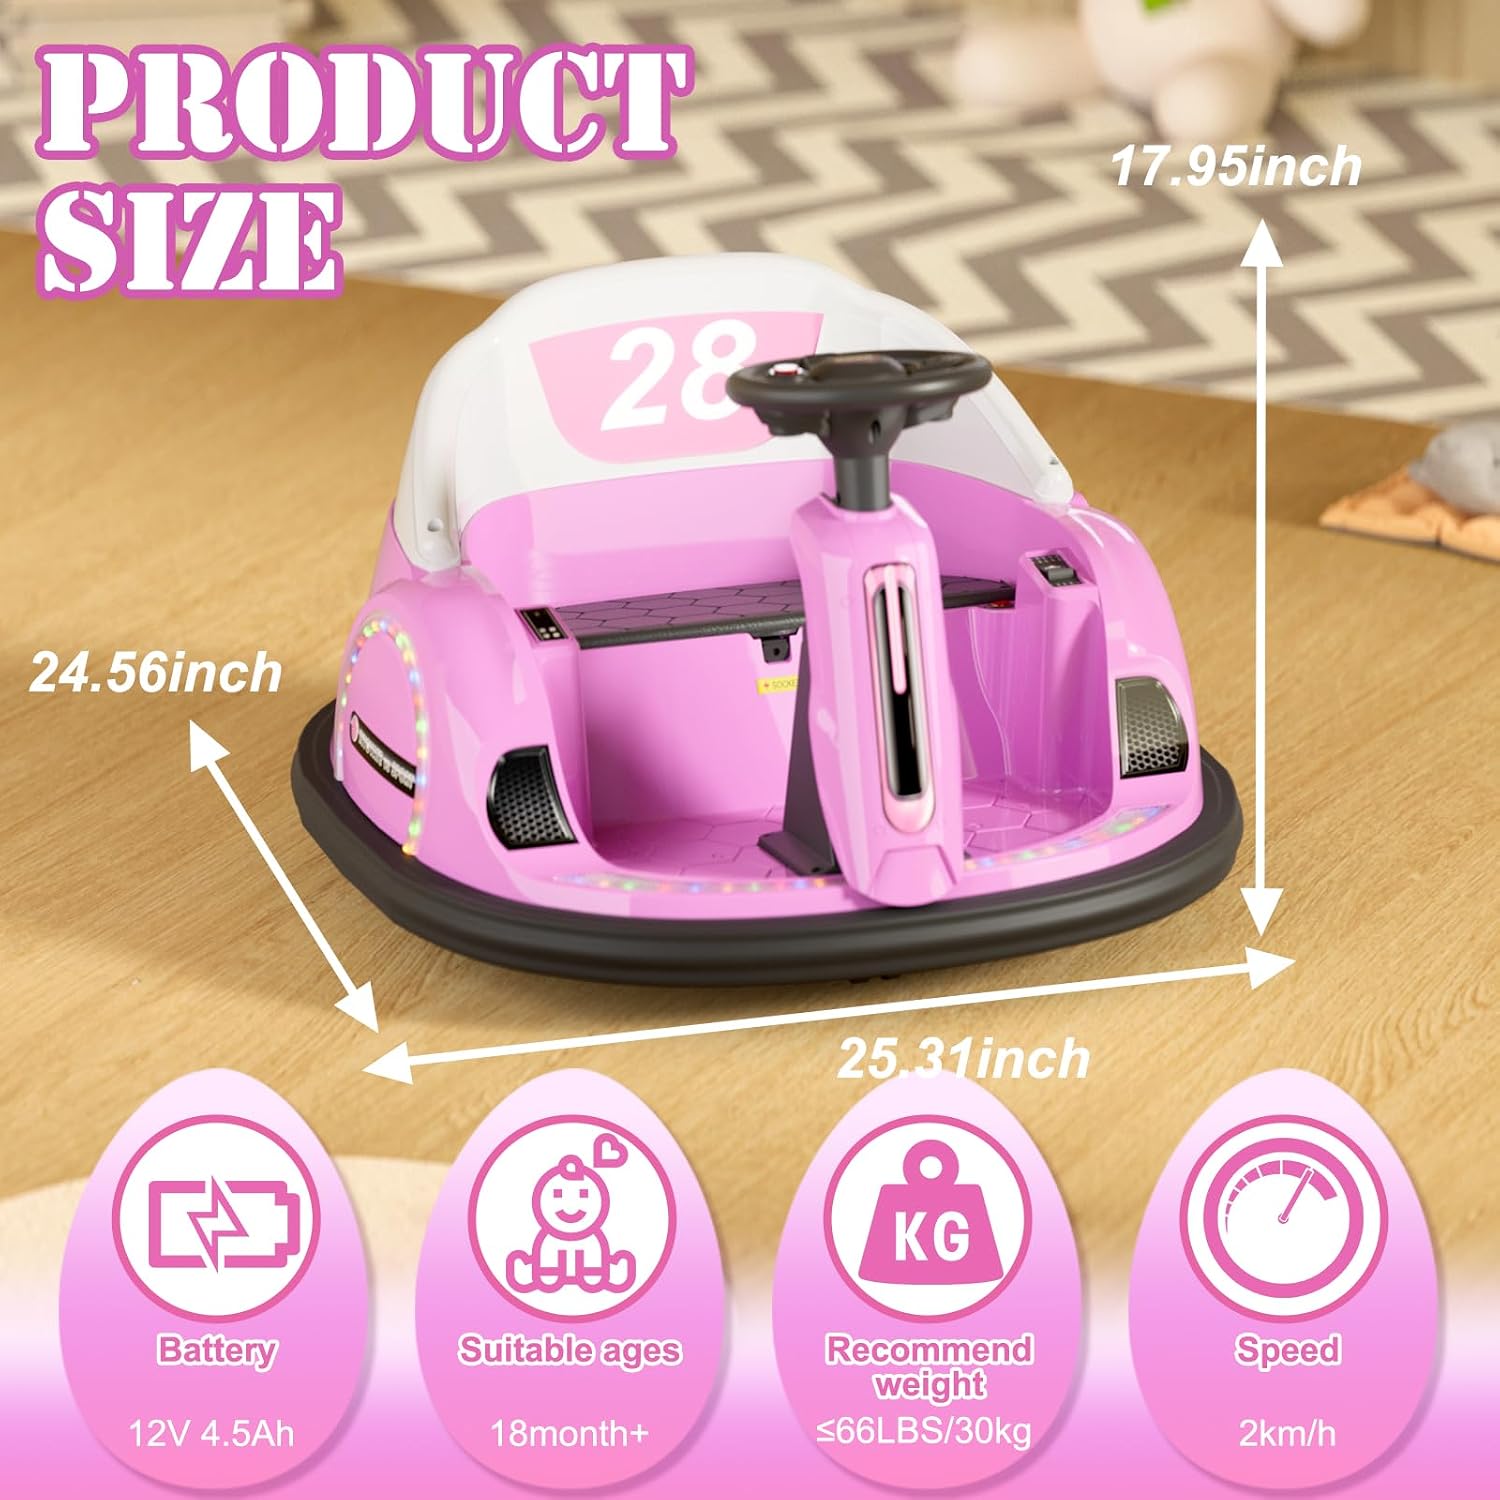
Image: Visual representation of the product dimensions and key specifications.
Warranty and Support
For warranty information, technical support, or replacement parts, please contact XJD customer service. Refer to your purchase documentation for specific warranty terms and contact details.
You can also visit the official XJD Store for more information: XJD Store on Amazon