Retevis C1
Retevis C1 Dual-Band IP67 Waterproof Walkie Talkie User Manual
Model: C1
1. Introduction
Thank you for choosing the Retevis C1 Dual-Band IP67 Waterproof Walkie Talkie. This manual provides essential information for the safe and efficient operation of your device. Please read it thoroughly before use and retain it for future reference.
2. Package Contents
Verify that all items listed below are included in your package. If any items are missing or damaged, please contact your retailer.
- 1 x Retevis C1 Walkie Talkie
- 1 x 1800 mAh Li-ion Battery
- 1 x Antenna
- 1 x USB Charger
- 1 x Belt Clip
- 1 x Hand Strap
- 1 x Multi-language User Manual
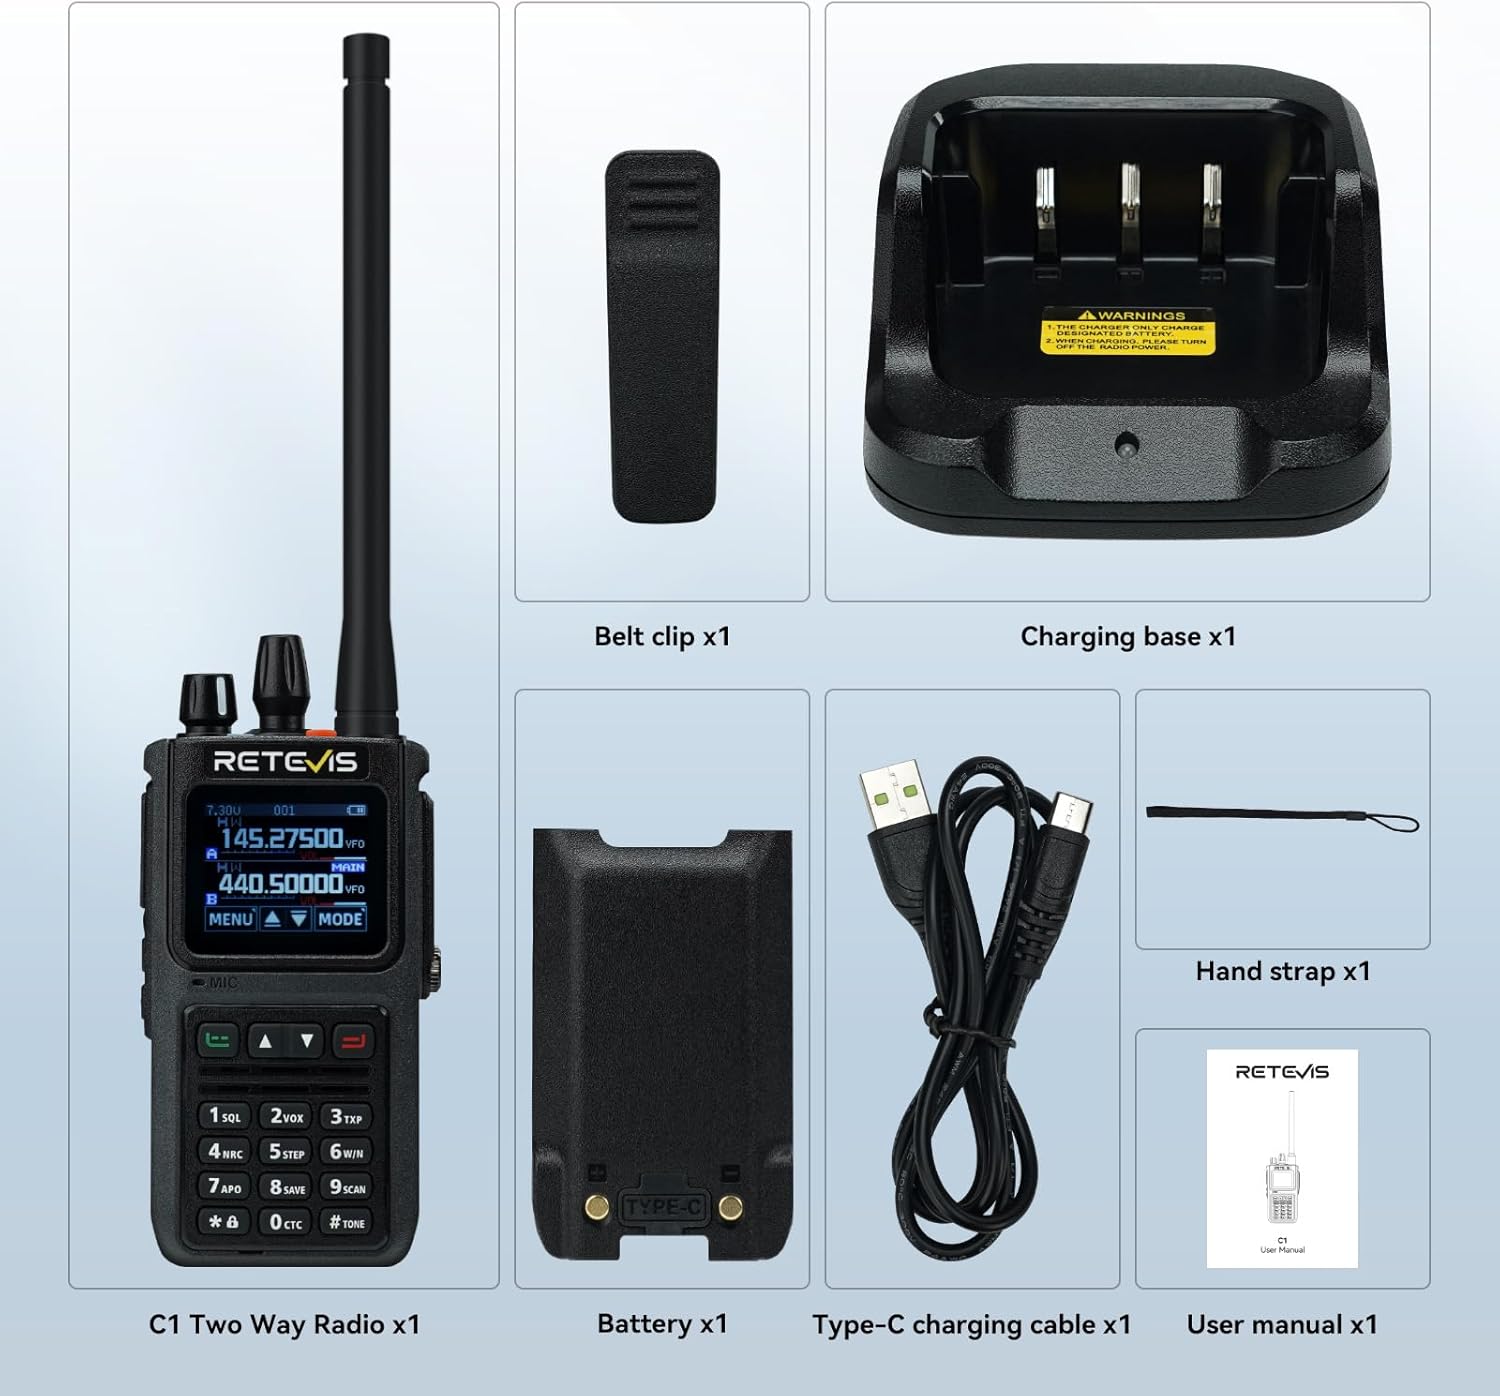
Figure 2.1: Included components of the Retevis C1 package.
3. Product Overview
The Retevis C1 features a robust design with an IP67 waterproof rating, a 1.77-inch color screen, and dual-band capabilities for versatile communication.
3.1 Key Features
- IP67 Waterproof: Designed to withstand wet and humid environments.
- Two-Way Noise Reduction: Equipped with a BK4829 chip for clear audio.
- Long Battery Life: 1800mAh Li-ion battery provides up to 20 hours of continuous use and 95 hours of standby.
- Dual-Band Operation: Transmit and receive on two channels simultaneously.
- 1.77-inch Color Screen: Easy to read and navigate settings day or night.
- Emergency Alarm: Local and remote alarm functions for safety.
- Type-C Charging: Convenient charging options for extended battery life.
3.2 Physical Features
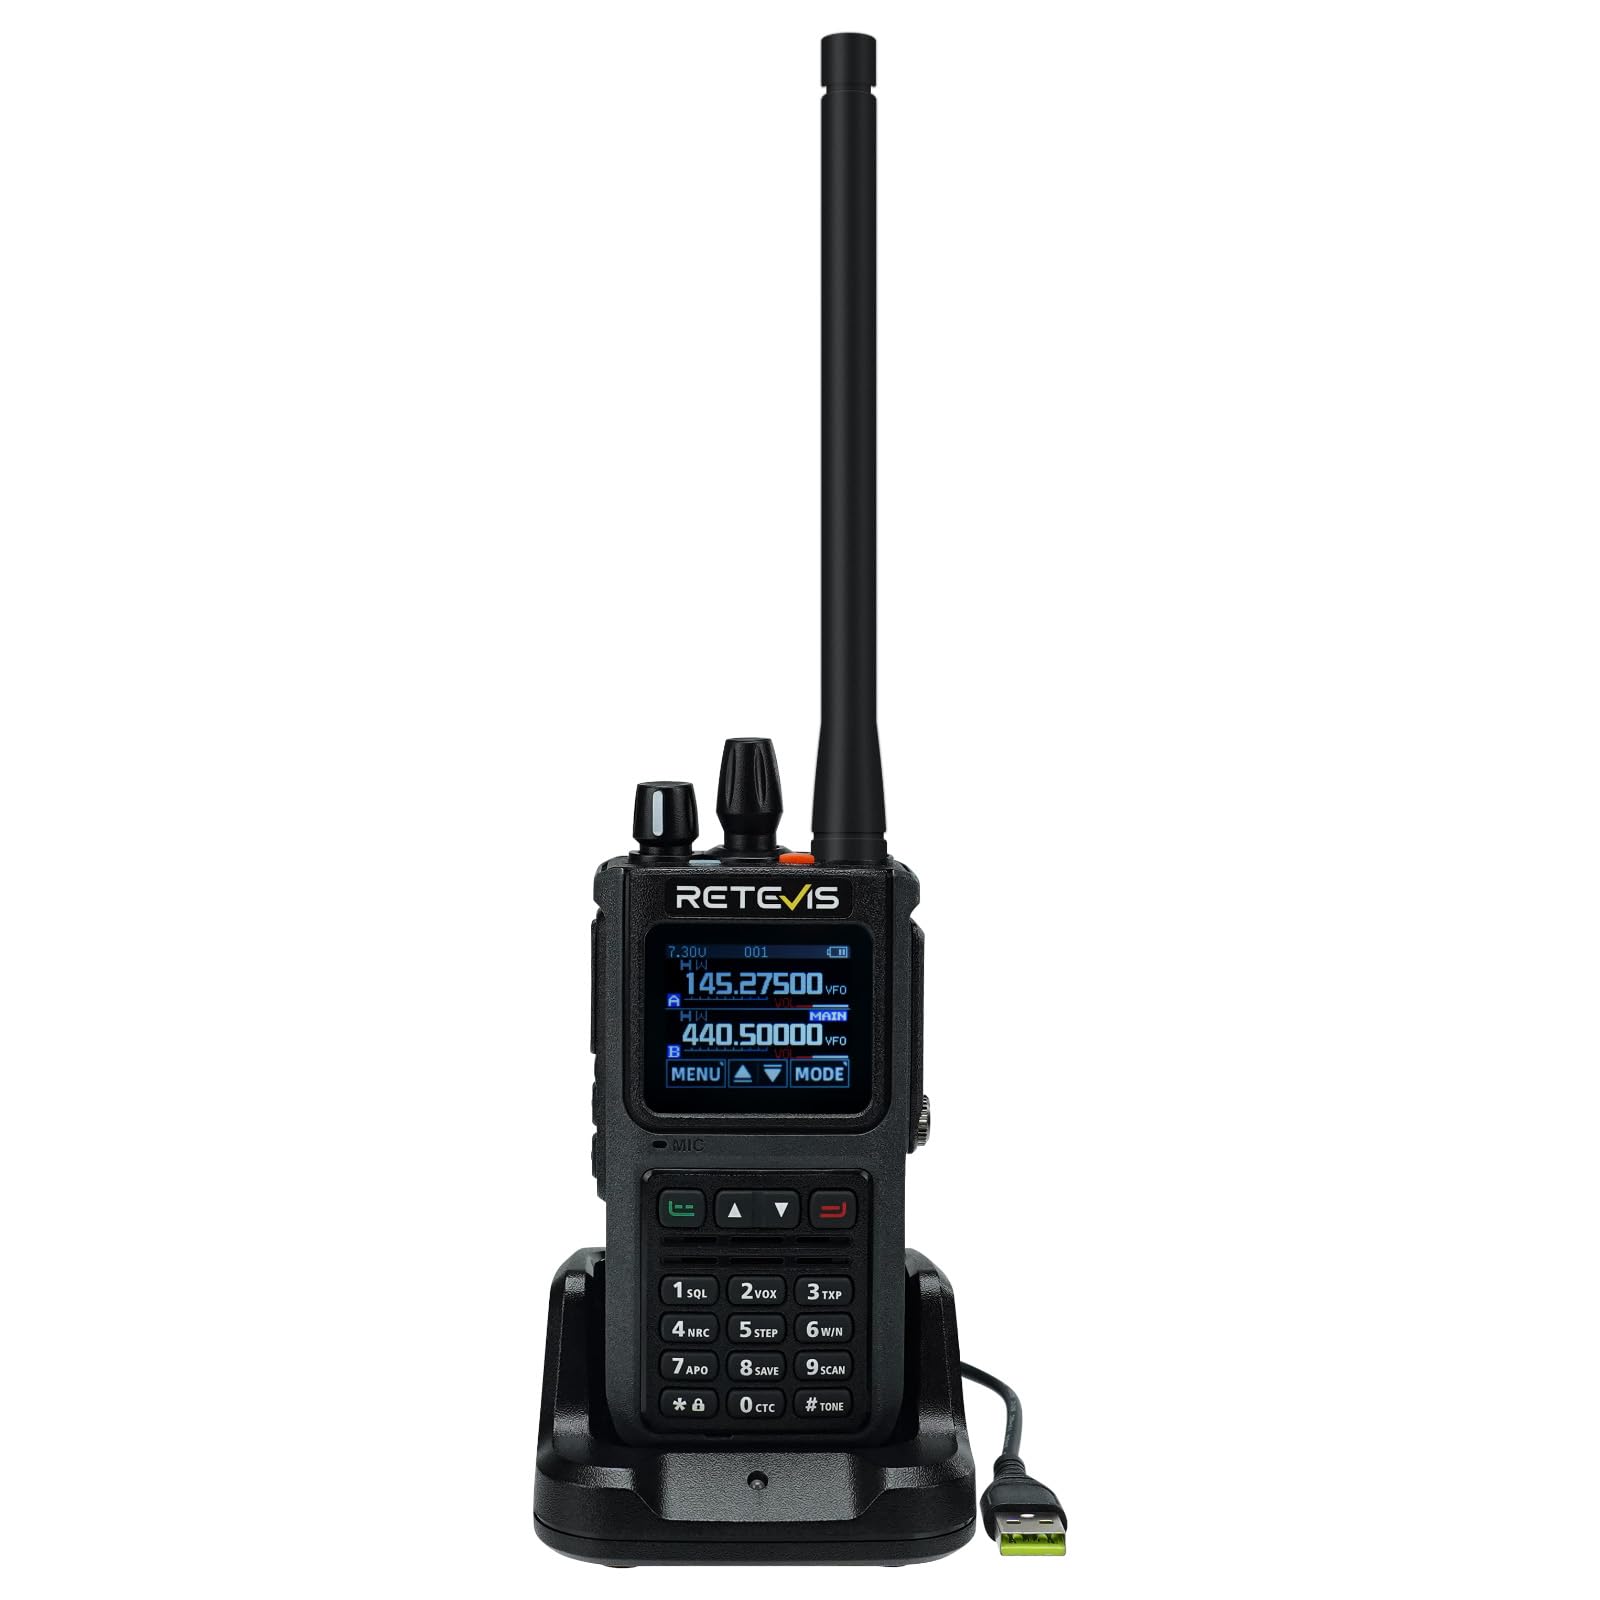
Figure 3.1: Front view of the Retevis C1 Walkie Talkie.
The device features a robust casing, a clear color display, and a full keypad for easy operation. The top includes an antenna connector, volume/power knob, and channel selector. Side buttons provide quick access to functions like Push-to-Talk (PTT) and programmable features.
4. Initial Setup
4.1 Attaching the Antenna
- Align the threaded end of the antenna with the antenna connector on top of the radio.
- Turn the antenna clockwise until it is firmly seated. Do not overtighten.
4.2 Installing the Battery
- Ensure the radio is powered off.
- Align the battery pack with the battery compartment on the back of the radio.
- Slide the battery into place until it clicks securely.
4.3 Charging the Battery
Before first use, fully charge the battery. The Retevis C1 supports both desktop charger and direct Type-C charging.
- Using the Desktop Charger: Place the radio with the battery installed into the charging cradle. The indicator light will show charging status.
- Using Type-C Direct Charging: Connect the Type-C cable to the port on the side of the radio and to a compatible USB power source.

Figure 4.1: Charging the Retevis C1 using the desktop charger.

Figure 4.2: Direct Type-C charging of the Retevis C1.
5. Operating Instructions
5.1 Power On/Off and Volume Control
To power on the radio, rotate the top knob clockwise. Continue rotating to increase the volume. Rotate counter-clockwise to decrease volume and power off.
Video 5.1: Demonstrates basic operations of a dual-band radio, including power on/off and volume control. This video is for the Retevis RT85, which has similar operational principles to the C1.
5.2 Channel Selection and PTT
Use the up/down arrow keys or the channel knob to select your desired channel. Press and hold the Push-to-Talk (PTT) button on the side to transmit, and release to receive.
5.3 Menu Navigation and Settings
Press the 'MENU' button to access the radio's settings. Use the up/down arrows to navigate and 'SELECT' to confirm. The 1.77-inch color screen provides clear visibility for all settings.

Figure 5.1: The 1.77-inch color screen offers clear visibility for settings in various lighting conditions.
5.4 VFO Mode (Variable Frequency Oscillator)
In VFO mode, you can manually input specific frequencies for transmission and reception. This offers flexibility for advanced users.

Figure 5.2: Manually inputting frequencies in VFO mode.
5.5 SUB-PTT Function
The SUB-PTT function allows transmission on 2m/70cm frequencies without switching frequency bands, enhancing communication efficiency.

Figure 5.3: Using the SUB-PTT function for seamless dual-band transmission.
5.6 Emergency Alarm
Activate the emergency alarm for local and remote alerts to enhance safety in critical situations. Refer to the full manual for specific key combinations.

Figure 5.4: Emergency alarm feature for enhanced safety.
5.7 App Connection and Channel Editing
The Retevis C1 can be connected wirelessly to a mobile application for advanced channel editing and configuration. This allows for easy customization of frequencies, CTCSS/DCS codes, and other parameters.
Video 5.2: Demonstrates wireless connection to a mobile app for channel editing and data writing. This video is for the Retevis Ailunce HA2, which shares similar app programming capabilities with the C1.
6. Maintenance
6.1 Cleaning and Care
Regularly clean the radio with a soft, damp cloth. Do not use harsh chemicals or abrasive cleaners. Ensure all port covers are securely closed to maintain IP67 waterproof integrity.

Figure 6.1: The IP67 waterproof design protects the radio from water and humid conditions.
6.2 Battery Care
To prolong battery life, avoid overcharging or completely draining the battery. Store the radio and battery in a cool, dry place when not in use for extended periods.
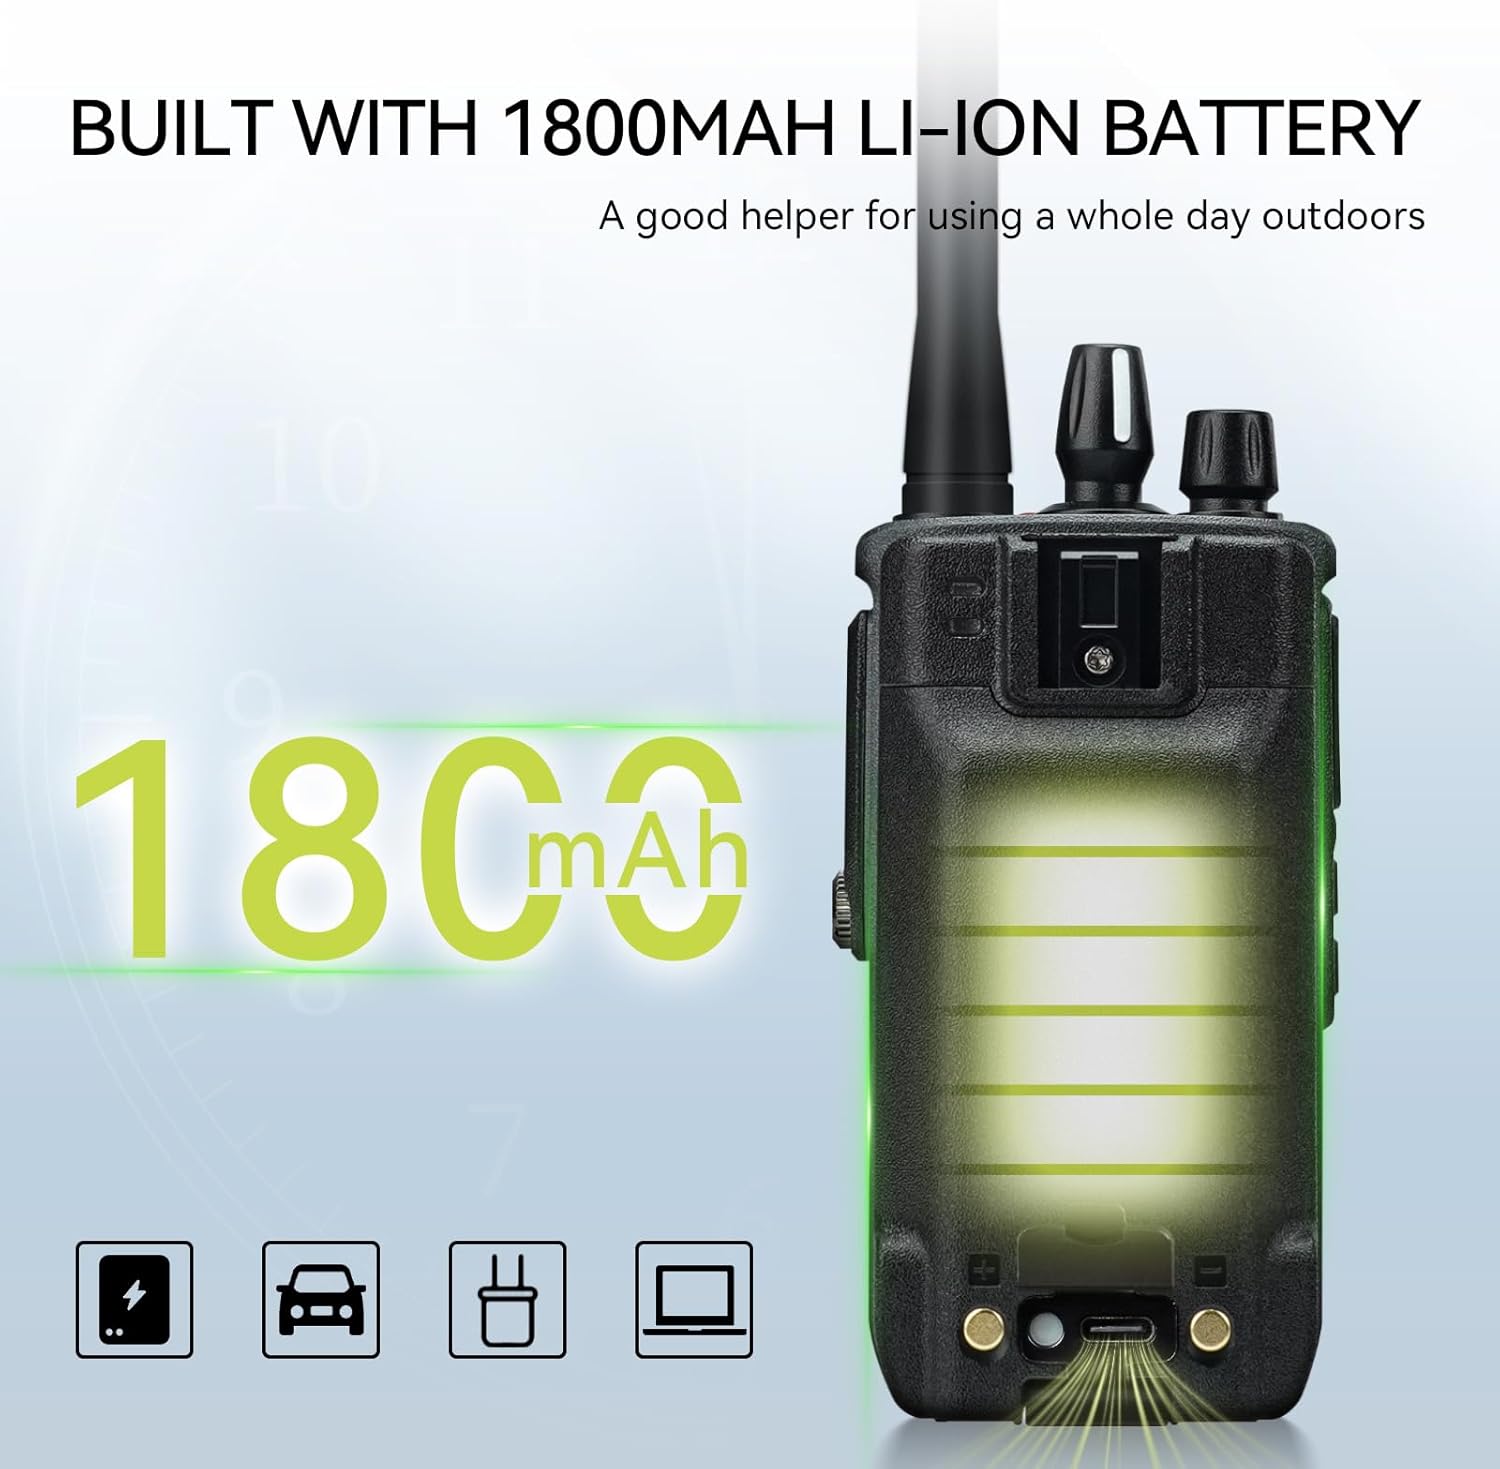
Figure 6.2: The 1800mAh Li-ion battery provides extended operational time.
7. Troubleshooting
| Problem | Possible Cause | Solution |
|---|---|---|
| No power | Battery low or not installed correctly. | Charge the battery or re-install it. |
| Cannot transmit or receive | Incorrect frequency/channel, out of range, or squelch level too high. | Verify frequency/channel settings, move closer to other radios, adjust squelch level. |
| Poor audio quality | Weak signal, interference, or noise reduction settings. | Move to an area with better signal, check for sources of interference, adjust noise reduction. |
| Keypad locked | Keypad lock function activated. | Press and hold the '#' key to unlock the keypad. |
8. Specifications
| Feature | Specification |
|---|---|
| Brand | Retevis |
| Model Number | C1 |
| Waterproof Level | IP67 |
| Power Output | 5W |
| Number of Channels | 250 |
| Frequency Range | Dual-band |
| Battery Capacity | 1800 mAh Li-ion |
| Battery Life (Continuous Use) | 20 Hours |
| Standby Time | 95 Hours |
| Display | 1.77-inch Color Screen |
| Noise Reduction Chip | BK4829 |
| Dimensions (D x W x H) | 4.1 x 6.3 x 13.3 cm |
| Weight | 291.5 Grams |
| Operating Temperature | -10 to 55°C |
9. Warranty and Support
Retevis provides a 2-year warranty for the radio body and a 1-year warranty for accessories. Additionally, a 30-day no-reason return policy is offered.
For warranty claims or technical support, please contact Retevis customer service via Amazon. We aim to respond within 12 hours.
Even beyond the warranty period, we continue to offer service, with buyers responsible for associated costs.
Ask a question about this manual
Ask about setup, troubleshooting, compatibility, parts, safety, or missing instructions. Manuals+ will review the question and use this page’s manual context to help answer it.